The last of April showers hit us on our most recent visit to the site, but even the rainy weather can't put a damper on the progress inside the house. Although this update isn't as dramatic as last weeks, it's still another big step forward towards the completion of the house. It was actually pretty nice being in the house for a torrential rain for three reasons. We could see how soundproof the house was. In our current house, when it rains, it hits the vinyl siding and even though the walls are 2x6 with insulation, the impact noise is significant. My neighbor loves to use his backpack style leaf blower for hours on end and that engine droning noise is loud enough to require raising the volume on the TV. In the new house, unless you're right next to a window, you don't hear any rain impact noise at all and the ambient noise level is absolute quiet. It helps that our nearest neighbor is hundreds of feet away. Second, we could see how the roof handled the rain. We've always debated the need for gutters since most of the first floor already has an 8 foot extension away from the house due to the covered porches. We saw that during heavy rains, a lot of water is shed from some of the major roof valleys, so we'll probably need to put in some kind of gutter system. Lastly, it was just nice to enjoy nature sitting dry and protected in the covered porches. There's some thing extremely peaceful about the sound of rain hitting the leaf litter in the forest floor, or looking out over the water as rain dapples the surface of the lake. I don't think I'll ever get tired of living in this house.
Distinctive Designs was hard at work this week beginning installation of the door and window trims, starting on the first floor. Progress on this front will be a little slower because this is finished construction, which requires more exacting cuts and measurements. They've been moving quickly, but with a smaller team. Mike tells us that they'll move in to high gear when the interior doors come in. Exterior finishes continue on the porch ceiling with the installation of quarter round. The kitchen center island is in place, but not fully set and all the other cabinets are in the house, but not in place. We should see some good progress in the weeks to come.

It's been a little tough getting around the side porch to the back door to take a look at it from the outside, but there was a clear plywood path I could walk on for this visit. This gave me the opportunity to take some pictures of the full glass exterior door that was installed last week. Like the mudroom door, the door trim is right up against the ceiling, which will make installing the finished quarter round a little problematic, but I'm sure we'll find a solution to this. The door is just as impressive from the outside as it is from the inside. The glass is thermopaned, but unlike the Softlite windows, uses a metal spacer, so I'm not expecting the efficiency of this glass to be as good.

Here's a look at the door and the rest of the wall it sits on. This door is pretty well protected from the elements so I don't expect a ton of wear on the wood finish. The door does face another court in our subdivision, but there's so much tree cover that I don't think we'll need any privacy coverings. Even during the winter, it's not the easiest view to the other houses, and there isn't a great view of any living spaces through the door.

The study is the first room to have all the window trim applied and completed. The baseboard molding hasn't been installed yet, but since it has a different work flow, I think they'll install those after all the windows have been completed. I really like how the window trim turned out. I was a little apprehensive about the two step design at first, but now that I can see it in its entirety, I think it looks great. Flipping the bottom trim was a good decision too. Even with the 1/8" reveal on the window casing, there's still enough room to sit in the window and you don't even feel the reveal. The middle stiles still need to be installed, but Distinctive Designs Mike said he has something nice planned for them and I have no reason to doubt them.
A few cabinets remain in this room since they're waiting to be installed in their appropriate bathrooms.

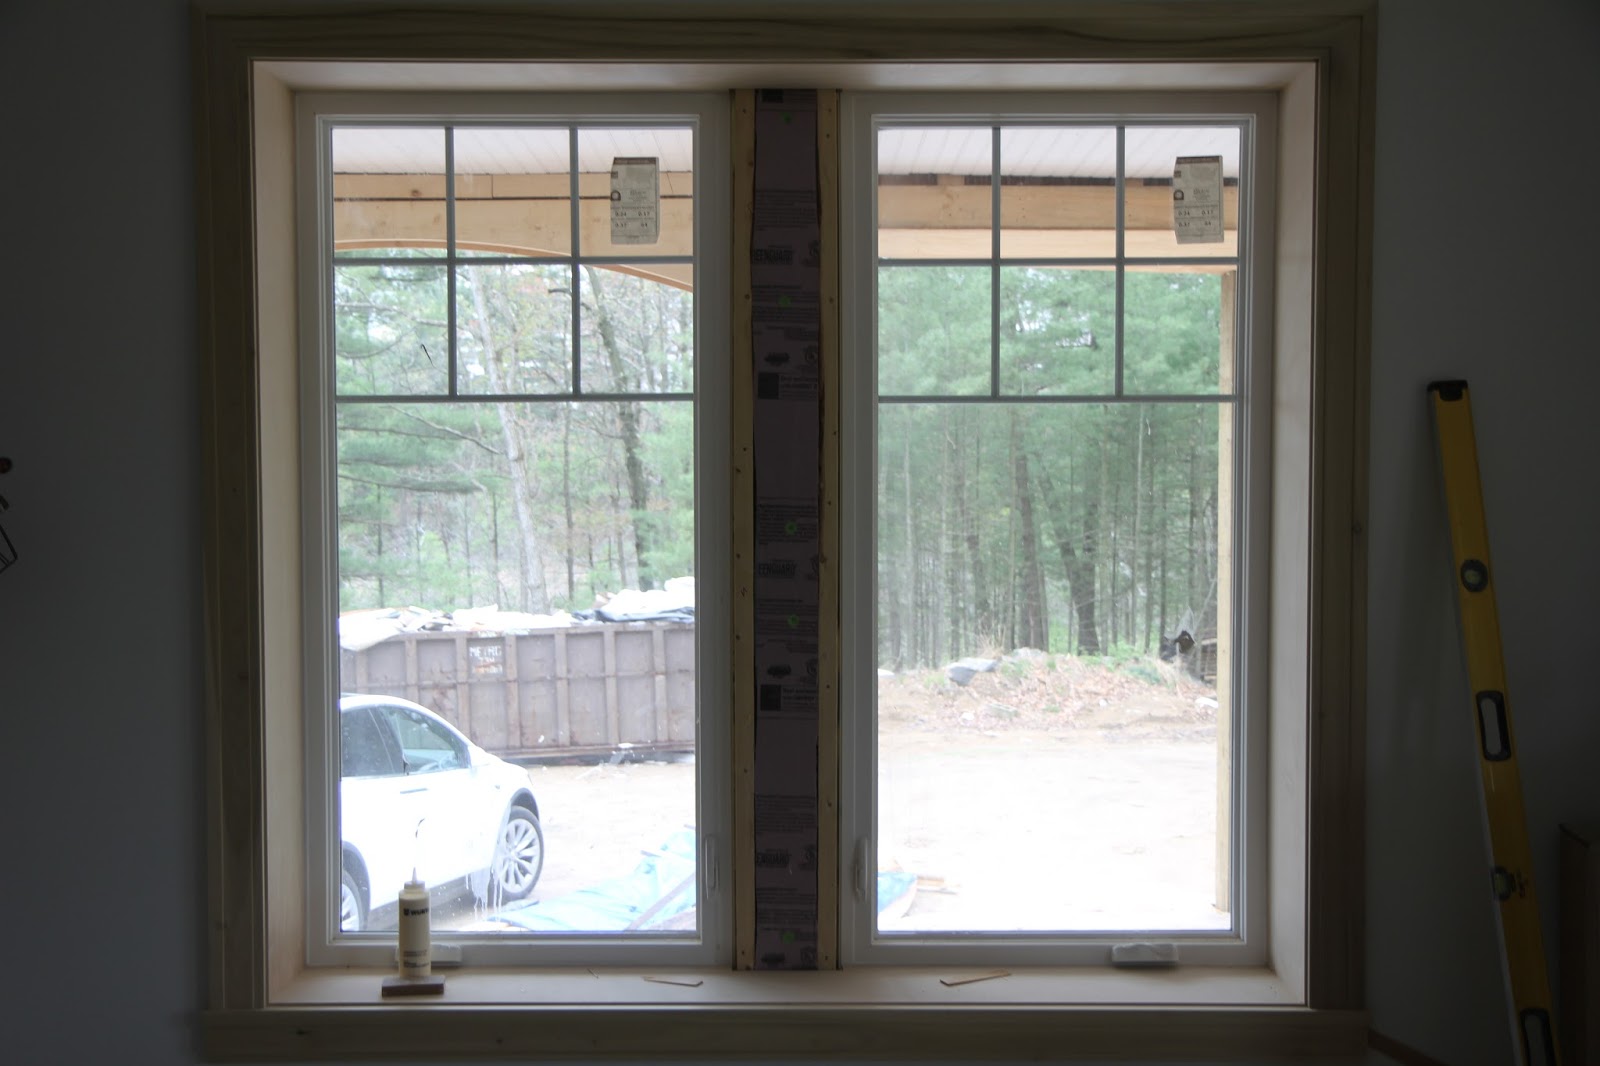
Here's the front study window and the view it offers to the front of the house. The thick center stile was something that I didn't really consider during the design of the house but any window we put in there would have had a center support of some kind. Even if the two windows weren't separated by a window buck, there would have been the combined window frame themselves so going a little thicker between the two is a smaller deal that I though it would be. I always read online citing issues with a large porch overhang, and the amount of light it blocks to the interior of the house. I agree that it does block some light, but it doesn't make the room too dark. This is the light level on a fully overcast day and there's still enough natural light to not need to turn on electric lights. I think the room most impacted by the lower light level due to the porch is the kitchen, mostly because there's only one window. There's still a good amount of light in there and we would turn on the overhead lights for tasks anyways.

The light level in the dining room is more than adequate even with one window. The trim on this window was also finished, and is waiting for the center stile completion. This room is currently housing the poplar trim for all the other windows, as well as some of the thicker baseboard trim. Judging by the pile, I don't think this supply will satisfy the needs of the entire house. Considering Distinctive Designs is cutting these in their shop, we'll probably see a resupply in this room as progress continues. The closest pile is cut plywood used for the casings of the windows. It looks like they're cutting the plywood to width in the shop and it's fit to length on site.
Here's a closeup of the plywood they're using. It's looks like a high quality or cabinet grade 3/4" plywood with one edge veneered. The plys are very clean and free from voids as far as I can tell and the surface veneer is clear without defects. They'll take paint well and should hold up to anything we can throw at them.
The guest room window trims are also completed save for the oval window in the bathroom. There are three single casement windows in this room so there appears to be sufficient light. Even though the trim is 5 inches wide, I think almost all the windows have enough surround to fit the full width. The only window it will be an issue with is the kitchen window, since it's flanked by cabinets, and the mudroom door since it's flanked by the oven and refrigerator cabinet. Although we haven't officially stated it, I think the trim will be painted with a satin or semi-gloss white paint.

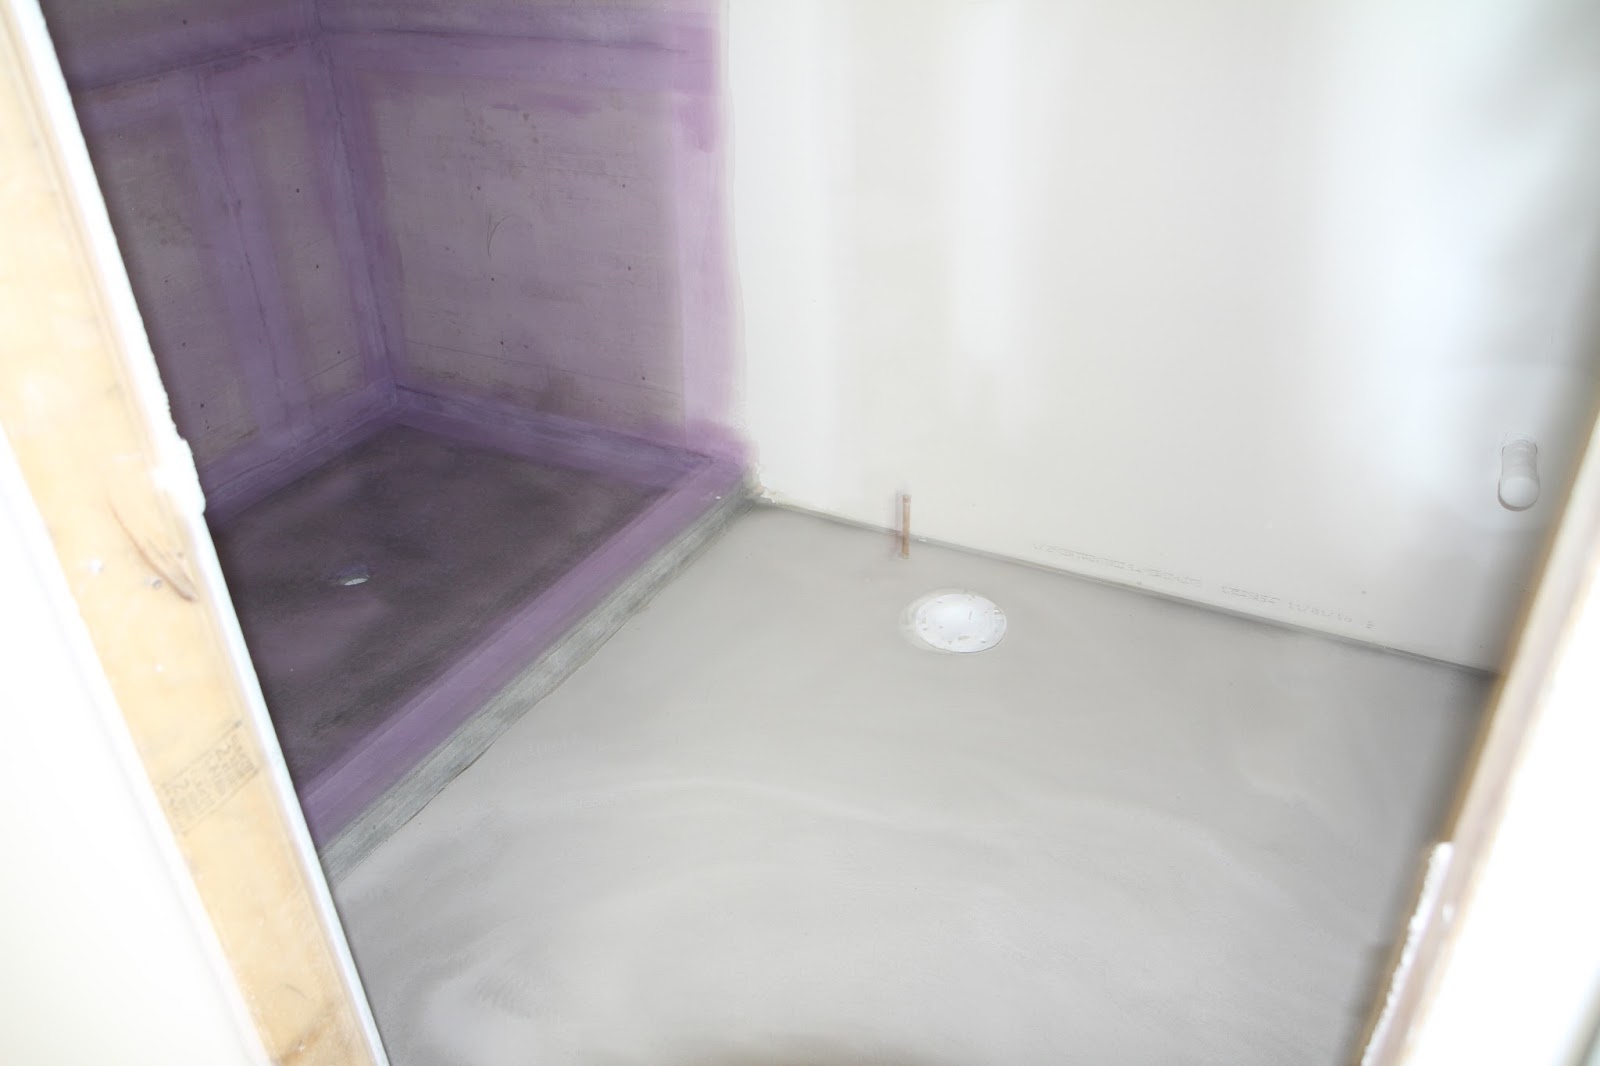
Tile prep has completed in all the smaller bathrooms, as shown here in the guest bathroom. A leveler was applied to the floor which serves to provide a smoother level surface and stronger bonding interface to the tile. Mike said that he talked to Matt Lincoln about the concrete applied in our house. Matt said that they used the same mix in another house and encountered adhesion problems with the tile, so Mike, being the awesome builder he is, wanted to ensure a quality and trouble free finish. The floors aren't perfectly level in all places, so required some leveling. In this bathroom, with the zero threshold shower, the slope of the entire room needed to run down to the shower drain. The slope will be reinforced in the mud and tile application.

The shower was also prepped for tile with the application of a waterproofing paint. It's a crack isolating and waterproofing painted membrane that's applied to all the showers in the house. While a product like a Schluter Kerdi waterproofing membrane would be more foolproof, I think this product will be adequate. Kerdi has a great marketing team and there's no denying that it's a great product. If we had drywall in the shower walls I would have insisted upon Kerdi, but since we have cement board, I'm comfortable with the painted on membrane.

The waterproofing material is called Hydraflex and it's made by TEC. They say it isolates cracks 1/8" wide and is resistant to mold and mildew. It's similar to other products like Redguard and is commonly applied to basement concrete floors. It also provides a mechanical separation for the tile so if the concrete cracks, the tiles will remain adhered to something and won't start popping off. I don't expect any issues with this product and it's use is pretty standard across the tile industry.
The greatroom is currently being worked on, but these windows will be getting a different treatment. We won't be using the same window trim on these windows since their proximity to each other calls for something different. The window side of the greatroom will have a panel effect to reduce the visual business of the room. Window casings are still made and are sitting in place, but not currently tacked in.
Here's one of the window casings assembled, but not placed. This one is for one of the side casement windows. The joints are glued and nailed, using a simple butt joint since mitering the corner is not necessary. The upper windows will probably require the use of the curveable wood on the rear flanking windows since they all have a slight curve across the top of them. Development of the woodworking in this room will be interesting since we're also getting a coffered ceiling in here.

Here's the current state of the kitchen and future banquette eating area. It's being used as a trim cutting station complete with two miter saws and a few work stations. Appropriately, the cabinets themselves aren't being used as a work surface, but everything will require a good dusting as we near completion. The center island is set in place, but not secured, and a bathroom vanity occupies the seated end of the island. Trim is being staged against the walls, awaiting installation and the doorwall is the first door to be trimmed out.
You can see that the sink side of the kitchen is a little darker than the rest of it, even though it has a double casement window. I think it looks that way because the light admittance is in contrast to the large sliding door and the amount of light it lets in. As I said, almost any activity performed in the kitchen will require direct task lighting anyways, so we would probably turn on lights anyways. On a day that's less overcast as this one, there's actually more usable light available to us.
Here's a dark shot of the sliding door, fully trimmed. It's using the same trim as the windows and runs to the floor. The baseboard molding will butt against the trim, with the door trim sitting slightly proud of the baseboard molding. This is the first peek we get at how the rest of the door trims around the house will look, and I'm pleased with the appearance. The trim really adds a lot to the look of the windows, and will look even better when painted white to match the vinyl color.

Here's the kitchen island sitting where it will eventually be secured. The white cabinet is for one of the other bathrooms, and I'm not sure why it's sitting in here. The island slab itself will measure 4x8 feet and we will not have a prep sink in it. We considered a sink, but opted for a larger uninterrupted work surface since the kitchen sink is easy to access and the butlers pantry near by will have a small bar sink. We also considered having a butcher block top as a counter near the sink, but so far have decided against it. Normal prep surfaces are generally flanking the sink but the end of the island will also offer a convenient prep location.
The island cabinets are "L" shaped because the side closer to the fridge/freezer and the end where the bathroom cabinet currently resides will be used for seating. The island is not at bar height, but we figure we can fit at least four stools in these locations for in kitchen seating. The planned banquette is a few steps away and should be sized to fulfill our family needs, so this will be more for entertaining.
The cabinets in the island are Omega Dynasty, a slightly lower quality line from the white Omega cabinets in the kitchen. They use the same slow close drawers and hinges as well as the same quality plywoods. The only visible difference I can see is in the treatment of the drawer top edges. The drawers in the white Omega cabinets have a profiled drawer top edge and those in the Dynasty are eased off square. We do have doors on these cabinets, but the interiors contain sliding drawers, so ease of access is maintained. There's a space for the drawer style microwave in the island, which I've had some apprehension about, but will retain judgment until I get to use it.

The mudroom bathroom got the same leveling and waterproofing treatment as the other bathrooms and appears to be all prepped for tile. Mike said most of the tile we chose is regularly stocked so there's little to no lead time for obtaining it. I'm not sure what the time table is for tile installation, but I'm guessing it's soon. It might just be one of those surprises that pops up during one of our visits. This bathroom has a proper curb as we'll probably be using it for dog washing and swimmer rinsing.

All the cabinets have been removed and the debris cleaned from the garage in preparation for the drywall installers to come back to finish taping, mudding, and sanding. We actually got the chance to swing by the site on Friday after a visit to Hardwood Door and found Mike pushing a broom in here. That's proper dedication and attention to detail when your builder, the guy in charge, is pushing a broom to get things done. This would have never been done with our previous builder and looking back, he only visited the site a few times, when we called emergency meetings. I can't state enough how awesome
Mike Perri has been and how important he was to the completion of our house.
The three wall cabinets have been moved into the butlers pantry and I'm hoping that they'll soon hang them. They're a similar style to the glass insert cabinets in the kitchen, but are Omega Dynasty. Visually they're identical, and I'm hard pressed to find any quality or construction differences.
All the cabinet trim is currently being stored in the pantry. It's a safe place for it since the pantry is not a high traffic area and we probably won't be installing baseboard trim in here until after the pantry shelves go in. There's quite a lot of trim in there and they're individually packed in a cardboard sleeve to protect them. They'll still need to be cut to length during installation so it's not as easy as putting a kit together. Good thing we have those nine foot ceilings.
The master bathroom cabinets were brought into the house and deposited in the rotunda landing on the second floor. I'm not sure if these will be installed before or after the master bathroom tile since the flanking towers sit on the floor and the rest of the vanity floats. It might be easier to install the tile if the floating vanity isn't there, but since we're planning on a border detail, I think the towers would need to be installed, or at least the footprint known.

The bathroom in the extra bedroom upstairs has been leveled and waterproofed as well. The waterproofing comes all the way down to the tub and there will probably be a bead of caulk applied to the corner after the tile is installed. The threshold of the door and the area where the pipes come through the floor were dammed off from the leveling compound which would imply that the substance is fairly non-viscous. Looking ahead, we haven't really decided how we'll close off the various showers and bath tubs, but we pretty much agree that we don't like shower curtains. Whether we use a sliding glass door or hinged will probably depend on the specific bathroom and application.

The master bathroom shower is undergoing a water test in anticipation for a plumbing inspection visit. The rubber shower liner was installed and the drain stopped so the entire shower floor could be flooded. We tried to get a zero threshold shower in here too, but this is the lowest we could get away with. In order to have a true zero threshold, you need to slope the entire floor of the bathroom. In here, that would mean a slope all the way to the opposite wall, making that side at least three inches higher than the shower drain, which was problematic. The finished threshold will probably end up being a couple inches, which isn't too bad as thresholds go.

The entire wet area of the laundry room had a waterproof membrane applied to the floor surrounding the floor drain. In the event of a catastrophic washing machine failure, there's not much worry about the concrete floor becoming damaged. However, since the walls are drywall and not cement board, it's much safer to install a membrane so should the water not be quickly drained by the floor drain, at least the walls won't get damaged. The slope of the floor will gently go towards the drain so leaking water shouldn't get far. I don't think the membrane is code, but a drain pan might be. Either way, it's an awesome addition.
The last bathroom on the list is the turret bathroom, which was also leveled and waterproofed. The waterproofing in here is a bit more important because of the built in cubby, which introduces seams in the concrete board. The leveling doesn't extend into the closet beyond the bathroom because the wood floor will pick back up in that room.

On the back porch, quarter round trim has been installed between the wall trim and the beadboard, closing the gap between the two. This will also be done on the front porch and still needs to be completed. There's some work that needs to be done at the top of the mudroom door to try to figure out how we can install the two products, so I'll update with the solution at a later date. The stainable beadboard covered in the front of the house is confirmed to be installed in the gazebo so I can't wait for that to go up. Mike said Old Country Stone will wait to install the bluestone until near the end of the project so it won't be walked on by installers. I would have loved to have seen it installed sooner, but it will be fine to wait. I would hate to have a paint stain on the surface.

Mike stained a large section of siding so we could see what it looked like near the roof color. In this light, and next to the roof, it looks a lot less green and much more gray. It's kind of neat how the color looks different, under different conditions, but I'm glad it looks more gray than green. I think this will be a great look on the house. It looks like painting prep is nearing completion and all we need is four more corbel installations on the great room and we'll be all set for paint and stain. Well, we'll also need a few nice days, but now that we're into May, we might get luckier and dryer.
So that's about it for this week. Next week might see the start of the deck installation, great room ceiling coffers, more completed woodworking and more tile prep. Judging by the laundry room, it looks like the tile installers mop the floor before applying any surface so hopefully we'll see a cleaner house too. At least all the drywall dust is moving out into the garage where we can just blow it right outside. 19 more weeks until the end of August!


No comments:
Post a Comment