Monday, September 26, 2016

One step forward with the bank. Some window prep.

   We cleared the first hurdle for switching our builders with the bank.  The 6th bank draw is in and all the old suppliers are being paid soon.  Ken submitted his full and unconditional waiver of lien to the title company so all the paper work is in on his side.  We'll be getting a little back from our out of pocket advances on the HVAC and windows, but a large bulk of it went to the suppliers for over budget costs.  Mike is nearing completion for getting all the new numbers together to submit to the bank.  Hopefully it will be close enough to true that we won't have to pay too much out of pocket for unexpected expenses.  I don't doubt that we still might have to advance the draw sometimes since that's the way it seems to work in this industry, but I think the proposed finishing budget will be closer to actual cost so there will be much less stress on us to make up the difference.  Mike has found a few surprises along the way.  A couple years back, we paid permits to the township for the water and sewer tap, but nothing was ever done with that.  Mike worked to make sure those permits are still applicable since they're pretty costly.  However, he discovered that the sewer is still only at the street, which might incur more cost to us since we would have to dig up a portion of the concrete curb to tap into the sewer.  We might be able to tap into our neighbors line, which might save some cost.  These are things that should have been worked out at the beginning of the build, but somehow fell through the cracks.  Once Mike discovers all the surprises and assembles a building budget and plan, he can submit it to the bank and we can get rolling on the second part of the bank switch over; obtaining a new mortgage.  Yeah, we have to go through that process all over again.  Fun.
   We're still concentrating on getting the exterior sealed up so we can work inside for the winter.  There has been a little progress on that front and some window prep for the greatroom windows.  Hopefully Pro Brothers and Soft-Lite will get those two replacement windows to us so we can get them installed when the lift is on site.

   The days are getting short and the temperature is starting to stay in the low to mid 70's but they're still beautiful.  We're expecting a mild winter this year, so that might help with building, but we still have some wonderful fall days ahead of us with perfect temperatures for putting up an exterior.  
   Here's the current state of the build.  No more windows have been installed since the last time, but there are subtle changes going on right now.  Almost all the windows have been fully nailed in, with a nail in every nail hole in the flange.  The windows were just staked in with a few nails before so they could get the placement set and in the opening.  The turret windows still need to be installed, but I think the copper roof should be installed first, which in turn the turret roof fascia needs to be repaired.

   Besides the turret, laundry room, great room, and one basement window, all the windows have been installed.  The sliding doors still need installation as well and we still need to track down what door we want in the master bedroom.  A short list of tasks I need to complete is starting to creep up on me so it's something I'll need to tackle soon.  Mostly design decisions that will affect the budget of the build, but important nonetheless.

   A little work was done on sealing the windows.  The front windows on the first floor had some Tyvek adhesive tape used as flashing.  It's odd that they used 2" tape and just overlapped them so when I asked Mike about it, he said, it's not final and it's just what they had available at the time.  I should tell them that they can use a rasp to rough up the ICF before the tape to get better adhesion.  I would expect at least a 4" tape, but would prefer 6"-10" since we're installing window trim.

   Here's how a single layer of the tape installed on the wood between the windows looks like.  You can see how little overlap there is onto the wood.  I think ideally, this whole piece of wood would be covered with tape for a good installation.  I'm not sure why they bothered to install the tape in the first place.  Maybe just a mock up for the trim guys.

   It looks like some of the 5/4 boards were used to buck out the window bucks in the great room in preparation for the window install.  One piece was nailed into the buck on each opening, which shifts all the windows a bit to the right, but I don't think it will be perceivable once finished.  I think another piece of wood will need to be installed on the interior of the buck since a finished piece of wood will be installed on top of that.  Things will really look different when the windows are in place.
   So that's it for this week.  We should be getting the water and sewer lines bored next weekend.  I'm not sure if the sewer tap issue will prevent the actual boring, or if they'll do it and just not connect it up.  Either way, geothermal wells will be installed in a few weeks and more work on the house should pick up.

Monday, September 19, 2016

Lumber delivery

   Nothing new to report on for building progress, but we did get a lumber delivery.  It looks like material for the exterior window trim, some rough lumber for various fixes, some cedar, and some large white Azek boards.  I'm not sure where everything is going, but it does mean that there will probably be some work going on soon. 

   The lumber was delivered in three stacks and all but the longest stack was placed in the garage.  The third stack of material is hidden behind the stack of half inch plywood.  Up front is a stack of untreated 2x4, some 2x12 cedar plans, some pressure treated 2x8 and a few 2x10 boards of white Azek.  I can guess that the 2x4 is for general structure reinforcement, but I'm not sure what the PT, cedar, and Azek are going to be used for.  I know Mike has plans to redo the fascia on the turret since it's cracked, but I think this is too thick for that.

   Here's what the Azek looks like.  It's thick, but it might not be two inches.  I'm not sure where this will be going on, since we decided to use a primed rough sawn cedar for all the window trim.  There might be spaces in between the windows where this will sit.

   Here's the front stack from the side.  Mostly 2x4 material with some 5/4 on the right.  The large pieces are the 2x12 cedar boards.  They're smooth sawn and thick, so I'm fairly certain they won't be going on the windows.  Usually something this broad is used for structure, but we don't need any cedar structure.  Maybe a face board somewhere.  Also not sure where the 5/4 boards are going. They can be used for decking and trim, but since it's not really wide, I'm guessing it's trim of some kind.  It's a different experience not being so involved with the construction, because I don't know exactly where everything is going.  I'm definitely not the Alpha personality type so I'm okay with trusting that Mike knows what's going on.

   Here's the stack of pre-primed rough sawn cedar boards that will be used for the window and wall trim on the exterior.  We originally thought about using white Azek for all the trim, but a few things changed that decision.  After Mike talked to the trim carpenter about how all the siding, trim, and window thickness will match up, they said it would be difficult for the Azek to always line up properly.  Also since we have to have the shingle painted anyways, it doesn't make much sense to not have the trim painted as well.  It will make it easier to paint the siding, then paint the trim, rather than masking off all the trim and painting the siding.  Since the material is pre-primed on all sides, I'm not as worried about deterioration.  Just need to be concerned about woodpeckers.

   Here's the pre-primed trim sitting next to the stack of half inch plywood.  I'm not sure what we need so much plywood for, but I'm guessing it's just general space filling.  I know some is needed above the garage door to box in the beam and exterior face.  Some will probably be used to box in the porch beams before the fascia is installed.  Some will be needed for the window installation where ever there's a curved window (laundry room and great room).  That should be it though.

   Here's the surface texture of the pre-primed trim boards.  I think the rough sawn is nice and it will complement the cedar siding texture well.
   That's it for this week.  I'm waiting to hear back from the copper roof installer on when that will be installed.  We're still on the books for the water/sewer installation next week so that will be a fun update.  I might be able to make it out to the site when they're there.  We went out this weekend to some plumbing supply houses and found our kitchen faucet.  I'll post more on that when the time comes since it's way, way in the future.

Thursday, September 15, 2016

Windows update (again, not the software kind)

   I had a meeting with Mike and Great Oaks at the house today to get them to coordinate finishing off the landscaping in the front yard and planning the next few phases.  There were some requirements that Mike had where the retaining wall touches the front of the house that he needed to coordinate with the repair of the heaving of that wall.  Since the cut cobblestone needs to attach to that wall, Mike feels it's necessary to install a dimpled polyethylene material to the ICF behind the cobblestone so there's a drainage plane should water infiltrate between the surfaces.  If water gets back there, we're not concerned so much about it infiltrating the ICF, but it could degrade the mortar holding the cobbles on, causing it to crumble.  This is a concern I had way back when they were installing and back filling the basement ICF, but I was told that the double 6 mil plastic that's in place is good enough. I guess I shouldn't have been such a push over.
   We all got up to date on the schedule so here it is.  The water and sewer is going to be bored in at the end of the month.  Since we can't run the electricity up to the front of the property with the water anyways, boring the water and sewer pipes is easier for the crew.  We'll have to come back and dig a trench for the gate electricity and security.  During this time, we'll get the copper roof installed on the turret and the rough and trim carpenters will come in to start to bring the build up to standard.  On October 10th, the geothermal wells will be drilled and connected to the house.  After that, we'll bring in fill sand to bring the house to construction grade.  This will allow Great Oaks to come in the spring to finish the landscaping and get the driveway installed.  Winter time will let the sand settle and compact.
   After the meeting, I got a chance to look around and see that most of the windows are installed.  There are some of the double casements that still need to go in and of course the largest in the great room that will require a lift to install from the outside.  There's also some movement forward on the HVAC in the basement.

   Here's the state of the front of the house now.  All the windows are in except for the turret and laundry room.  As I mentioned in earlier posts, the laundry room window will be installed later so they can use the opening to move all the upstairs drywall through.  Also the eyebrow window for this opening was cracked and is being replaced.  You can see the big great room windows still in the garage.  I really like how the front round window turned out and we're calling it the "Death Star window".  Maybe "Tie fighter window" is more accurate.

   Here's the inside of the Death Star window.  Similar mounting method to the oval windows with a little more bracing structure.  This window is about 30" diameter and static so there won't be any operable windows in any of the other bathrooms.  I'm not sure if that's good or not, but we couldn't get the option for an opening window here.

   Here's the outside of the Death Star window.  Nothing to write too much about, but neat looking none-the-less.  I think there's enough space around the window for framing, but it might get tight up at the top if we have something coming down off the overhang fascia.  We're actually finding that it's going to be tricky in a few areas around the house to get the window and roof trim to behave.  For example, the roof line on the turret comes lower than the tops of the turret window openings, so having a flat overhang similar to the rest of the house isn't possible since it would intersect the window.  These are all things that we'll have to figure out soon since the siding plays off of these locations as well.

   I'll provide some more details about the windows over the next few pictures.  On the taller windows, there are more locking lugs to account for the greater edge that needs to be sealed.  You can see from the picture above what sits behind the locking lever on the inside of the frame.  The forked piece is powder coated aluminum as far as I can tell.  Since it moves the bar with a HDPE bushing, there will be very little friction and wear between the two materials.  I fully expect the powder coating to last forever.  The opening to the locking mechanism sits between the second and third seal so even though it slightly penetrates the sash, it's still behind two seals.

   Here's a better look at how the frame is constructed and the spacer used between the window glass.  Having a fully welded seam in the frame is important.  Lower cost windows will use screws and brackets, which creates seams that can open with temperature fluctuations and create failure points in the window.  The welded seams are fairly clean and very tight.  All the corners line up with no slack or misalignment.  The non-metallic spacer between the two pieces of glass contributes  a  lot to a better thermal break between the glass and to the low condensation score.  Often times you'll find windows with condensation around the edges of the glass because of the cold thermal transfer from the metallic spacer.  Also, the metal expands and contracts at a different rate than the surrounding material so, given enough cycles, seals can break and the inert gasses contained between can escape.

   Walking around, I see that there are different ratings for different windows.  This is the eyebrow window in the master bathroom shower.  All the numbers are slightly different than the casements due to different sizes.  The condensation resistance is lower but the SHGC is higher.

   Here are the numbers for the casement window.  SHGC is slightly lower than the other windows as is the visible transmittance.  The U-Factor sits in the middle of all the windows and the SHGC is the lowest of all so these windows block the most sun heat compared to the others.

   This is the sticker from one of the largest windows from the great room.  A huge static pane of glass, this window has the lowest U-Factor of all the windows so it's great at keeping heat in.  The SHGC is in the middle so that room with the ten huge windows will do pretty well with controlling sun heat.

   Looking in the basement, it looks like Porter and Heckman have gotten some of the first floor and basement main trunks installed.  Since this is connected to the right trunk that goes up stairs, it looks like this is the supply trunk, which is a little confusing because I thought it was going to go closer to the outside of the house.  Since it's situated on the right, the return trunk is situated on the left and when it makes the turn across the house, the return trunk will be more outside of the house.  Of course, the trunks that go to the front of the house are reversed, so it works out fine there.  I guess we can't have it both ways.
   The insulated section is the part that sits on top of the furnace.  I guess it's not really so much a furnace, but an air temperature exchanger since there's no combustion going on.  The trunk going away is going towards the back of the house and vice versa going forward.  The wire hanging down is the thermostat from the second floor.  I'm guessing some of those lines will go to a baffle somewhere, or maybe to the furnace controller that will then hook up to the zone baffles. As of right now, the trunks going up to the second floor are connected to the top of this piece.

   Here's looking up into the box from the previous picture.  You can see the two trunks for the basement and way at the top is where it connects to the trunk going to the second floor.  Maybe the zone baffles will be installed right at this interface, but the first floor will need two zone baffles alone that act the same.  I will be interesting to see the programming for that since you'll need to have two baffles balancing the first floor and one baffle on the second.  The first floor baffles will need to have the opening angles adjusted to account for two trunks.  The construction of the box is some kind of rigid insulation material so you can see the fuzziness on the inside.  Ideally we'll have all the hard boxes insulated so energy goes where it's supposed to go and not into the ambient surrounding.

   Here's a neat box that the HVAC installers fabricated to fill three floor cut-throughs for the returns from two different rooms.  This will connect the returns from the first floor sitting area after the rotunda and the guest room to the main return trunk.  There's no exit from this box to connect to the return trunk, so I'm guessing it will be put in place then connected when the trunk is installed.  The way it's sized, it pretty much sits right up in the cavity created when removing the ICF foam.  I'm hoping almost everything besides the trunks will be hidden in the ICF cavity layer.


   Here's another angle of the supply trunk so far.  It hangs a bit off the ICF, which is good so we can get insulation up there.  I would also expect the seams to be either mastic painted or taped (or both), but it's far too early to do that.  I think those two round ducts will supply the guest bathroom and bedroom, but I can't figure out how they'll dodge the return trunk that will run parallel to the supply trunk.  That large ICF cavity is in line with the second floor return trunk so maybe they'll use that as a return chase.  That would be pretty clever.  They'll just need to find a way to go under the steel beam since you can't drill through the space above the beam.
   So we have a working schedule for the next month or so with definite progress being made.  The over all battle plan is to get all the infrastructure required to get the siding and stone up, so that's where the water/sewer and rough carpenters come into play.  If they can get the exterior up before the cold weather hits, then they can work on the inside over winter and be in a good place during the spring.  We're still waiting on getting all the sub contractor bids back but a preliminary schedule is starting to form so we can at least dream of some light at the end of the tunnel.

Monday, September 12, 2016

Windows installation (not the software kind) and 100th blog post!

   As expected, the windows are being set in the window frames.  Right now, they're squaring and securing them in the bucks, but not insulating them because the trim carpenters will get a chance to look at how they're going to install the window trim and siding before everything is sealed in.  Mike found that two of the windows, one of the arched tops for the side of the great room, and the smaller arch top on the laundry room, were damaged during transit and contacted Pro Brothers.  They're already rush ordering replacements for those two windows.  The laundry room window isn't going in right away to provide second floor access for the dry wall, but the great room window will create some difficulty.  Those windows will need to be placed with a lift, so we'll need to get the lift two times.  Security won't be an issue since the opening is 30 feet up.

   Most of the windows on the side of the house have been installed.  The turret windows will need some extra consideration since the turret roof comes down on the window opening so low.  Originally, we wanted to put some dentil molding up there, but that doesn't look like it will be a possibility.  Now we're looking at corbels in between the windows; just trying to capture a bit of that Victorian look without making it too gingerbread. 


   You can see the round window opening is prepped for installation and the study windows are already in.  We went with the 1/3 window grid rather than having half the window obscured with mulls so we could get a better view outside.  When we visited the site on Saturday, they were still there installing the windows for a few more hours so they probably got the round window set already.  I don't think they could have finished it up, especially considering the great room windows, but they'll probably get it done this week.

   All the master bedroom windows have been installed and you can see the bedroom and bathroom windows here.  Also the kitchen window was in place, so it was nice to open it and take a peek at what our view of the back yard would be like.  The master bedroom window is on the left and has two opening elements, just to each side of the bed.  The bed will sit under the arch window and two night stands will sit under the side windows.  We couldn't get all the mullion grids on the master bedroom eyebrow and lower windows to line up but that's okay.  I would rather have evenly spaced mulls in their respective frames and the offset isn't too great.The other arch eyebrow window is in the shower and is the sole light providing window for the master bathroom.  There will be a long bench under that window in the shower so it will be possible to look out when standing on the bench.  Unless you're on the roof, you would be hard pressed to be able to look in so it will be nice to have light with privacy.

   A little closer look at the master bedroom windows.  This eyebrow came in three sections that were assembled during installation.  You can see the nailing flange on the center section compared to the missing nailing flange on the side pieces, since they meet up with the lower windows.  There are mull installation spacers that install between the sections and fill the gaps.  Obviously once the window trim is in place, you won't see any gaps around the windows.  Those will also be filled with insulation, most likely spray expanding foam.  All the nailing flanges will be flashed with a self adhesive membrane which will then be covered by the window trim and siding.  We were debating if we needed a membrane in the window opening as required by standard construction houses.  Since the bucks are all pressure treated wood, we're not worried about the rare occasion when water could penetrate to it.  Also, since the wood shingle siding is already spaced away from the ICF, there's no threat to water infiltration staying behind the siding and rotting it out from behind.

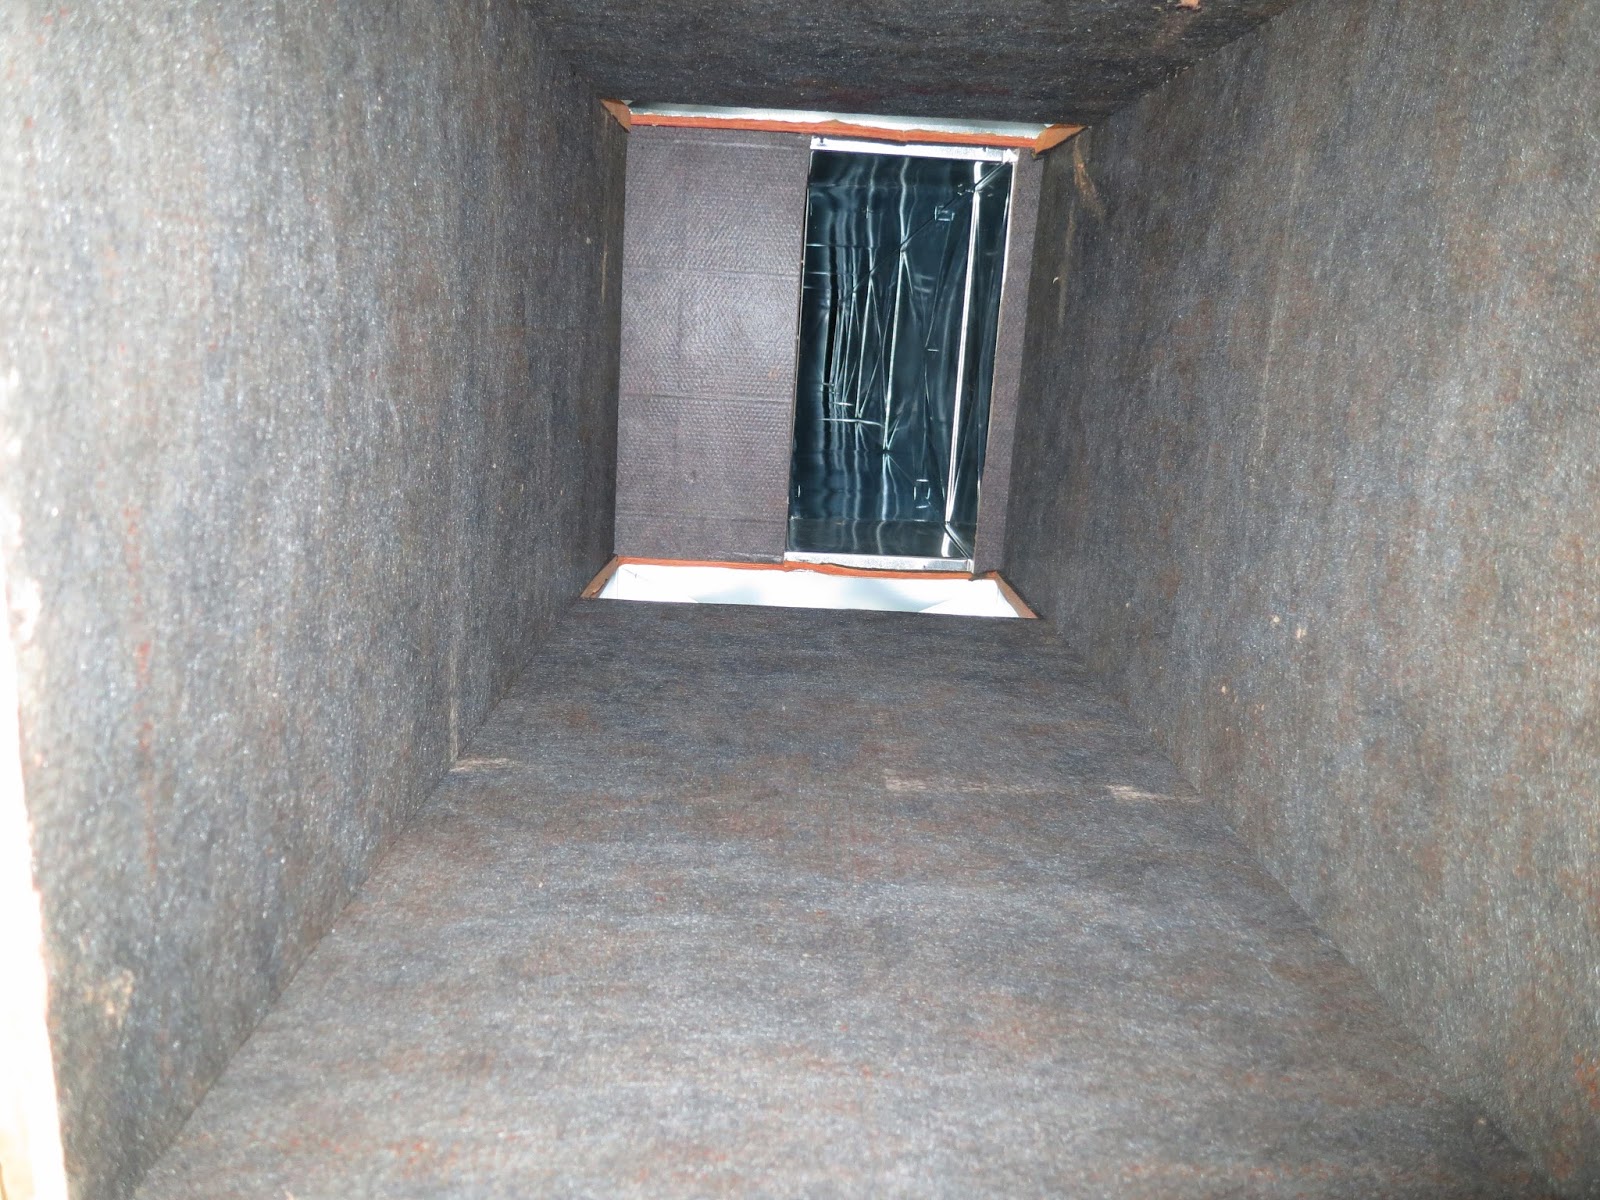
   Here's how you fit a round (or oval) window into a square opening.  The corners are bucked out and a plywood mask is applied through which the window can come through.  I guess this inside of this window might be a little weird depending on how we finish it.  The easiest way to finish it would be to keep the rectangular box and finish the sill as such, filling out the space around the oval window.  I think the best way would be to some how bring the whole oval forward to the interior wall depth so the opening remains oval.  I'll have to ask Mike about this but I think the latter method is preferred.  

   Here's the inside of the master bedroom window.  Besides this, there's another window on the left wall, as well as the french door to the balcony so I don't think we'll be short on natural light.  We're actually considering how to install light blocking since sleeping times could be during daylight hours.  The space between the windows is perfect width for the California king bed we have right now so all smaller beds will also fit.  I think two full sized beds are wider than a California king so if we want to full sized adjustable beds when we're super old, some of the beds will overlap the window space.

   Here are some details on the windows and what makes them so appealing.  Here's the locking mechanism for the casement window.  Normally, you would see two latches and two locks.  The locks aren't only for security, they also pull the window tight against the sash to create the air seal.  The Soft-lite design has one latch for ease of use, but it moves the entire bar to engage/disengage three locking points on the window frame.  Since frames can flex, having more locking points is better to have an air tight seal.  The sliding bar locking lugs are all metal and they're captured by high desity poly urethane brackets which self lubricate so they'll always operate smoothly.

   Here's a close up of the locking mechanism and lock bar.  The locking mechanism engages the bar and the lock point simultaneously, and you can see the lower locking lug at the bottom.  Should the HDPE bracket break, they'll be easy to replace and the simple design makes fabrication easy if I ever need to make my own.  You can also see two of the three window seals in this picture.  From left to right, there's one that partially obscures the HDPE bracket screws, and one just on the other side of the locking bar.  The last window seal is on the casement itself and sits even farther out from these two seals.  It's no wonder they can achieve a 0.02 cfm air infiltration with this set up.

   Here are the Truth Encore dual arm operators that come with the Soft-Lite casements.  I've heard that Truth makes some of the best hardware available and it's reassuring that parts will be easy to obtain if needed.  The cranks are very smooth and require little effort to open and close the windows.  The ratio of handle turning to window opening is a little low so it does take a good number of turns to open completely, but that's a small trade off for less resistance.  As far as I can tell, to clean the exterior of the window, you just need to crank the window open to 90 degrees, and there's enough space between the sash and window to clean.  It's a pretty simple operation, but almost all our windows are accessible by the wrap around porch anyways so it's a non-issue.  Cleaning the exterior of the great room windows will be a trick.  For closing, after the cranking to almost closed and engaging the window lock, it still takes a hard quarter turn of the crank to get it to the stowing position.  It's an odd operation, but not that annoying.

   Here's the crank in the stored position.  Nice and clean.  As far as I can tell, all the parts are cast aluminum and the crank and case are easily removable if we wanted to paint them a different color.  We'll be keeping them white.  Another nice feature of an ICF house is having a huge window sill on the inside.  Since the walls are ten inches thick plus drywall and the windows mount more towards the outside, there's a lot of sill space on the inside for window treatments or small potted plants.  Margaret was happy when she learned how much space we'll have to hang window treatments.  

   Another nice feature of the Soft-Lite windows is on the hinge side of the window.  You'll find these locking lugs that engage when the window is closed so it doesn't only rely on the hinge strength for air tightness.  The lugs engage each other as the window closes and creates another lever point to press the casement against the sash weather seals.  That means positive locking pressure on both sides of the window.  Very nice.

   Here's what the exterior of the oval window looks like.  You can see that not all the nailing flange is secured right now.  They're just setting the windows for security and will come back to secure the entire flange before flashing and siding.  There's enough there to securely hold the window in place.  As with all windows, the mulls are internal so they're easy to clean.  The window molding will have to be curved but this will be easy since we're not using any complicated profiles.  Basically, it's not so much about curving wood, but cutting a curved piece from a wide piece of wood.

  Here they are fitting the round window as we were leaving.  We didn't get to see it in place since they needed to fine tune the fitment, but it's probably in place now.  The guy in the salmon shirt is our builder, Mike.  Every time a sub-contractor has been out there, he's been here.  As you can see, he's not scared to get in there and help, and that's a refreshing change.  We spoke for an hour, discussing all the things that will need to be "fixed" in order to get the house to a state where they can continue to build.  Not too much with the inside of the house, a few places where the ICF buckled and will need to be smoothed.  Some missing blocking in the roof.  Most of the issue is with the porch and how it will interface with the stone and siding.  Some areas of the porch roof will need to be bolstered.  Little things that make me wonder how Matt and Ken were going to tackle them.  For instance, the hidden room under the porch needs a concrete slab poured on it.  Pouring a 2 inch slab will bring the height up to the level of the deck joists.  Unfortunately, you have to consider how the deck boards will span this part.  Since Azek uses hidden fasteners that usually attach to joists, was the plan to tap-con down into the concrete?  It's not really okay for the Azek to be sitting right on the concrete, so a spacer would be desired.  Maybe the slab could be poured to 1.25" thick and a 3/4" spacer tap-conned to the concrete as a nailer for the hidden fastener.  Or maybe it's okay to put the Azek on concrete and just use adhesive between the two.  Stuff like this will need to be figured out, but it seems like it could have been avoided if steps were taken in the design.
  We also met with the California Closets designer to get preliminary measurements on the master closet, laundry room craft area, and pantry.  We'll have a follow up meeting later this month to take a look at materials and initial organization design.  Of course, a final measurement won't take place until all the drywall is in, but at least we can get the ball rolling on this process and plan for the cost.
  Jonathon of The Sound Vision also came out to meet with Mike, but I got a chance to catch up with him.  He detailed his requirements for the electricians, and it seems like it will make their job easier, at least in the rooms that will have lighting control.  Not much changed from the initial design, but some technology will be difference since advances were made.  Looking forward to seeing that all implemented.
  So that it for this week.  Next week should have almost all the windows installed.  After that the rough carpenters will come in to fix the various issues we need to fix before we can move forward.  Mike should have all the subcontractor bids in this week so we can present our time table and budget to the bank.  It will be interesting to see what the difference is between the last budget and this one.  We pretty much knew the old numbers were under budgeted when we started pricing out cabinets, but we didn't have a feel how much the finishing work would cost.  It will be nice to not have to pay so much out of pocket for every milestone.  I have a meeting with Great Oaks later this week so we can all get on the same page about finishing up phase 1 and planning out the next phases.  There's a lot going on even though the days are getting shorter.

Thursday, September 8, 2016

Window Delivery

   After a year and a half of sitting in a warehouse, and about two years after I placed the initial order, our windows have finally come home.  It's not because of Pro Brothers.  In fact, they have been more than generous and warehoused our windows while we waited for the house to be constructed to the point where we could install.  They've been so patient with the whole processes and invaluable in designing the 50 window and doors we have in the house.  There are actually more than 50 windows since some of the openings are compound windows.  I haven't gotten much chance to play with them since they're safely wrapped in their protective shrink wrap, but Mike's carpentry crew will be coming out on Friday to start with the installation.  We have a meeting on Saturday at the site with a designer from California Closets so hopefully we'll get to see some of the windows in place.

   So this is what over 50 windows looks like.  They brought them in a 20 foot moving truck and had about 6 of their guys there to offload them directly into the garage.  Good think I had some plywood to lay down so both the windows and floor would be a little protected.  If you need a scale to how big some of the windows are, remember that the ICF block layers are 12" tall.  The closer windows are for the turret and stand 7 feet.  Those are the windows that will need some custom mullion work in the upper windows.  Pro Brothers supplied the mullion material so we could make those "x" shapes.  They're just adhered to the window and since it's all vinyl, they can be glued together using PVC glue. 

   These are the round and oval windows for the bathrooms.  The big round one will go in the middle of the house, front elevation.  It will sit above the toilet in the turret bedroom.  The two ovals will go in the other bathrooms left side elevation or the guest bathroom down stairs and the second bedroom upstairs.  All the windows are static and do not open, and all have integrated mullions.  All the windows come with nailing strips and these are no exception, however, they're not attached.  You can see the nailing strips behind the windows.  

   Here are the energy ratings for our windows from the sticker:
   0.24 U Factor 
   0.18 Solar Heat Gain
   0.42 Light Transmittance 
   64.0 Condensation Resistance 
   0.02 CFM air infiltration 

So here's a quick primer on what those numbers mean.  You can find more information at the NFRC website

U-factor ratings generally fall between 0.15 and 1.20 and measure how well a window prevents heat from escaping the house with a lower number indicating better heat retention abilities.

Solar Heat Gain Coefficient (SHGC) ratings fall between 0 and 1 and measures how much heat from the sun is blocked by the window.  The lower the SHGC, the more solar blocking ability the window has.  There's a trade off here in temperate zones.  You want a lower SHGC for the summer time to keep the inside of the house cool, but a higher SHGC for the winter to all the feeble winter sun to heat up the house.  Some people opt to install different SHGC windows on different sides of the house, depending on how the sun hits the windows.  We didn't take that into consideration.

Visible Transmittance (VT) ratings fall between 0 and 1 and indicate how much light is allowed through the window; basically tint.  One way of making a window with a lower SHGC is to install additional glazing, or layers in between the glass that are coated with very fine metallic dots.  These dots reflect solar radiation while allowing light to get through.  The more dots, the more solar radiation is reflected, but with less visible light transmitted.  As you lower SHGC or add more glazing panes, the more your view out the window will turn gray.

Condensation Resistance ratings fall between 1 and 100 and indicate how much the window can resist condensation, with a higher number indicating better resistance.  When cold air meets moist warm air, condensation can form on the interfacing material, namely, the window.  Thermal insulation acts to prevent the cold and warm air from meeting.

Air leakage ratings generally fall between 0.1 cfm and 0.3 cfm with the lower value indicating a more air tight window.  Unless the window doesn't open, there will be some gaps that air can leak through; tracks, places where the panes meet, etc.  Measured in cubic feet per minute (cfm) 0.30 cfm calculates out to 2.25 gallons of air a minute per window.  Multiply that by the number of moving windows in your house and you can see how leaky windows can be.  Forget insulation, air infiltration is the greatest loss of energy in a house.

So from the energy rating sticker on the window, you can see that we have a pretty good U-factor, good SHGC, a nice balance on the VT, and descent condensation resistance.  The shining star is the extremely low air infiltration, which is one of the main reason why I hunted down a Soft-lite supplier.  After all, what's the use of having an energy efficient house when you have huge holes in your windows?  Other great things about Soft-lite is that they use a non-metallic spacer between the panes of glass.  Metal is a great energy conductor so often you'll see condensation form on the edges of the glass during the winter time.  This is because most window manufactures use a metallic gasket window spacer between the outside and inside glass.  Once the outside window gets to the cold ambient temperature, that cold can easily conduct through the metal spacer and cool the inside glass, causing the condensation, which leads to mold and mildew.  Soft-lite also uses high quality Truth hardware and uses a unique triple locking system on the casement windows so you only move one lever to unlock the window, but the window engages three locking lugs for a better seal. Other attractive features include triple gasket weather seals and foam filled window frame cavities.

   Here are the static great room windows that go on the back and sides of the great room.  The full arch windows go up high on the sides and there are eight windows across the back with two of them being partial arches.  You can also see the three sliding doors we ordered from Soft-lite.  One will be in the kitchen and the other two go down stairs in the basement.  We still have to order the french door for the master bedroom.  The arched eyebrow windows in the front are for the master bathroom and the laundry room.

   Here are all the windows in one shot.  Any window that opens is a casement and most of them are double casement windows.  The only single casement windows are going in the turret.  Total cost of the windows and sliding doors was about $53k so it was no small amount.  Modern vinyl windows are much more durable than those of the past and aren't prone to cracking and fading any more so we're not expecting to ever have to replace them.  It's difficult to say if the initial cost will return to us in energy savings, but I can confidently say that they'll make life more comfortable.
   
As I mentioned, Mike's rough carpentry crew will start installing the windows tomorrow.  I can't imagine they'll get them all installed, or even that they'll be insulated and taped, but I'll have some update pictures this weekend.  Having the windows installed will be an amazing step forward.  Hopefully they'll be safe through the rest of the construction process, but this is about the right stage for the installation.  They need to be installed before the siding can go up and before any utilities and drywall is installed.  
   We're meeting with California Closets on Saturday for an initial design consultation for the master closet, pantry, and craft area in the laundry room.  Margaret recommended them so we'll see what they can come up with.  
   The remaining bank situation with Ken is one step closer to completion now that he has submitted the final draw documents.  I think we still need final waivers of lien from the vendors and all that will be settled so we can move forward with figuring out the new financing with Mike as the builder.

Tuesday, September 6, 2016

No progress this week

   No real progress to report on this week.  We've finished cleaning the house in preparation for the window delivery on the 7th.  Mike says that the windows will be set on the 9th so I should have some nice pictures for the next update.  I'm not sure they can complete the whole house in one day so all the windows might not be completed for the next update, but it will at least be started.
   The final draw with Ken has been submitted and we should be wrapping up this stage of the bank stuff soon.  Hopefully the vendors will be paid soon and we'll get a little out-of-pocket expenses back, which will go right into the house for the copper roof or the window setting labor.  We need to finalize our design intentions for the gazebo fireplace and maybe get in contact with California Closets to come up with a design for the master closet.  We could even use them for the pantry, garage, and craft area in the laundry room since it seems like they do all that too.
   Mike should be getting his estimate to us soon since most of the major decisions have been made.  I think the only remaining budget item was the electrical installation, which needed to be calculated from the lighting plan we came up with last week.
   Some times things move fast, and some times things move slow, but at least things are moving forward.