Monday, March 28, 2016

Roof, walls, and turret

   I got a chance to visit the site on a sunny Easter day and was greeted with more steady progress and some surprises. The entire garage roof is now sheeted in and the structure for the fascia is in place so we can see where the front porch roofline will meet up.  More decking was installed on the second floor in the front of the house, but the connector trusses have 
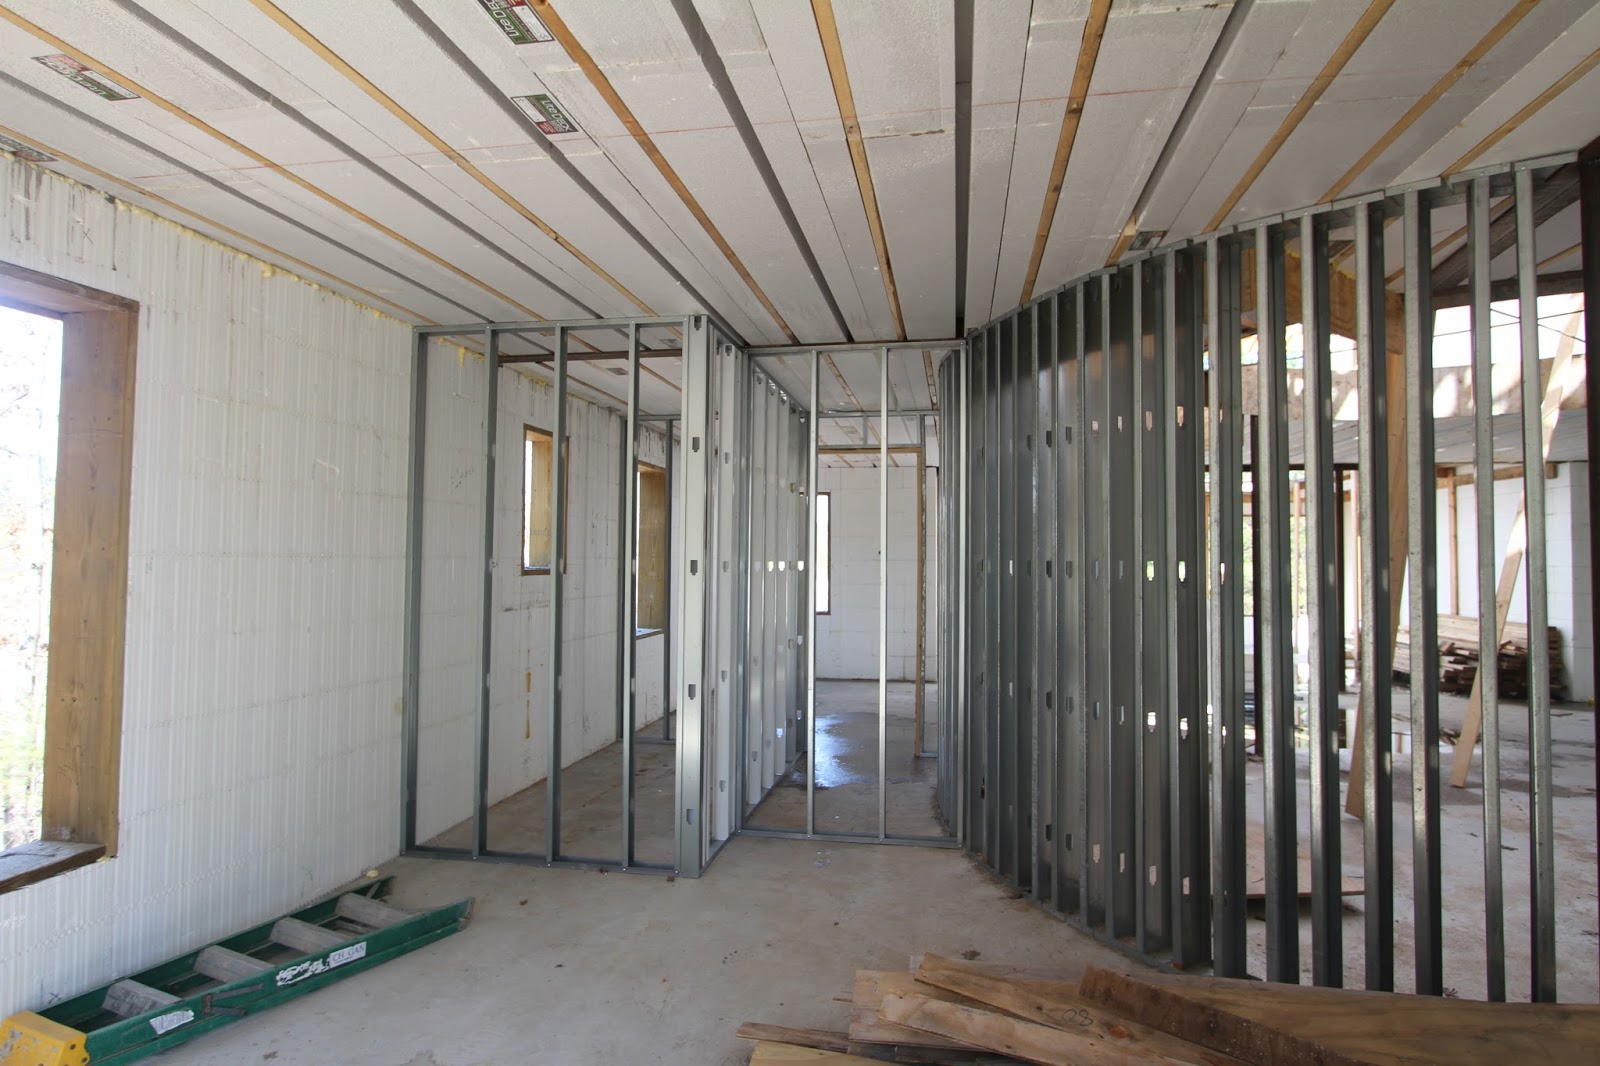
yet to be created.  The interior kitchen wall stud was erected so we could get the cabinet designer out to measure the space for final ordering.  The surprise is that they also erected the stud walls on the first floor between the study and guest room.  

   Here’s the state of the house from the front.  You can see that the garage is sheeted up to the house, the roof on the front of the house is almost completely sheeted, and the windows on the turret have been corrected.  It’s a huge difference for the turret, as the windows are lower to the floor, down from about two and a half feet to two feet, and the top is corrected so the entire height of the opening is seven feet.  

   The windows of the turret take up seven of the ten feet in height, giving two feet under the window as per code, and one foot above.  You can see the exterior is covered in plywood, which was slotted from behind to allow it to curve.  The height of the turret is visibly above the height of the ICF wall next to it.  The truss interface between the turret and house plane will be interesting to see.  We’re hunting for a nice finial (thingy that goes at the peak of the turret) so if you have any good ideas, leave a comment!   

   The garage roof is now connected to the master closet since the entire garage roof decking is completed.  The truss structure that was above the double garage door is now obscured, and you wouldn’t know that special engineering was required to create that plane.  The little space around the master closet is enclosed and it’s a pretty awesome space.  More pictures on that later.  The very peak of the roof decking doesn't meet since there will probably be a ridge vent up there.

   Here’s the awesome space that’s created from the Lite Deck that supports the master closet, and the space under the garage trusses.  I don’t think any other structure will be put in here, but I could see the possibility of more supporting 2x4 being installed.  Maybe the roof pitch and proximity to the structural master closet wall is enough to support the static weight of the roof and any snow that might accumulate on it.  The space is pretty large and the roof is high enough to stand under for most of the space.  There’s a little bit on the other side of the master closet corner.  As I mentioned before, I’m not sure about the safety of creating access from the master closet but we’ll at least be able to have access from a hatch in the garage ceiling.  Good place to hide presents.

   Here’s what the kitchen looks like with the side wall installed.  I verified the wall length measurements just in case so it looks like we’re ready to order cabinets.  The right corner of the kitchen from the door towards the back will be for the double wall oven and some cabinets.  From the door forward, we’ll have the fridge and freezer columns.  There’s just over five feet on that wall so we might be able to squeeze a 36” fridge and 24” freezer, or a 30” fridge and 30” freezer in there.  We also have to account for the space that door molding and side panels will take up on that wall.  The opening between the wall and elevator is the doorway for the butlers pantry.   With the fridge/freezer being on the left of the door to the mudroom  and the double oven being housed in a cabinet to the right of the door, we weren’t sure where a light switch could go.  Turns out, with structured wiring lighting control, you can get away with a ¾”-1” depth box, so it can be mounted in the oven cabinet.

   Here’s what the turret looks like now.  Huge difference between the first iteration.  Small piece of advice to everyone out there building a house: Always double check the work!  The windows are ordered so while correction wouldn’t have been too bad since it’s all just wood construction, it’s still money lost from wasted materials and time.  The windows themselves will be a 2’x5’ casement topped by a 2’x2’ static window.  My only worry is how cold this area will be during the winter.  Hopefully, between the high efficiency, low air infiltration windows we bought and proper insulation/air sealing of the studs, it won’t be too cold.

   Here's the panorama of the turret view with the new window openings.  The windows are so tall, I couldn't capture the entire height.

   Here’s the progress of the roof decking on the second floor.  Most of the front of the house is covered with roof plane interfaces needing attention.  The back half of the house will needs the truss interface between the main part and the greatroom, so that will need to be constructed before the decking can go on.  Also, the turret and turret trusses needs to be completed since it will probably intersect the main house plane. 

   This one was a pleasant surprise.  This is the doorway from the guest room into the guest room bathroom.  It’s only five feet wide, but it will be enough for a bathroom with a shower.  We’re planning on also having a no threshold shower in this bathroom since our guests won’t need a tub.  Just on the other side of this wall is the study.  The window in this room is a static oval window.  The plan right now is to have the toilet below the window and the vanity next to the door with the shower on the far wall.

   Here’s the guest room doorway to the walk in closet.  I know there’s really no reason to have a walk in closet for the guest room, but there wasn’t a great way to expand the bathroom into this space so we left it like this.  I think the wall will stay curved inside this space so it will have a neat look to it.  It’s only just over 4 feet wide and part of the depth is taken up by an alcove from the study.  

   Here’s the wall from the study side.  You can see the alcove that will house some kind of countertop built-in for charging devices or holding shared printers.  We currently both have our own desk spaces and computers so we’ll want to have something functional in here.  We’re having some difficulty figuring out how we’ll configure this space for our work spaces since the large windows are only two feet off the floor and it might look ugly having a desk in front of the window.  I think the best use of space would be having two corner desks with a low bench connecting the two that runs under the window.  The downside is that we'll be facing away from each other into the corners.  We have Margaret thinking up some good ideas.

   One last parting shot of the house from standing on top of the concrete retaining wall.  Eventually the front porch roof will intersect with the garage roof where the long fascia support is.  It's getting really exciting to see so much progress each week.

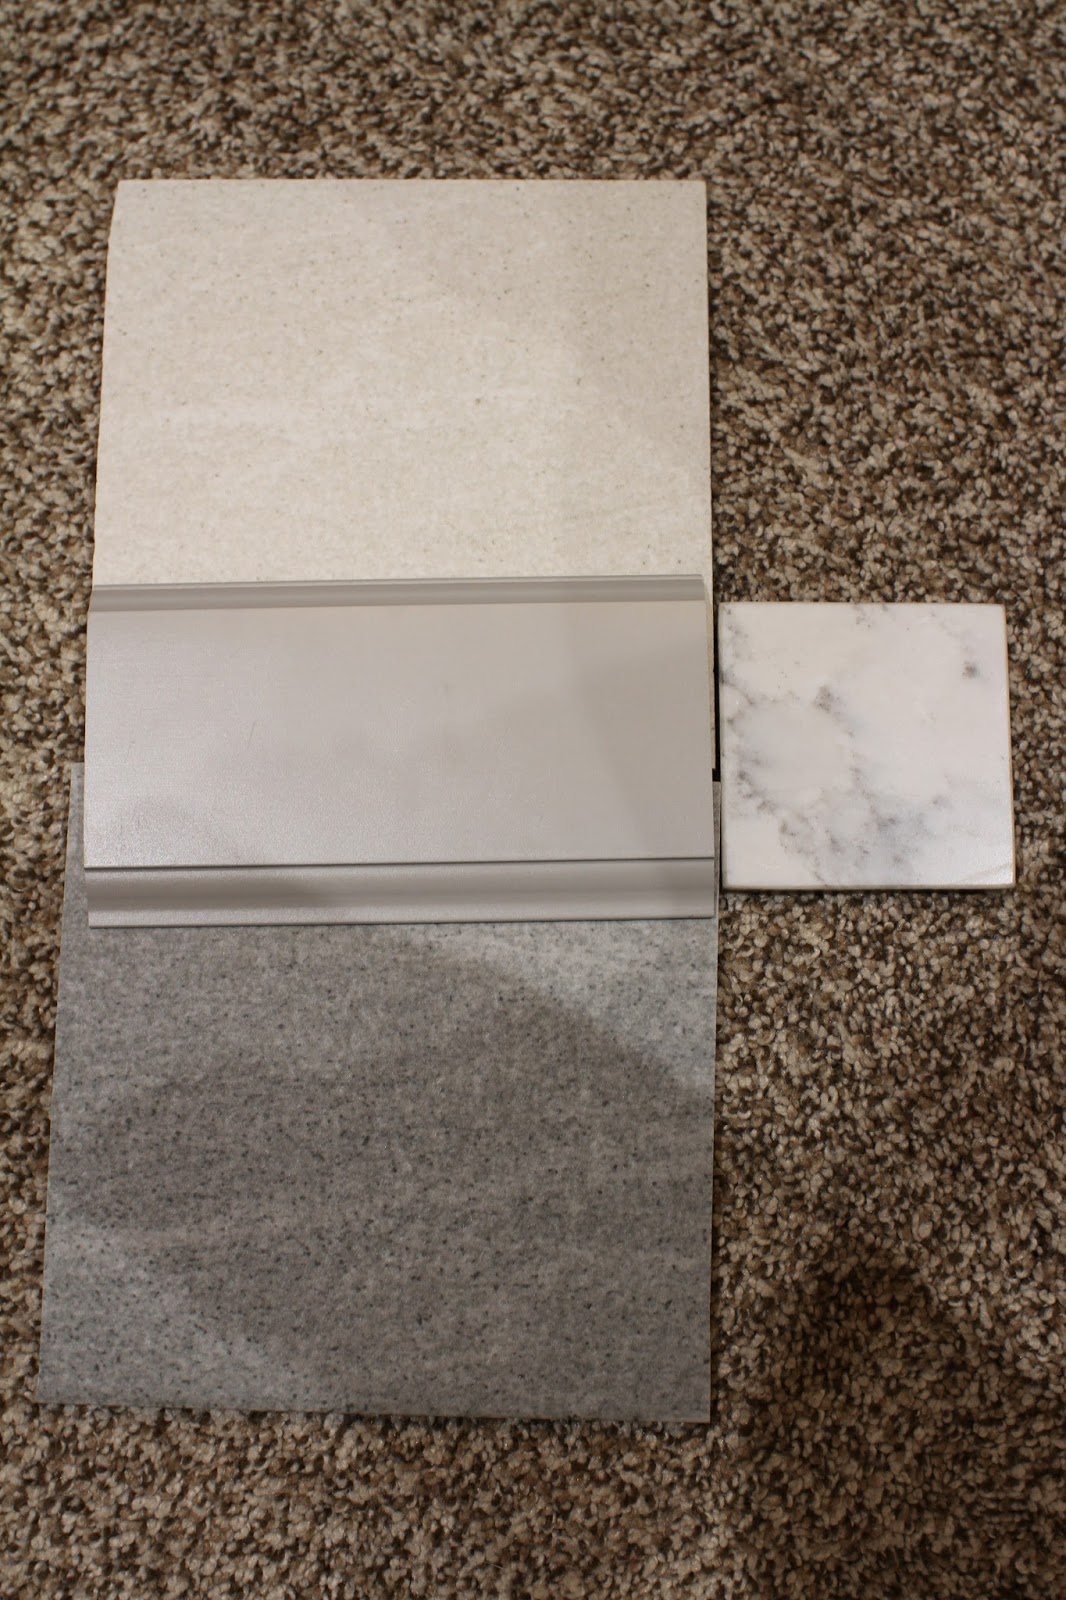
   This week, our kitchen designer, Eric Johnson from Cobblestone Cabinets will be visiting the build to take measurements for cabinet ordering.  We're hoping that we can get the order in before the expected price increase later this month.  Being one of the most expensive items in the house, it would be great to save a few thousand dollars on cabinets.

Thursday, March 24, 2016

Interior Design: Hard surfaces part 1

As I've mentioned before, our interior designer is Margaret Skinner of Margeaux Interiors.  We hired her on to the team late last year and she has been fantastic ever since.  Her email replies have been prompt and she supplies new information at a pace that keeps us moving forward, but allows us time to think things through.  As a bonus, she has her builders license, so you know her input is from an aesthetic as well as functional perspective and could answer some of my technical questions about HVAC and lighting placement.

After looking at our Houzz saved pictures, blueprints of the house, and discussion with us, she determined what our style was and what our expectations were for the scope of the job.  We pay her on retainer and have had to refresh the retainer once so far, so for the amount of work that she gets accomplished, I feel this a very reasonable arrangement.  She is a full service interior designer, so we wanted, we could have her pick out exact pieces of furniture and upholstery for the room design she planned.  We're still thinking about using that service, but are heavily leaning towards it.  We know she has an ultimate design in mind, so to have her implement it 75% might not allow the look to be completed.

We've gone through cabinet selection with her and Eric, the kitchen designer at  Cobblestone Cabinets for cabinet selection for the entire house.  That includes cabinet brand, material, and color for the kitchen, mudroom, master bath, three bathrooms, laundry room, and butlers pantry.  Being a woodworker, I knew what I was looking in a cabinet from a construction perspective.  Short of full custom cabinets, which are extremely expensive, I initially wanted Omega cabinets throughout the house.  I decided on Omega because they use 3/4" cabinet grade plywood for the carcasses, minimum 5/8" solid wood drawers, dovetailed on all joints, Blum slow close full extension drawers and doors, solid wood doors with plywood panels on the doors (depending on the door style), and color matched interiors.  I also like how the cabinet carcasses are constructed.  Being a woodworker with limited funds, we had to go with Omega cabinets in the kitchen (where the most use is and durability is an issue), with Dynasty Cabinetry (lower Omega brand) and Home Crest cabinetry everywhere else.  Cabinet layout and pricing was determined over the course of a few weeks and was much less painful than I thought it was going to be.  Luckily for me, my wife, Tanja, is very decisive when it comes to selection.

With the cabinets decided, we could move on to tiles and counter tops.  One meeting, Margaret brought all our cabinet door samples, and her initial selections for every tiled room so we could see how the materials would combine.  This is where I'll start up with the process since it's the most picture worthy part.  I have prints of the proposed kitchen cabinet layout, but they're not digital, so I'll have to scan and upload them in another update.


   Here's our cabinet and counter top selection for the 4'x8' kitchen island.  The counter top material is a solid surface made by Vicostone, Onyx colored.  We wanted the appearance of a carrera marble, but not the natural material because of the maintainence and stainability.  The island cabinets are going to be the Dynasty Omega to save some money and will be the dark walnut color you see here.  We've decided to not go with a sink in the island since we'll have one in the butlers pantry just around the corner.  We've thrown around the idea of having the counter top of the island closest to the sink made of end-grain butcher block, but haven't made a decision yet.

Here's a closer look at the island counter top.  It's not pure white, and there isn't any glass aggregate in it, but there's a subtle gray veining and mottling that is supposed to mimic onyx. It doesn't have the translucency of the natural stone, so some of the effect is lost.  We're still on the fence about this material.  Tanja's not sure she likes the grey mottling because, to her, it looks like it has a smudge of dirt on it.  We haven't been able to find a white solid surface that has a dimensional sparkle, but not a ton of glass aggregate.  I think we initially didn't want to go with the more exact carrara marble analogues because the strong veining would detract from the veining in our soapstone counters, which I'll get to next.

 For all the cabents that go around the exterior of the kitchen, we've decided to go with a white Omega since they'll be used the most.  To back up a bit, all cabients will have inset doors and drawers, which adds a slight premium.  The interior wood and color will be a natural maple except where there's glass on the door, in which case the interior will be white.  For the counter top that runs along the exterior base cabinets, we've decided to go with a natural soap stone.  Soap stone is a durable and serviceable natrual stone that is commonly used on laboratory tables.  It can be left honed and dry giving it a gray color, or oiled to a dark black color.  Scratches may appear with wear, but they can be buffed out with a slightly abrasive pad.  Grey to white veining may be present.  In this picture, I've wet the soap stone to simulate what it would look like when oiled.

The backsplash tile is from Metis warm from Mosaique Surface.  It's made of Calacatta Dore & White Thassos, which are both natural materials, so sealing will be necessary.  I think the backsplash is a little less prone to staining and etching since it's a verticle surface.  We really didn't have a great idea what we wanted for the backsplash and when Margaret pulled this out, we were happy with the selection.  It kind of follows the trend of using a mosaic tile, but doesn't use the tired trend of horizontal stacked mosaics.  I think this tile can be installed both horizontally (chevrons running horizontally) or vertically (chevrons running vertically), but I' think we've decided we want it installed horizontally, as shown in this picture.

Next to the kitchen is the mudroom and full bathroom ajoining that.  The mudroom selections were simple since we're just deciding on a tile to match the locker/bench that's going in there.  The locker/bench will also be provided by Cobblestone Cabinets and will be constructed by Homecrest.  The color is going to be that washed gray and the bench itself will be a dark walnut color.  We've considered using a live edge slab for the bench but haven't decided on it yet.  The floor will be a ceramic tile, in a basalt color, easy to clean and hides dirt well.  

Also shown in this picture are the tiles used for the bathroom.  I can't remember exactly which goes where, but I know that the small mosaic will be used on the shower floor, the large gray piece at the bottom is the solid surface counter top, and the textured tile at the bottom is the shower wall tile.  I think the white was used as a reference for the cabinet, but I can't remember.  This is more of a utility bathroom since it comes right off the garage and back door.  I imagine using it to shower off after swimming or cleaning up after doing yard work.  Maybe even used for cleaning a dog.  We haven't picked out a sink or toilet yet but something with more utility might be nice.

   Here's the initial selection for the master bathroom.  The cabinets in here are going to be Omega Dynasty as well but the construction will be different than the rest of the house.  Here, the cabinets will be a floating console, two drawers in height.  It will also use a full overlay door instead of an inset, and the door itself will be a walnut slab instead of white shaker, with the woodgrain will running vertically.  The color scheme for the rest of the hard surfaces are natural materials white and gray, giving a classic bathroom look.  The solid surface counter top is the carrara marble looking material from Vicostone.  The floors will be a 12"x14" white tile that will transition into something smaller in the shower.  The funky looking chevron tile will be applied to the feature wall that separates the shower and bathtub.  The counter top material will also be used for the long bench in the shower.  The shower wall tile will be the same as used on the floor.  There has been some discussion about adding a border around the bathroom floor, if it should deliniate the shower, what color it should be... We're also thinking on coming up with an alternative to the feature wall.  The tile is nice, but might not be our style.  Plus, it's not wet rated so it couldn't go on the inside of the shower, hence the other mosaic shown.  Tanja has her eye on something else, so we'll have to get pricing on that.  We've narrowed down a tub, but not hardware, plumbing, lighting, or toilet.  So many decisions.


While most of the bathrooms are plays off each other in one aspect or another, the guest bathroom departs a bit from the norm for a little pizzaz.  Margaret did stay with the white tile on the shower and wall base, she chose this black and white tile for the floor.  The vanity will be a white prebuilt inset shaker door unit with a white solid surface counter top so this floor will add a lot of pop to the room.  The small tie floor format is very Victorian, but usually implemented with a hexagonal or square tile.  This lends itself well to the design of our modern Victorian house while still feeling modern.  It was a surprising choice at first, but I think it will work really well. 

   Here are the materials for the bathroom in bedroom #3.  This room is the non-turret room and basically mimics the floor below so the dimensions of the bathroom are almost exactly the same.  Despite their similarities, Margaret went with different materials, but carried some of the themes of the other bathrooms into to keep a little continuity.    Since there will be a tub in this room, the tub wall will be tiled with the white ceramic subway.  The counter top will be darker gray solid surface from Solid Surfaces Unlimited Jasper collection.  It's the Andes slab, but this sample looks different than the one picture on the manufacturers website.  The floor tile is the textured gray from Beaver tile and stone in a gray minerali color.  Again, the sink will be housed in a pre-built drop in white cabinet with inset shaker style doors.  We haven't picked out a tub yet, but the dimensions are set, so it shouldn't be difficult.  We're looking at a fit in tub and tiling the walls rather than a whole tub/wall combo.

   
   Here are the materials for the laundry room.  It will be pretty simple and functional since it's a laundry room and we don't need to have a lot of fancy stuff here.  The floor tile has a nice non-slip texture to it that makes it look like burlap.  It's hard to recall all the details, but I think we were going with the gray color on the cabinets.  The solid surface sample will be used for the counter top.  It's a pretty good sized room so we were thinking about maybe putting in a craft table too or something.  Maybe add some more functionality to the room since we'll only be washing clothes in it once or twice a week.  
A few features we would like to see in this room if you're looking for ideas:  
  • air drying cabinet with flat drying racks
  • in wall ironing station
  • lots of clothes hanging space
  • possible linen closet


We shrink the master closet a little and move the wall shared between it and the laundry room to make the window more symmetrical, then move the washer dryer on that moved wall.  That will give us a lot of storage space where the washer and dryer are right now. The wall space next to the door might be a nice place for a long craft table.

   These are the materials for the turret bedrooms bathroom.  Pretty clean and simple affair since we're thinking about keeping the twins in this bedroom.  We're looking at the darker gray tile going on the floor, the cabinets will, again, be the light gray color to keep it kind of universal, and the lighter gray tile being used for the tile in the tub.  The solid surface counter top is the same as the one for bedroom #3.

  So we're pretty happy with most of the selections, but there are some that require some tweaking.  Also not shown is the powder room in the rotunda, because that's going to be specifically designed and wildly different than the rest of the bathrooms.  I guess it's a chance to add a lot of pizzazz to the house since it will be the main bathroom used by guests.  I've heard rumblings of backlit quartz walls and concrete counter tops.  Should be interesting.

Monday, March 21, 2016

Start of the turret and more roof work

Looks like were on a roll with the construction!  The weather has been holding out for the most part, with temperatures in the 50s and 60s F.  Progress is being made on a few fronts, which is really great to see.  I got to visit the site on a cold but sunny Sunday and was greeted with a dry and firm driveway and a clean work site.

    Most of the trusses are gone from the front of the house and the crane truck is offsite too.  The skytrac still here, and I think they're using it to get the plywood up on the roof.  You can see that half of the garage has the sheeting up and they finished much of the truss structure over the large garage door.  Another obvious addition is the turret!  More details on that later.

    Here's a close up of the garage.  You can see the "hand built" trusses that connect up to the master closet wall.  There are a couple places on the house where two truss planes intersect and need this kind of treatment.  They still need to install the structure above the door itself, but it's much clearer what the intent is.

    You can see the back of the garage is mostly sheeted up too.  From this angle, you can see how the other trusses will extend over that odd structure above the garage door.  There's a generous overhang on all the trusses.  The garage is almost enclosed on the top and it's starting to look like a real garage.  Just need to add a slab floor.

    Here's what the inside of the garage looks like now.  We haven't discussed ridge venting, but it's pretty standard in Michigan.  There's a lot of space up there so I'm hoping for some nice access.  The 2x6 truss structure isn't really rated for a lot of weight from above since it's holding the span of the depth of the garage, but I'll still like climbing up there, especially to access the concrete pad that the master closet is sitting on.

    Here's what the master closet wall looks like right now.  It's nice that they left me a pass through for now because it's fun to walk out there.  I'm still contemplating the feasibility of adding a small fire-rated door to access the rest of the pad.  It might be a nice place to bolt down a safe or something.  Two concerns are that the space is unconditioned, and I would have to ensure that the door is air tight since it's above the garage space and I don't want fumes leaking in.

   Here's the master bedroom, bathroom, and closet wall that faces the back of the house.  They've started sheeting up this roof plane as well.  There will be an entirely different feel to this space when the roof is up, and even more so when the ceiling goes on.  Construction is slow enough that I get used to the feel of the spaces without ceilings.  

    This is looking across the entire master suite.  It extends from the front of the house to the back and pretty much takes up the entire side of the house past the elevator shaft.  The laundry room will get to have that big window so I'm thinking if there's enough space, we should have some craft tables in there too or something.  It would be a waste to just use it for laundry once or twice a week.

   I'm leaning out the master window to get this shot of the back of the garage.  You can see the laminated beam and how much of a generous overhang there is for the roof.  I think our current house only has a foot and a half overhang.  I didn't measure this one, but it looks bigger than our current house.`

   Here's a closer look at the hand made trusses on the garage.  The bottoms are bird mouthed to the garage wall top plate.  All that's left is to continue the trusses directly above the garage and put on the decking.  It might have been neat to have some usable storage above the garage, but it would probably require much thicker horizontal pieces in the trusses.  I'm not a structural engineer, but I wouldn't trust any big weight on the 2x6's used to span the twenty foot plus distance they are now.

   Here's the turret as viewed from the bedroom it's attached to.  I'll have to confirm the height of the window bucks since it looks off in these pictures.  The turret itself is going to be at a ten foot ceiling height to raise the roof line above that of the rest of the house.  The turret roof will be constructed on site and is planned to be copper clad. 

   Driveway view from the turret.  The turret construction is from 2x6, which will be clad with plywood then two inch foam on the outside bringing the thickness close to the ten inches of the ICF.  Matt suggested that standard cellulose insulation is sufficient, but I might try to push for foam since this area will be colder due to the seven windows.  Then again, with seven windows, maybe it doesn't matter as much what the insulation is in the wall cavities.

There are seven windows that allow views from one side of the peninsula to the other.  Here's a semi-poorly stitched together panorama of the turret from the front of the house on the left to the back of the house on the right.  I can't wait for this part to be completed, because it's going to be an awesome space.

   A little more on the construction of the turret, they used a double thickness of 3/4" plywood for the sill plate and since you can't get curved 2x6 naturally.  It will be a trick to see how they curve the drywall on the inside.

   The window bucks are curved as well with a slight bevel on the vertical bucks.  The windows are not radiused, and fit square in the bucks so each window sill will be curved as well.  In general, we haven't decided upon window sill treatments yet.  Stone would be nice, but wood is less expensive and easier, especially in cases like this curved turret.

   Here's how the turret looks from the garage/master closet pad.  The wrap around deck will curve out under the turret to make a nice round sitting area.  The deck roof will curve accordingly as well.  I'm not yet sure how the deck "ceiling" will work around those beams.  They might have to be boxed in or something, depending on how the deck roof trusses are constructed.

   Here's the house from the back.  You can see where the greatroom and rest of the houses truss structures will intersect and how they'll need to be built on-site to join them together.  There's also the matter of the back deck roof and gazebo.  The gazebo roof is connected to the back deck roof, and the back deck roof will partially support the master balcony.  Also, the master balcony will have a roof that should extend off the main house roof, so this will probably have to be built on site too, as an extension and sitting on top of the main roof.

   Not only was a good amount of construction completed, but the basement was completely cleaned up.  There were some blow outs from the first floor pour, as seen at the ends of the beam.  While the blow outs still need to be chipped away, the concrete spillage that was stuck to the floor has been cleaned up.  All loose nails, dirt, and materials were removed from the basement.

   I don't think I've ever seen the basement this clean yet.  There were always some leaves or construction materials stashed here so it's nice to see that they're starting to move into later phases.  This area will need to be clean for HVAC, electrical, and plumbing roughs to come in and start working.

   So it looks like progress is moving along and it's just in time for some nicer weather.  As always we're hemorrhaging money since the cost of building materials have supposedly increased since we started this project a year ago.  Also, the unexpected complexity of the build is starting to add some costs too.  Once we start on the interior walls, the costs should stabilize a bit.  Here's hoping.


Sunday, March 13, 2016

Trusses flew up!

   The weather is warming up again and all the snow that was dumped on us a few weeks ago has melted off.  I can't be sure that winter is done with us yet, but at least we can enjoy the early mild spring, and the great building days that come with it.
   We were surprised this trip with an almost completed roof as far as the trusses go.  Progress has been slow for the past month so it's a great feeling to drive up the muddy path to the house and see such huge changes.  It looks like they got all the shipments they wanted for the trusses and the proof is in the pudding.  There are a few areas that still need some completion, but there are also some other areas that I didn't expect to be completed yet.

    Here's the great sight we were treated to when we came up on the house.  The ground was pretty firm despite the snow melt so it looks like they didn't have any trouble getting the crane in there to lift the trusses up.  You can see that there are still some trusses on the ground but it's obvious that almost all of it has been installed.

    A little bit more needs to be installed on the garage to finish it off.  There might be something tricky going on where the garage roof meets the house.  Also, the odd structure over the large garage door was unexpected.  The plans don't detail the truss structure, but they do show the roof, and there isn't any break in the slope here.  I'm not sure if this is just underlying structure or if it's something that affects the planes of the roof.  I guess we'll have to wait and see. 
   You can also see the walls of the master closet have been installed on the LiteDeck pad, and the trusses are supported on them.  Plywood sheathing has been installed on the wall and I expect it to be well insulated.  
    Here's a shot from inside the garage.  You can see the trusses attach to that odd structure, and the slope will probably continue down from there to form the overhang.  On the left of the frame is one of the laminated beams needed to support the truss structure that I talked about last update.  The odd structure attaches to that beam, which then carries the load of the rest of the trusses.

    Here's a shot in the garage looking towards the house.  You can see the laminated beam that the odd structure attaches to and how the Strong Ties hold the rest of the garage roof trusses.  Who knows why it had to be designed this way.  Maybe the span was too great for the trusses, with the slope the roof required.
   You can also see the corner of the master closet and how it will be encased in the trusses.  It's a tight fit and the roof might need to be built by hand here, which is why it hasn't been assembled yet.

    Here's the result of shifting the garage to mudroom door over by six inches.  The foam was cut away and the concrete was cut and chipped out.  I could see the cut rebar embedded in the concrete.  All that's left is to buck the opening on the left and build it out on the right.

    Here's the back of the house, where the gazebo will go.  You can see that the trusses extend only to the exterior wall of the house.  However, there will be a roof over the master balcony.  This roof will probably be completed by hand after the lower porch roof is sorted out.  The trusses offer a generous overhang from the house.  

    Here's what the second floor trusses look like from the ground floor rotunda.  A maze of 2x4 webbing bewildering to look at.  This is one stage where I have to have complete trust in the designers and installers because I have no idea what I'm looking for.  Yes, I know what the standard spacing should be and I can realize that there are some structures that should be watched out for, but besides that, I can only see the ceiling and roof decking.  Everything else inside is a mystery.

    Here are the trusses above the great room.  We decided to go with a flat ceiling pretty early on in the design process.  The ceiling of the room will already be twenty feet high so adding cathedral ceiling would just be a waste of heat.  We are thinking about having some kind of coffered or beamed ceiling up there to break it up and give it character.  You can see another laminated beam installed across the span that carries the transition between the house trusses and the greatroom trusses.  Many laminated beams were installed, especially on the second floor above the windows.

    Like this area for instance.  If you'll recall, this span was too great for the ICF to span alone, so a laminated beam is installed and will be sandwiched with foam to create the desired insulation value.  This beam carries the weight of the trusses since there isn't a gable or dormer end.

    Here's the back of the garage from the back porch.  You can see how much is left to finish and you can also see the laminated beam.  That beam actually runs along the Lite Deck that's used for the master closet so you can see how the roof trusses are delineated from the area that will be built by hand.  A truss system isn't needed in that area because the steel beam and master closest walls will be able to support the weight of the roof.  This might be one of the roof lines that will require a gutter to prevent rain back splash on the house.  I guess this could be mitigated with planting beds and rocks, but it would be nice to have a rain catchment system, even though we're surrounded by water.

    Here's the front of the house, looking at the laundry room window.  There's one more piece that goes on this gable end, and it's one that was assembled on the ground.  It will have the foam and house wrap installed.  You can see another laminated beam installed above this window and how recessed it sits from the foam wall.  This space will be filled with rigid foam to bring it flush with the wall and add insulation.  Solid wood, or in this case, laminated wood, has a pretty high insulation value already so adding foam on the inside and out will be good enough to increase it to acceptable levels.

    Here's what's going on with the turret right now.  The turret will be built with the steel studs and the turret roof will be built by hand.  The tie in between the turret roof and trusses will probably also have to be done by hand to prevent any areas where debris can accumulate.

    I grabbed a ladder and went up stairs to see how things looked on the second floor.  This is what the master closet looks like.  The corner sits a bit off the end of the slab above the garage.  The steel studs create a six inch thick wall cavity so the insulation will be sufficient.  Since it's such a small area, I'm going to push for spray foam to add air tightness to this room since it is above the garage.  I don't want any change for exhaust to creep into the house here.  There's a good amount of Lite Deck slab behind the right side wall.  It's tempting to make a secret area back there.  There won't be as much head room, but it might be enough for a safe or something.
   Here's the back side of the master closet.  You can see how the laminated beam rides right up along side the concrete pad.  Right under the edge of the pad is a steel beam.  I wouldn't be surprised if the laminated beam is bolted to the concrete.  You can see how much space there is outside the closet, even with the slope of the roof.  There should be access in the garage ceiling to get up here.  It might be a nice place to hide stuff.  As per code, the master closet wall will have to serve as a fire break from the garage so maybe I can't make access from the closet to this space.

    Here's what the greatroom looks like from the second floor now that the trusses are in place.  There's nine foot ceilings on both floors and the trusses definitely enclose the space a bit.  Plenty of space for lighting and sound in that ceiling.

    Here's the turret opening.  You can see they built out the ICF a bit.  I'm not sure why it was needed, but a major truss spans this area.  It's pretty amazing that you can have a completely open interior and have trusses that span the entire depth of the house without any internal load bearing walls.

    Another peak at the garage roof from the turret.  It almost looks like that structure above the garage doors will interrupt the roof line.  I suspect there will be some other 2x4 installed from the peak that will birdmouth to this structure and form another plane of roofing for this area.  There's definitely a break in the plane of the roof due to the increased depth of the garage.  The trusses supply the primary support structure and the yet to be constructed structure supplies the roof plane.  

    Here's the inside of the garage truss system.  Nice and tall to walk through. I can see a nice boardwalk going down the middle here to reach my hiding spot.  You can see how the structures are joined together with the nailing plates and nothing else.  That's a lot of faith in those plates.

   Here are the master bedroom and bathroom windows with their beams installed.  You also get to see a small pile of the steel studs used in the master closet.  These will probably be used for the turret as well, but not for the interior of the house walls.  We're using steel studs for interior walls, just not this thick.

   So there's a little more truss work that needs to be finished and the slower part, installing the roof decking, can start.  With the estimated completion for the roof at middle of April, we can finally start looking forward to getting some interior work done on this monster build.