Sunday, January 31, 2016

More wall work, warm weather (!?)

It's unexpectedly warm this winter, which helps the building process.  Still yet, we're waiting for the trusses to be delivered.  I'm predicting it now, once they come, winter will rear is cold ugly head and slow down construction.  In the mean time, Great Oaks is still plugging away at our phase 1 landscape implementation.
   More recycled concrete aggregate was delivered this week and placed next to the driveway.  That's good since last time, they dumped it in an area, while unused, still didn't belong to us.  I'll probably need to reseed a lot of the court in the spring time.  There's still a good pile up at the house, so this is probably for the street retaining boulder wall.

    The driveway is completely blocked with these huge boulders.  I wasn't sure how big they were going to be.  Looking around the neighborhood, I've seen sizes range from bowling balls to large beach balls.  These are definitely large than those, most ranging between 2-3 ft in diameter.  I would have loved to hear the sound and feel the rumble when the truck dumped these off.  Maybe this will stop my nosy neighbors from investigating my build.  Probably not though.

    Here's a closer look at the size of these boulders.  I wear a size 12 for reference.  It's tough to determine the stone compositions, especially since I don't have much knowledge in minerals.  I can say that they aren't all granite.

    Here's the approach to the house.  Looks like a good number of stones are gone from the side.  That or they were just moved around a bit.  Some of then exhibit signs of manipulation.  I saw what looked like drill holes in them so they could be split.  Since everything is thawing out, the driveway was pretty muddy and soft in some spots.  The crushed concrete aggregate laid down in the deeper trenches definitely helped with walking back there.  I don't think I'll be driving it until the crushed limestone is laid.  Too much worry about puncturing  a tire.

    The pallet of Rosetta stone steps was moved closer the wall and spread out a bit.  There were some pieces up on the higher tier too so I think they were stepping out how they would be installed.  The mini excavator and bobcat were still there.  I think they move the stones with the bobcat and attached fork, then somehow place the stones with the excavator.  I should take a half day and shoot out there to see how they do it.  Might be fun to watch.

    Here are the two tiers roughly laid out.  You can see some of the wall constructed in the left of the frame.  The big stone in the middle is a Rosetta stone.  The stake on the right of the frame is where the crescent boulder stone wall will start.  There's a rebar stake in the ground on the left, which I think is where the stairs will land.  The highest dirt level is final driveway grade.

    Here's what has been constructed so far.  Last weekend, just the two stones on the bottom left were placed and the limestone bed was compacted in for the rest of the wall.  It seems like fitting and cutting the pieces to fit is time consuming.  They'll also need to cut and fit pieces near the house, which should be interesting since we don't have our final material on the house yet.  There won't be anything below the brick ledge but the face with the gas meter will have the granite cobblestone.

    Just a farther perspective on thew all.  The upper wall curves away from the lower wall to provide some planting space, so basically the dirt you see above the current wall will be stone.  It's about an eight foot drop, so it's nice to have two tiers.  As always, I can't wait to see it completed.

    You can see the separation fabric here covering what is probably the crushed AA aggregate and drainage pipe.  I didn't see any of the crushed concrete so I'm not sure how much is in there, or where the drain pipe will come to sunlight.  It's obviously not coming through the wall yet.

    If you look closely, you might be able to see paint marks on the ground, plotting out the top wall path.  The large stone in the middle is the Rosetta step, but I think it's going to be placed just to side of where it is now.  The wall takes a turn in towards the step to form the sides of the stairs.  The black landscape fabric kind of mimics where that turn will be.  There's supposed to be a few feet between the crescent shaped wall (visible wood stake) and the stone wall and it looks like it's going to be close.
    Here's where they determined the center of the driveway will be.  Actually, I think this is the center of the circle.  There were paint markers in a slight circular pattern up near the stairs to the house too so they were probably plotting out where the top of the steps will go.  This whole area was very soft.  I think they moved some of the dirt to the concrete wall as well, because it looks much more finished than last time.

   All the dirt piles have been removed from the front of the house, so there should be enough room for the truss crane and trailers to move in when they get here.  The only think I'm not sure about is how they'll work around each other since the street boulder wall will need to be installed, occupying some of the driveway.  Also, Great Oaks will probably need to work from "above" some times too so it seems like they'll be stepping on each others toes a bit.  I'll have to shoot an email to Bob Porter and make sure room will be available and see if he's still on his projected schedule.  If this is how much they can get done in one week, I'm estimating three more weeks of landscaping work left. before they're done.

Monday, January 25, 2016

Sunny day, stone walls started

  The temperature hit the low 40s (F) today so it was a nice sunny day to visit the job site.  I got word from Matt that the trusses will be ready in 1.5 -2 weeks.  Talking to Great Oaks GM Bob Porter, he said that's enough time to get out of the way of the crane and two semi trucks that will be needed to bring the trusses in.  They started work on the stone retaining walls near the house on Thursday last week, so this is what two days of work looks like.

As a refresher, here's the plan as it was submitted to the city.
The two dark gray walls are undergoing implementation right now.  They've started on the lower (upper) wall so far.

 They excavated the hill where the two walls will be and put down small crushed stone as a base for the stone.  I'm not sure how deep this trench is, but from the plans submitted to the city, the base is supposed to be 12" deep and 2AA crushed limestone.  The stake you see is where the stairs will come down.  On paper, the wall looks huge, but seeing it on the ground, and with its proximity to the boulder stones that will be circling the small stand of trees, it doesn't look like it's going to be that big.  The foundation you see is for the lower wall.

    You can see how the ground slopes away from the wall, just as the plans show.  It looks like there's a little deviation from the plan because the wall was supposed to come off the corner of the house, but the gas meter is there so it had to be moved in a bit.  I don't think this is a big deal.  If that stake is where the stairs come down, then yeah, it feels small.  I'm sure it will look great though.

   Here are the first two stones laid in.  The pipe you see buried in the rubble back fill is the pipe that was tied into the form-a-drain.  Pretty good idea to bring it behind the wall, since the wall will already have a 4" perforated pipe behind it to carry water away to daylight.  It's neat how these two stones fit so well together.  I'm not sure if they made it this way or were just lucky.  This is clearly where the skill of the install becomes a larger expense.

    Here's a roll of the geo-fabric used to separate the rubble drainage layer from the soil back fill.  It's much thicker and stronger than the small rolls you'll find in the local big box hardware store.  I think there was some more stone delivered too because it seems like there are more piles.

    The crushed limestone is very solid.  I didn't see a vibration compacter on site so they either took it with them or just used the heavy machinery to press it down.  The stones are dry laid, relying on only their own weight to hold them in place.

   It looks like they back filled all of the cement retaining wall.  All the piles of crushed concrete aggregate are gone from the street but there's one in front of the garage now.  I think they might have just moved it from the street to the site and used some of it for the back fill.  Some more dirt was removed from the large piles, but at the same time, the overall height was increased due to the spoils of the stone retaining walls.

   I think there's more here than there was at the street.  I'm sure more will be needed especially if it's placed behind the boulder retaining walls as well.  

   You can see the stakes in the ground that mark where the circular retaining wall around the stand of trees will go.  The end of the stone retaining wall doesn't meet up here and there's a little slope of grass between the two.  In paper, this slope looks pretty large, but as it's laid out here, it doesn't look like it will be more than 5 feet.  The wall surrounding the trees is pretty much right up against the driveway so I can get a little better sense of how the land will be used.

   I climbed on top of the dirt pile and got a nice shot of the concrete retaining wall.  It's hard to believe that all that height will have to be back filled to get the motor coach to grade.  We really are adding a lot to the land here compared to its original state.  I was just looking back at pictures of when we first bought the lot.  Everything was almost flat in this area.

   Once nice thing about the cold weather is that the wetlands solidify enough to carefully navigate without sinking up to your knees.  I ventured out to the lands edge to take a shot back towards the back of the house.  The path you see is kind of our proposed run where the catwalk over the wetlands will be.  It's not straight back and perpendicular to the house, but it's at an angle that offers the shortest path and the best view.  The plan is to have whatever catwalk over the wetlands the DEQ will allow, then maybe have a nice platform at the waters edge to which a permanent dock can interface into the water.  There are neighborhood deed restrictions governing how wide the dock can be so I'll have to make sure to review them before we implement.

      There are two pieces of machinery on the lot, this little excavator and the tracked bobcat with the bucket and fork.  There's a blade attached to the front that they can use to grade and scrape.  I don't think its strong enough to move the stones, so they probably just use it to excavate and fill/level.

   So yeah, there's more stone here now that I remember from last time I was here, so it seems like the walls should be pretty impressive.  The dumpster is still on the site, but it's full so they should probably remove it soon.  The weather is holding out nicely so the working conditions aren't too miserable.  There isn't any snow predicted this week, with temperatures in the 30s-40s.  Hopefully it will still hold out to get the trusses up.  We really need to move on taking delivery of the windows and getting measurements out for cabinets.

   Here's the pile of the 2AA crushed limestone used as a base for the stone walls.  There seems to be a good amount here, but I'm not sure if it's enough for the whole build.  This is the same stuff that will be used as a base layer for the driveway.  

   We have a meeting with our interior designer, Margaret, this week to take a look at tile and stone.  We got approval from the HOA for our exterior building material.  We'll have to use wood shingle on the first floor to satisfy a deed restriction, but it will be painted and all under the 8' porch, so exposure shouldn't be a big issue.  We're still hammering out other details of the landscaping plan, but hopefully we'll be able to close that chapter and concentrate on the build itself.  We might find some time to visit the site after our meeting with Margaret.  If not, I'll go up next weekend to check out the wall progress.

Tuesday, January 19, 2016

Stone delivery

   We're starting to get into some really cold weather now and Great Oaks has delivered some of the stone that will be used for the retaining walls.  Particularly, the caramel mint stone for the two retaining walls next to the house, used to hold the driveway/motor coach area.  Boulder stones still need to be delivered but some backfilling was completed behind the concrete wall.  Trusses haven't been delivered yet and we're still determining an ETA.  I'm hoping the wall installation progresses fast enough so they crews aren't stepping on each others toes.

   One of the large piles of recycled crushed concrete that is used as a drainage behind the concrete retaining wall.  This is going to be the same stuff that goes down as a base for the driveway.  It looks like there were two or three piles to begin with.  The small bobcat that was used to move the stone is still on site.  I'll have to make sure the grass in this area is stone free in the spring and throw down some new seed, since it's not really my property.  The driveway is currently in a frozen state so I'm not sure if we'll need to lay down rock or now.  I guess we'll see how the trucks tear up the ground as the building progresses.


  There were a few stacks of the caramel mint stone lining the driveway leading up to the house.  It doesn't seem like much at first considering the cost, but looking at the area it will be installed, it's probably enough.  The stones are about 10"-12" high and span a few feet in width.  Definitely irregular shapes, which is good.  I think the thing that bothered me most about the Rosetta stone (concrete product) was that it was too regular.  Great for installation, but bad if your eyes are prone to picking up patterns, like mine are.

   I'm not sure why they're called "caramel mint" because they just look gray to me.  I think the color is perfect compared to the proposed color of the house.  Not sure how it will match with the granite cobble and boulder stone, but I think variation is better than monolithic uniformity.  I'm really glad we decided to get these stones.

   Even though I love the natural stone, it doesn't make for great steps.  The variability in the thickness doesn't lend itself well to even steps, so we are using the Rosetta for the stairs that cut through the walls.  They're a little browner than the caramel mint, but I think it will be okay.  Here are are wrapped up on a pallet. It's a part of their irregular stone steps line so it's a more rustic look than the cut stone they also offer.

   Here's a close up of the Rosetta stone.  It's not a bad product, but you can really tell the difference between it and natural stone.  The corners aren't as crisp, the surface looks more porous.  There's a little bit of chipping on the corner, and you can see the concrete aggregate underneath.  I'm not sure if this product needs to be sealed to protect the color, but it's something to look into.  Although the cost of the material is more than the caramel mint, since they're consistent dimensions, they're easier to install.  The wall stones have a "lug" formed into the back edge of each stone so they lock into each other.  So the material cost is more expensive, but the labor is less.  I think a comparison between the two is almost a wash.

   Another pile of caramel mint stone.  I didn't count how many pieces we have but judging by how smooth the driveway was due to the numerous trips the bobcat had to make, it's a significant amount.  My harvested logs are still on site.  I'll have to give a call to the sawyer again.

  The last pile of caramel mint stone.  In all, they're pretty uniform in size considering they're a quarried stone. There's one stone that's fairly large and dissimilar in shape, but that will add to the charm of the wall.  I can't wait to see how the installation is implemented.

   Here's some of the concrete aggregate installed and left uncovered.  This is closer towards the end of the wall, away from the house.  I'm not sure how the boulder wall is constructed; if it will need a similar draining treatment, but this might not be completed because it will tie into the boulder wall.  You can see the landscaping fabric they use to cover over the stone to keep it separated from the fill dirt.  I first thought that there would be perforated pipe behind the wall, in the stone, but it seems like it's not necessary.  The stone goes right up to the drain holes.  I guess if water reaches that level, it will "naturally" drain out through the weep holes.

   Great Oaks did backfill some of the wall to help move the dirt piles for access to the house.  There are still large piles in front of the house, so I don't think it will be enough for trusses to be installed.  Once they get all the walls installed, there will be a lot more room in front of the house to work with.  You can see the landscaping fabric covering the crushed aggregate before backfilling.  Notice how high the garage door is from the current grade.  Enough fill dirt and driveway will need to be placed to make up this difference.  Oh, add three inches for the garage slab too.  The concrete will be capped with bluestone slabs so the height of the wall will be just shy of the driveway, for proper drainage slope.

   Another angle of how the wall is backfilled.  There has to be enough room from the top of the wall to the gravel to account for the roots of the plantings.  It's a good three or four feet from the top of the wall so I don't think we'll have any troubles there.

   One last shot from above.  The ground is frozen pretty solid so they'll need to use heavy machinery to fill and grade.  I noticed all kinds of material in the crushed aggregate.  Some ceramics, brick, stone.  Didn't see any rebar, but it's possible.  Some of the aggregate spilled onto the driveway on the trip back to the site and it was near impossible to chip out of the frozen sand.  I didn't venture driving back because I wasn't sure if the aggregate would contain something that could puncture my tires.

   Shot from below.  After backfilling, there won't be such a drastic difference in the height of the wall, but it will still be over 6 feet.  The backfill will go up 1 foot off the footing.  I think there will be some low plantings, but nothing that will require a very deep root base.  This face will be covered in the same granite cobble and may seem like a waste.  Besides being an HOA requirement, I think I'll enjoy them as I walk the perimeter of the woods.

   So we're expecting trusses to be delivered some day now and hopefully that will go up fast.  Cabinet prices are going to increase at the end of February, so I hope we can get some stud walls installed so we can get our order in before then.  Upcoming costs?  Roofing and landscape completion.

Sunday, January 10, 2016

Landscaping part 4: The wall

   The concrete retaining wall has been poured and the forms are off.  Pretty quick turn around time.  Standing next to it, it's basically the height of a basement wall.  The highest part is near the garage and it steps down twice as it leads away.  The drainage, gravel, and backfill are still needed to complete the wall, but it might wait until the boulder wall is also in place.

   If I didn't know better, it would almost look like we were building another basement.  I think the tallest section is about 9 ft.  With the wall up, you can really see how big the motor coach will be.


    The footings are still exposed on both sides.  As I mentioned, the backfilled side will have gravel, a drainage pipe, more gravel, probably some kind of permeable fabric to mitigate soil seepage into the gravel, then backfill.    The open side will have soil come up about a foot off the footing with plantings on top.  The ground will properly grade away from the wall.

    These are the drainage holes that the drain pipe will be attached to.  The open side of the wall will be covered with the same granite stones that will cover the basement level of our house.  This will work especially well since it will just tie right in with the garage.  The landscaping plan also calls for the wall to support some kind of climbing ivy.

    Here's the "outside" of the wall.  As I've mentioned, it was poured basically the same way a basement wall is poured.  Rebar structure in the middle with forms that sandwich it.  Supports connect the forms together and are cut and plugged with the forms are removed.  I estimate that the drain holes will be just about at grade when completed.  Maybe a bit higher to account for bed mulch.

    Here it is from the other side, where it turns and connects to the garage.  They had to build the footing up a bit here so it didn't underpin the garage footing.  This is where the walkway to the deck that goes around the garage will be.  Kind of a neat area.

    Looking forward from the garage window.  It's kind of a angular funky shape, but the actual curve of the driveway will soften that angle.  Also, it will be topped with a blue stone ledge so they'll probably be able to soften the top angle a bit.  Lastly, the granite boulder stone facade will round out the corners.

       Same angle, but from the garage door opening. The wall itself is somewhere between 8"-10" thick.  I didn't take a measurement.  It's nicely finished off at the top.  You can see where it drops in height; about 4"-6" each time.  We joked, that if we were super rich, this is where we would have the car bunker, with stalls that would rise out of the ground.

  The hills of dirt are still there, but I think they'll be able to move them back soon.  No progress on the house for some reason.  I'm going to have to call Matt and see what's up.  We're getting super lucky with the weather this year, but it can't hold out forever.

  Bob Porter of Great Oaks said that the boulders and stone will be delivered soon so construction can begin on the other retaining walls.  Once they're finished, that will conclude the first phase of the landscaping plan.  It should be an impressive site (pun intended).

Monday, January 4, 2016

Landscaping part 3

   Here's the update to the landscaping that I promised.  It's timely since we've actually started "phase 1" of the landscaping plan.
  If you'll recall from the previous landscaping post, we had to submit revisions due to the wetlands setback.  Here are the final city/county accepted revisions for the front and back yard.

    The front yard had the retaining walls on the right side of the driveway reduced in size due to the setbacks.  We're basically following as close as we can to the setbacks as possible in order to have enough room to turn around from any garage door opening.  As I stated before, Great Oaks actually marked out the driveway in their parking lot and made the turn from all spaces with a large pickup and a mid-sized car.  You can't tell me that's not awesome.  If you look closely, you'll see that the area in front of the front door steps forms a circle.  The area of the driveway here will actually be covered with a circular concrete paver stone pattern.  Great Oaks gave us three options with three cost points.

   The first option was a small paver circle in the middle of the asphalt driveway.  We felt that it implies something nice, but the negative cost differential wasn't nice enough to consider.

    The second option was a large circle border with the small circle inlay.  It used asphalt to fill the field between the outer border and inner circle.  While this got closer to the full circle implementation, again we felt the negative cost differential from the full implementation wasn't worth the savings.  It could always be the case where, years down the road, we could tear out the asphalt field and fill it with the random paver pattern,  but by then, we would be established in the house and couldn't park in the garage (or charge vehicles) for the duration of the driveway renovation.  Plus, there would be added cost of demolition and removal, possible grading and repair of the existing paver, the curb would probably have to be remade.  It seems like it would ultimately cost more, so if we decided that we could probably squeeze a little more blood from our stone to implement the full design now.  Okay, a lot more blood.

   Here's the design we went with.  The color of the paver is undecided, but it will probably be a blue or gray mix to match the bluestone of the front steps and concrete wall top.  The rest of the driveway leading up to the street will be asphalt since concrete would have been really cost prohibitive.  Since we won't want the final top coat on until all the heavy machinery is done, we'll probably delineate a line at the flare and finish past it, which includes the paverstone circle.  When the last large truck is gone, we'll finish off the rest of the driveway with a new topcoat, having only one seam.
   We don't entertain too often, but we feel that the driveway area near the house (they called it a motor coach) in combination with the two spaces closer to the street, will offer enough space for guests to park.  I figure we could probably squeeze five cars near the house and still have enough room to turn around.
   The only deviation from this plan was a cost saving measure.  We're replacing the caramel mint stone wall on the right of the driveway with a boulder stone wall.  The cost is about half and since it's on the backside of a decline, it won't be really visible.

   One of my favorite features is the little catwalk/deck that wraps around the side of the garage.

   The elevation change here is pretty drastic and this was the best way to have access around this side of the house.  The large tree listed near the deck is a huge white pine; probably the largest on the lot.  It might not seem significant, but the window from the garage looks right out at this tree, with views of the south shore of the peninsula behind it.  The little deck will be just large enough for a couple chairs and a small table, making it the perfect place to site in the morning (southern sun exposure) and enjoy nature.  The deck sits about 9 feet up from the grade here, so it gives the feeling of being in a tree house.  We've thought about putting a tree house in this tree, but it would have to be done so it doesn't harm the tree in any way.  If that thing fell, it could take out our whole garage roof.  Not sure it could damage the ICF.

   Here's the final revision for the rear of the house.  Again, we had to pull in the boarders a bit, reconfigure the retaining walls on the left of the yard and move the pool to the right, to avoid the wetlands setbacks.
  The pool fence is required by state code, and has been a huge pain in the ass.  The whole reason we purchased a property with tons of trees is to be surrounded by nature.  To put a fence up to cage in the pool and bisect the yard would be a crime against aesthetics.  Maybe in any other neighborhood, this fence design would have been okay, but not this neighborhood.  Specifically not with this HOA.  I could write volumes on the lack of logic operating here, but suffice to say, the HOA is attempting to create rules where no deed restrictions exist.  In fact, the lack of a deed restriction defines the rule, but it's just the opinion of five people that the fence encloses "too much" of the back yard.  Not to mention that the portion of the back yard it encloses is a fraction of the entire property.  Also there are at least two other houses that have their entire back yard enclosed in a fence to surround a pool and concrete deck area.  Enough of this for now.  Maybe I'll calm down enough one day to write about it.

   Not a ton of work has been done since my last visit, but I guess that's to be expected considering the holiday season.  It didn't stop the landscaping crew from working.  I guess work will pick up more after they lay some crushed concrete and AA stone on the driveway.  It has been getting rutted out and muddy due to all the landscaping trucks.  Matt had some concern about driving back there, so in the stone goes.  I'm okay with it.  I talked to the Bob Porter, the general manager for our landscape implementation from Great Oaks.  He visited the site when I was there, to check on the progress of the concrete retaining wall.  I expressed my concern with laying down stone for the temporary driveway, only to have it torn up for the driveway installation.  He said that the crushed concrete base was DOT approved now so there would be no need to remove it for the final driveway.

    Almost all the temporary supports for the second floor have been removed and clean up has begun.  I got a nice new battery powered leaf blower for Christmas so it was the perfect opportunity to blow out the leaves and dirt that accumulated in the house. If you're in the market for one, I highly recommend it.  It's almost as powerful as a backpack gas blower, but uses a brushless motor and has tons of battery power.  Blowing out the first floor and basement didn't drop the battery more than 25%.
  Here's the dining room and mudroom, with the rotunda to the left.

   Here's a shot, standing in the kitchen looking at the greatroom.  We'll need to get these interior walls up as soon as possible since kitchen cabinet prices will be increasing in the spring.

   Here's a shot standing in the kitchen corner of the house looking across at the rotunda and guest room.  Can't wait to be buttoned up.  I didn't get a chance to go up on the second floor, but it's just as well.  Earlier in the week, a freezing rain storm came through and iced all the concrete that was exposed to sky.  The greatroom, rotunda, and second floor are basically a sheet of ice.  Not sure if the temperature will rise enough to melt it or if they'll have to remove it some other way.

   The monster dumpster is now full and there's still a good pile to remove.  They'll have to get another dumpster, but I'm not sure if they're going to wait until they have enough to fill it or if they'll get a smaller one.  I'm also not sure if the rental is by the load or by the duration.  In any case, it's nice to see some job site clean up.

   My saved logs are still there.  They'll be fine over the winter since there really isn't to much rot that takes place in the cold.  You can see one of maybe 5 cement trucks that came in today to pour the foundation of the concrete retaining wall.  There's quite a bit of engineering involved with the wall and you can see the piles of dirt that was excavated for the footing.  Nice to know that my house is sitting in sand.  I won't have to worry about drainage.


   Here's the engineering plan for the poured concrete wall.  You can see that there's only 12" of fill to be replaced over the footing.  I'm not sure why there would be a difference from regular house construction footings, that require either a frost free design, or have the footings below the frost line under ground, but you can see there's quite a bit of engineering involved with this simple wall.  Ultimately, it will be faced with the same granite cobble that we're putting on the outside of our house, so it will hopefully merge well with the boulder stone retaining wall that will be installed next to it.

   Here's a shot of the footing mid pour.  I think this is probably the third truck they brought in.  With all the tree removal and landscaping trucks that have been going in and out of the property, there are sections of the driveway that are pretty rutted out.  We'll be grading andlaying down some crushed concrete and AA stone to solidify the driveway for the winter time.  I spoke with Great Oaks Bob Porter about this and he ensured that the material that we lay down now will not need to be removed when we install the final driveway. 

   Here's the footing near the end of  the pour.  They've already begun to set the vertical rebar that will be inside the wall.  There's a little bit of a rise as it approaches the garage because they didn't want to risk underpinning the garage footings.  At this point, they'll probably need one more cement truck to finish off the footing.

   Here's another shot of the footing at the same stage, from the garage door.  It looks like there will be enough room to back out while turning and complete a 2-point turn to drive out.  I can see the importance of the asphalt curb along the driveway near this wall.  There will also be a safety railing at the top of the wall.  Not that it will stop a car from driving off, but should at least act as a visual barrier.

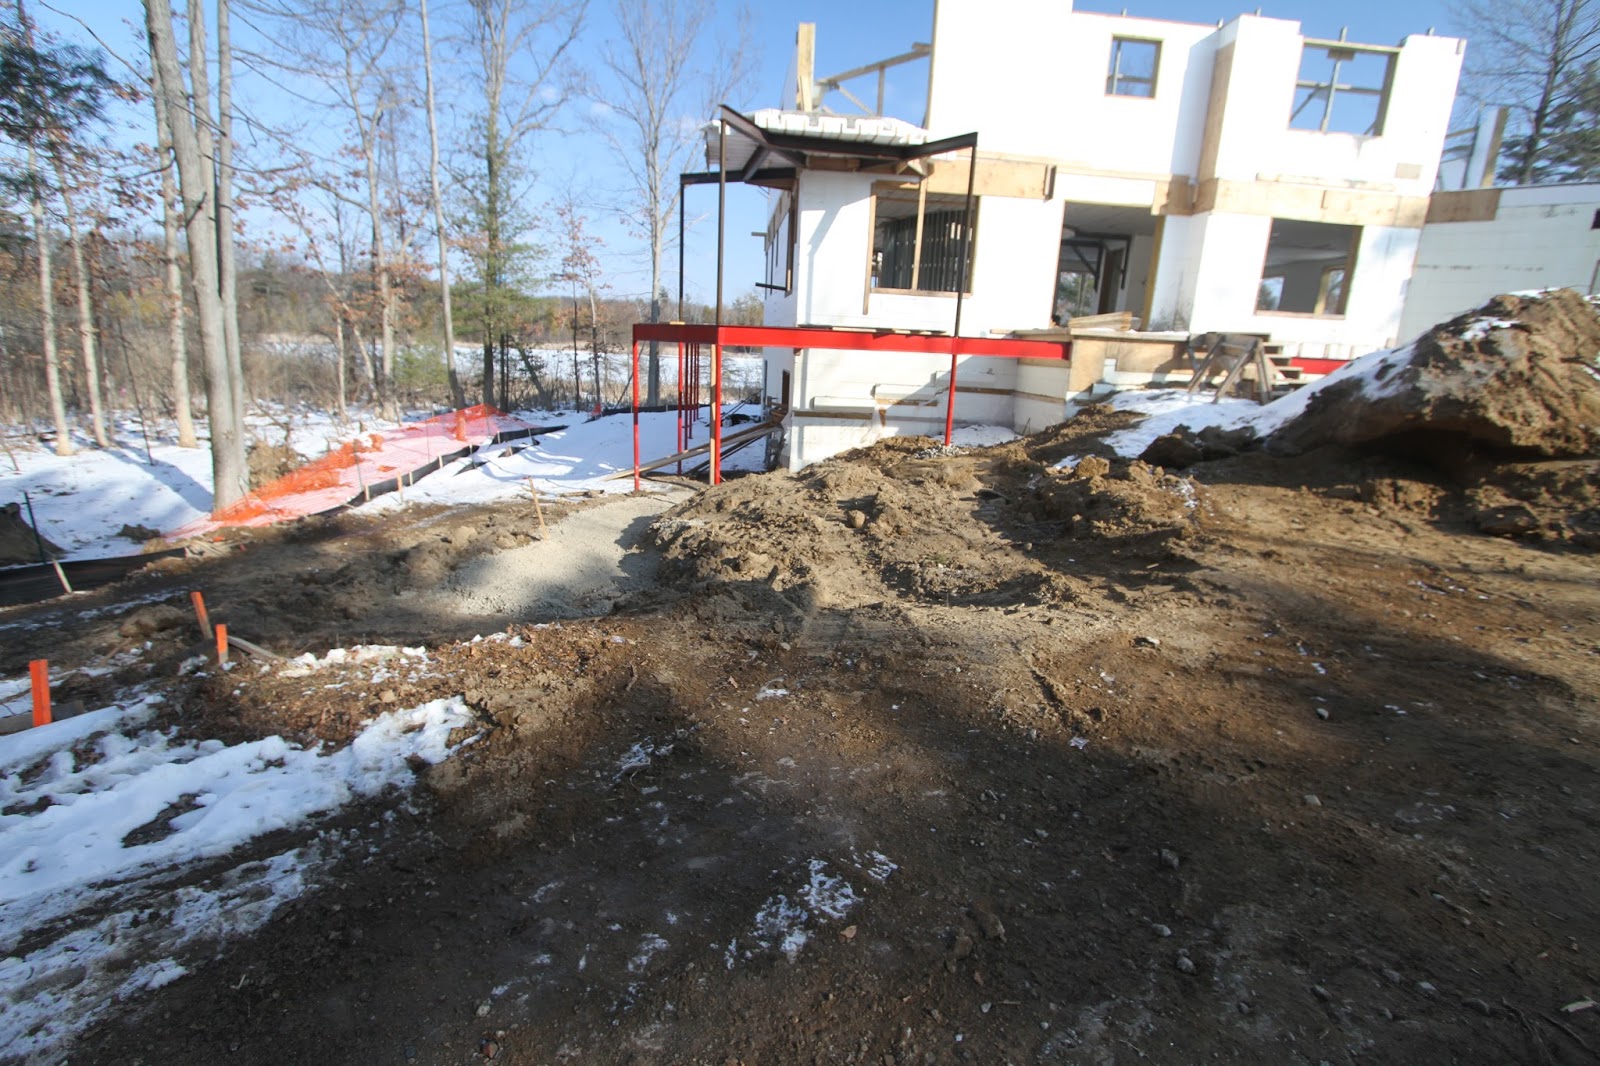
   Here's the sand that was excavated for the footing, piled up near the front of the house.  All this will be going back to either covering the footing, backfilling the wall, or raising the height of the driveway grade in the motor coach.  It's currently about a foot lower than final grade, so we'll probably need to use the swimming pool spoil and add some extra to reach final grade.  I guess we can also count on the driveway foundation to add some height.

   A shot of the future motor coach and where the concrete retaining wall is being constructed.  When the retaining walls are finally in place, it will add a good amount of space in front of the house.  The concrete wall will be topped with the same bluestone we'll be using of the front steps, and other places around the house.  The finishings won't be applied until most of the primary construction is completed on the house.

   One thing that needs to be addressed with the laying of the stone for the temporary driveway is how it will be affected when we finally trench for sewer and water. It might be the case where they only lay stone in the areas that need it, so those sections are sacrificial when we need to lay water and sewer.  The other way it could be handled is that the layers can be scraped away and replaced after the trenching takes place.  

   Wall construction should take place this week, so this weekend I should have some nice updates to this area.  I have a meeting with the HOA tomorrow night to talk about landscaping plan elements that they don't like.  I hope to resolve every issue and finally get them out of our life.