Friday, December 30, 2016

The calm before the storm

   With the hectic holiday season almost done, our minds can turn back to the business of working on the house.  Even though it's the time between Christmas and the New Years, progress still continues on the house in ways that make visiting exciting.  We're surprised to see progress during this time considering last year this time, we had just gotten the second floor walls poured and work came to a halt because of the concrete curing and deep snow.  Now we're full steam ahead.
   While the business with extending the mortgage works it's way through the underwriting process, the bank has already authorized Mike to request draws, which is good because the current trades are knocking down tasks and spending money to get there.  One of the biggest differences with Mike is that he's not afraid to extend his own reputation and money out there, knowing that the draws will complete and he'll get paid back. It's refreshing and much less stressful not having to advance draws out of pocket, only to get the repayment swallowed up by constant budget overruns.
   We got a chance to visit a couple of stone suppliers to get eyes on some black onyx for the powder room vanity.  The plan is to either have an open metal cabinet design with a back lit onyx counter top, or a floating onyx apron front counter, both using a basin sink.  We really like the three dimensional look of the black cloud onyx and found a good distributor/fabricator so we only have to buy what we use.
   The snows of the previous weeks have melted away with an unexpected thaw and we visited the site on a sunny, but 37 F day.  We happened to get there just as Mike was pulling up, and one of his carpenters was already on site mocking up the design for the bracket mounts that will flank the garages.  Although we didn't get to visit the site on the holiday weekend, we still found some progress in key areas.
    Even with the melted snow, the gravel Mike got down in the driveway is holding fast and the way up is solid all the way to the house.  Tarp was placed on both the front and rear door of the single bay garage door to help shield the materials from wind and snow.  They'll probably tarp up the double bay too to provide a sheltered work space once the weather gets cold again.  A small platform was erected to the left of the garage doors, off the deck, to provide easy access to the garage bracket area.  I didn't get a picture of the mock up, but  it allows the bracket to sit proud of the cedar siding, while also providing a mounting location for the sconces that will flank each door.

    These twins are currently sitting in the garage, ready to be hauled up to the second floor.  They're the Kohler Bellwether apron front cast iron tubs that will be installed in the two kids bedrooms on the second floor.  Specs say they're 327 lbs each but the only stairs to the second floor are temporary in design so I'm not sure if they can handle the three to four guys plus tub weight.  Nevertheless, they'll be making their way up to the second floor some time next week so they can be set and inspected once all the plumbing roughs have been completed.
   The insides of the tub are a little dirty right now, but it's probably normal.  Like most cast iron tubs, they're ceramic coated for a durable finish.  These tubs are a little troublesome for installation and trim fitting since the overflow drain side of the tub has a good amount of slope to it.  You need to match up a tub filler spout that's at least 7 inches long, which limits the selection a little.  I think there's also a little rough plumbing magic that needs to happen to get everything to fit.  Despite the weight of the tubs, it's good we're on concrete floors and the orientation of the tubs are perpendicular to the concrete beams so there's no issue of floor support.  They have little cast iron feet, so I'm not sure if a concrete bed is still poured under the tub, as is done with acrylic and fiberglass tubs.

   Some carpentry work continued in places where the plumbing had to run under the first floor ceiling.  Here's the foyer where the turret bedroom bathroom drain plumbing needed to run across the concrete beams and down the right side wall.  We couldn't run the pipes parallel to the beams because this room opens into the rotunda with no wall to drop inside of to the basement.  The front door will be an eight foot arch top door with two partial arch top sidelights so the arch you see in the door rough is the door frame itself.  The trim carpenters will have a fun time trying to fit the door molding in where the pipe soffit is, but I'm sure they'll figure out a way.  We might look into arching the soffit above the door to follow the shape of the door, but I'm not sure if we'll keep that arch near the side walls.  It's just one of those things that we'll figure out before drywall goes on.

   Roxsul insulation is being installed in all the drain stack and pipe soffit locations to dampen the sounds of rushing water in these spaces. Since these spaces are on the inside of the house envelope, we're not so concerned about temperature insulation, but the Roxsul adds a level of sound insulation.  It's especially important in the pipe chases, because without it, the enclosed empty spaces would act as a resonating chamber for water running through these pipes.
   The ceiling in the powder room was dropped down about six inches to allow for the bathroom vent to sit flush in the ceiling.  This was another area where we couldn't run a chase parallel with the floor beams so it cuts across the beams, under the level of the ceiling, and into the adjoining pantry, where it can then go up into the ceiling chase and out of the house.  Both the powder room and pantry have the ceilings dropped a bit, but since we're using nine foot ceilings, loosing half a foot in a small room isn't very perceivable.

   One more piece of the puzzle falls into place.  A door frame was added for the basement access door.  There still might be some figuring out to do around the support post on the left.  The posts are usually integrated into the wall, with studs surrounding it for drywall attachment.  We'll have to see how this lines up with the stairs and the curved inner rotunda wall.  These little additions means that all the big things have been completed.

   Another place where we had to drop down the ceiling due to second floor plumbing was in the first floor guest room bathroom.  Although the layout of this bathroom and the one above are nearly identical, a steel structural beam complicated the second floor drain routes since they needed to duck under the beam.  This means that we had to install a soffit in this area, but rather than just make a box, we took it across the width of the room. This area drops right where the walk in shower is so there's really no issue since it will actually define the shower space a bit better.  Again, having nine foot ceilings helps here since we needed to drop it about eight inches.  If we had standard height ceilings, this shower could start to feel a bit claustrophobic.  The plumbing and entrance for this shower will be on the left since the toilet sits on the exterior wall on the right.  The plan is to have a floor to ceiling glass shower wall.

  Two places that have inconsequential plumbing soffits is in the garage storage place.  Much of the master bath plumbing and all of the laundry room plumbing runs through this area on it's way down to the basement.  I say it's inconsequential because it's not in the primary living space but it's good that it will still be concealed behind drywall. Even though this space doesn't have any ducts supplying it, I'm not too concerned about freezing temperatures.  For one, it's inside the main envelope of the house, so enough heat will permeate it's way into the space.  Second, it's connected to the garage, which is also ICF, so there's an added layer of frost protection.  Third, the soffit will be insulated with Roxsul so any heat that does make into the space will be kept there.
   Here's another look at the plumbing soffit in the storage space.  The electricians haven't started up on the interior of the house, but they'll have plenty of spaces to run wires through once they do.  The main trunk of electrical routing to the second floor can be done through the HVAC chase to the attic, then drop down the walls.  The first floor can be supplied through the floor from the basement, so we shouldn't have any issues with running wires.

   The second inconsequential plumbing soffit is in the mudroom closet.  These are the drains for the master shower above and it doesn't matter that this small space has less ceiling height.  We should be okay with the routing for the master tub since we can run that pipe parallel with the concrete beams and drop down the mud room's bathroom wall to the basement.  It's really fortunate that all these things are working themselves out as we go along since we weren't supplied a detailed plumbing and electrical layout in the blueprints.

   Lots of goodies in the safety of the basement!  Sorry for the quality of the picture as it was taken in very low light conditions.  All the plumbing roughs for in-wall installations are on site and ready to be installed.  We have boxes from hans grohe, dorn bracht, and kohler here.  It will be exciting to see these installed in the wall because that means we're one step closer to getting the drywall up.

   Here's the box for the Dorn Bracht wall mounted faucets we'll have in the master bathroom.  Super excited about seeing these guys installed and running.

   So that's about it for this week.  Mike's carpenters are on site every day completing tasks here and there.  The plumbers, electricians, and HVAC installers will be back in the new year to wrap things up.  Jonathon of the Sound Vision is officially on the payroll and will have his installers come in after the new year to coordinate with the rough electrical installers.  The stone masons will be on site soon to prep the exterior walls for the granite cobble install.  I think they have to install a wire lath on all the stone surfaces before installation.  They requested the drip edge that sits under the stone ledge to be installed so they have a delineation between the stone and cedar shingle.  Speaking of which, the cedar shingle installers will be on site in the next couple of weeks to get started on that, which means the bead board on the porches needs to be finished so they can complete the trim under the porches so the shingle can be installed.  The roofers are coming to finally install the rest of the roofing shingle near the turret, and waterproof the chimney box a bit more so water can't make it's way in.  The bank sent an inspector to check out the state of the build and was surprised to see people working on site.  He told Mike that this is the first time he's inspected the site while workers were present.  Considering the other times he inspected, I'm not surprised now that Mike is on the job.  Things are rolling ahead full steam for the new year!


Monday, December 19, 2016

Suddenly winter, but progress still moves forward.

   We've had about 10 inches of snow fall over the past week but progress still moves forward on the house now that we're sealed up for the winter time.  Even though the insulation isn't in the attic, the trades run the construction heat while they're working and can stay comfortable inside.  Suprisingly, even though two walls of the basement are exposed to air, it stays much warmer than the rest of the house when the heat is off.  This week saw some progress on plumbing, but there's still work to be done in the basement on HVAC and all over with electrical.

   We had one more good snow after Mike got the site plowed, so there were a few inches of snow on the ground.  It probably wasn't a big deal, but it was more than enough to leave the car at the street and walk in.  Since the insulation isn't up in the attic yet, all the heat hits the roof and melts the snow, creating icicles.  We shouldn't have that problem when the house is fully insulated, but that won't happen until electrical gets a chance to install lights in the second floor ceiling, which hasn't been started yet.

   I always figured that the covered porch wouldn't accumulate much snow but I guess I've been proven wrong.  There was a few inches of snow on the back porch and gazebo, probably from wind blown snow. Definitely not as much as what was on the ground, but more than on the front and side porch.  The glass panel railing we're considering on the back porch will most likely mitigate almost all the snow, but we'll have to makes sure to space it off the surface enough to shovel any accumulation off the edge.

   The left foyer niche was constructed, so we're now symmetrical in the entryway.  Besides minor fitment changes, I think this is the last bit of wall construction we're expecting.  There might be some issue with fitting the greatroom fireplace but it will be resolved.  The only remaining stud walls to be constructed in the house will be in the basement, which won't be created for initial occupancy.  I guess this is a pretty monumental occasion.

   Another clash of design vs implementation.  This is how the drain for the powder room vanity needed to be implemented.  It's definitely an odd implementation but I'm guessing that the water supply just barely dodged a concrete beam that the thicker sink drain couldn't, so they had to bridge over to the next space.  I think they could have opted to go into the pantry for less intrusion into the usable space.  I'll need to confirm the vanity design with Margaret.  If we're installing something that has a boxed in base, then this won't be an issue.  If we're going with a floating or furniture-like piece, then the base will be open and this will be problem.  We haven't completely nailed down the design of the powder room yet, but we haven't ordered a cabinet base, so I'm thinking there might be a design issue here.

   Water to the master shower and tub has been routed into the ceiling of the mudroom and mudroom bathroom.  These are 3/4 inch lines and they penetrate up into the master bath wet wall, but no hint of a hot water circulation loop yet.  There isn't one visible on the first floor so unless they install it in the basement, it will need to go up in the master bathroom wet wall, which is why there are two hots and one cold PEX line.  It's good to see nailing shields on the ceiling nailers, to protect the PEX lines.

   Here's another angle of the water supplies for the master shower and bath.  They run in the garage storage and down a plumbing chase to the basement.  Although the laundry and master vanity water supplies run near here, they're not connected to the master shower lines.  This is good because keeping the separate will prevent any water pressure drops when the shower is running and the toilet gets flushed or the sinks turn on.  All told, there are three separate supply lines going into the master bathroom: vanity/laundry, toilet, and shower/bath.  Nice bit of separation there.  Although the garage storage isn't heated, it's in the envelope of the house so it shouldn't get cold.  The pipes will be insulated for both heat and sound so we won't have to worry about them freezing up.

   The cold supply for the pot filler above the stove has been installed.  Generally, it's not the best idea to run water supplies on an exterior wall.  All that's keeping the line from freezing during cold weather is the level of insulation on the exterior wall.  In standard stick built houses, the exterior wall is a 6" stud.  With adequate insulation, it would have to get pretty cold to freeze those pipes, but with air infiltration, it's possible.  In our house, since there's two inches of foam on the exterior and 6 inches of concrete acting as a thermal mass, we don't have to have a second though about installing water on the exterior walls.  The foam is simply carved out, providing a 2 inch deep channel, and the PEX can be attached directly to the concrete.

   Here's a close up of the pot filler PEX to copper connected and the concrete tapcon screws used to attach it to the wall.  Although you still have to carry a heavy pot full of water to the sink to empty it, a pot filler is convenient because of the larger sized supply line.  This is a 3/4 inch cold water supply line as opposed to a 1/2 inch used in a standard kitchen faucet.  It's a time saving convenience to fill the pot since the 3/4 inch line has a higher flow rate.  The copper stub is crimped onto the PEX and a copper bracket is used to secure it to the wall.  Insulating foam can them be sprayed into the remaining channel to further secure the line against movement.

   Here are the supply line penetrations in the master bathroom wet wall.  These lines will supply two shower heads and a hand held sprayer on the shower side, and a tub filler on the other side.  Mike tells us it will take a bit of effort to install the valve trims on the curved surface so we'll have to wait and see what that kind of implementation will bring.  The radius is pretty tight so there might need to be some flat space build out to mount the trims.  While PEX has a smaller inside diameter vs copper, I'm hoping that the 3/4 inch line will be sufficient to supply the shower and bath or two shower heads simultaneously.  We're planning on having four mixers on this line, one for each tub, two shower heads, and the hand held sprayer.  While it's very unlikely that we'll have all four running at the same time, it would be an interesting exercise to see if they size the supply line to the max usage scenario.

   A wall was necessary in the master water closet due to the drain placement for the toilet.  Since the room is running perpendicular to the concrete beams, the drain for the toilet needed to be placed a bit farther away from the wall than desired.  If the wall wasn't built, then there would have been a huge gap between the toilet and the wall, so this furring wall was erected to remedy the problem.  As an added bonus, the water supply to the toilet will be in that wall, so it will get the water supply penetration up off the floor and make it easier to clean.  The water closet is large enough as it is, and there isn't an easy line-of-sight comparison the the true exterior wall, so you would be hard pressed to notice it.

   I'll have to trace these through the floors, but I think these are all the basement drain connections for the mudroom bathroom, second floor laundry room, and most of the master bathroom.  The master bathroom shower and tub still needs to be routed through the mudroom ceiling and it looks like there are a few open connectors in the basement still.  These drains are in the unfinished storage room, but it gives a good idea of how low they'll be installed in order to pass under the floor beams. They'll all run towards the exterior basement wall and drop down to a stack that was installed before the floor was poured.  We're trying to minimize ceiling artifacts in the basement so we can have as uniform of a ceiling as possible.  It's really difficult to do because all this stuff needs to pass under the supports of the floor above.  We would encounter the same issue if we constructed with wood joists, but might have avoided it with open web steel trusses or engineered steel trusses.  The basement is 10 feet deep, so even with the intrusions, there's no lack of headroom.
   So that's about it for now.  We're going into the holiday season, so I'm not sure how much more work will be accomplished over the next few weeks.  An installation slow down will give the underwriters at the bank an opportunity to move the process forward with Mike so we'll be able to go full steam in the new year.  Before you know it, we'll have drywall going up!

Tuesday, December 13, 2016

Winter is here. Electrical install starting up.

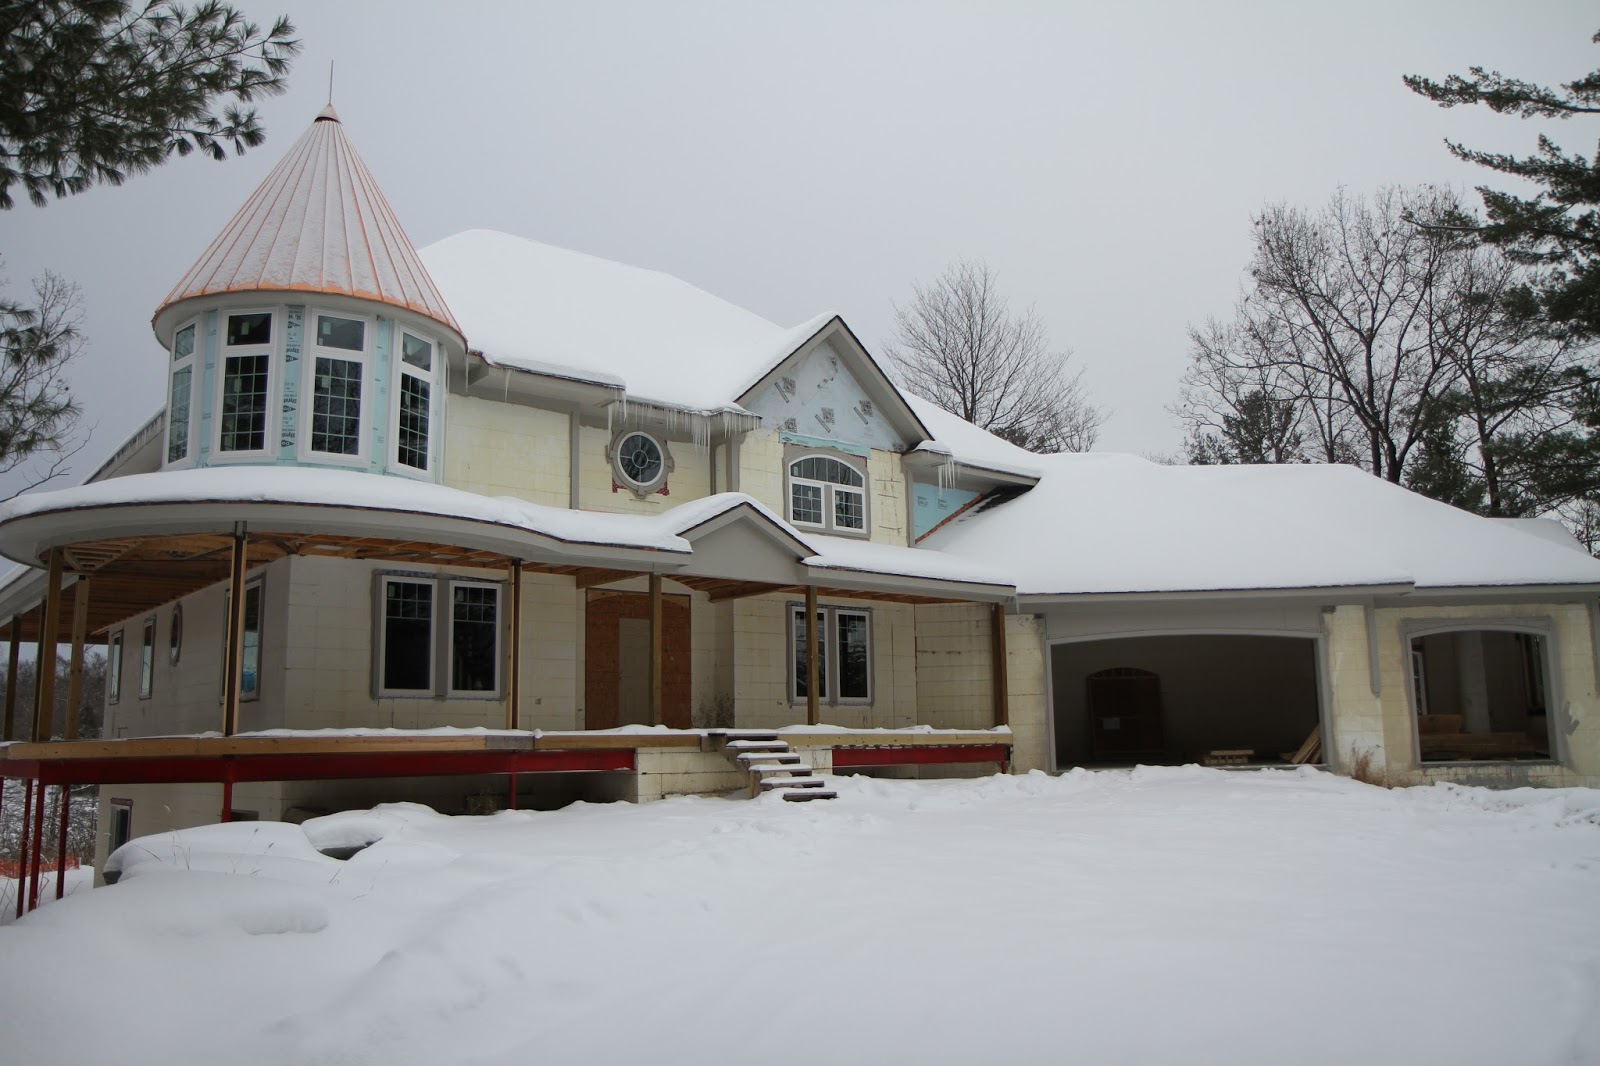
   It looks like winter is officially here with a snow storm that dumped 7"-10" in our region.  Luckily, I had the chance to make it to the property before the really bad snow hit.  There should be enough work vehicles making their way up and down the driveway to clear the snow this winter, but if a really bad storm hits, I'm not sure how the driveway will be cleared.  Can't really plow it since it's still only  a gravel/sand mix.  If we have an excavator on site, maybe heavy snow can be cleared down to a drive-able depth.  This time last year, we were just pouring the second floor so I think the excavator was on site to help with the snow removal.
   There was a bit of progress this week with the HVAC installation and electrical starting up.  The city hasn't been out to connect the water up to the valve and I'm not sure when that will happen, but I think it will be soon.  As before, the sewer is hooked up from the basement to the street so all that remains is to hook up each plumbing fixture to the main stacks and that system will be completed.  The water meter remains unconnected as does each supply fixture, but there's still rough work to be completed before that can happen.  We received the dragon weather vane that will be mounted on the turret, but since the skytrac is gone, we won't be able to mount it until the spring.  In all, good progress for the week and we're ever moving forward.

   The electricians starting working on their portion on the house with the installation of the recessed lights on the porches.  Mike stated that this will be the first area so that he can get the bead board ceiling installation completed before finishing up the exterior trim work.  The cans are non-insulation contact, 6" Halo fixtures that we'll probably retrofit LED bulbs into.  Using standard light fixtures with LED bulbs gives us the lowest cost and most flexibility with our lighting plans.  LED specific recessed cans exist, but are more expensive and can only fit specific LED bulbs.  As LED technology progresses, I can't imagine a day when manufacturers won't make retrofit form factors available to the public.

  Most of the front porch has the cans installed, but wire hasn't been run yet.  We're also planning on installing a few duplex power receptacles in the porch ceiling so we can easily light either the overhang or the railing with Christmas lights.  The side of the house is probably long enough where stringing a single chain of lights would exceed the recommended amount so we're looking at three receptacles on that side.  We'll probably only need two on the front, and three around the back porch.  It will also be handy to have them if we ever need to plug in an extension cord for a yard tool or something.  I'm not sure if there's code for receptacles on the exterior of the house, but we still might want some at ground level so we don't need to get out a ladder every time we need power.  These are the tree light cans to the left of the door, under the turret.

   There are only two cans installed on the side of the house, but they will be installed all the way up the side here.  We opted for lights in the porch ceiling only and not in the overhang on the second floor because we didn't want too much light pollution and the lights on the second floor is more for aesthetics.  We haven't discussed dimmer options on the porch lighting and I'm not sure it would be necessary. It might be nice to be able to have a lower light level and it would be a simple thing to implement.  I'm also not sure if the porch lights will be on the lighting control system or just a simple switch.  I think it will be a simple switch since the lighting control will only be for specific interior rooms.

   These are the cans that are going in the porch.  Halo 6" new construction recessed lights.  These are also IC (insulation contact) rated and air tight even though they don't need to be in the porch.  They'll be good for the second floor since that's up against attic insulation.  The first floor might need the IC rating since it might touch the ICF.  These 6" cans should provide a big enough light pool to light up the porch.

   There are a couple wires going through the wall in the kitchen going out to the back porch.  The nice thing about removing the 2x8 nailers is that it gives a perfect chase for wires to run through if you're going parallel with the concrete beams.  if you need to transverse the beam, you can just cut out some of the 2" foam that sits under the beam, so running electrical wires shouldn't be difficult at all.  These wires are supplying the power to the back porch lights and since they're already in place, it looks like this is where they started.

   All the cans are in place and connected with wire.  There will probably be a switch just to the right of the sliding door in the kitchen that will control these lights, which is why the wire is running down there.  Again, these are the same 6" cans as on the front porch and these will provide all the lighting back here.

   Four lights in the gazebo should provide enough lighting.  There are two wires at the kitchen sliding door which would imply two switches, one for the porch and one for the gazebo.  But wait, what about the mudroom entrance?  That would require a three way switch so you can turn on the lights from either the kitchen sliding door or from the mudroom exit since they both go to the back porch.  That means a three-strand line that has a common to share between the two switches.  Enter the lighting control.  With our lighting control setup, we can just use two-strand wire to connect to one switch which will communicate with the lighting control computer.  Now any wall switch can be programmed to control the porch lights.  Or all the porch lights.  It's going to be awesome.
   You can also see the shallow box for the ceiling fan that will be up there.  It's always nice to have a fan in the gazebo, if not for breeze, then to keep the bugs off you.  If we feel like we need more lighting, we can get a light with a fan.  If we feel like we don't need a fan because of the near constant breeze, we can get a nice light.

   Here's the mudroom side of the back porch with all three lights installed.  It's probably just the way they spaced it, but I appreciate that there aren't any lights directly above the kitchen window.  A light there might cast a glare on the window glass and make it difficult to see out of at night.  I think we're also planning on having a wall sconce at the mudroom door, but overhead lighting will be good too.

   This is the first time I'm looking at the greatroom without the construction scaffolding.  That scaffolding was up this time last year to aid in the construction of the second floor ICF and it remained up throughout the construction of the window bucks.  Now it's just a pile of lumber in the middle of the room.  Removing it really opens the room up and brings it in line with our final vision. The room still doesn't feel super deep but it's really wide and I'm sure there's more than enough room to get whatever seating requirements we want in there.  The room feels so open now and it's great to just walk around and look out the windows, especially now that there's snow falling.


    Here's the view from the other corner compared to one of my earliest renders of the room.  Pretty close match I'd say.  We're still not set on any furniture arrangement, but I think it would be prudent to get some floor sockets in some areas so we can have lamps on tables without running cords to the walls since it's almost certain that we'll need walking around space on all three exterior walls.  The railing in the render is a placeholder too since we didn't know what we wanted, but we've since landed on a nice design for the stairs and balcony landings.  The fireplace material will be a textured 3 dimensional stacked stone running all the way up to the ceiling.  I also don't have coffers in this render, so I'll have to go back and update it.


   Another angle of the room compared to my first render.  This is how we decided on what window shapes we wanted and I think it worked out perfectly.  This also made up our mind on what windows should be clear and which should have divided panes.  It's kind of uncanny that I got the photo and render angles almost perfectly lined up.  This will probably be really helpful in the near future for finishing material and paint colors. Maybe I'll make a post dedicated to all my room renders so I can compare it when the house if finally complete.

   Here's the view of the room from the second floor, left balcony.  We won't be able to get up close to those second floor windows anymore unless we get a ladder.  I'm not sure how dirty they'll get on the inside of the house, but for the outside, I have a squeegee on an extension pole that should work well.  I have some worry about TV noise making it's way up to the second floor, especially since the surround sound speakers are up in the ceiling.  They're mostly directional, but with so many hard surfaces, we'll have to consider reverb and reflection.  The balcony spaces are small enough where much of the sound will be blocked, but if anyone is sleeping up stairs, we won't be able to watch loud movies here.  Guess we'll have to push to get the basement theater finished quickly.

   There was a spool of 14-3 wire sitting up stairs in the master bedroom, but I'm not sure where it's going to be used.  14-3 means that it's 14 gauge wire, rated for 15A, which implies light circuits.  There are 3 wires, common, neutral, and hot, plus a ground.  Usually these are used for three way lighting switches and smoke alarms.  Sometimes they're used to have a switched hot (lights) and a constant hot (electrical outlet).  I guess we'll have to wait to find out where this wire is going to be used.

   I found more 6" cans stacked in the garage. I think they're a 6 pack, so that means there are thirty more here?  Probably for use in the rest of the house.  I think we're getting 6" in the great room since it's a really high ceiling, but these would be too big anywhere else.  It's amazing to think that we'll have wires running all over the house soon.  This is the part I love, seeing all the mechanicals go in and trying to figure out all use cases for the future.

   Other things I found in the garage are all the roughs for the exterior door openings from Hardwood Door and Bevel (wooddoorandbevel.com).  We went in a few weeks ago to confirm the design of all the exterior doors and Craig said he would deliver the door roughs so the exterior can be installed.  Here's the rough for the master bedroom balcony french door.  I guess these can replace the plywood covering the doors right now, although once they're in place, you can't get through them.

   There are three door roughs here, mudroom, greatroom, and rear garage exit.  The garage entry doors will be fire-rated steel doors and we'll obtain them through Mike's supplier.  The exterior doors are all arched top mahogany doors, each with a different glass panel design, but all with the same door design.  The greatroom has a single thermopane of glass for the entire door.  The garage and mudroom doors are both five panel doors, but the mudroom will have a glass thermopane instead of the top wood panel.

   Some more HVAC work was completed this week in the basement.  The supply run for the back of the house was completed and the beginning of the greatroom supply ducts were installed.  They pass above the steel beam, with some of them supplying the future work out room, and four of them going up to the great room.  One question was answered from last week.  The inflatable bladder dampers are installed in the round ducts.  So here's my guess.  We're installing three zones, one on each floor.  Since there isn't a main damper going to the second floor supply (yet) I'm guessing that these bladders will be control by the zone control hardware, which takes inputs from the thermostats to each floor.  So if calls are made to warm the second floor, but not the first, the first floor dampers will inflate and shut the ducts.  Pretty crazy implementation if I'm correct, and it has interesting implications.  If I decided to later implement a "per room" zone control, the inflation bladders are already present, so I could just shut off the great room HVAC, provided I have enough outputs from a controller.  This could offer a great future upgrade-ability.  I could just ask, Porter and Heckman, but speculation and discovery is more fun.

   Here's a close up of the thing polyethylene tube that goes to the inflation bladder for the great room.  I imagine the hole will be sealed when it's completed.  Each tube needs to run back to a pump, which is in turn controlled by the zone controller.  The bladder is capable of partial blockage to balance the house.  It will be super interesting to see how this is implemented in the zone controller.  Maybe there are procedures to balance then house, then set it as the baseline all the rest of the zone control will operate around this balance.  It's all feasible, I'm just not sure what the actual implementation is.  Sorry for geeking out.

   One huge bummer that I was hoping to avoid is the waste of ceiling space in certain basement areas.  This is the HVAC supply for the kitchen and mudroom.  Unfortunately, the straight shot paths pretty far away from the wall in the theater room so we'll have to hide it in a soffit.  Second bummer is that it's on the expected movie screen wall, so that takes a bit off the total height of the screen.  Since the basement is ten feet deep, we could still have a huge 9 foot tall screen, so it's still not too bad.  We can use this space above to either hide a retractable screen, lights, or front speakers.  Not too bad, but not the cleanest look.  I know Tanja won't be happy about it, but I think we could figure out a way to make it look nice. Most home theater pictures I've seen online have some kind of tray ceiling so this could be used to hide the ducts.

   Here's the supply duct from above and the two round ducts that will run to the kitchen and mudroom.  At least they're putting it up the ICF floor so we don't have to worry about boxing in parallel to the beams.  The right most one will stop short of the plumbing, but there will still need to be a drain pipe that comes down to hook up to the drain rough in the basement floor.  This can be concealed in the theater by a decorative "column", so no big issue there.

   A little more progress on at the heat exchanger itself with the addition of this bend that will connect to the return duct.  We've upgraded the filter to a powered electrostatic filter and added an HRV to provide fresh air to the house, so we'll have to see where it fits in here.  The HRV should just be a duct that connects to the return duct.  The upgraded filter is a bit bigger than the existing one so I hope they don't have to change much to accommodate it.


   The driveway coming in has been leveled and some gravel was laid, but the ground is now rock hard due to the cold, so there's no issue with driving on it.  All the major ruts have been smoothed out and the gravel will help with the heavy trucks we're expecting this winter.  If the driveway doesn't freeze up with compacted snow, the gravel will also help with traction.  The area in front of the house was also leveled as well as all the parking spaces, so we should be able to accommodate lots of vehicles.

   We got the weather vane in from West Coast Weathervanes and we couldn't be happier.  The thing is almost three feet across the directional arrow and taller if you count the directional arrows.  It's handcrafted from copper with brass wings and rocks, and gold gilding on the chest and spikes.  The cardinal directions are made from solid brass and not picture are two copper balls that sit above and below the directions.

   The cardinal directions come in two pieces to be assembled on the weather vane spike.  When it's installed, you need to take a magnetic compass up there to orient the direction properly.  Unfortunately, the Sky Trac isn't on the property anymore so we'll have to wait until the next time it's here to get the dragon up there.

   The detail on this thing is amazing, and will probably be somewhat lost from the ground.  The eye is a single green glass marble that allows light to shine through.  The tongue, teeth, and horns are also gold gilding.  In time, the copper and brass will patina out, but the gold will remain shiny.

   While the dragon isn't flat, it's not exactly three dimensional.  I'd call it a thick bas-relief without the background.  The wings are spread about 8 inches apart and have support structure in between them. We took a trip across the lake to the other neighborhood and had no trouble spotting the copper roof on the turret.  I'm sure this dragon will stand out that much more from above the tree tops.

   That's about it for this week.  We should see some more progress on the HVAC, plumbing, and electrical this week.  The HOA hired plows dumped a lot of the pushed snow in our driveway so I contacted the HOA to get it removed.  To their credit, they were quick to respond and remedy the situation, so it shouldn't happen again.  Maybe I'll get those orange sticks everyone has to demarcate the edges of the driveway.  Porch electrical shouldn't take long and I know the carpenters are itching to get back in there to finish off the porch.  We should see some nice updates next week.