Hey! Looks like we have a roof going up! The roofers started work last Monday and got all of the garage, most of the back porch, including gazebo, and pretty much most of the second floor roof completed. They still need to put copper on the turret, finish off the front porch, and finalize the finishing touches all around. I contacted Great Oaks last week to inform them to try to pencil us in for the front landscaping completion, but haven't heard back from them so I'll Pro Brothers to tell them they can come and install the windows in a week. Looks like we'll be closed up soon!

Here's what the front of the house looks like now. I think the Certainteed Grand Manor is a pretty good facsimile to slate and I've seen it on some really nice houses. They give it a lifetime warranty, but they're pretty stringent about the installation procedure, so if anything is off, it nulls the warranty. Roofers in general give it a 40 year life since it's a 5 layer shingle so I'm hoping that we'll never have to replace it in my life time. Well, maybe we'll replace it once when we're old and gray.


All the flashing in valleys and drip edges are copper. This isn't copper plated either, it's true copper. Here's the step flashing where the garage meets the house. All the horizontal flashing is a single piece and all the diagonal is step flashed. They overlap in such a way so gravity will shed water to the next piece of flashing, similar to how the roof is installed.

Here's the Winter Guard they use on the first five feet of the roof to prevent leaks from ice dams that could form during the winter time. Ice dams happen on the edges of roofs because the heat that escapes from the conditioned space inside the house heats the roof, which melts the ice and snow. That melt refreezes on the overhangs since they're outside the house envelope. This ice can "creep" back up the roof and make its way under the shingle, causing leaks and damage. One way to mitigate this is to have good ventilation in your overhangs, so the roof never warms up too much. Another way is to install this self adhesive membrane so if ice does form, it can't get to the plywood roof deck and cause damage. It's code to have it installed, but it's always good to verify it was installed.

Here's the back of the garage. You can see some airlines and ropes still up on the roof from the roofers. This section of the house is pretty much completed. To my semi-trained eye, they did a good job with the install.

Here's where the back porch roof meets the master balcony. You can see the gray underlayment they're using under the shingles where the Winter Guard isn't installed. There's some copper flashing that will be installed here. Usually a felt underlayment is installed under the shingles, and it acts as a water resistant material. This is a synthetic material that purportedly doesn't buckle, allowing a smoother shingle appearance.

Lower down in this section, you can see the Winter Guard. Nice to see they flashed it up on the balcony wall, even though it will be copper flashed as well.

Here's what the copper drip edge looks like. This will be a nice detail since we won't have gutters on most of the house. Eventually, the copper will patina to a dull brown, and maybe when my grand kids inherit the house, it will be a nice green. We're not planning on having it chemically treated to accelerate the patina process.

All the valleys have this "w" shaped copper flashing, which is kind of neat. Our current house just uses shingles in the valley, but when you specify metal, they install this. The "w" shape is nice because any water running down the roof slope with hit the shape and stop or slow it down, preventing it from forcing up under the other roof slope shingles. These are just overlayed to run water with gravity but there might be some adhesive under the flashing.
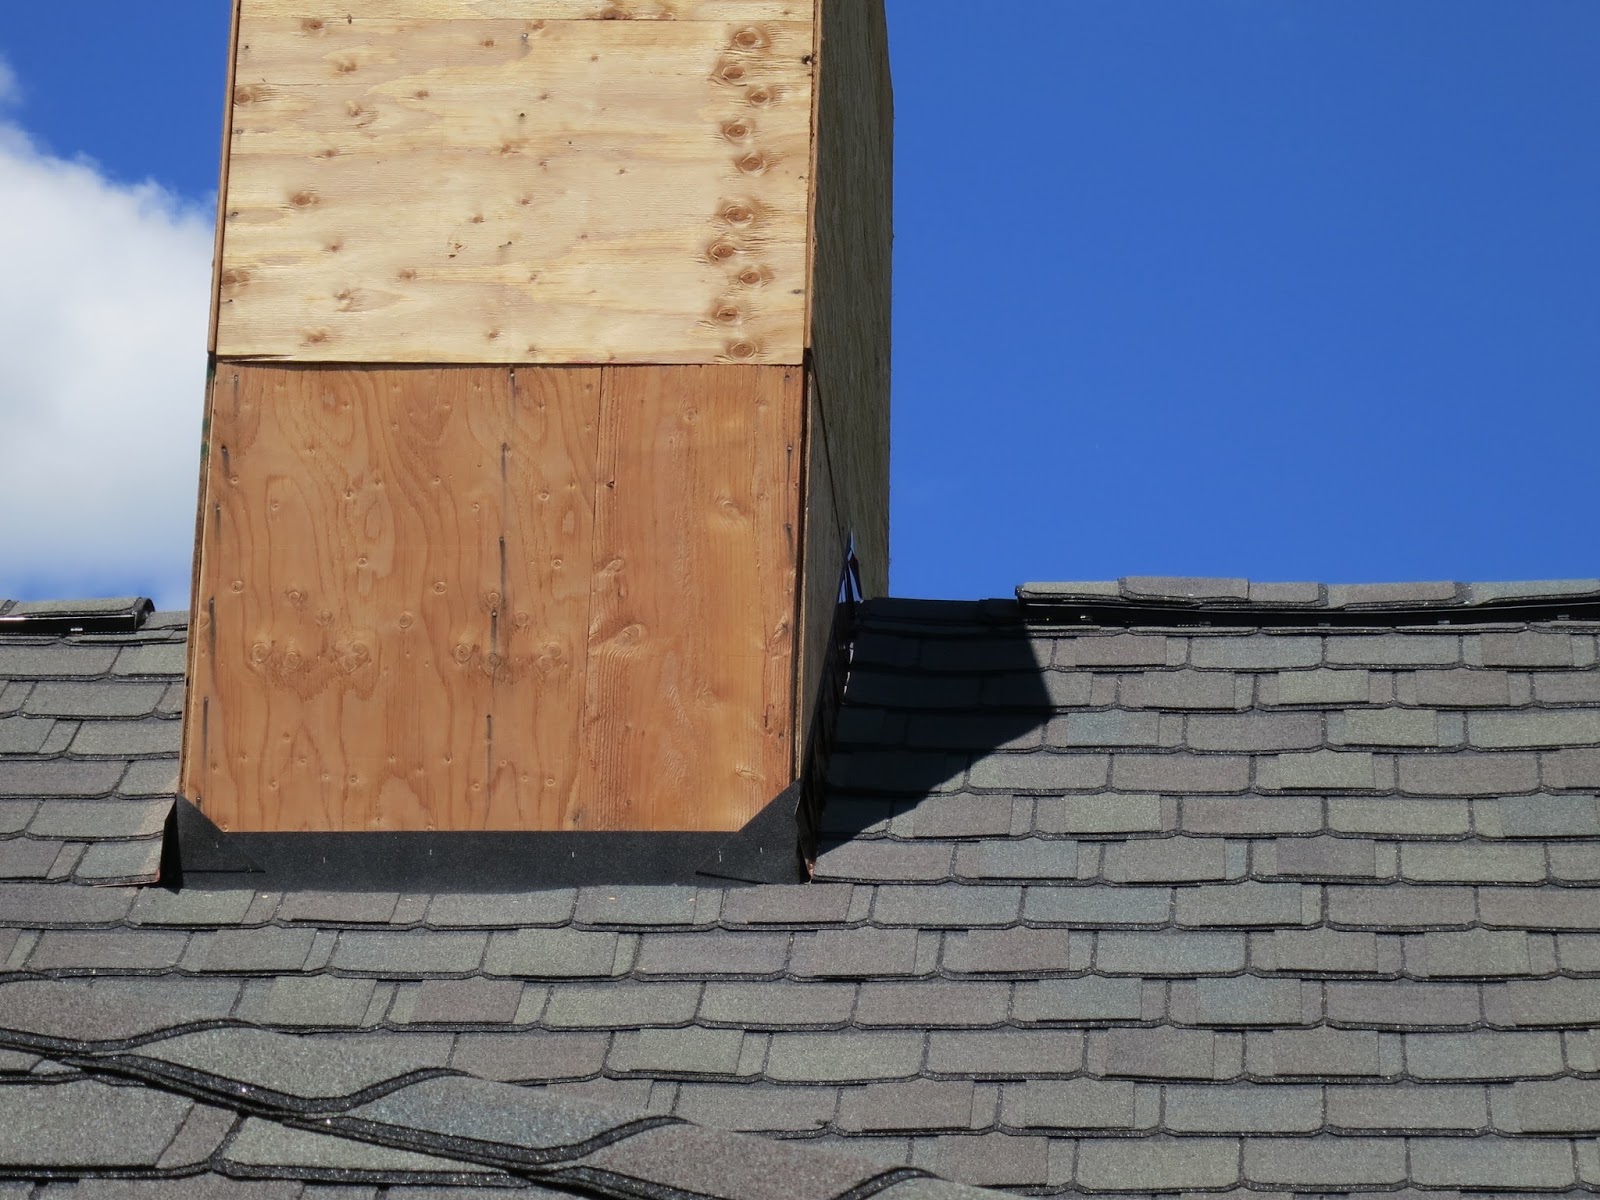
It's a little hard to make out, but there's copper step flashing on both sides of the chimney box. The lower side will be copper flashed with a straight piece, that sits on top of the shingle since you want the water to shed onto the roof, not under it. You can also see the ridge vent installed at the peak, and a nice example of the ridge shingles in the foreground. Also note that the Winter Guard has been installed up against the chimney box. It's actually installed in every valley as well.

So here's how the curved porch roof around the turret turned out. Pretty nicely I think. The roofers still need to get to this part and it will be interesting to see how they manage the curve both with the shingles and with the drip edge.

Here's a close-up of the curved porch roof. You can see the complexity involved with laying out the plywood to conform to the curves. Really bang-up job with the installation here.

In most places I've seen around the house so far, the valley copper extends out from the corner. I'm not sure if they'll come back and trim it into the corner or if this is how it's usually installed. I think it would make sense if we're getting gutters since this valley will extend down into the gutter, but without one, it kind of just hangs out there.


Here's what the back of the house looks like. We're thinking about putting a copper finial on the top of the gazebo, but that can come later. They used a bunch of those ridge shingles to form the peak right now.

One last shot of the house in its current state. The roofers should be able to finish the rest of the roof this week if everything goes smoothly. I do have some reason to believe that thing will not go smoothly.

Here's the state of the exterior ICF wall as you walk out the kitchen sliding door. It looks like the roofers decided to make the wall into a dart board and shoot their pneumatic nails into my insulation. Although there isn't any structural damage, the nails penetrated enough to reach the concrete. Since the foam isn't self healing, I now have a few dozen holes through my exterior moisture membrane and insulation that leads right to the concrete. I've already contacted Ken and Matt about this and I'm pressing heavily for some kind of financial restitution. Not only is this highly unprofessional, but it's blatant vandalism. Why is good help so difficult to find? I wonder what could have lead them to do something like this. Did they think I wouldn't notice?

Oh hey, this might be why they felt so bold to shoot up my house. This is after my clean up. Empty cans were littered all over the front of the house and a few were thrown down the concrete retaining wall, one was upstairs in the master bedroom and one was in the basement. Looks like a case plus a 6 pack of 20 oz. Again, did they not think they were going to be found? Ken and Matt have a pretty strict no-alcohol policy (amazing they even need a policy). If the work is good, I don't care if they drink, just clean up afterwards. This kind of stuff puts my whole confidence in their workmanship in question.

Another major issue I have is that they're using the same galvanized steel nails they use on the shingles, for securing all the copper. If you remember anything about high school physics, you'll remember that zinc + copper + moisture = battery. In other words, these two dissimilar metals in contact with each other and in the presence of moisture, will galvanically corrode, specifically, the nail will be eaten up. This is plain wrong, but holy crap, ALL of the copper is installed incorrectly. Sometimes I wonder why I'm paying my builder when I'm the one catching all the mistakes.
On to nicer things, I finally got that pile of logs milled up into some awesome planks. Owner Steve Mixter of MDJZ came to the lot on Saturday with his portable sawmill and cut up about 6 of the logs I saved from the latest tree culling. I thought I had a maple marked to save, but all the logs I had in the pile were red and white oaks. There was one tree that was too crooked to mill, so that might have been it.

Here's the biggest red oak on the mill waiting to be cut. They took a few slabs off each side until a square beam was left, then just cut the beam into planks. I requested 8/4 thick boards so Steve cut them as a heavy 8/4 so when they dry, they'll be a true 8/4. Watching him work with his son Zack, you can tell there's a lot of experience needed to harvest the best boards from the log.

The bark slabs were sometimes placed three on a side so that stickers (spacers) could be cut. The stickers are used in between the boards when they're in the pile to promote drying. Also, narrower boards were harvested this way. Native cut stickers will prevent "sticker staining", which happens when dissimilar wood species are in contact with each other during the drying process.

Check out this nice piece of white oak. The sinewy markings you see are called medullary rays, which are only present when the wood is quartersawn. If you imagine the cross-section of the tree is made up of layers of concentric rings, the medullary rays run out from the center of the tree. These rays are valued for their figurative appeal but trying to harvest as many pieces of this type of wood from a tree creates a lot of waste since the tree would need to be cut radially from the center. As such, you can either waste a lot of wood, or harvest these from the center cut of the tree, which we did.

More medullary rays in some of the red oak, book matched. You can see why the figure in this wood is desired in fine woodworking since it adds interest and character to the piece. I have a good number of boards like this and two of the largest logs were book matched (mirrored) at the center of the tree.


Here's the pile that I was left with. About 900 board feet of 8/4 boards. I paid Steve $480 for his time. 8/4 red oak goes for $6/B.F for rift sawn and $8/B.F for quartersawn. I estimate I probably have close to $6000 worth of wood in this pile.

I covered the pile with the left over stickers, covered by a tarp, then laid the bark slabs on top to keep it all in place and add some weight. Here it will sit for at least a year to air dry before I can move it into the house to complete the drying process. The wood is heavy with moisture and I couldn't move it into the basement or I would risk mold. Under the cover of the trees, there's always a nice breeze blowing through here, so I think they'll air dry nicely. Here's a Video of how the saw in action.
So I have some issues to work out with the roofers but they should be done soon. I hope to get rolling on the windows soon since I haven't heard back from the landscapers, then we'll be dried in for the HVAC to start work. I'm a little nervous about having the windows in while there's still so much construction happening, but I guess that's how it's done. The cabinets have been delivered to Cobblestone Cabinets and they can be held for a month without charge. After that, it's 0.25$ per cabinet per day so it's not a small amount, but it won't break us either. The clock is always ticking.
No comments:
Post a Comment