If the walls are the bones of the house and the roof is the hair, then the HVAC is the lungs, and they're going in quickly. Porter & Heckman worked hard last week to cut through our concrete floors on the first floor and route the main supply and return for the second floor. If you're looking for a great HVAC installer, I can recommend them. They don't hesitate to call and ask me for my input when the design needs to change and I really appreciate that. A few supplies on the first floor needed to be moved from their original location, and some wall redesign was needed to run the second floor supply and return, but we worked through it together. I'm hoping they'll complete their work this week and we can move on to other subs.

Here's one of the holes cut in the first floor for the supply. Since P&H needs to dodge the Lite Deck concrete beams, they drill a test hole to gauge their position in the floor then mark and cut the slab with a diamond blade in an angle grinder. A good number of swings with the hammer and the concrete comes out. All they have to do cut and clean up the foam then run the duct work through. There's a light metal mesh in the concrete that also needs to be cut, but that's no match for the diamond blade. There's no rebar in the places between the beams so we don't have to worry about those.
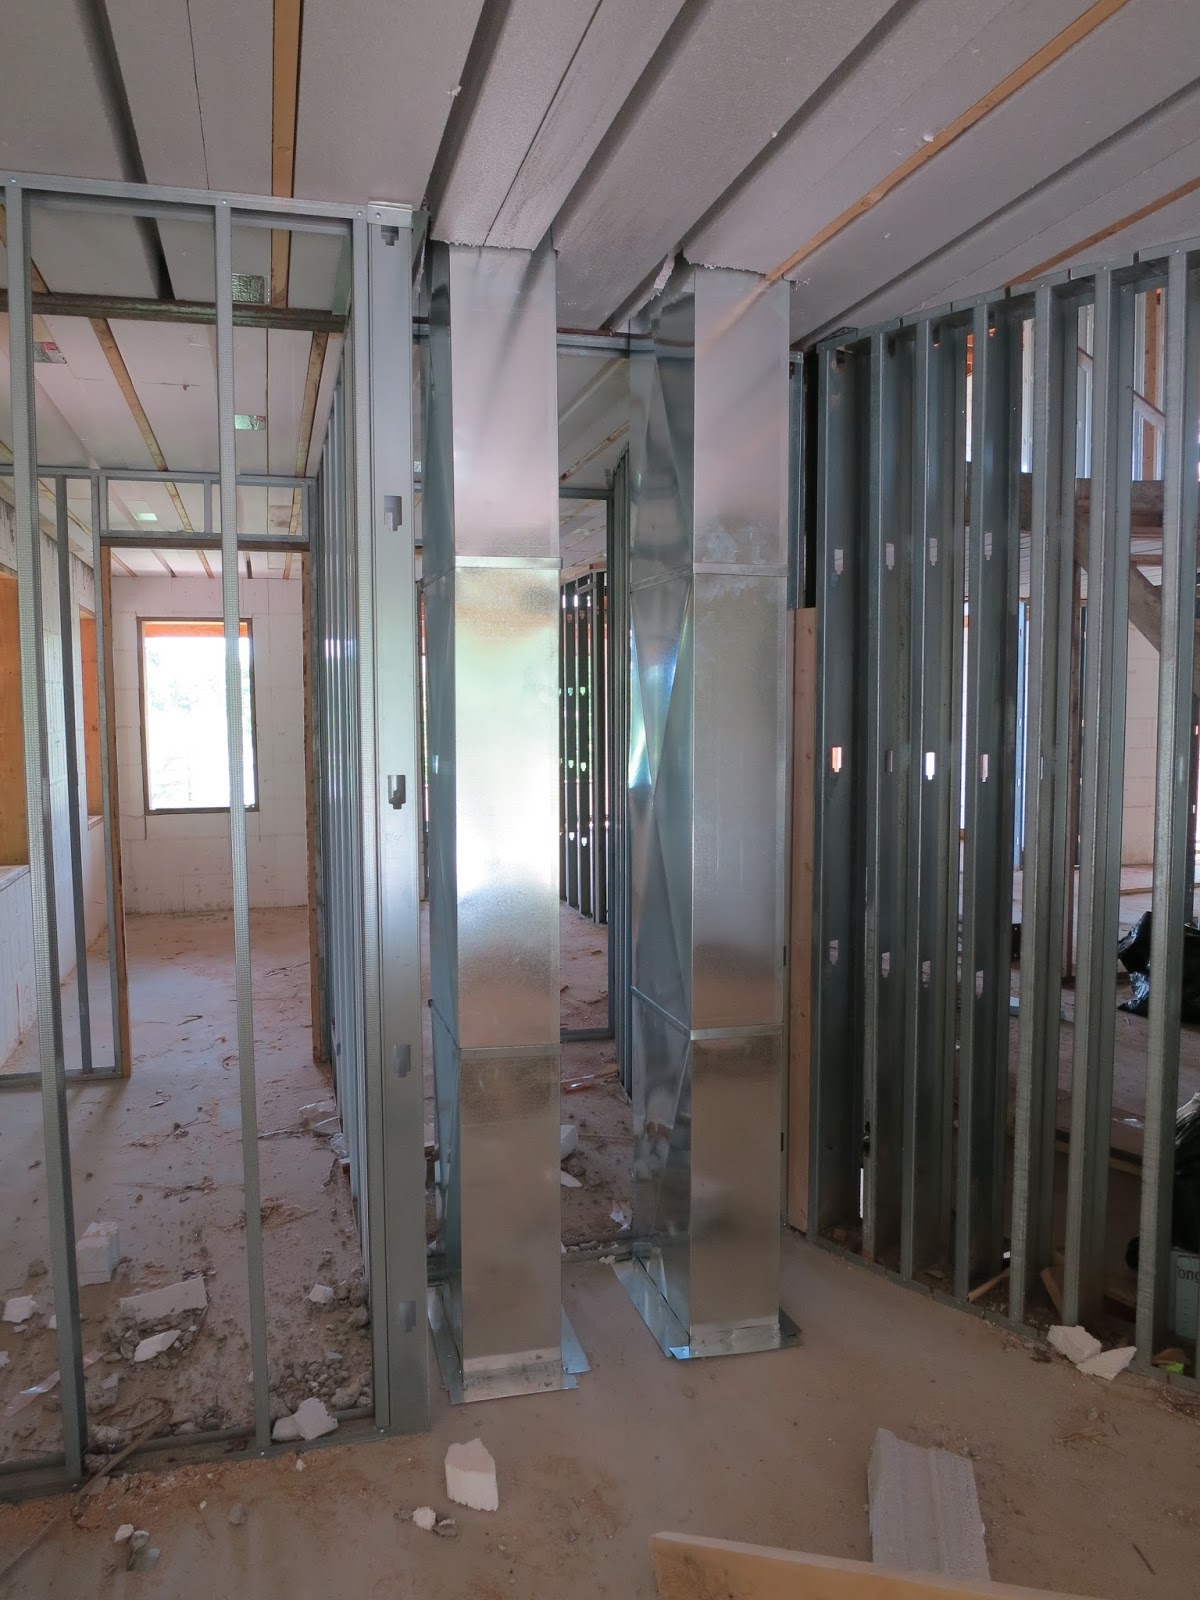
Here's where we needed to make some modifications to the original floor plan in order to get air to the second floor. Usually, when you have a forced air system on the second floor, you need to run supply and return ducts against the ceiling in the first floor. Since we used the ICF Lite Deck, if we wanted to run these supply and returns perpendicular to the concrete beams, the would have to sit below the finished ceiling level, which necessitates ugly boxes hidden in obvious soffits. Another way is to run a second floor supply and return up to the attic space and supply the air through the ceiling. This cleans up the design, but comes at a slight cost of efficiency since you're running HVAC through the unconditioned space of the attic. Any air leak or radiant energy loss goes into the attic instaed of into the living space. It's not he ideal way to do it, but in this case, probably necessary.
So here we have our second floor supply and return. It's sitting in what used to be our study nook, where we were going to install some built-in cabinets and shelves. There's a steel beam just on the other side of those ducts, so we couldn't move them back. If we were to go on the other side of the beam, it would have drastically reduced the closet space in both the guest bedroom downstairs and second bedroom upstairs so we decided that the nook could be sacrificed. Fortunately, it sits right above the mechanical room in the basement so there's minimal head pressure loss running to the second floor.

Here's the closet wall in the guest bedroom, just on the other side of the second floor trunks. That wall sits right on a beam and there's another one above it. While a walk in closet isn't important for the guest bedroom, we couldn't take away space from the second bedroom upstairs. It wouldn't be nice for that room to not have the turret feature AND not have closet space. I could hear children's' arguments ringing from the future about who has to stay in that room, right before I put them in a cardboard box outside (just kidding). There's still finishing work that needs to be completed on these trunks but it looks like this was the last thing they did before they stopped working last week. In a good installation, seams are taped with aluminum tape and hopefully we'll get some rigid insulation on the boxes.

Here's what the boxes look like coming out of the second floor. Unfortunately, the turret bedroom wall that shares the second-bedroom bathroom. Since the turret room wall doesn't sit right on the study wall below, we'll need to furr-out the existing wall in order to wall in the second floor trunks. That means that the turret room is losing a few inches, but when it's closed up, you'll never know. We could gain that space in the second-bedroom bathroom but since it's right where the tub will go, we'll have to see how the drain lands on that beam.

Here are the trunks as they enter the ceiling. It's unfortunate that we need to dodge a roof truss because every bend in the pipe adds some head pressure and flow loss, but as beds go, I think these are pretty benign. You can see they've already installed rigid insulation on these boxes and taped up the seams. On top of this will also be the blown-in insulation, but I might investigate getting some spray foam up there to seal and insulate the trunks more. Attic spaces are really hot in the summer and really cold in the winter and the greater the temperature differential, the greater potential for radiant energy loss.

Here's another first floor hole after it's all cleaned up. Supplies are cut into the floors as close to windows as possible. I think they do that to help with condensation in the winter time and help equilibriate the temperature in the room. If you had it on the wall opposite the window, you might get hot or cold spots in the room if there's not enough circulation. Likewise, returns are best placed on the wall opposite the supply vent so you're not sucking in newly conditioned air to be returned to be reconditioned. All the supplies on the first floor are placed high in the walls and use the stud cavity as a plenum. As such, the floors inside the walls need to be cut or drilled and connected to the return trunks. On the second floor, the returns are in the ceiling and connect to the return trunk in the attic space.

Here's one area where the vents needed to be reconfigured due to the ICF concrete beam placement. It was initially planned that there would be two vents on the big window wall, and one vent in front of each of the side windows. Because the beams are placed right next to the side walls, we couldn't place the vents there, so we decided to place a vent in front of each window. This works out since the returns are on the opposite walls, so it creates a good circular airflow to the room. You can see that they've cut the floor, but haven't removed the light mesh or ICF foam to open to the basement. It's a little unfortunate that they couldn't get the ducts placed equally in the window opening, but again, that's function of where the concrete beams fall. In a standard wood construction or web truss, the supports are narrower, so it allows some more flexability, but you still need to dodge them. If you're very particular about where your vents sit, then you might be able to space the joist, but it would take a lot of fine detail planning before any implementation takes place.

Here's what a second floor return looks like. It's in the master bedroom and it's a really large box when compared to the supplies. The return ducts use this silver jacketed flexible insulated duct that probably has an R6 value, which isn't a ton but it helps. As long as it's air tight, any additional insulation in the attic space will add to the R-value. I don't believe this is something that can be spray foamed. Each room has a return sized appropriately to the space and there's one more in the rotunda to catch the general area air.

This is how the flexible return ducts look when they attach to the return trunk. You can see that the return trunk is insulated with Owens Corning Quiet R duct board type 475, which is 1" thick and has an R-value of 4.3. Again, it's not great, but it's something and I think we can spray foam around the duct to increase the R-value and decrease any air leaks the tape might have missed. They did a thorough job tape sealing it from a visual inspection. Since it sits on the attic joists, we would have to have the drywall installed first, then maybe spray foam could be applied in between and around the duct, then blow in insulation could be installed. It would be a pretty small job, so it shouldn't be too cost prohibitive.

Here's what the supply runs look like. These are the supplies to the laundry room and a black 6" diameter R-8 flexible duct is used. I'm not sure why they use the silver metalized on the returns and black poly insulated on the supplies, but at least the supplies have a higher R-value. The number of supply runs to a room is size dependent. For our laundry room, we have only these two runs. For the master bedroom, we have three. Some houses have retro-fit A/C installations that use small 3" holes for vent supplies and really force the air to create good room circulation. Because of the size of these vents, this more akin to a traditional HVAC installation so the air won't jet out. It will be interesting to see how even the rooms warm up during the winter since the supplies and returns are in the ceiling.

Here's what the supply register looks like. As noted, this is a 6"x8" register and it's one of the two in the laundry room. The flange on the register accounts for the ceiling drywall thickness and the register diffuser will screw into the register, and looks like a regular floor air distributor.

In addition to running the supply and returns, Porter & Heckman is also responsible for running the bathroom vents. Here in the master bathroom, you can see the smaller black poly-wrapped insulated duct in place to hook up to the bathroom vent. This just goes out to a small round vent in the roof overhang. It's well protected there and removes the need to cut through the roof to vent the bathroom. There are actually two in here, one in the water closet and one in the main bathroom. Since these are in the attic space, we can run across ceiling joists to the overhang. On the first floor, they'll need to run along side the cement beams towards the back of the house. The foam between the beams can be cut out to run pipes so these duct lines will still up in the ceiling.

Here are most of the supplies for the master suite. From front to back it's one of the master bedroom supplies, then the water closet vent, followed by one bathroom supply, the other bathroom vent, another bathroom supply, and finally the master closet supply way in the back. Most of the other rooms still need their supply and return runs but I imagine that will be installed this week. It's much easier than cutting hard aluminum ducts and piecing and taping them together.

This is the box that the supply duct comes in. Nothing fancy, just wanted to include it for future reference.
It looks like Porter & Heckman is using a two man crew, one is working on cutting on the concrete and another is upstairs installing the flexible ducting for the second floor. Last week, I installed a wireless trail camera so I can monitor the site to see if we're getting unannounced visitors (haven't caught anyone yet) and I see the P&H guys there every day just around 9 o'clock so another bonus about these guys is that they're punctual and hard working.
We'll be meeting up with Margaret tomorrow at the site to run over some design information. Unfortunately, Pro Brothers backed out of our window installation, but they're still going to deliver and perform a final walk through of the install to ensure the mechanics of the windows are functioning properly. Because of this, we're trying to scramble to find a window installer so we're meeting with Margaret's general contractor to see if we can take on this job. It seems like Matt has been busy with other houses since we're still waiting on the garage slab pour and water/sewer trenching. Maybe getting in another GC will get things done faster.
No comments:
Post a Comment