An unexpected family adventure day ended with a visit to the house on yet another unseasonably warm winter day. Even though it's still January, temperatures this weekend are in the 50s with some clear skies and sun. Knowing Michigan weather, we can probably expect at least one more snow dump, but at least we can enjoy a hint of spring. The tile installers were in full force today with five guys working to finish up all the tile installations. Back splashes were being grouted, tile was being installed, and finishes were being refined. We also saw more progress on the final touch ups, but the wood floor in the turret bedroom remains missing. Mike says that the wood is delivered so we can hopefully expect installation this coming week. A few more visits from the electrician puts us a bit closer to perfecting all the lights and now the circuit to the car charger is connected. We're still waiting on a meter, but everything is in place on our side.

The packed in ice is finally gone from most of the driveway, and is at least clear in the front of the house. Three trucks were at the house today for all the tile installers and Mike, recovered from his hospital visit earlier in the week from flu like symptoms, was present to supervise. As warm as it was this weekend, we're expecting a snowstorm early next week with a chance it will all melt away later in the week again. I wish mother nature would make up her mind.

The tile installers were on site during the weekend to start laying the foyer floor tile. They prepped the floor earlier in the week by leveling and applying a scratch coat. The day were visited, they were dry-laying down the tile so we could confirm the spacing and orientation of the tile. Since it's best to have a full pattern tile layout in the center basket weave center, they started in the center of this field and worked their way outward. There will be a 17" border around the basket weave that will be made up of three layers, a large white tile edged by a thinner marble border tile. The border will be installed after the center field is set and the white tile will be cut to take up any variance between the sides. The diagonal walls that house the foyer art nooks aren't perfectly 45 degrees (of course) so unfortunately, the tile cut at these locations won't follow the 45 degree tiles in the pattern.

Once the position of the basket weave was confirmed, the tile installers carefully removed the tile while keeping the reference straight edge in place near the door. The used this reference to start applying thinset to the concrete floor and carefully place each sheet of the mosaic basket weave into place. They work pretty quickly, managing to install the entire field be the end of the day.
The tile installers work wasn't isolated to the foyer. While three workers were installing in the foyer, one was grouting all the backsplash tile that had been previously installed in the other bathrooms. This is the finished tile in the second bedroom upstairs, with the matte mosaic tile and dark pencil edge top. All the tile is now completed in this bathroom.

The glass mosaic tile in the mudroom has also been grouted, completing the tile in this room. One of the tilers was working in here when we arrived and it looked like he was also cleaning up the floor tiles. We had concern in this room about how the tops of the baseboard tile would be completed. The tile installers confirmed that it's not a good idea to apply grout to the top edge of the tile since it would most likely just fall off, so Mike said we'll have to paint it. I think this will be an acceptable solution. The faucet in this room also still needs to be replaced.

The round glass tile has been installed in the turret bathroom, but not yet grouted. The tile comes on a 12"x12" sheet, but the tile installers didn't want to install half a sheet, cutting through the rounds. Instead, they removed each round from the sheet and installed them in the thinset by hand. The tile isn't installed on the side like the tile in the other bathrooms, but we confirmed this design with Margaret. I'm not sure if it will be odd to deviate from the other bathrooms, but this vanity is also a bit different, with two columns of drawers in addition to the door cabinets. I think having the tile only on the back makes the vanity look more like a piece of furniture, rather than a fixture so there's some justification in that design. The grout on this tile should be installed by the next update.

The fireplace installers returned to confirm the installation of the gas fireplaces and install the screens and bezels. There's a protective screen on both fireplaces to prevent someone from burning themselves on the hot glass. The screen gets warm during normal operation, but not dangerously hot. This is the first time I'm seeing these in operation and I like the appearance. The "embers" below the fire are lit with LEDs and there are two orange halogen bulbs inside that throw light against the side of the fire box for an added ambiance. Additional "brick" needs to be installed on this side of the fireplace to complete the installation

Here's the greatroom side of the fireplace with the additional brick pieces installed between the glass and screen. When installed, it gives the illusion that the glass isn't there and the screen is the only thing between the fire and the room. There's still a little condensation on the glass that gets burned off each time the fireplace is used and the flame height isn't set very high but everything looks functional and the fireplace provides a good amount of heat.
Here's a closer look at the "embers". The under lighting and transparency of the embers gives a pretty realistic effect. I'm happy with the over all appearance of the fireplace and the performance it provides. I think there's a way to turn on the lights only without the flame so you can have the ambiance of the glowing embers without using gas. Since our house is so efficient, it will be interesting to see how running the gas fireplaces will heat the entire house.
All functions of the fireplace are controlled with these remotes. I wasn't aware, but there's actually more buttons on the remote and the white is just a shell to protect those buttons. Next time I'm at the house, I'll have to play around with the other features as I understand it, the flame height and temperature settings are adjustable with those other buttons. The remotes act as a thermostat and can adjust the height of the flame depending on what you set the temperature to.
Here's the fireplace on the second floor. I'm not sure if the log arrangement is final but I'm hoping that they'll adjust some of the logs so they're not so far forward. If not, then I'll figure out how to get in there and make my own adjustments. There are also some fingerprints on the left side of the glass that need to be cleaned up, and are only visible when the fire is on. This fireplace doesn't have halogen bulbs, but the embers do glow.
Here's a close up of the glowing embers. If they weren't so perfectly contained in the fireplace, I could mistake them for real. This fireplace also performs well and looks great. We originally had some other fireplaces picked out, but Mike decided to purchase these due to availability and his good experience with the installer. I'm satisfied with his decision.

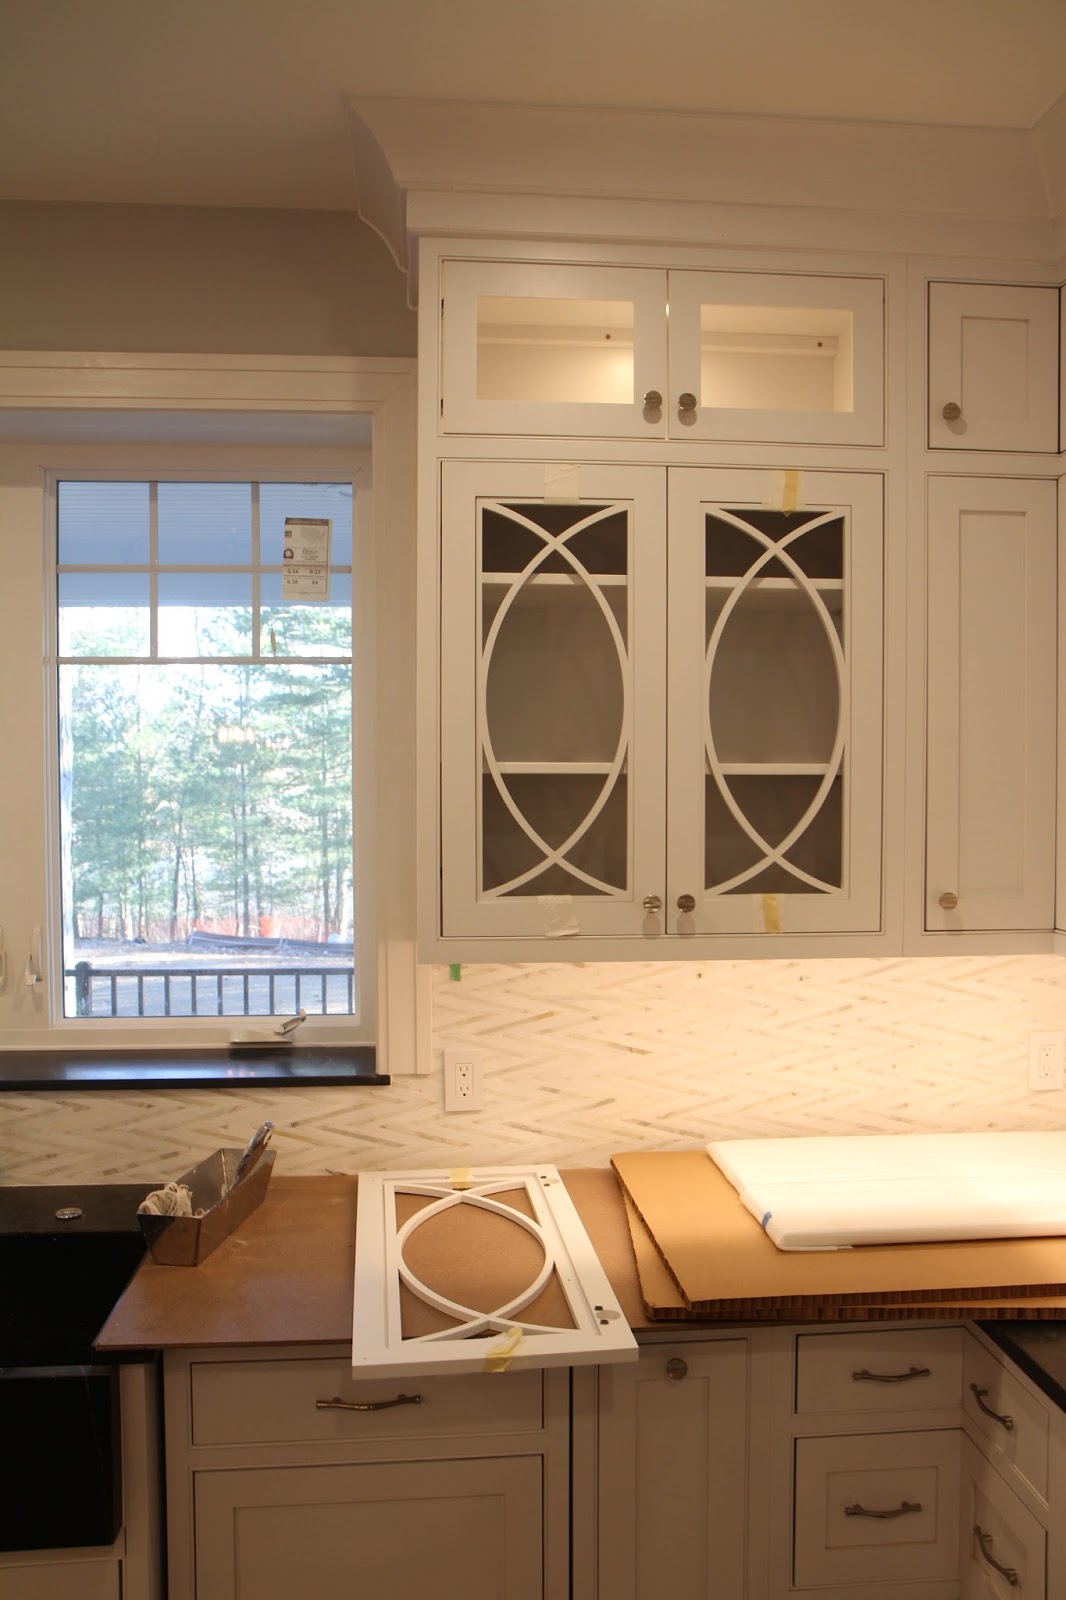
The replacement mullions for the glass front cabinets in the kitchen were installed this week. They're just loosely held in currently and will be attached permanently when the glass is installed next week. Apparently, Mike and Margaret weren't satisfied with the slight gaps in the curve pieces and got them replaced. The Sound Vision and the electrician also got the puck lights in the upper cabinets operational. They weren't controllable by the Control4 system and it seems that something wasn't connected. While he was there, the Sound Vision diagnosed some issues we've been having with our rotunda lighting. After diagnosing and conversing with Control4, it was determined that the controller itself was at fault and will need replacement.

The electrician sourced puck lights that can work with the amperage output of the mis-installed transformers in the butlers pantry. Unfortunately there are now holes where the light strip was mounted, so those will now need to be touched up some how. If it were up to me, I would drill them out a bit bigger and glue in a dowel to color match the wood. It shouldn't be too visible through the seeded glass that will be installed in the door but we'll still be able to see it when the door is open.

The final PEV meter hasn't been installed yet, but the circuit is ready for installation. DTE came to the house, but didn't have access to the inside of the house and didn't want to be responsible for energizing the circuit. They requested that the circuit breakers are turned on and left small metal bars that should be installed across the meter contacts. Basically the circuit is live and the DTE technician will remove the bars from the live circuit and install the meter. I'm surprised that's how they want it done since it's dangerous to work on a live circuit, but that's their requirement. As a result, the Tesla charger is powered and "free" energy is being supplied. I plugged my car into the charger but found only 12A being supplied, so it seems like the electrician didn't set the charger to the correct output amperage.

The shutoff breakers next to the Tesla charger have been switched from 80A to 100A as per my request. This matches the rest of the circuit going to 100A so the charger can output a maximum of 80A. With the opening of the Supercharger near me, high amperage home charging isn't much of a necessity, but it is a luxury. I'm opting for a flat monthly rate of $45 since I calculated that this will be the less expensive option with my daily commute.

The breakers in the basement for the dedicated charger have also been changed out to 100A. The other circuit is correctly at 50A for the NEMA 14-50, which can be used with the travel charger or any other battery vehicle, as well as welders. If we ever get another battery vehicle, both chargers could be used at the same time and the cost would be the same monthly, greatly saving money. If we get another Tesla, we could install another dedicated wall charger and daisy chain them together since they communicate and can balance the charging between the two vehicles.
That's about it for this week. Next weeks update should show a finished foyer tile, and probably finished tile in general. Hopefully a finished wood floor installation and continued touch ups. Like I said, we're getting really close, but we're also going into February so one more month has passed us by.


Hello! I found your blog when I google picture searched my tile pattern. I am trying to find the manufacturer and name of the same glass mosaic tile you have installed. Do you know the name of it?
ReplyDeleteThe label on the back of the tile sample says it's "American Olean - Color Appeal". 1x1 AOT C134 MOS11 Mosaic Field Tile C134 Silver Spring Blend. It has a color blend as follows:
Delete34% C102 Silver Cloud
33% C101 Pearl
33% C121 Charcoal Gray.
I hope this helps!
This seems to be the manufacturer website:
Deletehttps://americanolean.com/series.cfm?series=200