Summer continues to embrace us in it's molten hug with this weekends temperatures in the low 90s with similar temps continuing well into next week. This bodes well for the front and back stairs that are currently going in and hopefully we'll stay with the nice weather to complete all the exterior finishes before fall sets in. This week also saw some progress on tile work, but mostly with paint prep over the entire house, as well as the installation of some of the end game HVAC items. Still no word from Old Country Stone and we're still dealing with the issues on our exterior door installation, but hopefully these will be resolved soon.

Here's an updated shot of the front of the house in the glare of the rising sun. Two differences that stand out in this picture is the installation of the front step structure, and the dragon weather vane in it's final location on top of the turret (may it remain there forever). I think we're still a few weeks out on the replacement for the large garage door, which if fine since they need to revisit its functionality. The painters are on the inside of the house, but I think they two front columns will be painted when they revisit the exterior colors for the finishing of the gazebo.

Mike asked a favor of Nick the painter. He said "Hey Nick, how are you with heights?" Nick's not afraid of heights as evidence by some of the places he's reached to paint the house. So now we have our dragon weather van finally installed. They used a ladder to access the upper roof, then shimmy down to the valley between the turret root and house. Next an 8 foot ladder up the roof of the turret and the piece by piece installation of the weather vane. They used their phone compasses to align the cardinal directions. The dragon sits about two feet on the shaft and rests on a single ball bearing at the top of the rod, so it swings very easily.

I haven't seen it moving myself, but it is facing a different direction than when it was initially installed, so I know it can move. Not much wind here lately with all the hot weather, but we should be getting a change in weather later this week, so maybe I'll get the chance to watch it swing. We always wondered if the proportions were good between the dragon and the turret and I think it's just about right. We couldn't purchase a larger weather vane and I don't think a smaller one would have done the turret justice. From this distance, it's difficult to make out the green marble eye, but the gold gilded wings will always remain bright even when the copper body patinas to green.

Great Oaks is nearly finished installing the structure for the front steps. There's an unfortunate fact about these steps that I'll get to in a bit, but for now, let's just talk about the fact that they're almost done. I didn't get to see the whole installation, but if the submitted structural diagrams were followed, there are deep footings under the two planter platforms, and under the more forward steps. The lowest pad is just poured without any deeper foundation.
Here's the side cutaway showing the depth of the footings, reinforced with rebar, instructions for the mortared cinder block, and all the thicknesses for the concrete scratch pads on the various landings. Note that the dimension for the upper landing shows 4'2", but you can see the "urn pedestal" sits proud from this.
Here's a closer look at the texture for the concrete scratch pad. This is just a 4" thick concrete pad that sits on undisturbed or compacted soil without any underlying aggregate bedding. The purpose of the scratch pad is to provide a solid but rough surface to which the blue stone can be mortared. Both the lower landing and the upper landing have scratch pads so the blue stone walkway can be mortared to the surface.
Here's what the steps look like from the deck. You can't see the first two steps because they're not installed yet. There will be masonry steps with bluestone installed on them. There should be a step that spans the two urn pedestals to make up the final step before stepping up on the deck, but that hasn't been installed yet. Good thing too because I knew right away that something wasn't right with the install.
Here are the dimensions of the various steps and landings for the front stairs. Remember how I told you to remember that the distance from the front of the second landing to the steps was shown as 4'2"? Note that the distance from the front of the second landing to the urn pedestal is correctly marked as 2'10". Unfortunately, the installers subcontracted by Great Oaks made the second landing 4'2" from the front of the second landing to the front of the urn pedestal. This pushed everything else forward.
Here's how the front stairs were supposed to be implemented and how they interact with the driveway. The driveway is supposed to come off the large garage door perpendicularly, then angle in at the landing of the front stairs. Cleans lines, good implementation that provides space for planting beds.
Just with my eyes, I could see that it didn't line up. The lower stair landing greatly impinges upon the path of the driveway. Why the installers couldn't see this, or why they didn't "measure twice and cut once" is unknown to me. It's unfortunate, because now it will have to be removed and reinstalled, at the expense of the installers. There's no way we could make this work as is.
A second deviation from the submitted plans is the method of attachment for the cinder blocks. I'm not sure if this one is a big deal, but the plans call for mortared cinder blocks, which we saw in the construction of the gazebo seating by OCS. For some reason, the installers decided to use PL premium construction adhesive. The stuff is strong, so I'm not sure if there's any difference or detriment by using this over real mortar.
The construction adhesive looks well applied, but unfortunately all these blocks will have to be destroyed, the concrete pads removed, the footings re-poured, and the block relaid because someone misread the specs or didn't measure the stakes before digging. To me, it's an annoying delay. To the installers, it's lost materials, lost time, lost revenue from other jobs missed due to fixing this one, and a loss of reputation.
The plans do not call for any particular fill inside the urn pedestals so right now it's filled with broken pieces of cinder block. It will be capped with bluestone, so if their install methods follow suite with Old Country Stone, the cinder block cavities will be filled with rubble and mortar.concrete and the pedestal interior will be filled with rubble/concrete.
Another concern I have with the install is that I didn't see any rebar spikes in any of the cinderblock cavities. If rebar was installed, it should have protruded from the footing so the cinder block could tie into it and have mechanical fastening past the mortar or construction adhesive. I looked in all the cavities and as far as I could tell, didn't not see one rebar spike. I voiced my concerns to Great Oaks and they said they would investigate all the issues and determine what needs to be done. I have confidence in them to implement it correctly since Geoff is stalwart in his designs.

The installers for Great Oaks also poured the scratch pad for the rear garage walk out and steps for the back porch. Not much to see here since the step structures are still a big pile of cinder blocks at this point. Everything looks like it's lining up properly. There's a little bit of space between the column and where the stairs will be and it's like that by design. It remains to be seen if we'll need a railing on the steps to pass inspection, or if the drop doesn't warrant one.

Moving inside, Nick and his painting crew of three guys have completed masking the entire house in preparation for interior painting. This means that all windows are masked off with tape and plastic, as shown here. All exterior doors except for the front door is masked in the same way. All interior doors are off the hinges and propped up for painting. Having all the windows masked off means the interior of the house is a little darker and since the front door is the only opening not masked, there's not much airflow. Good thing the house is so well insulated or it would be an oven on these hot days.

The built-in in the study has been partially masked. The shelves remain on the wall, but are covered in masking paper and the counter top has been masked as well. I think it's interesting that the shelves remain on, indicating that they're not easily removable. I didn't see any set screws so I wonder if they're stuck on the support rods with epoxy or something. The base cabinet will be painted the same snowbound white satin as the baseboards so I think they'll remove the doors so they can spray the whole thing.

(Update) I had to swing by the house to have a meeting with Mike and Craig from Hardwood Door and Bevel to inspect the quality of the exterior door install. Nick was in the process of painting the Snowbound White all over the first floor. During my quick visit, I saw some painted baseboards, the dining room ceiling, some interior doors, and this in the study. They removed all the cabinet doors to spray them and hit all the interiors of the cabinet. I'm not sure how many coats go on, but it's pretty quick work once all the masking is completed. The walls and ceiling will be a different story though since all the stuff that's painted now will have to be masked off if they're planning on spraying everything.


Blurry shot of the dining room built-in masked off. They removed the two side doors so they could get the masking as close to the wall as possible. They don't bother to mask off the floor since it doesn't really matter if the floor gets painted. The underlayment and engineered wood floor will cover any over-spray from painting the baseboard, it's not worth the time to mask. Nick says they'll probably need to come back after the wood floor is installed to repair any marks made during the installation.
Here's what the turret looks like masked off. There's quite a bit of trim to be painted in this small space, so good masking is key to a clean finish. It will be nice to see this room once the trim is painted to see how well all the joints and patches disappear into the paint. Since this will be the girls room, the wall color here will deviate from the rest of the house into something more whimsical. We had a handful of paint colors to look at, so I don't really remember the colors we landed on, but I'll share the surprise with you when it's up.
There was a little tile progress this week, but not as much as I would have liked. That long piece of counter top that was sitting around in the mudroom bathroom last week wasn't actually the backsplash. It was the threshold for the shower, which is now installed. I think it's an awesome use for the material since it creates a seamless threshold and it looks great. A pleasant surprise that isn't getting implemented anywhere else in the house.
Here's a shot of the mudroom shower now that all the tile and shelves have been installed and grouted. There's masking near the ceiling so this room is prepped for paint. The two shelves are also the same material as the counter top. I think the plan for move in is to just have shower curtains everywhere and slowly replace them with glass doors once we decide how we want to use the space. Neither of us really like shower curtains, but it might be nice to have in a bathroom like this so we have full access to the entire shower.

Here's a closer look at the shelf. The shelves in the other showers don't have a matching counter top material, but it would have looked odd to have white shelves against this darker wall tile. Since this is cut from the counter top material, it's also thicker than the other shelves. It's pretty amazing going from one shower without any shelves to every shower has a shelf or built in.
The corner shelves in the guest bathroom have been re-grouted after they were cut into the tile and installed. Tile installation has slowed down a bit with only the addition of the mudroom shower threshold and this grouting completed this week. We still need all the wall tile in the master bathroom and the grouting in the turret bathroom. The master bathroom might be on pause until we get the counter tops and shower seat in from PMP stone. We also still need tile in the foyer, laundry room backsplash, and kitchen backsplash, but they're also on hold until other things are installed.

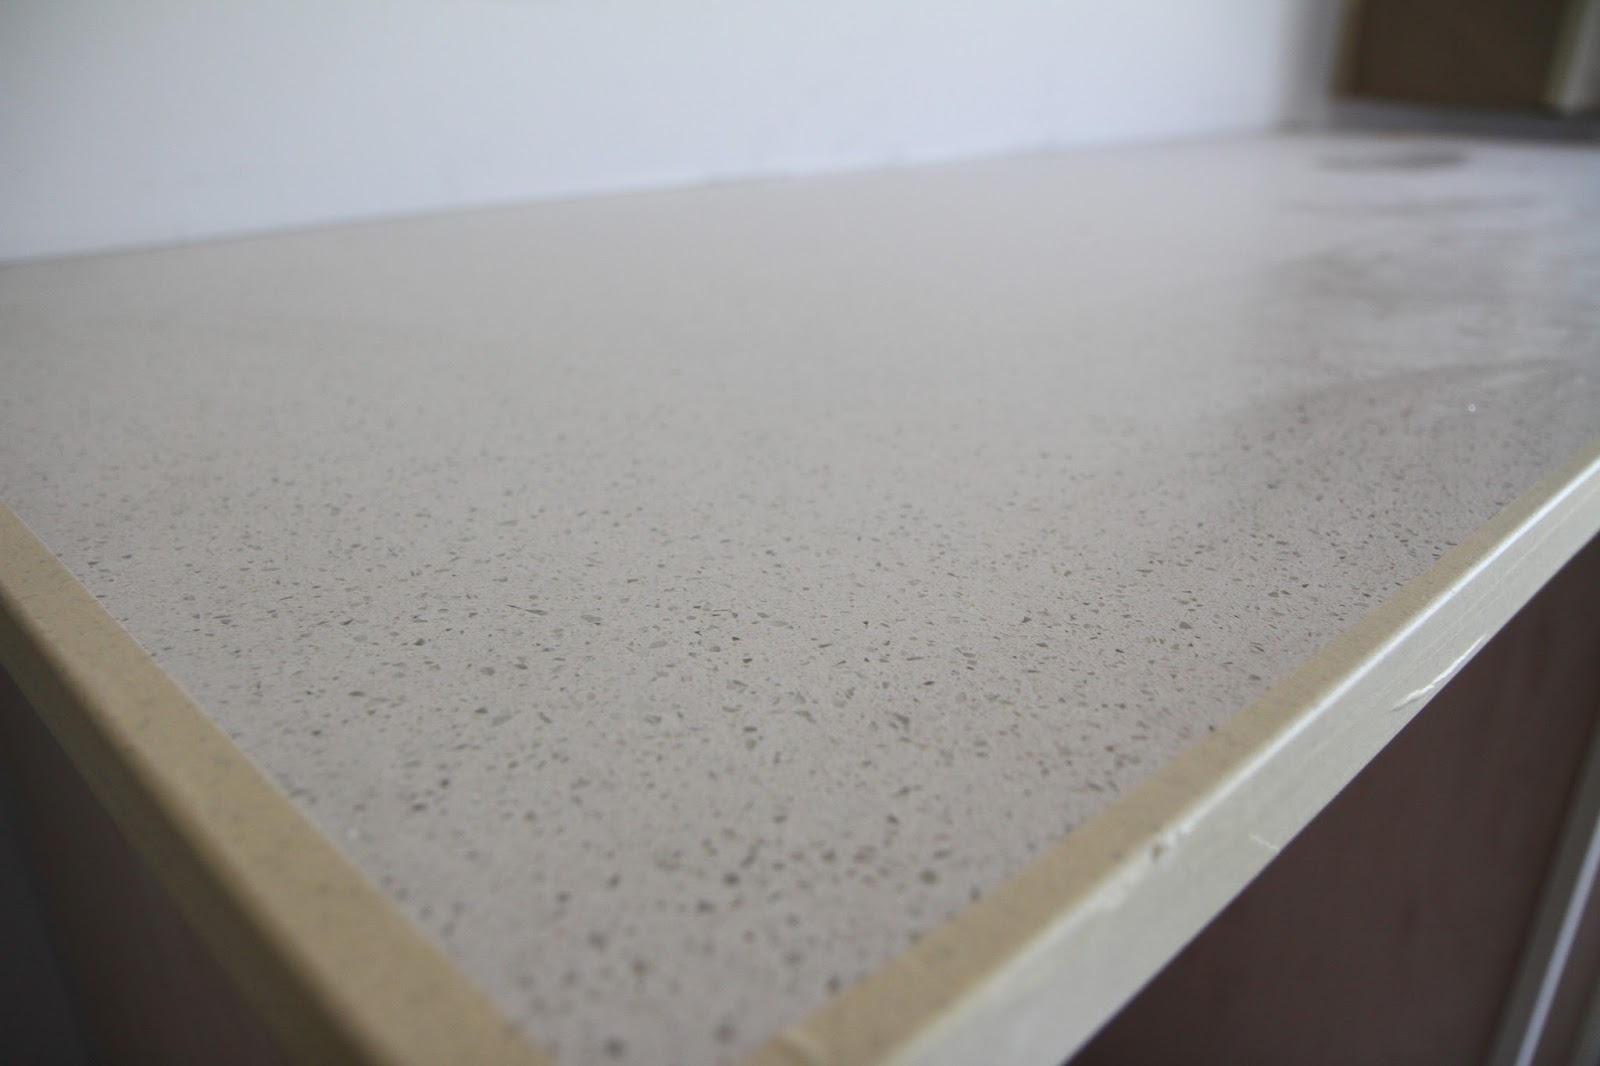
Most of it was masked off, but the correct counter top was installed in the laundry room. Once painting is completed in here, the metallic backsplash tile can be installed. This counter top is a little more subtle than the incorrect stone looking one and provides a cleaner look. The piece picture here is above the washer and dryer, which is pretty high, so I'm not sure what we'll be doing with it. A little too high to fold clothes on, it will probably just act as a shelf of some kind. The box for the sink is missing, so I'm assuming that was installed, but I didn't poke through the paper mask to verify.

This chunk of counter top material was left in the turret bathroom and will be used for the built in shelf in the tub. It's the same material as the counter top in the room and will be the only bathroom with a shelf like this. The second bedroom has corner shelves and the master bathroom has shelves cut from the counter top, but I don't think they have a return on them. Now that we have this shelf, I think they can install the border tile around the built in shelf, then grout the whole thing.

Porter and Heckman visited the site to install a few items related to HVAC. They installed all the thermostats for the three zones and mounted them on the wall. Here's the thermostat for the second floor, which sits in the master bedroom. The thermostat for the first floor is in the rotunda and includes a humidistat. I'm not sure if that's hooked up to the HRV, geothermal, or both to help balance the humidity in the house. We actually don't have a whole house humidifier because removing the humidity from daily living is more of a concern than creating humidity in a super tight house. This system has the capability to add remote sensors so if we're having trouble in some rooms, we can install one of these to help balance the house. It also has an exterior sensor to show us the outside temperature. I'm not sure about its connectivity, especially with the Control4 system we have installed, so Jonathon will have to check it out.

Porter and Heckman also installed the Airzone zone controller that controls the HVAC air flow control to the house. This system inflates and deflates bladders placed into the air ducts to control air flow and temperature throughout the house. Rather than having only solenoids that open and close dampers, which we have for the trunk to the second floor, these bladders are placed in the ducts for the first floor and basement. When the controller calls for service to the first floor, but not the basement, this zone controller will inflate all the bladders associated with the basement to cut off air supply while opening those to the first floor. While this controller only handles three zones, we could get one that handles more if we decided we want to add a zone to the great room. The air lines for those bladders would get hooked up to their own circuit, and a wireless thermostat could be added to the system.

This is the zone controller that hooks up to the thermostats around the house. This controller only handles six zones, so if we wanted to add zones in the future, this controller could handle it. This is what sits in between the thermostats and the actual zone controller that controls air flow to the house. The way the house is designed, we couldn't zone off individual rooms on the second floor since only one baffle controls the entire floor. We could add zones to the first floor and basement though, but I'm not sure we would ever need to.

The preheating tank was installed for the hot water heater generation. While this looks like a standard electric hot water tank, this 50 gallon tank is only being used as a water preheating system. It's supplied by the city water but cycles through the geothermal heat exchanger. On hot days when the system is removing heat from the inside air, the waste heat is used to warm up the city water before it enters the actual electrical water heating tank. This reduces the electricity required to heat up the incoming water. This system can also be used to preheat the water in the winter, using the geothermal wells for source heat. Since running the geothermal pump is less expensive than heating the water directly with an element, energy is saved.

Here's the energy information of the pre-heat tank, but I don't think it will be connected to electricity. It's almost a shame that this entire system is being installed from the beginning because then I won't have any energy consumption data to compare to a standard system. We'll be getting the actual hot water tank plumbed in soon and I think that one is a monster 80 gallon. The only thing that will be running on gas in this house will be the BBQ, cooktop, and clothes dryer.

Porter and Heckman also installed the final vent covers in the basement since there's not much left to do down there. They can be painted over with the standard white if they paint again but I'm not sure if that will happen. All the work that's left to be completed is in the mechanical room, with the installation of all the lighting controls, hooking up the house to water main, and connecting all the circuits, the rest of the basement is as finished as it's going to be for now. Maybe if I'm feeling industrious one day, I'll go and start cleaning it up in preparation for move in day.
That's about it for this week. Judging by the trailcam traffic, the next update should show painted trim, maybe painted walls? Probably more tile installation and hopefully the gazebo stone and remainder of the counter tops. We should be taking delivery of the wood floors on October 2nd since Mike just ordered them today. We'll hopefully get the railing for the decks soon too. I'm not sure where the installation of the finished plumbing and electrical falls in there, but I would think it has to be after wood floors. It's all down to the wire now that we're going into the final month!


No comments:
Post a Comment