The summer is hitting us with it's last bit of strength with temperatures in the low 80s during the day and 50s at night, which is perfect for sleeping and getting things done outside. While we work to prep the exterior of our current house for sale, progress continues on the exterior of the new house. The painter is finishing prep on the interior of the house and doing final touch ups on the exterior. It looks like Great Oaks completed the two retaining we needed, and should be moving on to the either the stairs or the driveway. The tile installers have completed some major installs, but still have a good amount of tile left to install. Counter tops and sinks were installed in the majority of the bathrooms, but we're still waiting on counter tops for the kitchen, butlers pantry, and master bath. Can it all be done before the end of October? I think it's possible

Until the driveway and front stairs are installed, not much changes on the front of the house unless you're looking at the details. The painter was on the site this week and cleaned up the over-spray from the wood stain application in the barrel vault and gazebo. There was minimal over-spray on the white trim so one more coat was painted to cover it up. Now it's clean and you could never tell it happened in the first place. Nothing like a crisp coat of paint to make the trim pop.

All the trim in the gazebo was painted with one more coat to cover any over-spray from the ceiling stain. The pillars remain unpainted because the final stone has yet to be installed. Still no word from Old Country Stone on when they'll come back to finish the mortar on the wrap around porch and, more importantly, the blue stone in the gazebo. Once that goes in, the base trim of the columns can be installed and final paint can be applied. The brown stained trim that covers the seams in the beadboard come down a bit into the white, making points in the vertex of each side. It's a neat look that I didn't expect.
All the extra landscaping stone left on the site is stacked in this small pile in the back yard. The driveway approach and front yard is currently cleared of all the old landscaping stone. Since we don't plan on implementing anything else this year, they should be removing this stone at some time since it looks like the installation of the south wall is complete.
Here's, what I think, is the final south wall installation. It's a little longer than what was installed last week and appears to be a bit larger than detailed in the original plan. I'm not sure if this removes the break in between the two wall sections and I think we'll only know if we overlay an aerial or install the next section of wall. In any case, it allows the current yard to slope nicely away from the house and retains the yard as expected.

Here's what the yard looks like now that it's retained and defined. The original plans show the first oak on the right but doesn't denote the second on the left. Nonetheless, the installers still dodged the tree with a slight hump in the wall. The plans also call for a planting bed along the entire wall, which helps us avoid a safety barrier on top of the wall. The final height of the wall close to the house is over the 48" height that requires a safety barrier. Because this is a retaining wall, the barrier is only needed if a walkway is installed next to the wall. By planting a bed, we're declaring that this isn't a walking area. If we had grass up to the edge of the stone, it might be determined that someone could walk up to the wall, causing a safety issue.

Here's a shot of the length of the wall, towards the back of the house. There are two block step downs as the grade reduces away from the house. You can see that the highest block at the garage corner is still lower than the grade of the slab. There's enough distance between the two where decreasing grade will make up for this height difference. The planting bed will absorb most of this height difference and plants will mask the slope. The section of wall at the bottom of the picture shows the difference from the original plan. The plan had the wall curving to the right and dying into the grade of the slope. The implementation has the wall curving slightly to the left before reducing one more level.

Here's the plan for the south wall on the corner of the garage. You can see how the wall was supposed to curve into the yard, where it now curves away. As long as the break in the wall is still there, I guess there's no functional difference. I though it would be nice to have a section where the wall wasn't present so we could still walk down into the woods. The planting bed is pretty substantial filled with shrubs and low ground cover.
The two highest blocks closest to the garage should somehow serve as a landing for the catwalk-deck planned for the future. The walkway actually bridges over these stones to land on the ground so it's probably of no consequence that the wall is lower than the garage slab grade. I think the idea is that we'll implement the cat-walk deck next year since it's the easiest way to get around that side of the house short of opening the garage doors. This will come after irrigation, topsoil, and grass seed.

Here's a close up of the end of the wall. It's only about three blocks high stepping down to two blocks at the very end. There's a socked flexible drain pipe protruding from the base of the wall, which I suspect is the drain from the retained wall side. As before, I didn't see any gravel or rubble on site to backfill the wall and create better drainage, but maybe with a loose wall like this, it's not necessary. This pipe will drain any water from the base, preventing any water disruption to the loose foundation of the wall. There's no solid footing poured but you still have to worry about water pooling and freezing during the winter time. I'm not sure how this pipe will be terminated, at the wall or under ground, so I guess we'll just have to wait to find out.

Here's how the wall looks at the corner of the garage. There's a large bump out where the cat-walk deck will land. It's pretty easy to walk up the wall the way the stones are currently stacked, but the deck will block the ability to climb the wall when installed. The final grade when grass is planted should be pretty close to the height of the garage slab, but I guess a little step up into the garage wouldn't be too bad. I've never seen a transition from grass to concrete, so I'm not sure if we should be flush to remove trip hazards, or a little bit lower, to prevent water incursion. I could see having it flush to make pushing a lawn mower in and out easier. Maybe just a little lip is best.

One more look at the wall from the perspective of the cat-walk deck landing. You'll have to travel a bit farther onto the lawn of walk around the planting bed. I think this will be a really nice place to have a bed. The are a few deer that forage on the property so maybe these plants will be a little protected since there's only one way to get at them. Of course, the deer might like it since the wall gives them a quick means of escape.
One more look at the north wall near the gazebo from up high on the master balcony. I don't think anything changed on this wall since the last update but I wanted to record a better perspective. Since the implementation departs from the plan a bit, I'm not sure how the wall will continue past the stairs when we finally implement this part a few years from now. It will be nice to have planting beds so close to a main living space, visible from both the gazebo and great room.

Moving inside, Distinctive Designs have installed the two built-ins, one in the study and one in the dining room. I think the installation of these two things completes their work in the house, but there might be some small items left for them to complete. The built-in pictured here is in the study and shows the floating shelves that sit on those rebar rods embedded in the wall studs. There's a little bounce to the shelves if you push hard enough, but I don't think we'll have to worry about any weight load. The built in is about standard counter height and integrates in the baseboard for a cleaner look. We'll probably put the printer(s) on the counter top in the middle and use the cabinets below for file storage and supplies.

The construction is all cabinet grade plywood boxes and poplar doors since we'll be painted Sherwin-Williams snow bound white in a satin finish to match the trim around the house. The oak top and shelves will be stained to match the walnut color of the cabinets in the butlers pantry. I might replace the shelf in one of these cabinets with a slide out file organizer in the future if we feel like we're in need of more file storage. The doors use slow close hinges but we haven't decided on hardware.

The right most cabinet dies into the curved wall, where a TV will be mounted. When the doors are closed, these cabinet doors look the same as the other two, but when you open it, you find that the right door is a false door, and the left door overlaps the actual cabinet space by a good amount. Good way to camouflage a dead space while still providing storage. The right door is immobile and appears to be attached from the back, so I don't really have the option to open it up in the future. If I feel brave enough, I could cut into the space from inside the cabinet to install a small safe or something.

The shelves are constructed from either an oak plywood or MDF with oak veneer and an oak edge banding. I didn't attempt to remove the shelf, so I don't know if they're epoxied onto the rebar supports. I think the would have to be mechanically attached some how, but didn't look for any external fasteners. As I mentioned, these will be stained a dark walnut to match the butlers pantry cabinets.
Here's the second built in, in the dining room alcove. We knew that we wanted some kind of piece in here, but were undecided on if we should have shelves as well. We currently opted for no shelves but left the option open for the future. We knew we wanted some kind of dining room storage/serving space outside of the butlers pantry, so we had this made for us by Distinctive Designs. It's constructed of a walnut veneer, probably on cabinet grade plywood and the top is left unfinished. They'll be installing a powder coated metal top later which will be a great surface for hot dishes.

The cabinet is not deep, measuring in close to 12 inches. Still, it's enough for dining room table linens, seasonal center pieces, or maybe some smaller serving platters. These are the kinds of things were expecting to be able to store inside. Just around the corner, we have the butlers pantry so glassware and serving ware can be stored in there. These doors are slab style with slow close hinges and a similarly finished interior. The surface isn't finished and I'm waiting to see if a satin or flat polyurethane will be applied. Again, hardware is unknown, but I think it should match the kitchen or something. I'm terrible with picking them out.

The balusters for the railing have been installed, destroying my previous belief that the wood would be stained first. I asked Mike about the order of operations and he said that this is the way to do it. If you stained and finished the railing before installing the balusters, you would risk marring the finish. Staining will be a tedious process, taping each baluster to protect them. The railing is now very stable and strong with no play or wiggle when you push on it.
I thought that the balusters would close off the rotunda space a bit when installed, but they don't really offer much visual barrier since they're a brushed silver stainless steel. They're thin too so there's really no visual obstruction. Here's the view of the rotunda looking towards the fireplaces. I think the dark stain of the railing will give a bigger perceived visual obstruction than the balusters do.
The crystal spindles are installed every 6th baluster, which seems to work out perfectly for spacing on the stairs and around the rotunda. They add a little bit of sparkle, but they're subtle enough to not look too gaudy. The spacing works out to one every other step and there are two of them in each short section at the end of the rotunda and above the greatroom overlook.
Here's what the rotunda railing looks like from the fireplace, looking at the laundry room on the left and turret bedroom on the right. Painting is supposed to begin soon, so this will look completely different when done. The panel frames and floor face trim will be a satin white while the floor, railing, and stair treads will be walnut. I'm hoping the dark floor doesn't darken up the room too much, especially since it's already a windowless interior room.
The railing and balusters are completed on the greatroom overlook. They're completely solid with no wiggle and I think they turned out great. Now we don't have to worry about having the twins visit the site since all the perilous drops (on the inside) are blocked by railings.
After discussion between Distinctive Designs and Jonathon at
the Sound Vision, this part of the paneling was replaced with a square framing, and the speakers will have a square baffle. Jonathon though it was odd to have this be the only round element in the room full of squared panels and changing out the rear loudspeakers is an easy task. It's a shame they had to spend the time on the curved moldings only to have to replace them. We were okay either way, but Jonathon insisted that his product not be the odd thing in the room. I'm okay with his professionalism and pride in his product.
The tile installers cut in the shelves in the guest shower. It looks like they had to go back and remove some of the tiles to do it, so it's unfortunate the oversight made it this far. I'm glad they managed to get it in, but I hope it doesn't cause troubles years from now.
Sinks and counter tops! All the smaller bathrooms got the delivery of counter tops from
Solid Surfaces and sinks from Ferguson. We went with a white on white for the guest bathroom, using
Kohler Kathryn under mount sinks. The corners of the counter top are just eased over without any fancy profile. The wainscotting tile was carried into the back splash in this room more a more traditional look.
We also got the finished tile in the mudroom with the installation of these huge 2'x2' slate look tiles. I'm not sure why there's a finger print in each corner of the tile, but everything is grouted so the excess grout should have been sponged away. Maybe it's some kind of tile installing trade secret or something. The tile orientation is straight from the kitchen, which makes it diagonal to the garage and bathroom. I'm really liking this tile and it seems like it will be a super durable and easy to clean surface for a high traffic area of the house.
The counter top in the mudroom bathroom is a gray solid surface with a
Native Trails "Cabrillo" undermount sink in slate. It's made from concrete and jute, but you couldn't tell by touching it. We wanted something a little bigger in this bathroom since it was going to serve as a primary washing space directly from outside. This should provide a good amount of durability while not looking like a laundry room basin. I think the back splash material is provided in that large piece, yet to be cut to the angle of the wall.
The second bedroom upstairs has this gray solid surface counter top with the same Kohler Kathryn sink on a white cabinet base. A little more utility for this bathroom since it's destined to be a kids bathroom. I know we picked out faucets at one time, but I really can't remember our selection. I have a list somewhere, so I'll have revisit it to make sure my taste didn't change.
Here's a close up of the second bedroom counter top material. There's a slight white speckling and veining pattern in it that should help hide any major water marks or daily use messes.

The turret room got this marble like solid surface counter top with the same white Kohler Kathryn sink. This is going to be the bathroom for the twins and while some might think us made for having one bathroom for two girls, I'm hoping they'll be able to share it until they move out for college. I'm pretty sure we're going with a more "blingy" back splash in this room since it's going to be for the girls so we'll just have to wait to see it installed.

Here's a close up of the turret room's bathroom counter. I can't remember the names of any of these materials, but they're all Vicostone quartz surfaces from the "Crystal collection".

A detail that's either new, or something I missed on a previous visit is the installation of the final valves for the toilets. The water remains to be hooked up to the main in the basement so there's nothing running through the pipes right now. Even still, it's a big step installing these and I think they're the first interior finished plumbing parts.
The laundry room got their counter tops as well. Unfortunately, it's the wrong material, a fact that Margaret and Tanja caught onto very quickly. The new tops are being fabricated and will be installed soon, which is why the laundry room sink isn't installed.
The other side of the washer/dryer section has a small counter top as well, wrong material. I'm not sure how the mistake gets all the way past the fabrication process, but someone missed information somewhere and I'm pretty sure it's not Margaret. Doesn't matter to us since we don't have to pay for the mistake, but it does delay the install of the back splash for a bit.

The tile installers completed installation of the master bathroom floor tile, complete with grout. I can't find any fault in their installation and really like how this tile turned out. It's not a natural stone, which is nice because it's much more maintenance free. The tile goes all the way under the floating cabinet and terminates at the door with a brown metal Schluter strip. The transition to the wood floor in the master bedroom will be even, without a threshold, similar to the other rooms. Since the electrical isn't hooked up yet, we haven't been able to try out the heated floors, but you can bet I'm going to test it when they get to it.

The mini subway tiles in the master shower have all been installed, but not grouted in yet. This is a natural marble stone and we'll probably have to maintain it a bit with sealers, but hopefully it won't be too bad. These ended up being cheaper than the penny round marble tiles and saved us quite a bit of money. The small size of the tile in conjunction with the ground lines should provide a good amount of grip so we're not slipping all over the place. It's a large shower so there's no chance to break your fall or grab onto something in the case of an emergency. We have blocking installed in the walls for railings in the future, but we won't be doing that before move in.

They close up the holes around the master bathroom faucets. They had to open this wall to move the valves over so the faucet itself would be centered in the sink. The handle will be offset, but the initial install had the center of the valve body in the center line of the sink. This is going behind back splash tile, so I'm not sure if they'll spend the effort to tape and mud or just let the thin set take care of it. You can also see that they removed a section of the top drawer in the master vanity. This is to make enough room for the under mounted sink, which we didn't really plan for when we designed the cabinets. I'm surprised they didn't just remove the face from the box and attach the face to the cabinet, but I'm guessing we'll never change out the faucets or sink in here, so we'll never need to reinstate functionality to the top drawer. Still, it's an odd way to do it.

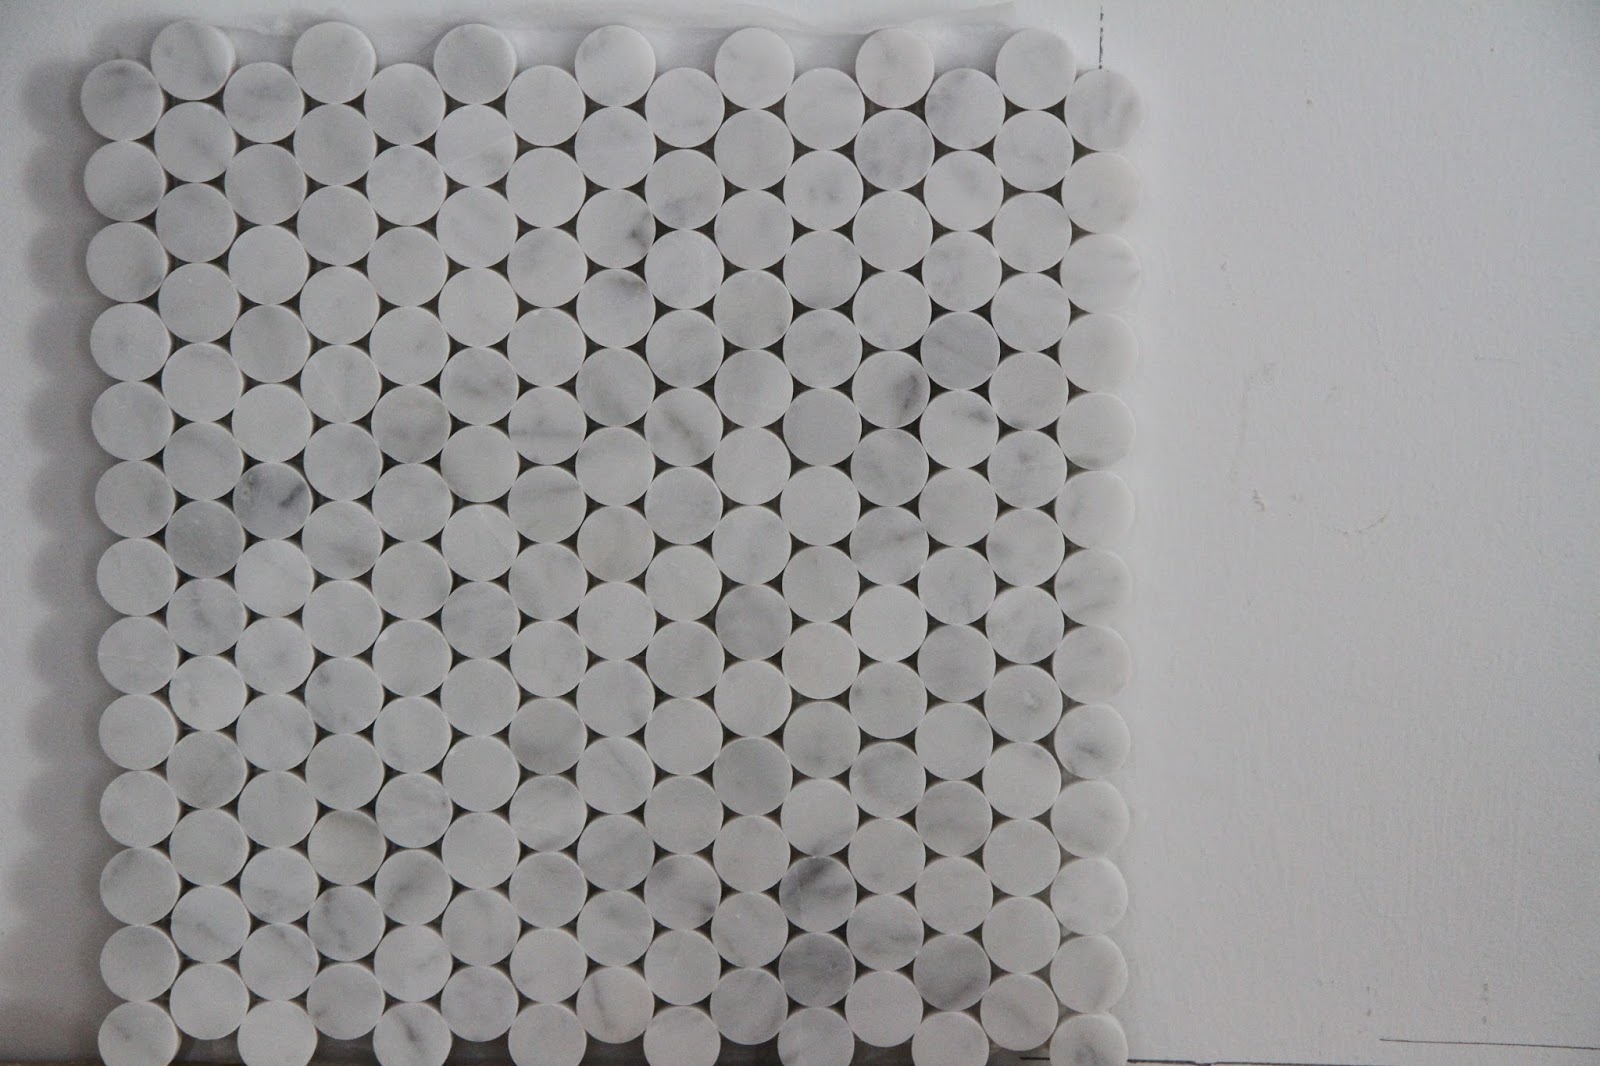
Here are the penny rounds that we'll be using for the back splash tile in the master bedroom. This will be installed both above and below the floating vanity. I'm pretty sure we'll be installing this all the way up to the top of the cabinet towers, but not over them. When we were trying to find places to cut the tile budget in the master bathroom, we considered only installing a shorter section of this tile, above the counter top, but below the mirrors. We figured we could install more tile in the future if we wanted to, but decided against stopping there. Margaret said it might be difficult to continue the tile seamlessly since the top edge of the tile will have half circles cut for a flat top.

Here's the stack of master bathroom tile stored in the master closet. All those boxes are filled with the penny round tiles. The two sheets on top are what we were going to put on the curved feature wall, but we have to delay implementation due to budget costs. The feature wall will be painted for now, and we can revisit it with tile at a later date without too much difficulty. We'll just need to make sure the tub filler and controls are installed with the intent to add a layer of thinset and tile later.
The wall tile for the master shower is being stored in the master bedroom and I imagine that this will be installed soon.
PMP marble and granite is supplying our master bathroom, kitchen, butlers pantry, and bbq area counter tops and they haven't delivered yet. We have a meeting this week to pick out the quartzite slab for the butlers pantry. Unfortunately, they didn't quote us for the master shower bench, which was just going to be a slab of the counter top material. Not only is this going to add a couple of thousand to the initial quote, it might be delaying the shower wall tile installation. PMP will also be making a counter top slab to fit the window sill in the master shower.
Here are the boxes of bullnose and maybe baseboard trim tiles for the master bathroom. These were stored in the garage, but have since found their way up to the master suite. I think the bullnose is only for the edges of the tile in the entrances of the master shower, The baseboard trim tile should be used around the rest of the room and in the water closet. Now that the floor is on, they'll probably be installing these next.

The door for the storage room in the basement was drywalled over in anticipation of inspection. The interior walls of this room is still ICF, and we would have to cover it with a fireproof barrier for inspection. So rather than doing that, we've decided to close this room off for final inspection, then reopen it to complete any other finishes we might need to do. We don't really have a use for it right now, but it will be a nice space to have when we're moved in.
That's about it for this week. There should be some big changes for next weeks update. Great Oaks will probably move on to installing the front and back steps before tackling the driveway. I would hope that the tile would be starting to wrap up. Word is that we're finally going to be getting our gazebo and back porch stone delivered and installation should begin early next week. Interior painting will probably start up now that all the prep is done. There's only 6 weeks left until the end of October, which should be enough time to get everything done. Flip side of that is that we should be seeing tons of visible progress so stay tuned for some great updates as we race towards the end!


No comments:
Post a Comment