More details fall into place as we continue the march towards completion. The past week was rainy and humid, which hampered exterior painting a bit. Regardless, the front and sides of the house received its trim paint but still needs final touch up on the siding stain. The back of the house still needs trim paint and touch up, but should be done in the next couple of weeks. Prep work for the front porch columns were completed and many of the column wraps are assembled, waiting installation. Millwork progress continued inside with the application of the panels in the rotunda with only the fine detail work remaining. Exterior carpentry and painting should wrap up around the same time as interior millwork, allowing the painters to move inside before floors and finished plumbing and electrical.

The fill sand remains unspread, but the stack of Trex is nearly depleted, with good reason. Besides a few small pieces and the main part in front of the door, the front porch decking is completely installed. The front trim has received its white paint, Sherwin Williams Duration in Satin. The painter was actually on site when we visiting on Saturday and commented that the siding will need reapplication before the trim since we already have five coats of paint (1 primer, 2 incorrect gray, 2 white) on the trim. We'll need to be sure to get his card so we can call him back in to re-stain the siding in what I hope is 10-15 years.

The first and second floor of the front and side have the trim and porch ceiling recently painted in white. We decided to have the spaces between the turret painted white to match the inspiration house and make the turret stand alone a bit. Although the beadboard on the ceiling was primed, it was an off white. Now that all the crown, ceiling, and siding trim is a uniform color, it adds much more presence to the whole porch structure. Mike said that the columns should be installed by the end of Tuesday, so the painter can paint the posts starting on Wednesday. Word from the exterior door maker is that that the master balcony french door is three weeks out so final paint and millwork won't be completed until that and the front door is installed, but it's a relatively small part.

Painters tarps covered the porch, but I was lucky enough to be able to stick around until they were done for the day so I got a chance to take some pictures after they cleared the tarps. All the arches have been painted, as well. Once the columns are fascia trim are installed, there will be a unified white from floor to ceiling, with the deck and railing acting as a color break.

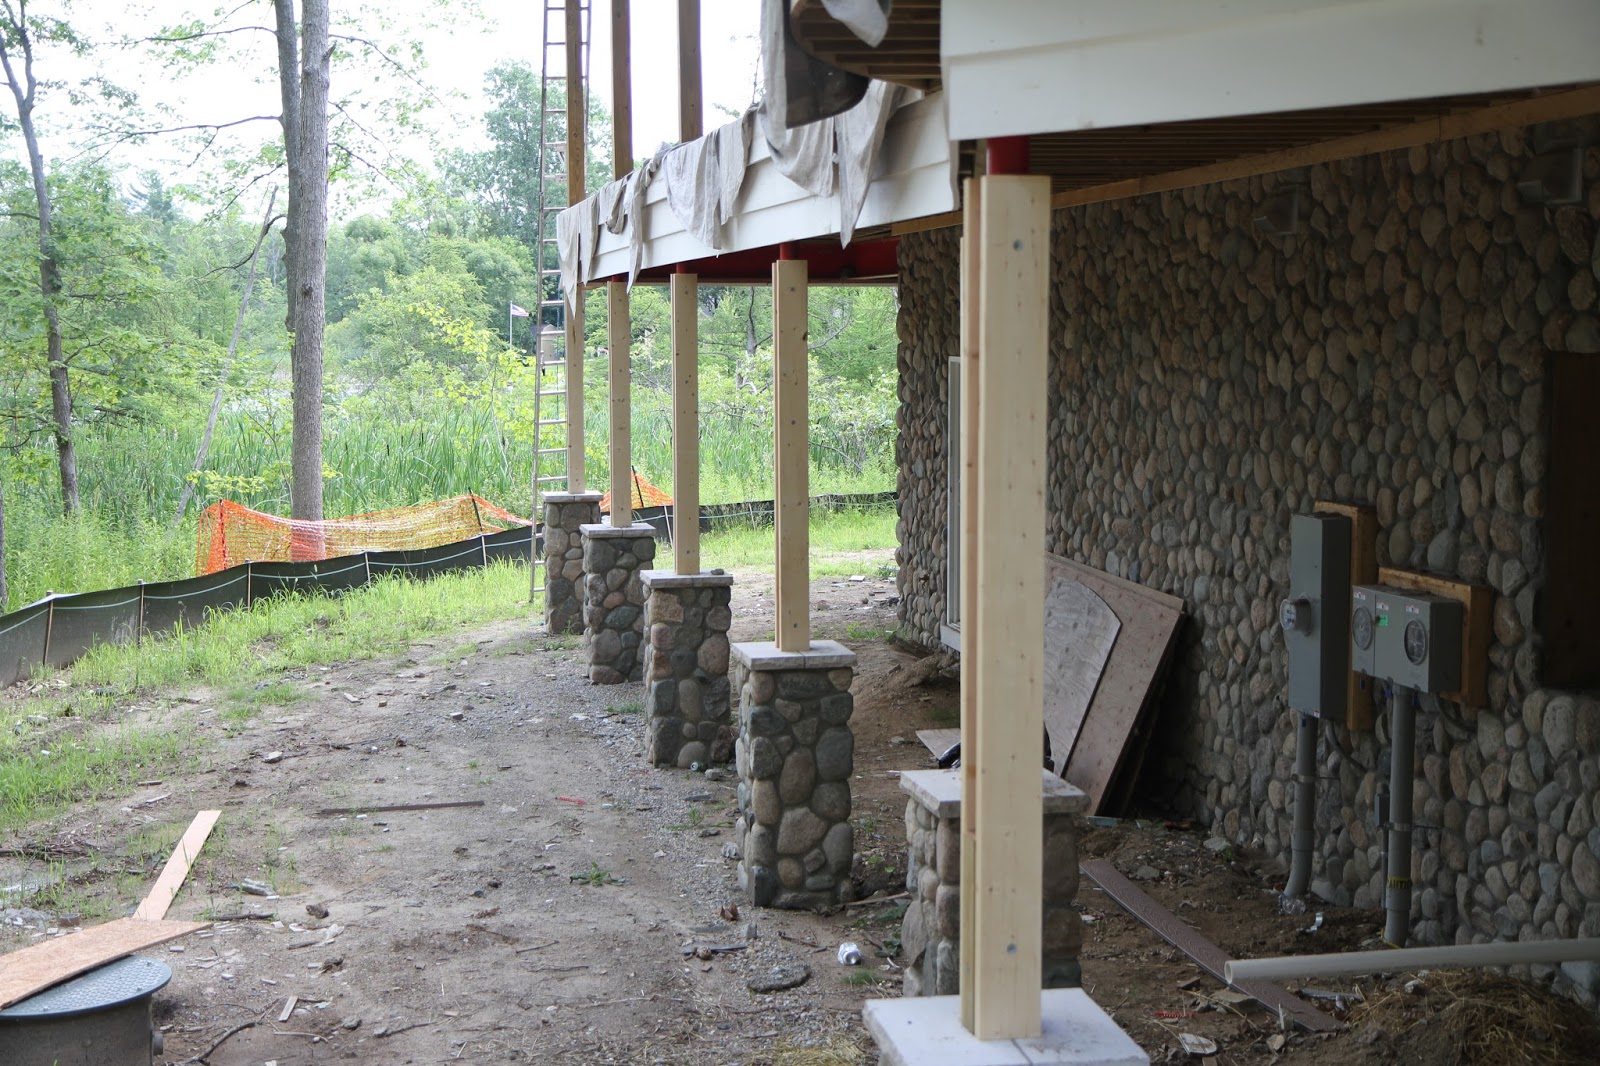
The lower porch posts on the side of the house are prepped for wrap installation. There's one steel post above that is prepped in a similar manner to these posts, which are sandwiched between two, 2x6. It doesn't look like the wood is pressure treated, which should be okay since they'll be completed covered and waterproofed by the MDO wrap. They're off the ground so we don't have to worry about water infiltration from the ground, and as long as the bottom is caulked where it meets the limestone cap, I don't think we'll have any issue with water wicking and rotting the wood. All these posts have their wraps assembled and waiting in the kitchen, but I failed to get a picture of them. I didn't see any assembled posts for the first floor.

There's some kind of mechanical fastener driven through the wood, into the steel post. I found a few strips of spent explosive nail set shells nearby on the ground, but I didn't know they could be used to drive into steel. I've only seen ramset into concrete, but I read that there's no issue with ramsetting into steel. The nail looks zinc galvanized and I assume they're some kind of iron based metal, so there shouldn't be an issue with any galvanic corrosion. It's probably intentional that the ramset nails are staggered to reduce the number of concentric penetrations to the post, which might weaken it structurally. The post wraps will be nailed or screwed into the wood and are obviously not structural.

The deck fascia has started on the back of the porch and has made its way to the front curve. It consists of three layers of what I think is Azek, which doesn't require paint. Whether or not they'll paint it to match the other white is unknown at this point. The whites are a little different and since they'll be right up against each other, it might make sense to paint it too.
Here's a look at the fascia on the side of the house, when the painters tarps were still in place for the day. There's a slight gap at the top board that widens as you approach the front of the house. This is probably due to issues in the initial construction of the front porch and Mike and his crew is doing their best to hide the flaws. It might be possible to lay a bead of caulk in that joint but it gets pretty wide. If they paint it, they could shoot the paint upwards to cover any visible wood structure to help mask the joint. We'll see how they tackle the issue.

The paint is satin, so it has a very slight sheen to it when the light hits it at the correct angle. The sheen isn't as evident in the trim since it's a rough sawn cedar. The roughness scatters the light a bit, reducing reflectivity, appearing more matte than the smooth surface of the beadboard ceiling. A glossier surface tends to be more durable and since all this trim is under the porch and protected from the elements, I'm hoping there will be less wear to the finish. Exterior paints can chalk after enough exposure to UV deterioration and weather. The painter recommended a light power washing two times a year to remove accumulated dirt and spider webs to keep the surface looking fresh.

Here's a look at the side porch looking forward. Now that the trim is all painted, you can really see how high the windows are under the front porch. Integrating in the top trim to the top siding trim helps offset the height, but for windows that don't touch the brick ledge, the upward placement is more pronounced. Ideally, there would have been a gap between the top of the window trim and the top siding trim, and a sharp eye will be able to spot the issue. It's easy to notice the oval window being cut short at the top and I would have preferred it to be separate from the trim, but we did the best with the issues left to us by lack of planning or poor architectural drawings. If I could impart one piece of wisdom it would be to find a good architect because an expensive but through plan will save you tens of thousands of dollars later.

Here's a closer look at the Sherwin Williams Earl Gray next to the white of the trim. It looks like there's some over spray of the white, but it might be white caulk. If not, the painters go back and touch up the gray in areas where they fill nail holes or have a bit of over spray. I've seen tape used to mask in most places and paper with tape in others but minor paint incursions can be expected during the painting process. They'll all be corrected in the end.
So here's what the finished deck looks like, after the painters removed their protective tarps. The boards are laid as long as they're made and perpendicular pieces define each section length. Since we installed the joists 12" on center, there's no deflection or bounce to the surface. The gaps between the boards are even and spaced due to the hidden fastener system. The front porch is 8' wide, making it wide enough for both seating and passage simultaneously. When the square footage is added up, it's actually a very big deck.

Here's the round part at the corner of the house. I thought there would be a double border on one of the rays, but it looks like they're all single width boards. They tried their best to land the borders on the posts, coming close on some, completely missing on others. They had to make the triangular wedges sized properly so if the border missed the post, it was because it had to be sectioned that way. Additional supports were added beneath when the deck boards ran closer to parallel to the joists, but there are a few places where I might add some more support. I've seen pictures of some decks that use curved Trex, and while it's possible, it would have been difficult with our radius and would probably add considerable cost. I think this is the best implementation we could expect and I like how it turned out.

Here's the corner of the house where all the borders radiate from. The angles look equal but I know they tweeked them a bit to try to hit the posts. If I took a protractor to it, I would probably find deviations of a few degrees, which is unimportant. The result looks even and clean without any oddly shaped pieces. There's nothing here leaving me wondering why it was implemented in that manner.
Here's the view of the side of the deck looking forward. By next update, all these posts should be wrapped and painted, almost completing the final look. We''re figuring out railing and Mike said he has something in mind, so that will be the final piece of the deck. Mike said of all aspects of the house, the front porch was the most frustrating part to figure out and correct. There were many things that needed to be fixed before the finishing could even begin, so having it turn out this good is a testament to his had work.

One more shot of the deck for this update. There are a few pieces on the curve to install, but most of it's there. The curve makes for some oddly shaped pieces and small jigsaw puzzle parts, but the curve is implemented well. Curving the railing will be a trick, but it's important to preserve the space and look. A better plan would have called for a curved I-beam for the main support of the deck. This would have made placement of the posts easier and more evenly spaced out but unfortunately, the architect didn't plan it out well, the first builder didn't have enough experience or foresight to catch the mistake, and the initial foreman just followed the plan blindly instead of critically thinking about it. If Mike came on earlier, he would have called for a revision so the deck would be implemented correctly. He did the best he could and it turned out great.
Moving inside,
Distinctive Designs completed the layout and installation of the panels in the rotunda. Also completed is the top border halo that goes around the inner and part of the outer rotunda walls. The bead trim still needs to be installed and it has to somehow be curved and I'm curious to see how they'll accomplish that. They do cut their own moldings, but the wood seems difficult to bend, especially with the profile of the bead cut in. They had to do a good amount of work, fitting in the halo at the top, removing the drywall in some places, but all the modifications are invisible now.

Here's the side opposite the stairs, which are also receiving panels. Below is the alcove for the powder room and first floor elevator entrance, with the second floor elevator door above it. They elevator openings are currently covered over with drywall and millwork for final inspection. When we want to install the elevator, we'll just open up the drywall and prep the elevator shaft for the hardware. Some additional millwork will be required and we'll have to have Distinctive Designs come back to trim out the additional doors for the elevator on all three floors.

Here's the paneling millwork of the stairs from above. You can see the little shelf they added to the top of the halo, which will tie in perfectly with the lip they need to install that runs the interior perimeter of the rotunda. It's not currently attached and I'm not sure if they'll stain it walnut before attaching it, but it will be the same color as the stair tread and floor. The exterior painter is staining the wood in the barrel vault and gazebo ceiling, as well as painting the interior. I'm not sure if he's also staining all the oak or if Distinctive Design is handling that color matching.
That's it for this week. Good incremental progress towards the next big steps. We still need to think about interior paint colors, which we'll probably need in the next couple of weeks. We're also looking at interior door hardware as well as cabinet hardware. The lighting list is set, and due to some additional super fancy fixtures, we'll need to kick in some money out of pocket. The tile budget is still being reviewed but it's a bit over so we'll need to figure that out. Finished plumbing hasn't been reviewed yet so we'll need assurances we're not over budget there. Garage doors are on order, floors don't take long to get in after ordering, so that's on hold. Not much else besides those punch items and 6 weeks until the end of August. It seems like it will be a tight finish, but I'm still confident we'll get there.


No comments:
Post a Comment