Our luck returned on our latest visit to the house with a sunny day and temperatures in the low 60s. Is this the first real look at spring or will winter blow in one more time? It's almost impossible to tell at this time of year but we're looking at almost a solid week of off and on rain next week. The damp weather shouldn't dampen the already made progress on the house. We were treated to an almost completely drywalled interior and more progress on the exterior stone. Although Mike though we could be completed with taping and mudding, I though it would be a little ambitious. They almost met their goal and probably have a solid week before the drywall seams are gone. Plumbers, electrical, and gas revisited to wrap up a few items as well and the house was left in a pretty clean state for the weekend, considering all the debris that's created in the drywall process.

The first thing I noticed when I walked up to the front door was the installation of the front porch hose bib. The plumbers came back to install all the house bibs around the house, five in total. These are Woodford Model 17 anti freeze and anti siphon hose bibs. I think both features are required by code, but the solid brass body and powder coated aluminum knobs are pretty nice. The plumbers also hooked each hosebib up to the cold water pex line inside the house, with a quarter turn shut-off valve for each. All the shut-off valves are accessible in the basement, but with drywall going up, we'll need to make sure they remain that way.

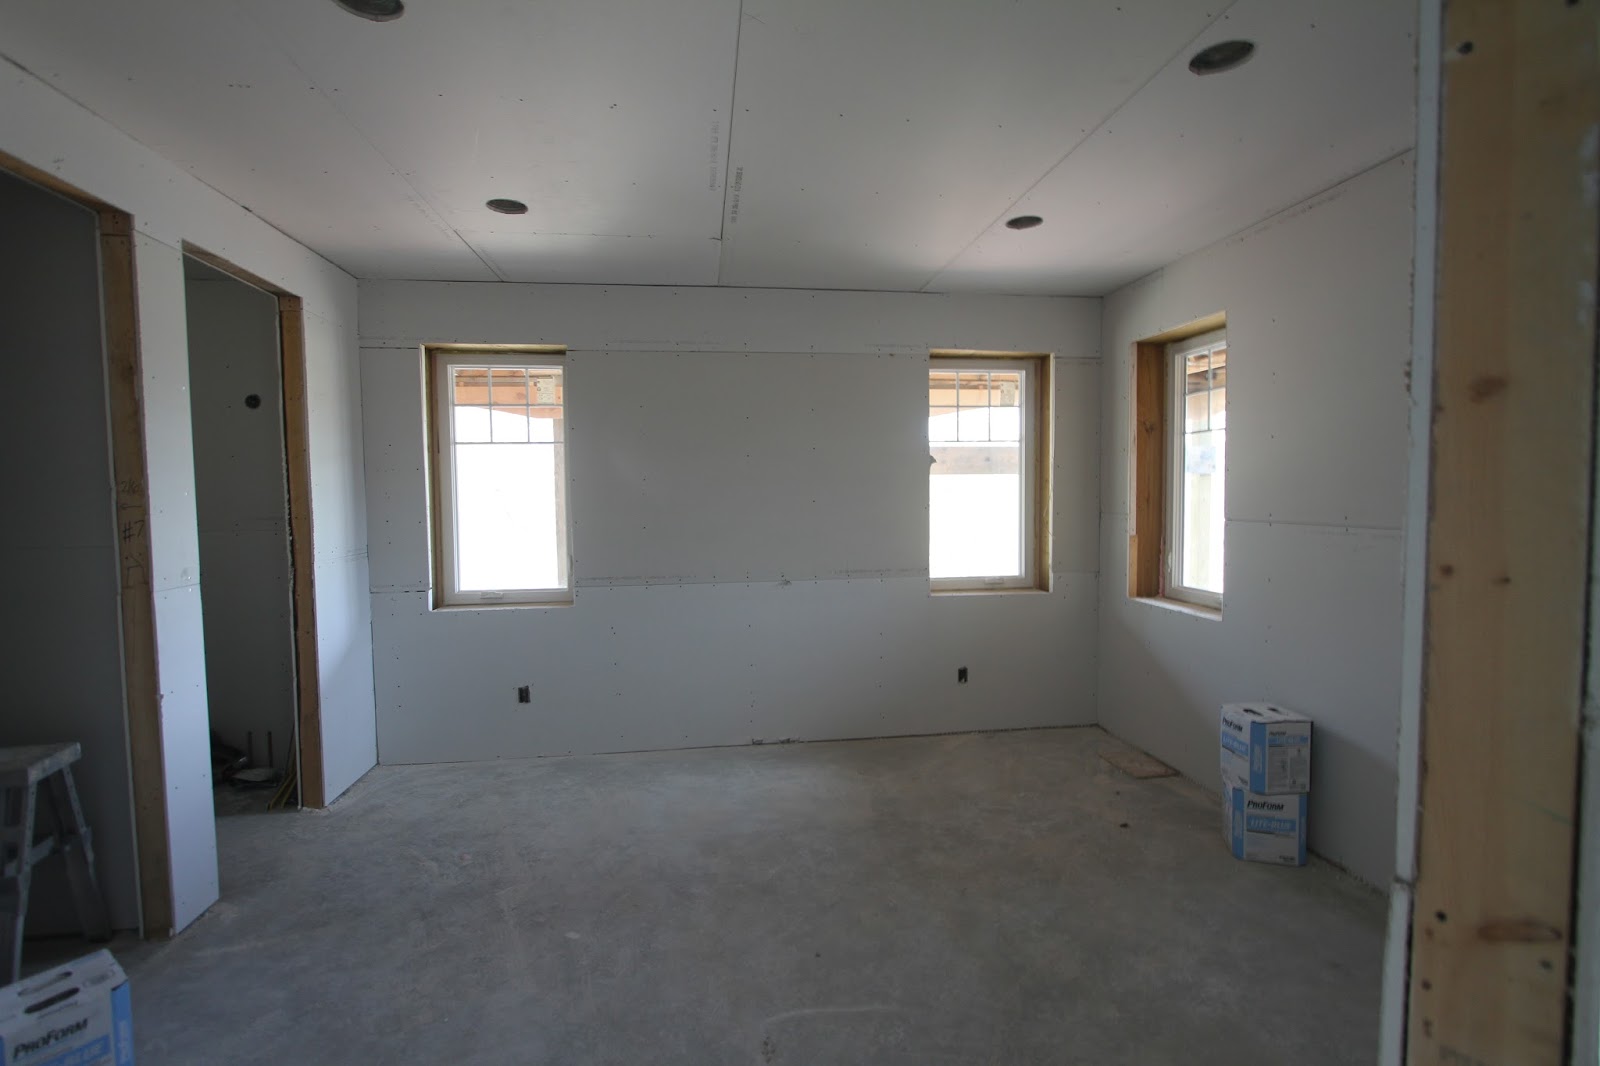
Here's the study with completed drywall hanging. The stack of boxes in the middle of the room is much smaller now, but not because it was used, but because they were distributed around the house. Once mudding begins, we'll see fewer and fewer of these boxes lying around. The electrical receptacles in the floor still need to be cut in, but that can wait since this room sits above the mechanical room, which most likely won't get drywall on the ceiling. It's pretty amazing to see how rough the openings are at this stage; jagged edges of drywall, torn paper, rough cut openings. It all gets refined and covered up during taping, mudding, and trim work. Good thing all that other stuff exists.

Here's the drywalled dining room. Even with our eight foot porches, there's more than enough light in the house after the walls are up. The dining room and study are southern exposure rooms, but I was worried the porch roofs would make the entire house dark. Since the walls will be a lighter color or some kind of white, this is close to the level of light reflection we'll get. The floors will be dark, which will absorb some of the light, but hopefully not by an appreciable amount. The sawhorse table in the middle of the room offers a little indication on what the room will feel like with the final diner table in place. We're hoping to fit at least a 10 person table in the room.

Here's a shot of the rotunda and great room beyond. This area is probably the darkest after the completion of the solid walls and it still has a good amount of light. There will be even more when the front door sidelite glass is in place to allow more natural lighting. The great room windows are north facing, so they never get direct sunlight. Even still, they provide enough natural light into the center of the house, especially through reflection from the second floor balconies above. Again, the space might darken up a bit when we have the dark wood floors and staircase in but considering the room is in the center of the house without any windows, it's pretty well lit.

Here's a shot of the rotunda from the elevator alcove. The alcove was boarded up with drywall for inspection since code requires all insulated surfaces should be fireproofed. The foam in the elevator shaft is still up, so we would have had to cover it with drywall. What we'll probably end up doing is tearing out the foam insulation in preparation for the elevator, then make a wood floor on each level so the elevator shaft can act as storage until we're ready to install. Finished doors would need to be installed anyways so those will go in, and we'll just put locks on the doors to limit access. The idea is to have the whole thing prepped so we can move on the elevator install when we feel like we can handle the cost.
The band of concrete floor is still visible because special treatment will be needed to conceal it. It was poured a little out of flush with the rotunda walls and the choice was either to grind it down, or figure out a way to cover it up. We decided we'll install a wood trim "halo" over the concrete that will be carried to the inside edge of the rotunda. This trim would also be the top of the paneling that will be installed on the stair risers.
It doesn't seem like the installers had any difficulty applying the drywall to the curved surfaces. They used one sheet of half inch thick drywall on all the curves, both concave and convex. They probably scored the back side to make the curve if the radius was too tight, but I didn't see any signs of scoring segmentation or drywall breakage on any of the curved walls, so they did an excellent job.

The great room is completely covered in drywall, high ceiling included. They just used scaffolding and muscle to get the large pieces of drywall up there, which is impressive in itself, but to do it so quickly is amazing. I think the taping and mudding will take longer, but closing up the ceiling in this space has done wonders in keeping the house warm and making the room feel bigger. I've heard that when the drywall goes up, the rooms feel larger, which is counter intuitive to me, but true. The great room feels larger and I can get a better sense of how potential furniture pieces will fit in the space. Wires for the floor receptacles have been brought through since we need to finish the basement space below. There's a fine layer of drywall dust throughout the entire house, and I can't imagine getting it all clean. It will probably take a good vacuum to remove all the fine dust, but that clean up won't happen until after all the drywall work is completed.

Here's a look a the other side of the great room with the entire fireplace column clad in cement board. That sure will make it easy to attach the TV mount. There's still a bit of drywall that needs to go up here, but it will be pretty quick work with just a few openings in the walls. With the upstairs bedroom adjoining walls closed off, I feel like this room is defined and enclosed better, but it's still open to the rest of the house. We never wanted to go for the "open concept" look but having two entrances and two balconies still keeps the room connected to the rest of the house.
The installation of the cement board on the fireplace column offers a hint at what the room will look like with the final stone installed. It offers just enough differentiation from the drywall to give it definition. I can't wait to see the stone installed, but we're a long way off from that.

Here's the other side of the fireplace column, in the space between the kitchen, rotunda, and guest room. This is the last place drywall needs to be installed on the first floor, with the pantry and some of the kitchen wall incomplete. After these parts are completed, work will continue in the basement since all the insulated spaces need to be fire protected. We managed to sign our names on one of the wall studs in the pantry, so at least we got to leave our mark for the future. This house will be standing much longer than we'll be alive, and I can't see someone tearing out the pantry, but if they do, at least they'll know who built the house. Almost all the drywall is up in the kitchen, which makes the mudroom pretty dark, but since the mudroom exterior door has a half window, I think we'll have enough light in there too.

Here's a shot of the kitchen that needs to be completed. Besides the pantry, it's just the refrigerator/mudroom wall and the header across the butlers pantry. Once the drywall is taped and mudded, we can begin with the installation of the kitchen cabinets, which are currently sitting in the garage. Every time I walk through this space, I try to imagine where the cabinets will be and follow the traffic patterns they'll make. I've traced out paths from the garage to the pantry, great room, and stairs multiple times. Someday soon I'll be walking the space and living there. It's mind boggling to think about.
The temporary furnace remains in place, but didn't turn on the entire time I was there. The furnace in the basement turned on a few times, but I would expect that since all the cold air still goes down to that level.
Here's a look at the rotunda towards the front door. Hardwood door and Bevel reports that all single exterior doors are ready to be delivered, and the master french door and front door still need to be stained and coated. We probably won't take delivery of the front door until near the end since it's still the primary entrance door and we don't want it to be damaged. It will be nice to have all the other doors installed but I hope everyone is careful with them.

All the bedrooms are done on both the first and second floor and if you've seen one, you've seen them all. Here's the guest room downstairs, ready to be taped and mudded. Nothing complex or exciting in here save for the curved wall. Every bedroom in the house has a little bit of curved wall to it. In the original plans, all the bedroom walls were straightened out with walls to conceal the back sides of the rotunda curve. I like that we got to keep them and I think they're a nice feature to have. The rooms were designed to have one furniture configuration so there's no guess work about the best layout for the larger pieces of furniture, but we can still be creative for smaller pieces.

Here's a shot into the guest room bathroom and closet. This is basically the same as the bedroom above it save for the shower/tub configuration. In the guest bathroom, we have a zero threshold shower so our elderly parents will have no problems with ingress/egress. The bedroom upstairs has a tub since it's slated for one of the kids. Other than that, and the finishing materials, the rooms are exactly the same. Designing the closet system for these rooms will be a little tricky since one of the walls is the backside of the curved rotunda. They're both small walk in closets, limited by that wall and the in-swing door, but should still offer adequate storage space.

Here's what the master bedroom looks like now that the drywall is hung. Even though the dividing wall is the full height of the room, it doesn't block all the light coming in the windows above where the bed will be. Add to this full glass french doors on the master balcony, with a southern exposure, and you'll have a master bedroom bathed in light. This is another space that seems to have gotten bigger with addition of the drywall. This is going to be a sitting room and we can easily put a few chairs, or a chair and love seat in the space, including a coffee table. With all these awesome places to sit, I can't decide which is my favorite.

Here's the bed side of the master bedroom. The space between the windows is measured out for a California King sized bed and the window height is purposeful to fit a nightstand underneath. We'll need a solution for window coverings since work schedules don't always allow for sleeping at night. It might be possible to have curtains drape across the entire wall since I can't see using a short curtain at the top. We have horizontal blinds in our current house, but those don't block 100% of light, so I think the only solution is blackout curtains of some kind.

Here's the drywalled laundry/craft room. It's neat to finally see all the extensive plumbing and sound insulation covered up and be able to realize the true depth of all the extra boxes. The lighting control panel is just barely seen off screen on the left and you can see the dryer vent box in the background. Another south facing window, this room will always be drenched in light and if we keep the door open, helps to light the rotunda. I think the only time we'll need to close this door is when we want to cut down on the laundry machine noise. This room has a small broom closet, so this is where we'll be keeping all the second floor cleaning supplies. An electrical receptacle in the closet helps with recharging cordless vacuums.

The turret room is now completely closed in and we couldn't be happier with the results. The space really came together and the turret, which was a huge design pain point, looks fantastic. We spent a good amount of time in this room, thinking about bed layout and decorating since this will be where our twins will sleep. I think the space is big enough to act as a bedroom and a play room, especially with the sun soaked turret. They'll have their own bathroom and large walk in closet so storage shouldn't be a problem. Really looking forward to decorating this room.

Here's the turret bedroom looking towards the entrance door and peeking into the bedroom. The turret bathroom contains the large circular window that's prominently displayed on the front of the house. I think of all the bedrooms in the house, the furniture arrangement in this one is the least defined and we might have done that intentionally. There are obvious spaces where furniture should go, but it's pretty open, so we'll make things how we think they should be when they're still young, and let them figure it out when they get older.
Here's one more look at the drywalled rotunda. The ceiling sits one foot higher at 10 feet and the windows are seven feet tall. This will probably be a general play/sitting area for now and we can decide to make window bench seats in the future if we want to. We're tempted to just curtain off the entire turret for light control, and dress it up to make it look like the curtain of a stage.
Drywall has already begun on the curved stairwell down into the basement. It looks like the furring adjustments worked out well since the drywall makes a smooth transition around the curve. Just a few more pieces in here and it will be done. The underside of the stairs should also be drywalled and lights will be on the right wall.

Drywall installation hasn't begun in the basement yet, but I figure it will be completed by the end of the week. A little more ceiling structure was installed to box around plumbing and ducts. There are odd bump downs to accommodate drywalling around these things, but we figure when it comes time to finish the basement, we'll normalize the drop and clean up all the ceiling elevation changes. The drywall is just needed to pass inspection and we can change it in the future. Originally, it was planned to keep this space unfinished upon move in, so getting it clean and drywalled is a large upgrade on its own. This way, I can finish it at my leisure while still using the space for play and storage.

This stud wall was added in preparation for the basement drywall. It's actually the wall for the future bathroom, but for now, the mechanical room and bathroom are being walled off together. When we're ready to finish the basement bathroom, we'll simply put up a wall between the mechanical room and complete the bathroom. It will be easier to contain the mechanical room this way while still providing flexibility to finish this space off.

The large make up air duct has been boxed up, and I'm a little surprised we needed it. I though the flexible pipe would fit up into the ICF cavity carved out, but Mike saw fit to make a soffit. This is probably a good idea since we still need to consider installing a filter and electric damper in the line. This will allow us access to install and maintain these things. It's unfortunate it has to be there, but I don't think it will interfere with our plans for this space. I'll have to figure out how to conceal the large part that goes under the beam, but I already have ideas on how to accomplish that.
Here's a look at the basement stairs going up. That boxed in beam in the upper right corner of the frame will be difficult to normalize. If we drop the ceiling down, we'll need to make a false header across the stairwell, which will be awkward. These are things that we'll need to figure out when we're ready to complete the basement, but it doesn't hurt to think about them now.

Out in the garage, all the cabinets for the kitchen, mudroom, master bathroom, and butlers pantry have been delivered. We're still expecting delivery of the other bathrooms and will hopefully have some space cleared out by then. All the boxes have been moved towards the center of the room since the drywallers have been working in the garage. Nearly all the drywall is in place with some large pieces still needed on the walls and ceiling closer to the house. The labels on the cabinet boxes aren't super descriptive, but they do call out the color and style, so I know more or less where they'll go. I think the large stack of material in the corner is baseboard and crown molding.

Here's a smaller stack of cabinets. The cabinets are generally in three stacks and protected by their original boxes and wrap. They've been like this for half a year now, so I'm eager to see them unboxed and installed. This constitutes a surprisingly huge portion of our budget and it was a huge hurdle to overcome, but it's something that is used the most in everyday activity so quality is important. I hope to never have to replace these.
You can see the remaining drywall in the garage. I'm not sure if it's all for this space or if some of it is overflow since most of the garage is completed. The installers use the wheeled scaffolding to reach the higher places around the room. Code requires that no penetrations are present in the ceiling, so we have light boxes installed up there with the expectation of installing surface mounted lights, probably LED work lights. They should provide more than enough light for the entire room.

Work progressed on the exterior stone as well. Old Country Stone has the fireplace stone nearly finished, but I'm going to have to remind them of the desired design. While the opening of the firebox looks good, it was intended that the border stone should have a staggered arch look. I contacted OCS last night and they already got back to me stating that it's not an issue to fix. It's odd that the detail was missed since I sent them a picture of the the intended design and they used to have it on site, but I think it has since been lost. The gaps aren't mortared yet, so changing it isn't too hard.
The entire back of the fireplace is completed up to the roof line. All that's remaining is the chimney above the roof. Flashing is installed between the roof and cinder block, which will mostly be covered by stone. Like the front, the joints still need to be mortared, but I'm really liking the look of the stone.
Here's a closer look at the interface between the two stones. There are still some spaces that will be filled with smaller stones and mortar but it's close to completion. Small chips are used to space the stones during the laying process and these will obviously be removed when the mortar is filled in. I think the largest voids will just be filled with mortar.
A large subpanel was installed in the unconditioned under porch storage space. It's wired with a thick gauge line and currently only has a single 100A breaker installed on a 240V spacing. I think Mike got this in so we could use it for the future pool expansion. Any electrical connectors we'll need can just be run under the back porch and exit out the back of the gazebo to be trenched to the rear or the property where the pool will be. This should be enough amperage for the pool and having it in this location will make it easy to shut down seasonally. The barbecue gas pipe was also connected to the house through the storage space.
OCS also started applying the granite cobble to the end of the garage. It looks like they're simultaneously working on the gazebo and the house wall stone, which is impressive considering they're usually only fielding three masons. While progress isn't as quick as when all three are working on the same area, it's still good progress.
Here's another shot of the large section that has been completed so far. There's still a good amount that needs to be parged up on the wall but there's a good amount ready to be stoned. Once they're done here, they'll probably move onto the retaining wall, then onto the rest of the house. There are currently three and a half pallets of stone on site, and I don't think this is enough to complete the house, so we're probably looking forward to more deliveries.
The remote blower has also been installed in the porch roof. The Broan HB-11 has a pretty short run to exhaust with few bends. It's currently sitting on plywood, but I'm hoping we'll be able to suspend it to cut down on vibration noise. Even though it's close to the exterior wall, I'm not too worried about the noise level inside the house since we have concrete and foam walls. I not sure how much noise there outside when this thing is running full blast, but I'm hoping it's tolerable.

Here's the exhaust vent for the kitchen. Its placement is a little unfortunate since it's outside the side master bedroom window and in sight of the master balcony, but there really wasn't a better place for it to go. If we installed it around the corner on the other roof section, it would still be close to a master bedroom window, but it would be more visible from the back yard. There was really no getting away from this location unfortunately. I'm just hoping that smells won't vent back into the house if we have a window open.
That's about it for this week. Tons of drywall and stone progress with touches from each of the rough mechanical installers. We have a meeting in the middle of the week to review interior trim and doors so we'll get a peek at the midweek progress. I might provide a midweek update if there's enough information. If not, I hope to fill my next weekly progress update with pictures of completely finished drywall .


No comments:
Post a Comment