We had a meeting with Hardwood Door and Bevel to solidify the plans for the doors we have ordered so far, and put in a request to get two more doors ordered, the master bedroom balcony door and the garage exit door. We still need to finalize the leaded glass in the front door sidelights, but have more solid plans on the great room and mudroom doors. They'll be coming out today to measure for the other doors we added. Since the store is so close to the property, we had a chance to take a look at some wood floor at a local supplier, and swing by the house for a mid-week update. It seems like I'll have to do these mid week updates or my weekly posts will be way too long for all the progress that's being made.

This is the floor we're looking into. It's made by Artistry Hardwood Flooring and it's from the Smoked Oak color in the Windsor collection. It's an eight inch wide, 3/4" thick white oak engineered floor with a 5.4 mm wear layer. It's finished with a wax and oil finish rather than a polyurethane and the wood is not stained. To achieve the color, it's smoke treated, so the wear layer doesn't mean much because you'll never sand and refinish the floor or else you'll lose the color. The hard wax oil finish soaks into the wood and leaves a thin protective surface that needs to be refreshed every few years, depending on use. The advantages are that it allows the wood to feel more natural, compared to a surface coated polyurethane, and that small scratches can easily be buffed out, so while the surface isn't as protected as polyurethane, you won't see the "skin" damage that you get with scratched poly.

Since I obtained the garage door specs from the manufacturer, the rough carpenters have boxed in the garage door openings to the radius of the arched windows on the door and it's everything we wanted. All the garage doors will be radiused like this since they'll all be the same style. It's nice having walls that are thick since the garage doors will sit ten inches deep on the inside of the wall. It creates more depth and dimension for a more pleasing appearance.

Here's the single bay garage door opening all trimmed out. The trim on the outside corner to the left is short because it still sits on the brick ledge, but both the brick ledge and granite cobble will stop at the garage door trim. Just like the rest of the house, above the brick ledge will be shingle. You can see by how high the garage door is, how much fill dirt we'll need. Right now, there's almost a two foot drop to the current grade.

So here's the end result of a brief discussion with Mike on how we can finish the vertical window dividers. They managed to figure out a way to reduce the divider so it wasn't taking up the whole sill, while still allowing some insulation in between the outside and inside trim. From the previous post, the divider was going to go all the way to the inside edge of the sill. I think this is a great solution.

The divider now only takes up one and a half inches plus what ever interior trim board thickness. That gap will probably be filled with an EPS foam and will offer more than enough insulation. I'm not worried about this being too cold since most window frames offer less insulation than what we have here.

The great room fireplace has been roughed in to the correct height. We wanted the two way fireplace to sit about a foot off the ground since we're not planning on having a hearth. This will allow a better eye line sight from the front door to the rear windows. Raising this will also probably mean raising the TV above it, but we could probably come up with some kind of a lowering TV mount solution for the months of the year when we're not using the fireplace.

The carpenters are also hard at work making the gazebo right. They've boxed out the drop down for the side of the gazebo against the rest of the porch and started to install trim to hide the beam structure. We're still trying to figure out the ceiling. We trying to go for bead board on the angled and flat ceiling, but need to work out the details of the installation.

Here's another angle of the rim trim around the gazebo. Since the height is so great, they had to use two boards to span the structure, then another trim board to span the seam. I think it's a good look and will look great when it's all painted white. It gives a nice shadow line detail going around the perimeter.
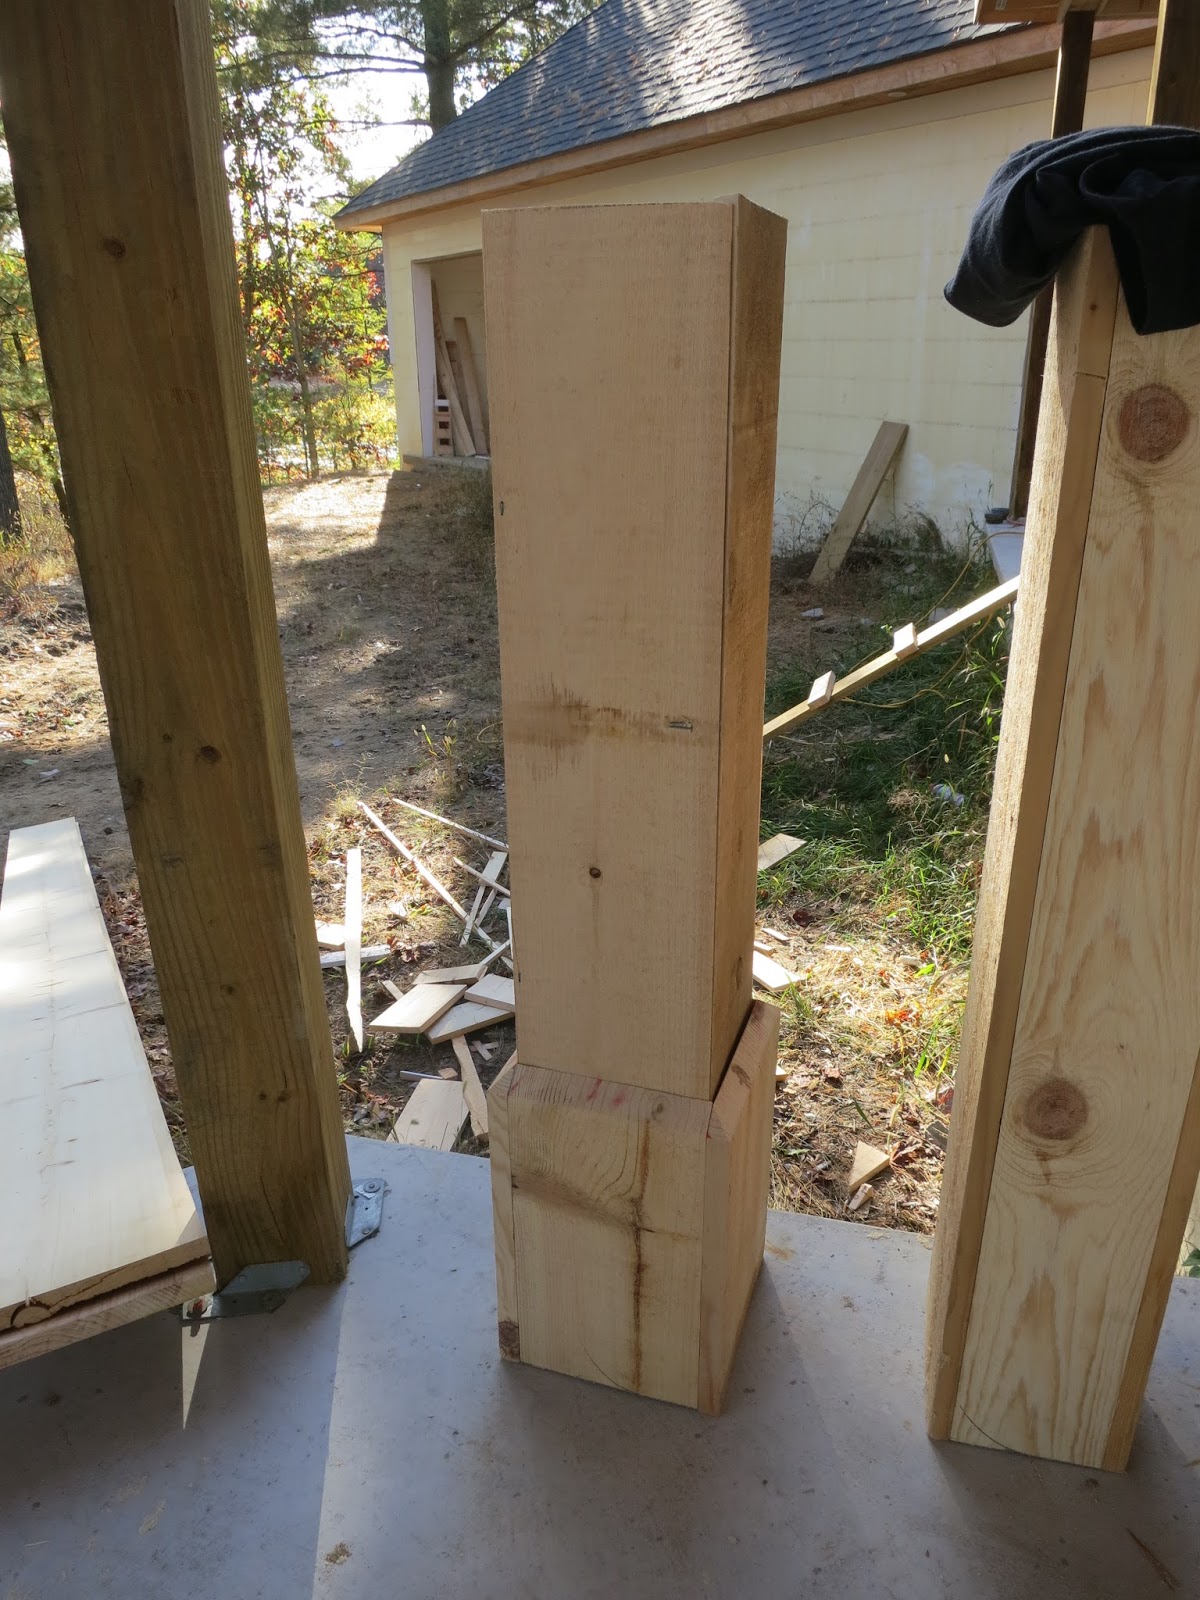
Here's a rough mock up of the post coverings. We'll probably get something prefabbed that clam shells onto the 6x6 posts, but they'll most likely be square. The inspiration house had round columns, but unfortunately, there was some discrepancy with the elevations and the blueprints of the house. The way the front porch is constructed, it would be very difficult to use round columns. There just isn't enough space between the post and the edge of the deck for a round post and base, so we would have to really build out the fascia of the deck by three or four inches in order to make a round post work. Rather than add that expense and head ache, we've decided to roll with it and find a good square column. Some times you just have to compromise.

The upstairs fireplace was also roughed in, but again, I'll have to get the final install spec to Mike so he can complete the opening rough. This will also be elevated, but we're thinking about putting a mantle on this one. Gotta have somewhere to hang Christmas stockings.

They installed a weatherproofing membrane on the master balcony since it needs to be waterproof to the deck below. There's some vent duct work in there that should be protected, and since there's bead board on the ceiling below, we can't allow water to get trapped in there. Sleepers will be installed on top of this to which the Azek can be attached. This is what you want to see with a water proof membrane. Under the door sill, and up the sides in a continuous piece.

They added on this boxed out trim to act as a terminating post for the railing. There's so much exterior finishing detail going up right now that we didn't expect, so even though we've planned almost everything in our heads, we're having to jump ahead to the finishing work mindset. There are some fine details we thought we had time to figure out, but we're now finding that we need answers to.

The balcony beams were also boxed in, but they'll have to be changed since we didn't get a change to tell them they need to be arched. The carpenters were following the elevations, but the elevations had very little detail so I'm having to revisit them and figure out all the things that are missing. We've had to make a few change orders but I think we've finally fit in everything we're looking for.

So the saga of the free standing wall continues. We suggested that maybe adding wings on the walls would stabilize the design, but when they attempted it, they discovered that the wall was still too unstable. I think physics is against us on this one so we might just have to take the wall to the ceiling. Margaret suggested that we get a piece of custom furniture or cabinet shelving to take the place of the wall and act as a room divider, but we intend to install a TV on this wall. While we could probably find something that could work, we'll have to throw around the idea of having a non-permanent piece to act as a room divider.

The curved shower dividing wall will also have to go to the ceiling and this is where it's a bummer. We were hoping to have a free standing wall here so the light from the window would make it into the rest of the bathroom. The walls are just too unstable to free stand, so we'll have to make do I guess. There are a few techniques to attempt a tall free standing wall on concrete, but I think we'll just concede this design idea.

The laundry room window looks m much better with the thick center divider removed. Before, it looked like a pedestal in the middle of the window, but now it just looks like a flat window. As with the other windows, there's still enough room for insulation.

I think this divider takes up even less thickness than the other windows since it looks barely thicker than the window itself. There will need to be a final trim piece that goes on, but that will add a nice dimension to the window depth.
So we have another meeting at the site this week to talk to our neighbor to see if we can inconvenience them to take out some of their driveway so we can connect to the sewer. Unfortunately, we can either tap into the sewer on the far side of their driveway, or we can dig up the curb and street to connect to the line as it goes the the main branch, which would be much more expensive. We've met the neighbors a few times and found them to be very pleasant and reasonable people so I don't anticipate any issue. I'll try to get to the site this weekend and give another update. I'm sure there will be even more progress to report on.
No comments:
Post a Comment