Still in the icy gasp of winter, we gained a good snowstorm over the last week, dumping 6-8 inches of snow on the house. Thankfully, that didn't stop the tile and floor installers from coming to the house to do their much needed work. This week saw progress on the remaining tile backsplashes as well as the start of wood floor installation on the second floor. Installation of bathroom accessories makes the house feel one step closer to a legitimate living space, something we don't even have in our current house. Nearly all the cabinet hardware is installed but we're still waiting for some of the pieces to be delivered. One more week until Christmas, but there's the time between Christmas and the new year when a lot can happen. Finishing tasks are winding down, but there's still some large items left to complete.

The replacement exterior light for the barrel vault at the front door was delivered to the house. We needed to get a replacement because the original didn't include a yoke to mount the light from above. We also decided that the yoke installation would place the light too low, so we went with a simpler rod hanging mount. Margaret thinks it will still be a little low, but we'll see once it's installed. I should be able to shorten the mounting rod if it's an issue so I'm not worried about getting that perfect height.
The fixed Framburg sconces were also delivered. If you'll recall, the glass wasn't fitting properly in the light and it was determined that the correct glass base wasn't installed. We could have either reordered the light or sent them back for repairs. We chose the later option since the former would have been another 4-6 week turnaround. I made sure to check these myself and found them to be correct.

The foyer sconce location as its drywall patch but needs some mud patching and painting before it disappears. Hopefully that won't take long so we can finally see what these things look like properly. The Sound Vision and the electrician should be visiting the site this week to finalize all the electrical installations. I know I've said that before so I'm really hoping this will be the last time we'll need to have them back on site. Some line voltage rooms still need to be connected to the basement panel and many of the lights need to have the finished programming performed before we reach preliminary functionality. After we move in, we can call Sound Vision back to start setting up scenes and multi function buttons.

More wood floors were delivered to the house and are staged in the office. An additional 300 square feet of flooring needed to be ordered to complete the second floor. The installers didn't want to start the work until the additional material was delivered so they could mix the contents of all the boxes as they installed, just in case there were color deviations in the boxes they could distribute across the entire floor.
The dining room is also being used to store some of the wood floor for the second floor. Additional boxes are already on the second floor near the fireplace. It's difficult to judge how much area these boxes will cover, but we have the three bedrooms and the rotunda walkway to cover so I'm hoping we won't run into any more delays with this installation. Nearly all of the plumbing and tile work is completed on the second floor so there's no reason why we shouldn't see the completion of this by the end of the week, as long as everyone shows up every day to work.

The backsplash tile in the kitchen is completed... well nearly completed. All the tile that's installed is grouted but there's a small gap between the top of the tile and the ceiling, behind the cooktop. Mike said they need a few more sheets to finish this part off and then we can finally get the hood installed. I really like how the backsplash turned out despite all the turmoil with tile direction. I don't think it's too trendy and I think it will age well, hopefully never needed replacement.
Here's a closer look at the tile with the grout installed. We used some kind of a white grout, but there were so many variations of white, I'm not sure which one it was. The grout lessens the the definition of the tiles so that the only obvious visible lines are the darker tiles. I think there's a bit of grout at the bottom of the tile up against the soapstone counter. I didn't touch the corner between the two, so I'm not sure if it's caulk or grout.
The fridge and freezer still need to be installed because the plumber and electricians weren't on site last week. Hopefully this is something that will be completed in the coming week. Here's a look at the entire kitchen with the backsplash installed. The lights will be adjusted this wee and the hood should start to be installed now that most of the tile is up.
Here's a view of the kitchen backsplash and the little bit that needs to be completed. The pipe sticking out of the wall is for the pot filler. I'm hoping the rest of the tile will come in quickly because we can't fully install the chimney that will cover the pipe until that tile is in place. Since the stone is natural, we'll probably have to seal it occasionally with sealer to help protect against grease splatters from cooking. Hopefully the powerful hood will help take care of some of that.
Here's the other corner of the kitchen with the ovens, dishwasher, and sink. All the tile here is installed and grouted, mostly completing this part of the kitchen. The appliances are still not powered on, but I'm not sure if that's because they didn't turn on the ciruit, or if it still needs to be wired up in the panel. Really all that's left for most of the kitchen is hardware install and glass in the upper cabinets that flank the sink.
Even though we're still waiting for the hardware in the kitchen, the hardware in the butlers pantry has been installed. Like the kitchen, we have two kinds of hardware installed in this area, knobs for the doors and handles for the drawers. Finished in a brushed stainless steel, the knobs are a little chunky with a light ripple on the surface. The ripples are oriented horizontally but could also be turned vertically. I think horizontal works better with the cabinets and wood grain direction.
The handles are the same brushed stainless steel material and fairly simple in design. They're basically tubular handles with a little profile to them. Nicely rounded, they feel great in the hand and soft to the touch. No hard edges to really catch anything on, I think they offer a nice compliment to the clean hard lines of the shaker cabinets.
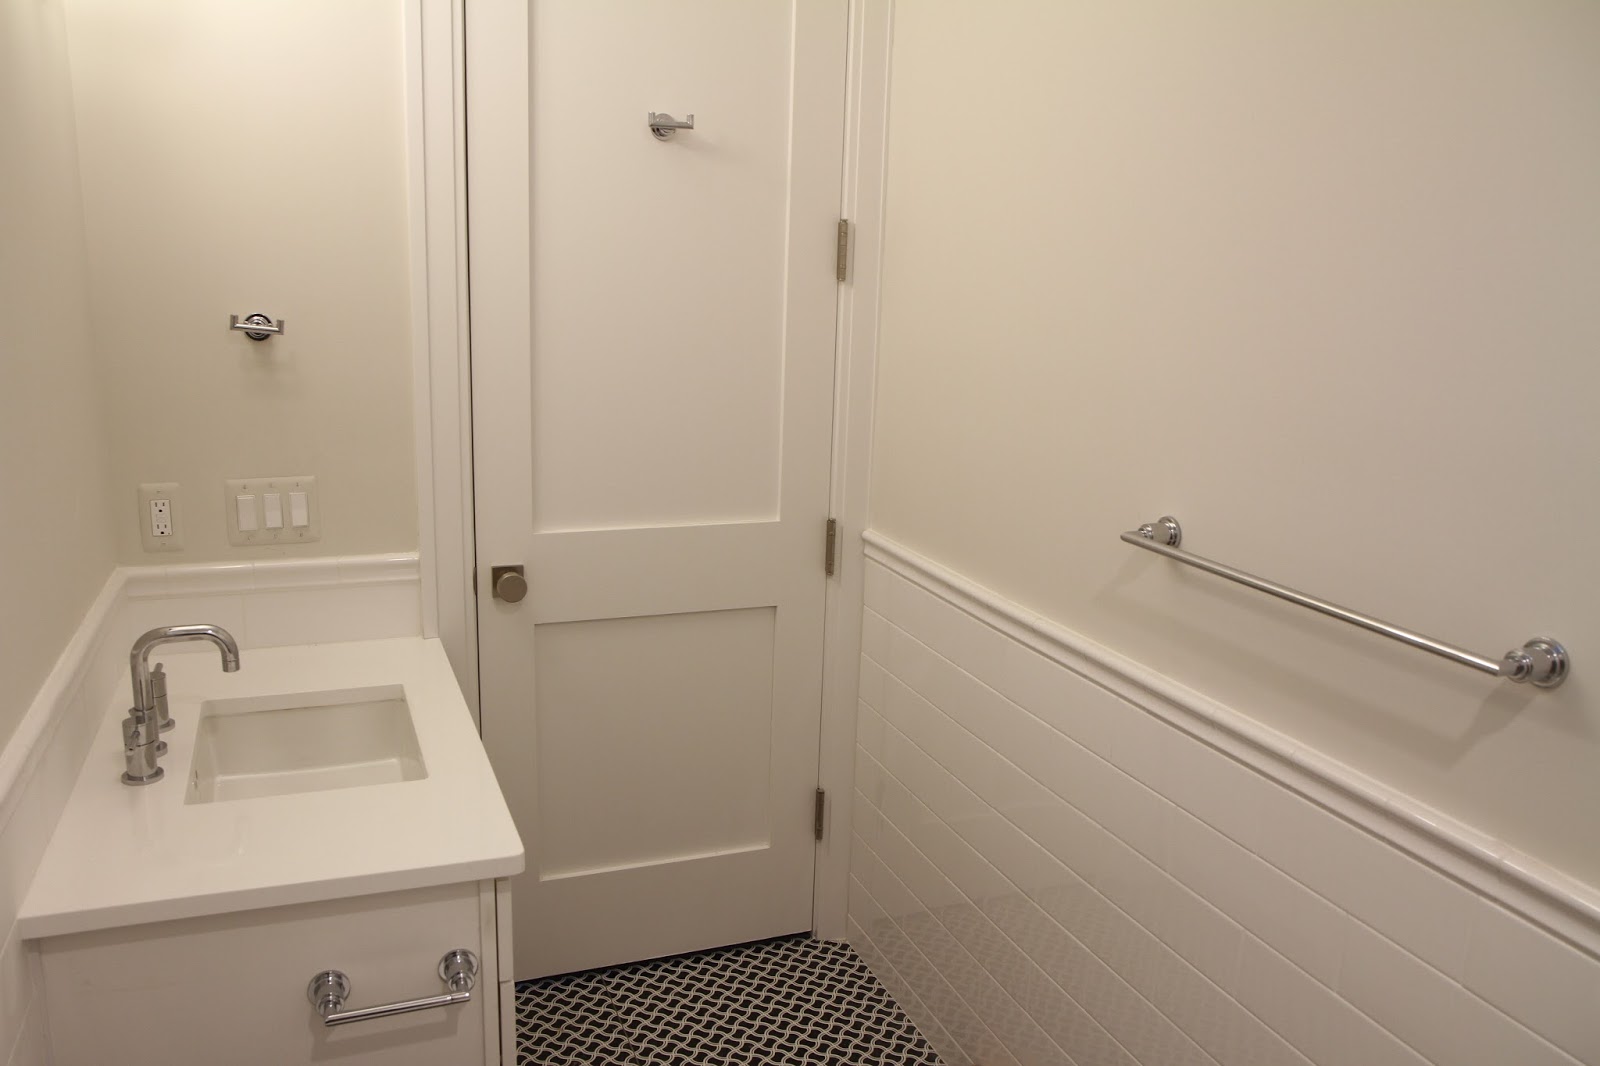
The mudroom hardware has also been installed. We went with more of a craftsman or arts and craft look here with the visible through mortise and square pins holding the pieces in place. We wanted something a little more utilitarian looking in here since the purpose of this bathroom is such
All the bathrooms now have all the bath accessories installed. Most of the bathrooms have the same style accessories except for the master bathroom. We went with a more simple tubular design, which matches well with the various sinks around the house. These match especially well in the guest bathroom since we're using a three hole faucet in a similar style. In general, we got towel bars, toilet paper holders, and a few hooks placed around each bathroom. All the door knobs have also been installed around the house. I think every door is now populated with the Emtek doorknob, but we'll still need to sort out door stops.

Wood floor installation on the second floor has begun with the longest section on the floor. As with the first floor, the longest section is installed first so it can be guaranteed that the floor will be straight and contiguous through all the rooms it goes through. If you started installing using one room's wall as reference, it might not end up being parallel with another room's wall, which would be glaringly obvious. Since we don't have to worry about putting a nail through the floor's tongue, the floor can be installed in both directions. There isn't much flooring to be installed in the second bedroom, but the installers do have to contend with the angular and curved walls so it's not a simple installation. The planks have to be installed within at least a half inch of the baseboard so the shoe molding can cover the rest of the gap. As with the rest of the house, it's a glue down, so there's no need to worry about expansion and contraction.

There are 6 courses of flooring laid in the second bedroom upstairs but it looks like the floor is cleaned and prepped. I'm hoping they'll be able to make short work of the second floor, but from experience, they don't seem to come to the site to work every day during the week. If we could only get them here on a regular basis, I'm sure the floor would be finished quicker.
The rotunda landing is finished up to the greatroom overlook and connects the flooring from the second bedroom all the way into the master bedroom. The rotunda floor has been cleaned and there might be some new leveling compound on down. It will take a little more time to work on the rotunda since there will be short installed sections involved between two curved borders. Straight cuts, even on an angle, are easier to make than curved, but at least it doesn't have to have finished carpentry level accuracy since the edges will be covered by a shoe molding.

There are 12 courses laid in the master bedroom. They'll have to carefully lay the flooring around the dividing wall and pick it back up on the other side. If there's any deviation from parallel, there will be gaps in the floor. The wood floor in the master closet required a riser molding from the wood floor to bathroom tile transition. I'm pretty sure we'll have to have something like that in this room too since the tile build up was much more than the thickness of the wood floor. Maybe if we didn't have the in floor heating in the bathroom, the two floors would be flush without any height transition. It's not much of a transition; less than that of the stone thresholds we have in our current house, but it's not as smooth as the other rooms.

The bed area of the master bedroom is currently being used as the cutting station for the second floor. I'm not sure if they'll try to finish the master bedroom before moving onto the rotunda hall and turret bedroom, or if they'll keep this as their cutting area and finish all the other rooms first. I know Distinctive Designs is itching to come in and finishe the shoe molding.
The second bedroom also has all the bathroom accessories installed. We opted for towel hooks next to the sinks rather than towel rings. It's a definite improvement from our current "leave the towel on the counter" method and we'll have to buy a lot of new linens to populate all the new bathrooms. It's nice to start out with all the bathroom accessories already installed. In the 13 years since we've bought our house new, we just barely managed to install hardware in the kitchen, let alone towel racks in the bathrooms. I wonder if I'll need to install something before we move out.
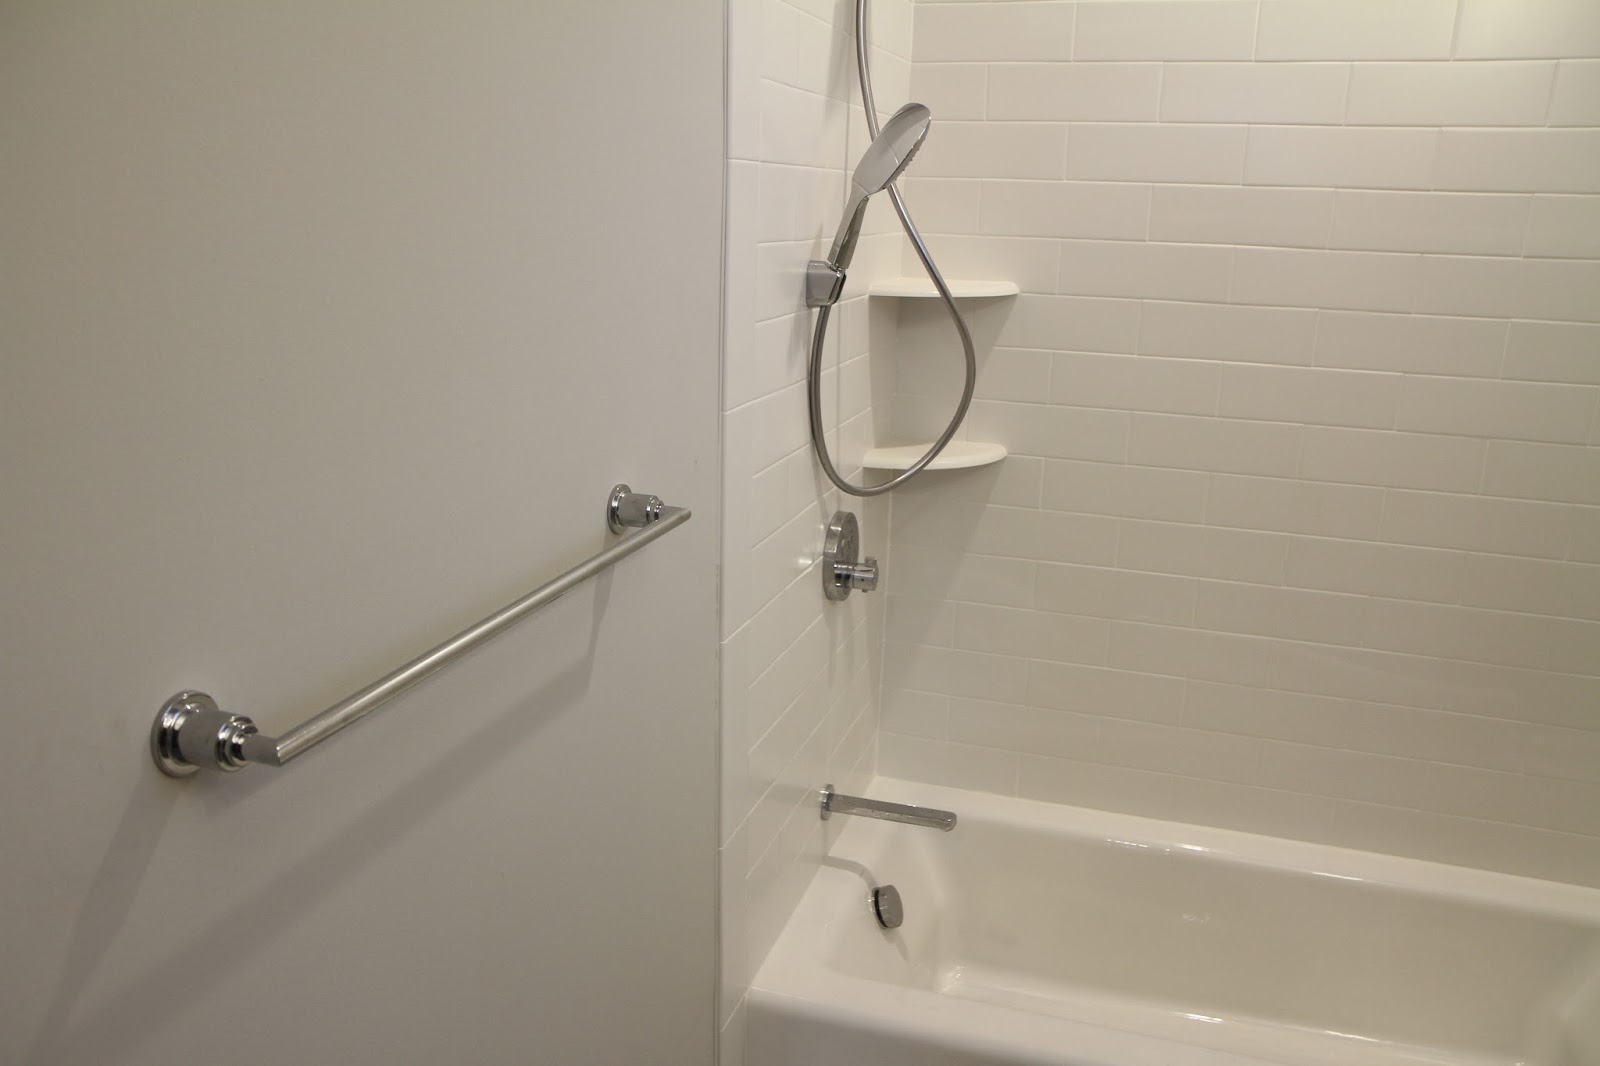
This bathroom also has a towel bar large enough for one towel unfolded or two folded. We've still decided on shower curtains for the two upstairs bathrooms, until the kids get older, but we've gotten quotes for the guest and mud bathroom shower doors. With all the additional building costs, those will have to be something that's installed a bit later, but definitely on the agenda.

The location of the toilet paper holder was a little difficult. I wasn't sure if I wanted it on the side of the cabinet next to the toilet or across from the toilet in the wall. On the side of the cabinet, it's a little bit of a twist to reach. It's easier to reach when it's attached to the opposite wall from the toilet, but then it juts out a bit into the main walking space of the bathroom. You can get semi flush toilet roll holders, but they're not as nice looking. These are nice because to don't have to deal with spring loaded toilet roll holders. Once side is hinged and the rod swivels up. No more excuses for leaving an empty roll on the holder.

The master bathroom has more hooks than I know what to do with. Each side of the vanity has two hooks installed on the wall. Maybe one for a robe and one for a hand towel? We didn't get a hook installed on the side of the tower cabinet, which would be a good place for a hand towel, but we can always install something later. We have to be a little careful with opening the cabinet doors in the tower because they can hit the hooks. Margaret said we could install hinge limiters so the likelihood of damage is less.

Towel bars are present at each of the shower entries. The one not pictured is a little farther away from the shower door since the water closet is just adjacent. In our current house we just drape our towels over the edge of the bath tub. It will be nice to have a formal place to hang our towels. We didn't opt for a towel warming or anything fancy. It's not something we've really experienced, so it wasn't high on the list of things to install. We've never really had a problem with our towels being particularly cold.
The laundry room got a bit of bling in the form of these stainless steel tiles. They're actual stainless steel over some kind of mineral backing tile. They install in sheets like other small format tiles and seem to cut well. This laundry room keeps getting fancier and fancier.
The metal tiles are still not grouted, but I think we're getting some kind of gray grout in there. It will be interesting to see how they float the grout without scratching up the surface of the tiles with the fine, sandy particulate matter in the grout. We don't have any undercabinet lighting on these cabinets and we really don't need to. There's a ton of natural light in this room and more than enough overhead lighting. The metal tile does offer a reflective surface to help shine light on the counter top, so there's really no need for undercabinet lights in here.

The turret walk in closet got the same bubble glass knobs that are in the adjoining bathroom, installed, completing the closet in here. I think of all the spaces in the house this is, unfortunately, the most awkward one. The closet isn't large enough to have the door swing flat to the wall and it makes accessing half of the closet difficult. A pocket door might have solved this, but we have a bottle nook in the wall to the left and not enough wall on the right. The girls will just have to learn to live with it.
The basement is being used as a painting center for the shoe molding. Not all the molding is pictured here and with all the wood floors in the house, there will be a lot to come. It will install pretty quickly, but there's so much of it, it will still take some time to get it all installed. I think it will be installed before the final wax/oil finish on the floor and will signal the end of all the flooring installation.
That's about it for this week. Next week should see the final installation of all the electrical features with both the Sound Vision and the electricians coming in. The rest of the appliances should be installed and hopefully more tile and flooring will be completed. Unfortunately, the foyer tile is on back order and not expected to arrive until January, so we'll have to install something temporary to obtain COO. Every week brings us much closer to move in. I'll probably rent a dumpster over the break to begin the house purging and prepare for the move. When the time comes, I'll probably take some time off to get the house moved and we can finally close this chapter of our lives.


No comments:
Post a Comment