Progress continues well on three fronts; exterior stone, front porch, and interior trim. The exterior cobble stone application is completed, with only the gazebo blue stone application remaining. The front porch is about 40% completed and the interior trim has moved onto the baseboard installation stage and is already about 80% done.

The pile of building material in the front of the house is quickly diminishing now that the front porch installation is under way. The installers come in on the weekend to work and say that it will take about 6 weekends to complete. I don't doubt Mike did some wheeling and dealing to reduce the price of the install with the stipulation that it be performed as a side job. It fits in the time table and saves us money so I'm okay with it. Both the Azek deck boards and cedar beadboard is being exhausted from installation progress.
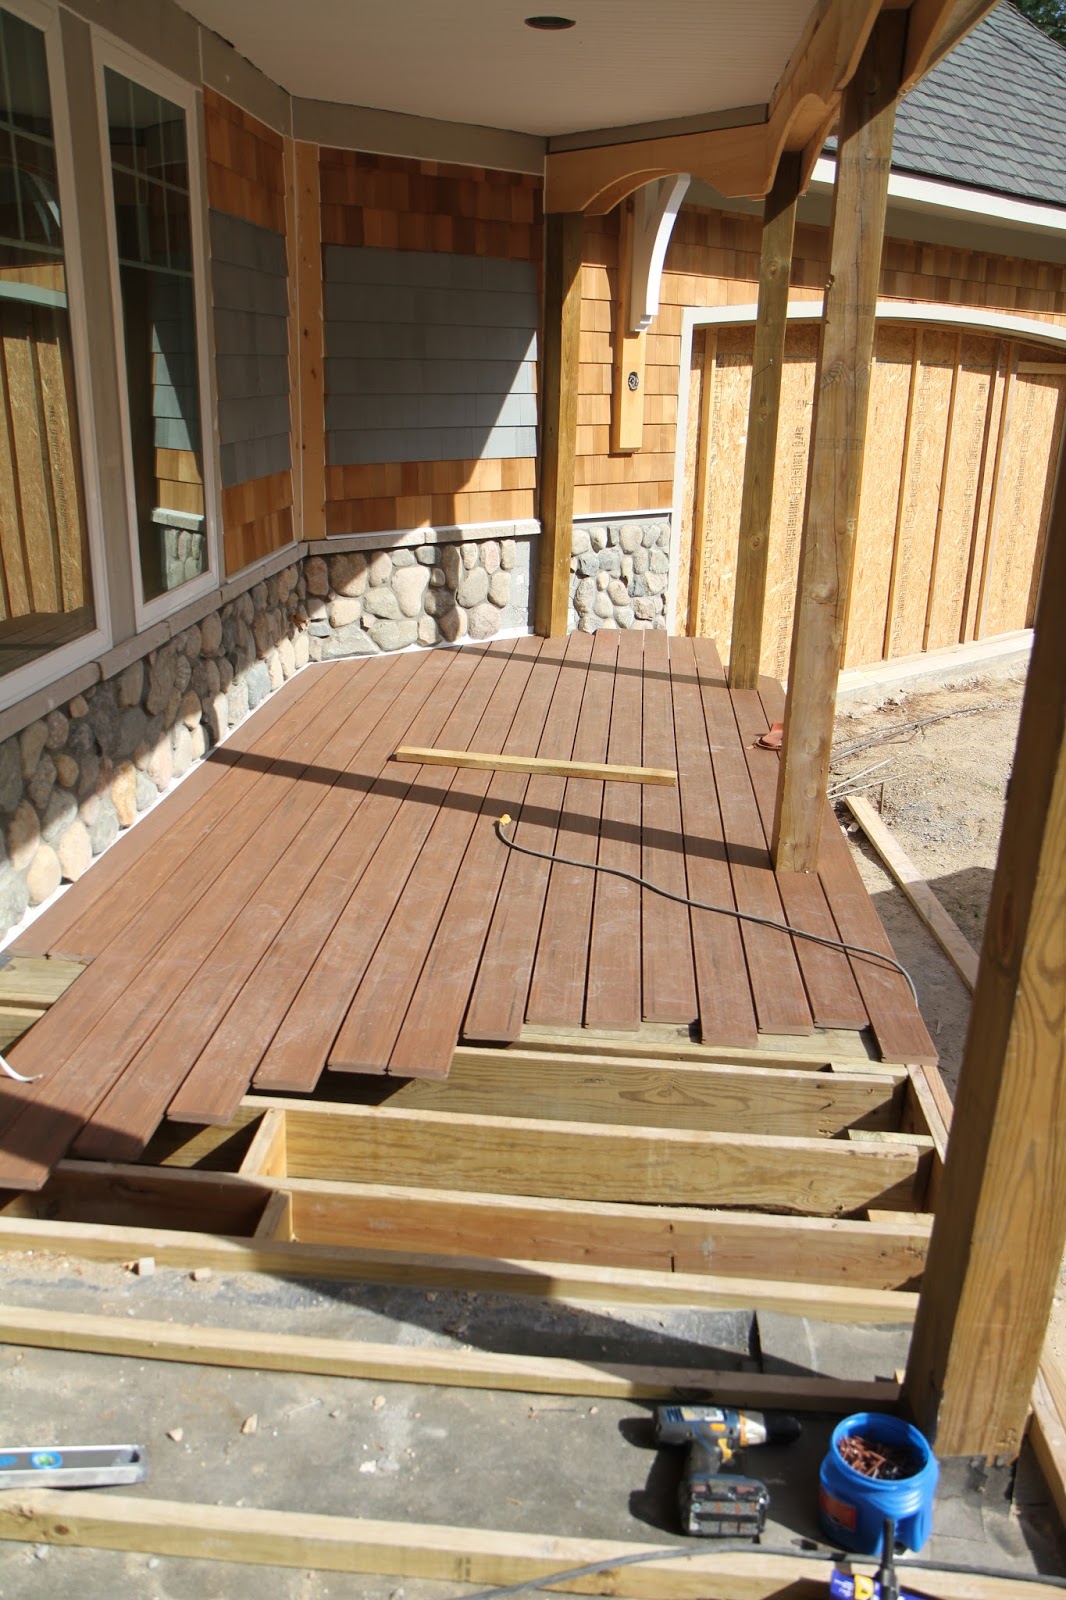
A large section on the front porch, to the right of the door, was partially completed. The final section in front of the door will be installed near the end of the build so the multitude of installers working on the interior of the house won't damage and add wear to the boards. You can see the double header in the fourth joist gap where the deck installers secure a flat 2x10 into. This is so the natural length of the boards have a place to end on, providing a solid place for the deck boards to butt up against each other.


The Trex RainEscape system is mostly installed under the completed portion of the wrap around porch. This will divert any water that falls between the Azek boards on the back corner of the house at one of the basement walkouts. The final landscaping plan calls for a paver patio under the walk around porch so adding this water diversion system will help keep the area dry and useable when it's raining out.

The flexible troughs are attached to the deck joists from above with mechanical screws and a waterproofing adhesive. The troughs are then adhered to the downspout funnel pieces, which will all be connected to a gutter and with a single downspout, to divert the water to a single location. I'm not sure how necessary this will be since the upper wrap around porch has a roof covering it, but some water is bound to trickle down through the deck boards, and this will help keep you dry.

Old Country Stone completed the mortaring of the granite cobble on the main chimney and cleared out their scaffold. This completes the granite cobble installation on all parts of the house. I'm not sure if they'll come back and mortar a bit more once the deck is completed, since there are some gaps that remain between the stone and the white aluminum flashing that sits on top of the Azek deck. They also need to come back and install the blue stone pavers on the back deck, so we'll see them on site again.

They close to finishing the ceiling of the gazebo with the installation of the cedar bead board. All the sloped areas have been filled and the flat center section still needs installation. This part is a little slower since they not only need to cut the ends of each piece to the correct angle, they also need to cut openings for the lights and speakers once the pieces are in place. These boards will be stained dark to match the garage and exterior doors, but the butt joints between the sides will be covered with a white strip.

Here's another angle of the gazebo ceiling. Some of the tongue and groove bead board was damaged, so they'll have to be returned and new material delivered. I think this is the only thing holding up the completion of this ceiling. Once this is complete, then the ceiling for all porches will be finished. There might be a few trim pieces that still need to be installed, but the majority will be done.


The half door to the seasonal storage space in the master closet had its door installed and trimmed. It's not really going to be secret room since the door isn't going to be concealed, but it will have to be worked into the closet system, and my end up being concealed by hanging clothing. The door will be insulated since the storage space beyond is insulated, but not conditioned. We'll mostly use it to store off season clothes and maybe bolt down a small safe.


That's about it for this week. Lots of progress all over the house, but it feel slow because we're starting to get into the fine details. As I mentioned, the front deck is slowly progressing but will remain unfinished until near move in. Woodworking trim should move to the special walls and ceilings, and once completed, we should be getting paint up on the walls. After paint is complete, we can order the wood floor for the rest of the house and start considering the finished plumbing and electrical installations. Not many more steps to complete before move in, but it all takes a lot of time to do correctly. 11 more weeks!
No comments:
Post a Comment