We've had about 10 inches of snow fall over the past week but progress still moves forward on the house now that we're sealed up for the winter time. Even though the insulation isn't in the attic, the trades run the construction heat while they're working and can stay comfortable inside. Suprisingly, even though two walls of the basement are exposed to air, it stays much warmer than the rest of the house when the heat is off. This week saw some progress on plumbing, but there's still work to be done in the basement on HVAC and all over with electrical.
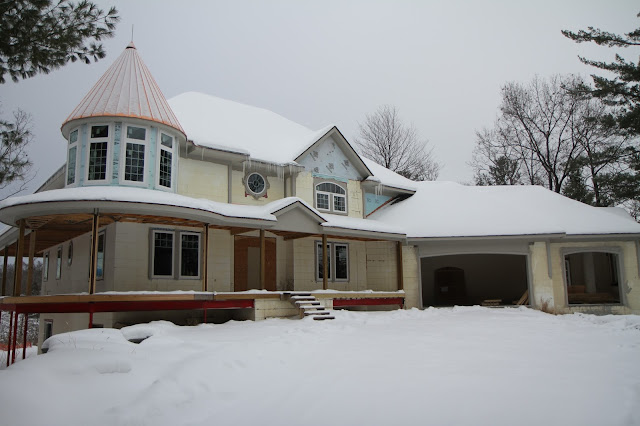
We had one more good snow after Mike got the site plowed, so there were a few inches of snow on the ground. It probably wasn't a big deal, but it was more than enough to leave the car at the street and walk in. Since the insulation isn't up in the attic yet, all the heat hits the roof and melts the snow, creating icicles. We shouldn't have that problem when the house is fully insulated, but that won't happen until electrical gets a chance to install lights in the second floor ceiling, which hasn't been started yet.

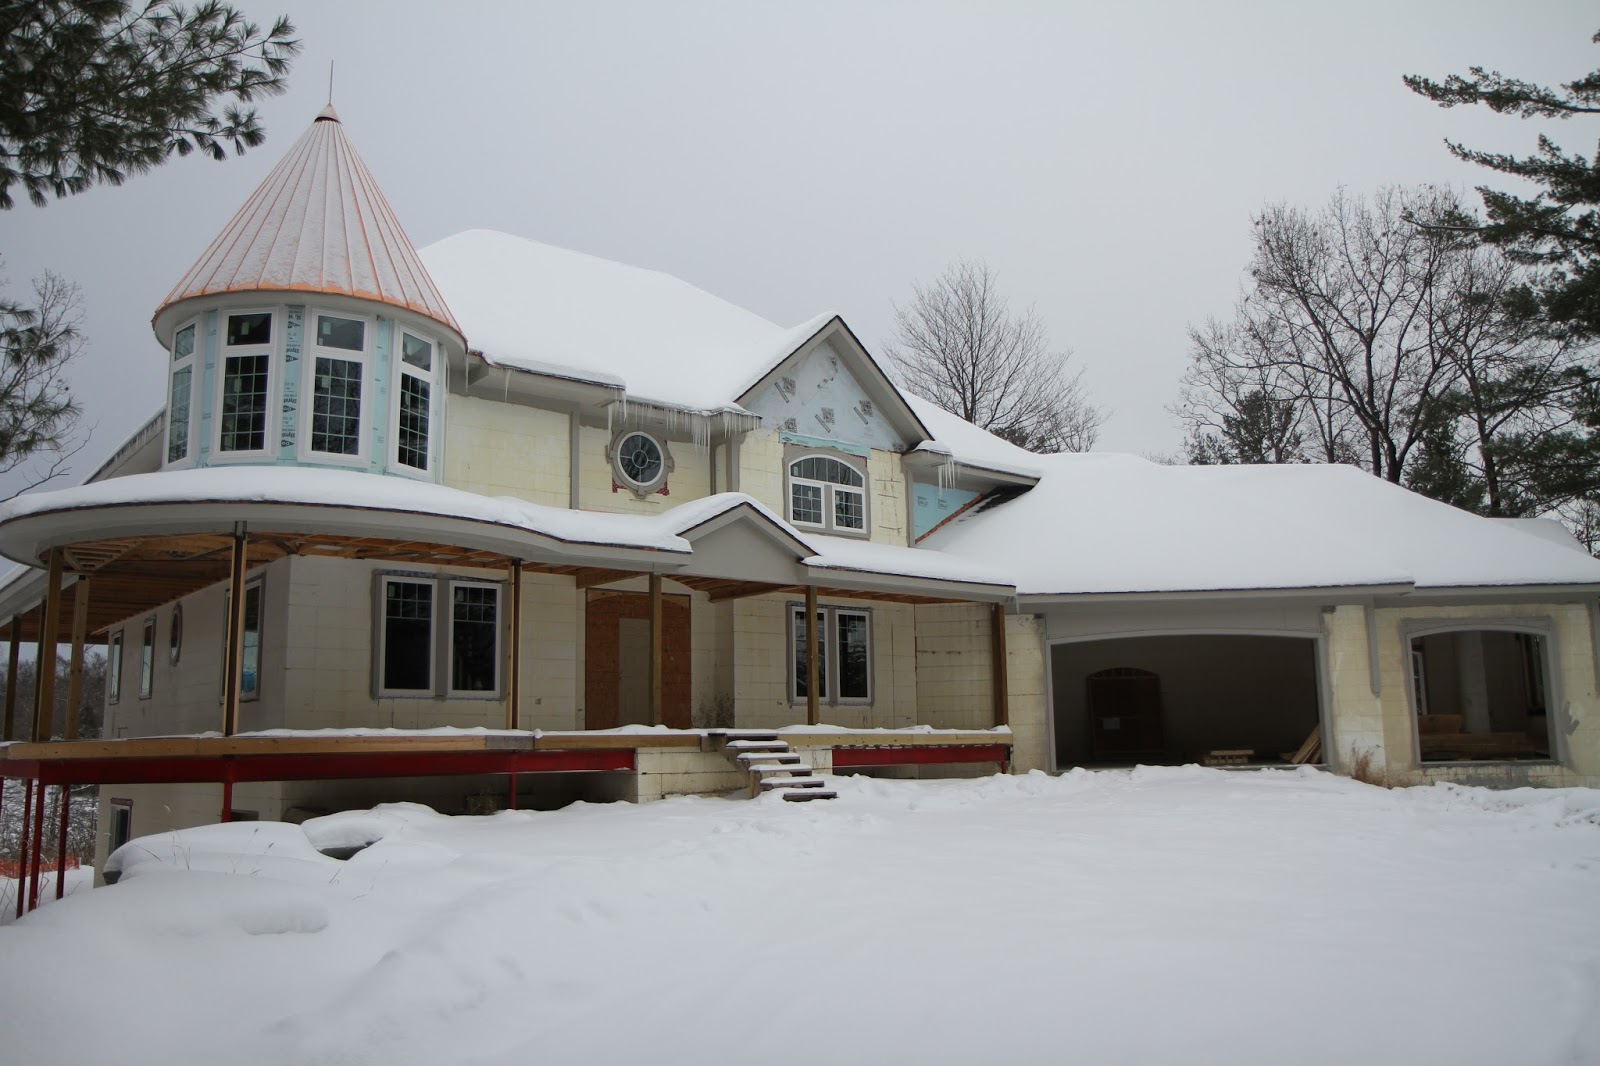
I always figured that the covered porch wouldn't accumulate much snow but I guess I've been proven wrong. There was a few inches of snow on the back porch and gazebo, probably from wind blown snow. Definitely not as much as what was on the ground, but more than on the front and side porch. The glass panel railing we're considering on the back porch will most likely mitigate almost all the snow, but we'll have to makes sure to space it off the surface enough to shovel any accumulation off the edge.
The left foyer niche was constructed, so we're now symmetrical in the entryway. Besides minor fitment changes, I think this is the last bit of wall construction we're expecting. There might be some issue with fitting the greatroom fireplace but it will be resolved. The only remaining stud walls to be constructed in the house will be in the basement, which won't be created for initial occupancy. I guess this is a pretty monumental occasion.

Another clash of design vs implementation. This is how the drain for the powder room vanity needed to be implemented. It's definitely an odd implementation but I'm guessing that the water supply just barely dodged a concrete beam that the thicker sink drain couldn't, so they had to bridge over to the next space. I think they could have opted to go into the pantry for less intrusion into the usable space. I'll need to confirm the vanity design with Margaret. If we're installing something that has a boxed in base, then this won't be an issue. If we're going with a floating or furniture-like piece, then the base will be open and this will be problem. We haven't completely nailed down the design of the powder room yet, but we haven't ordered a cabinet base, so I'm thinking there might be a design issue here.

Water to the master shower and tub has been routed into the ceiling of the mudroom and mudroom bathroom. These are 3/4 inch lines and they penetrate up into the master bath wet wall, but no hint of a hot water circulation loop yet. There isn't one visible on the first floor so unless they install it in the basement, it will need to go up in the master bathroom wet wall, which is why there are two hots and one cold PEX line. It's good to see nailing shields on the ceiling nailers, to protect the PEX lines.

Here's another angle of the water supplies for the master shower and bath. They run in the garage storage and down a plumbing chase to the basement. Although the laundry and master vanity water supplies run near here, they're not connected to the master shower lines. This is good because keeping the separate will prevent any water pressure drops when the shower is running and the toilet gets flushed or the sinks turn on. All told, there are three separate supply lines going into the master bathroom: vanity/laundry, toilet, and shower/bath. Nice bit of separation there. Although the garage storage isn't heated, it's in the envelope of the house so it shouldn't get cold. The pipes will be insulated for both heat and sound so we won't have to worry about them freezing up.

The cold supply for the pot filler above the stove has been installed. Generally, it's not the best idea to run water supplies on an exterior wall. All that's keeping the line from freezing during cold weather is the level of insulation on the exterior wall. In standard stick built houses, the exterior wall is a 6" stud. With adequate insulation, it would have to get pretty cold to freeze those pipes, but with air infiltration, it's possible. In our house, since there's two inches of foam on the exterior and 6 inches of concrete acting as a thermal mass, we don't have to have a second though about installing water on the exterior walls. The foam is simply carved out, providing a 2 inch deep channel, and the PEX can be attached directly to the concrete.

Here's a close up of the pot filler PEX to copper connected and the concrete tapcon screws used to attach it to the wall. Although you still have to carry a heavy pot full of water to the sink to empty it, a pot filler is convenient because of the larger sized supply line. This is a 3/4 inch cold water supply line as opposed to a 1/2 inch used in a standard kitchen faucet. It's a time saving convenience to fill the pot since the 3/4 inch line has a higher flow rate. The copper stub is crimped onto the PEX and a copper bracket is used to secure it to the wall. Insulating foam can them be sprayed into the remaining channel to further secure the line against movement.

Here are the supply line penetrations in the master bathroom wet wall. These lines will supply two shower heads and a hand held sprayer on the shower side, and a tub filler on the other side. Mike tells us it will take a bit of effort to install the valve trims on the curved surface so we'll have to wait and see what that kind of implementation will bring. The radius is pretty tight so there might need to be some flat space build out to mount the trims. While PEX has a smaller inside diameter vs copper, I'm hoping that the 3/4 inch line will be sufficient to supply the shower and bath or two shower heads simultaneously. We're planning on having four mixers on this line, one for each tub, two shower heads, and the hand held sprayer. While it's very unlikely that we'll have all four running at the same time, it would be an interesting exercise to see if they size the supply line to the max usage scenario.

A wall was necessary in the master water closet due to the drain placement for the toilet. Since the room is running perpendicular to the concrete beams, the drain for the toilet needed to be placed a bit farther away from the wall than desired. If the wall wasn't built, then there would have been a huge gap between the toilet and the wall, so this furring wall was erected to remedy the problem. As an added bonus, the water supply to the toilet will be in that wall, so it will get the water supply penetration up off the floor and make it easier to clean. The water closet is large enough as it is, and there isn't an easy line-of-sight comparison the the true exterior wall, so you would be hard pressed to notice it.

I'll have to trace these through the floors, but I think these are all the basement drain connections for the mudroom bathroom, second floor laundry room, and most of the master bathroom. The master bathroom shower and tub still needs to be routed through the mudroom ceiling and it looks like there are a few open connectors in the basement still. These drains are in the unfinished storage room, but it gives a good idea of how low they'll be installed in order to pass under the floor beams. They'll all run towards the exterior basement wall and drop down to a stack that was installed before the floor was poured. We're trying to minimize ceiling artifacts in the basement so we can have as uniform of a ceiling as possible. It's really difficult to do because all this stuff needs to pass under the supports of the floor above. We would encounter the same issue if we constructed with wood joists, but might have avoided it with open web steel trusses or engineered steel trusses. The basement is 10 feet deep, so even with the intrusions, there's no lack of headroom.
So that's about it for now. We're going into the holiday season, so I'm not sure how much more work will be accomplished over the next few weeks. An installation slow down will give the underwriters at the bank an opportunity to move the process forward with Mike so we'll be able to go full steam in the new year. Before you know it, we'll have drywall going up!


No comments:
Post a Comment