I had a meeting with Mike and Great Oaks at the house today to get them to coordinate finishing off the landscaping in the front yard and planning the next few phases. There were some requirements that Mike had where the retaining wall touches the front of the house that he needed to coordinate with the repair of the heaving of that wall. Since the cut cobblestone needs to attach to that wall, Mike feels it's necessary to install a dimpled polyethylene material to the ICF behind the cobblestone so there's a drainage plane should water infiltrate between the surfaces. If water gets back there, we're not concerned so much about it infiltrating the ICF, but it could degrade the mortar holding the cobbles on, causing it to crumble. This is a concern I had way back when they were installing and back filling the basement ICF, but I was told that the double 6 mil plastic that's in place is good enough. I guess I shouldn't have been such a push over.
We all got up to date on the schedule so here it is. The water and sewer is going to be bored in at the end of the month. Since we can't run the electricity up to the front of the property with the water anyways, boring the water and sewer pipes is easier for the crew. We'll have to come back and dig a trench for the gate electricity and security. During this time, we'll get the copper roof installed on the turret and the rough and trim carpenters will come in to start to bring the build up to standard. On October 10th, the geothermal wells will be drilled and connected to the house. After that, we'll bring in fill sand to bring the house to construction grade. This will allow Great Oaks to come in the spring to finish the landscaping and get the driveway installed. Winter time will let the sand settle and compact.
After the meeting, I got a chance to look around and see that most of the windows are installed. There are some of the double casements that still need to go in and of course the largest in the great room that will require a lift to install from the outside. There's also some movement forward on the HVAC in the basement.

Here's the state of the front of the house now. All the windows are in except for the turret and laundry room. As I mentioned in earlier posts, the laundry room window will be installed later so they can use the opening to move all the upstairs drywall through. Also the eyebrow window for this opening was cracked and is being replaced. You can see the big great room windows still in the garage. I really like how the front round window turned out and we're calling it the "Death Star window". Maybe "Tie fighter window" is more accurate.

Here's the inside of the Death Star window. Similar mounting method to the oval windows with a little more bracing structure. This window is about 30" diameter and static so there won't be any operable windows in any of the other bathrooms. I'm not sure if that's good or not, but we couldn't get the option for an opening window here.

Here's the outside of the Death Star window. Nothing to write too much about, but neat looking none-the-less. I think there's enough space around the window for framing, but it might get tight up at the top if we have something coming down off the overhang fascia. We're actually finding that it's going to be tricky in a few areas around the house to get the window and roof trim to behave. For example, the roof line on the turret comes lower than the tops of the turret window openings, so having a flat overhang similar to the rest of the house isn't possible since it would intersect the window. These are all things that we'll have to figure out soon since the siding plays off of these locations as well.

I'll provide some more details about the windows over the next few pictures. On the taller windows, there are more locking lugs to account for the greater edge that needs to be sealed. You can see from the picture above what sits behind the locking lever on the inside of the frame. The forked piece is powder coated aluminum as far as I can tell. Since it moves the bar with a HDPE bushing, there will be very little friction and wear between the two materials. I fully expect the powder coating to last forever. The opening to the locking mechanism sits between the second and third seal so even though it slightly penetrates the sash, it's still behind two seals.

Here's a better look at how the frame is constructed and the spacer used between the window glass. Having a fully welded seam in the frame is important. Lower cost windows will use screws and brackets, which creates seams that can open with temperature fluctuations and create failure points in the window. The welded seams are fairly clean and very tight. All the corners line up with no slack or misalignment. The non-metallic spacer between the two pieces of glass contributes a lot to a better thermal break between the glass and to the low condensation score. Often times you'll find windows with condensation around the edges of the glass because of the cold thermal transfer from the metallic spacer. Also, the metal expands and contracts at a different rate than the surrounding material so, given enough cycles, seals can break and the inert gasses contained between can escape.

Walking around, I see that there are different ratings for different windows. This is the eyebrow window in the master bathroom shower. All the numbers are slightly different than the casements due to different sizes. The condensation resistance is lower but the SHGC is higher.

Here are the numbers for the casement window. SHGC is slightly lower than the other windows as is the visible transmittance. The U-Factor sits in the middle of all the windows and the SHGC is the lowest of all so these windows block the most sun heat compared to the others.

This is the sticker from one of the largest windows from the great room. A huge static pane of glass, this window has the lowest U-Factor of all the windows so it's great at keeping heat in. The SHGC is in the middle so that room with the ten huge windows will do pretty well with controlling sun heat.

Looking in the basement, it looks like Porter and Heckman have gotten some of the first floor and basement main trunks installed. Since this is connected to the right trunk that goes up stairs, it looks like this is the supply trunk, which is a little confusing because I thought it was going to go closer to the outside of the house. Since it's situated on the right, the return trunk is situated on the left and when it makes the turn across the house, the return trunk will be more outside of the house. Of course, the trunks that go to the front of the house are reversed, so it works out fine there. I guess we can't have it both ways.
The insulated section is the part that sits on top of the furnace. I guess it's not really so much a furnace, but an air temperature exchanger since there's no combustion going on. The trunk going away is going towards the back of the house and vice versa going forward. The wire hanging down is the thermostat from the second floor. I'm guessing some of those lines will go to a baffle somewhere, or maybe to the furnace controller that will then hook up to the zone baffles. As of right now, the trunks going up to the second floor are connected to the top of this piece.
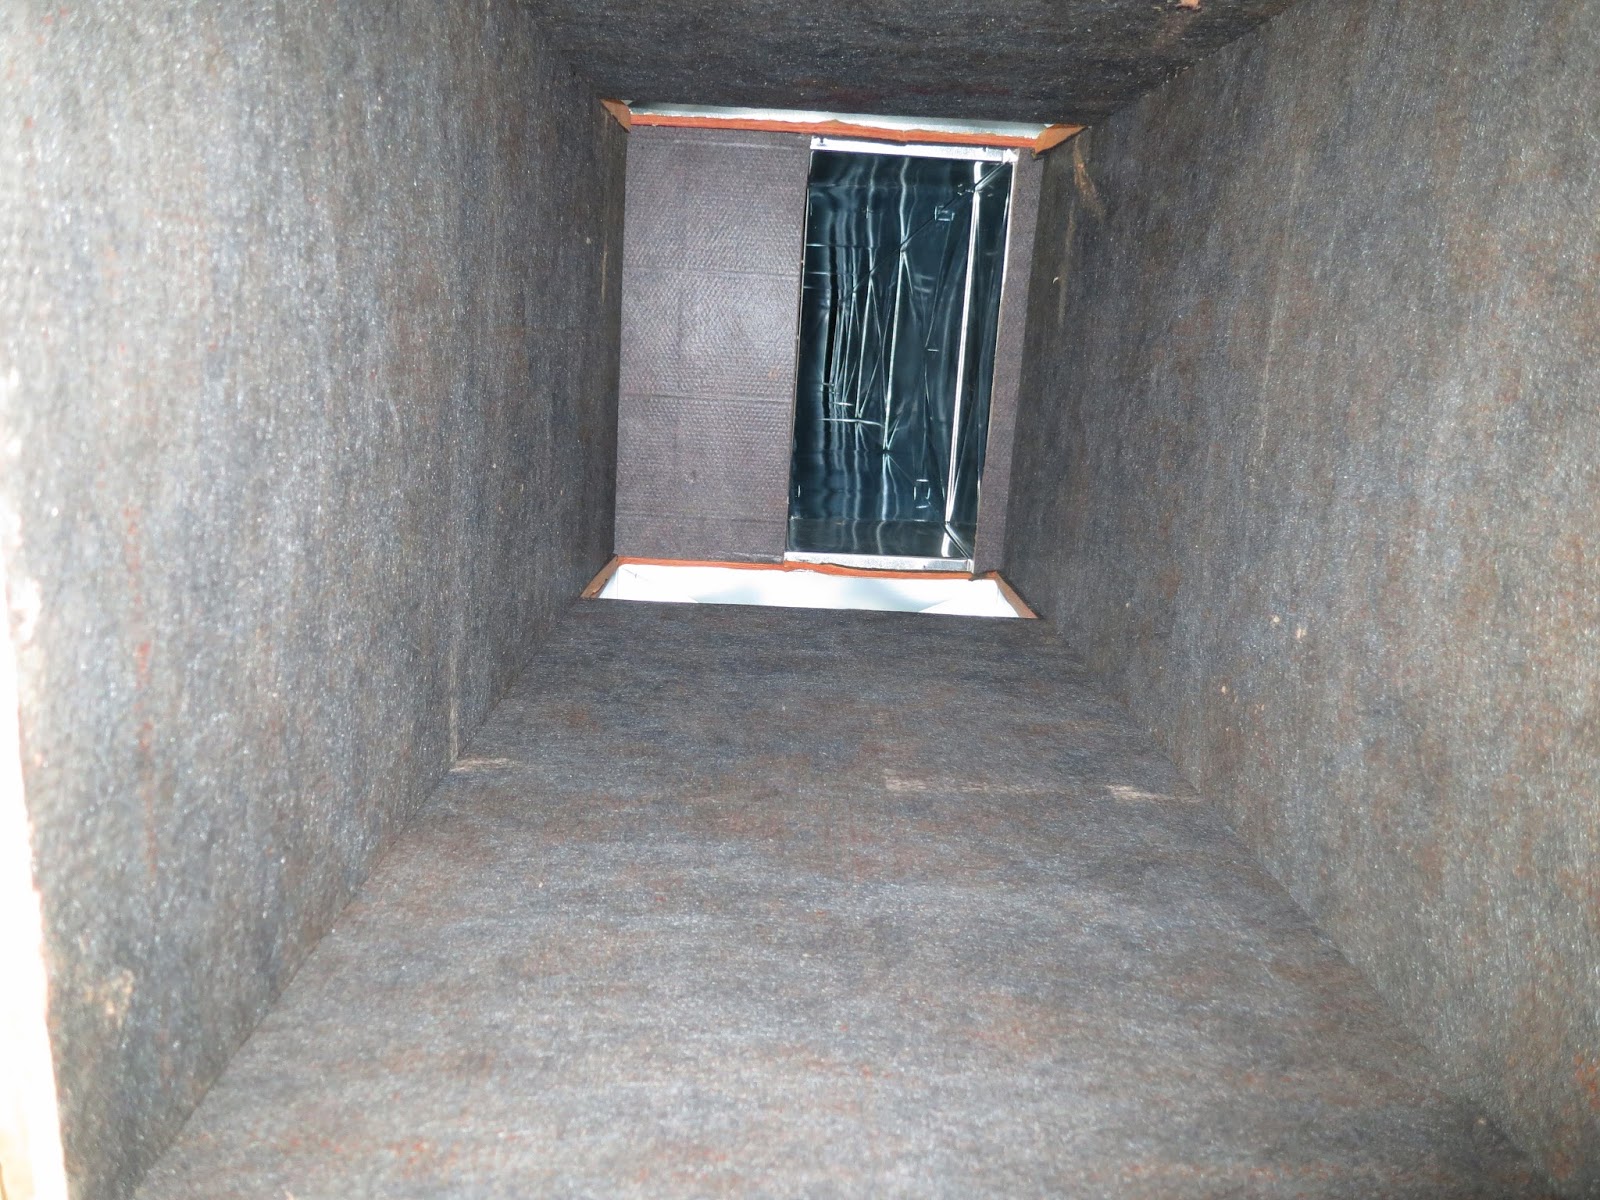
Here's looking up into the box from the previous picture. You can see the two trunks for the basement and way at the top is where it connects to the trunk going to the second floor. Maybe the zone baffles will be installed right at this interface, but the first floor will need two zone baffles alone that act the same. I will be interesting to see the programming for that since you'll need to have two baffles balancing the first floor and one baffle on the second. The first floor baffles will need to have the opening angles adjusted to account for two trunks. The construction of the box is some kind of rigid insulation material so you can see the fuzziness on the inside. Ideally we'll have all the hard boxes insulated so energy goes where it's supposed to go and not into the ambient surrounding.

Here's a neat box that the HVAC installers fabricated to fill three floor cut-throughs for the returns from two different rooms. This will connect the returns from the first floor sitting area after the rotunda and the guest room to the main return trunk. There's no exit from this box to connect to the return trunk, so I'm guessing it will be put in place then connected when the trunk is installed. The way it's sized, it pretty much sits right up in the cavity created when removing the ICF foam. I'm hoping almost everything besides the trunks will be hidden in the ICF cavity layer.

Here's another angle of the supply trunk so far. It hangs a bit off the ICF, which is good so we can get insulation up there. I would also expect the seams to be either mastic painted or taped (or both), but it's far too early to do that. I think those two round ducts will supply the guest bathroom and bedroom, but I can't figure out how they'll dodge the return trunk that will run parallel to the supply trunk. That large ICF cavity is in line with the second floor return trunk so maybe they'll use that as a return chase. That would be pretty clever. They'll just need to find a way to go under the steel beam since you can't drill through the space above the beam.
So we have a working schedule for the next month or so with definite progress being made. The over all battle plan is to get all the infrastructure required to get the siding and stone up, so that's where the water/sewer and rough carpenters come into play. If they can get the exterior up before the cold weather hits, then they can work on the inside over winter and be in a good place during the spring. We're still waiting on getting all the sub contractor bids back but a preliminary schedule is starting to form so we can at least dream of some light at the end of the tunnel.
No comments:
Post a Comment