Showing posts with label Mike Perri. Show all posts

Monday, January 9, 2017

"It's starting to look like a house instead of an Igloo cooler"

   Progress keeps moving full steam ahead with tons of changes present even since the few days I last saw the house.  Plumbing, electrical, and exterior siding all pushed forward with their installs and the carpenters are hard at work trying to stay ahead of it all.  Mike is three steps ahead, looking at the finish work and seeing what needs to be implemented now in order to fulfill his vision.  We're finding that we need to make decision on finished plumbing and lighting very quickly so everything can be lined up for their respective installations.  Everything is on track and almost every problem from the previous construction team is solved, under control, or has some kind of a solution in the works.  Mike has basically take the build from a very rough state with many issues to a state where everything is in its place to be completed with a foreseeable end date.

   One of the items the Mike and the carpenters are hard at work is how the final porch columns will look.  The porch was constructed so that we couldn't implement the initially desired round column post wrap, so an architecturally sound alternative was needed.  We came up with a shaker style panel like the one picture above, but only on the bottom half.  Mike mocked up this full column example from available construction pine, but the final will be constructed from Medium Density Overlay (MDO), which is like MDF, but with a weather resistant resin overlay, so we shouldn't have issues with moisture.  It's supposed to be more durable than plywood, but takes paint better, which is what we're doing, so I think it's a good alternative.

   We had some issue trying to figure out a square post that would work on our modern Victorian house and I think the shaker style is the closest we could get.  Alternatives were the tapered Craftsman style, which we definitely didn't want so shaker it is. Maybe only the haughtiest of architects would have a beef with the design fusion.

   They also included a design mock up of the final beam headers that will be applied to the front and back of the porch beams.  We wanted an arch from post to post and this is how they'll implemented it in rough sawn cedar.  Of course, there will be a full piece of wood the length of the beam and the arch will be continuous, peaking at the center of each distance.  The beam fascia is dropped down from the porch truss to account for the bead board thickness of the ceiling.  The underside of the beam will remain flat and not follow the curve of the arch as it approaches the post.  All the trim will and columns will be painted white to match the rest of the trim around the house.

   This is pretty exciting.  The cedar siding installers completed the front and side first floor, most of the second floor on the side, and one side of the great room already.  I think this is two days worth of work.  We almost like the clear cedar color, but will most likely use a semi-transparent or solid stain on the siding.  If this was a shingle style house, then the clear cedar might work, but we don't have the architecture or intent for that look.  It's getting easier to imagine what the stone will look like below the ledge.

   Even though the trim boards are the wrong color, I'm glad they are painted because it makes it easier to imagine how it will look when painted with final colors.  This wall has been white Styrofoam for so long, it's great to finally have something that resembles the final look.  All the trim sits just about flush with the bottom of each course of shingle, but has some reveal at the top of the shingle.  I think this will work fine as long as there's enough room on the shingle to caulk against the trim.  A little more reveal would have been nice, but I think the color differentiation between the trim and siding will go a long way in the looks department.
   Here's the entire side of the house from the basement level grade.  There's one strip left at the top right to finish off the side.  There are corbel blocks that will be installed up there and the only prep for the carpenter to do is to install a little piece of trim so the siding guys can cut around them.  Since this siding is already up, we can come back and cut out the siding to install the blocks to which the corbels can be attached.  They're still on order but should arrive in the next couple of weeks.  It's one of the things were implementing to try to capture the Victorian look, since we're not going with all the porch details.
   The entire side of the house was completed, including the great room!  Everything below the cedar will be real cobble stone, separated with a limestone ledge.  A scaffold or skytrack wasn't needed and they just used ladders to get up to the high great room side.  I initially thought the arch top window trim going into the house trim was a little odd looking, but now that the siding is up, it looks good.  There's going to be a lot of stone going up the side of the house, and the prep work for that should start soon.  The distance from the basement grade to the cedar about fourteen feet but is the most exposed side of the house.

   Bracket mock ups were also created so we could visually see what it would look like.  The bracket itself is made from polyurethane and the box behind it is created on site.  We needed the box to get the bracket off the wall and mark where the cedar shingle doesn't have to go.  Initially, I wanted the box to go down to the stone ledge, but Mike said it wouldn't work out right since there's a bit of a slope on the ledge.  You're just inviting water infiltration into the wood if it sits on the stone.  I think this look good too.  We'll one of these on each side of each garage door and it also acts as a base for the hanging style wall sconces, yet to be picked out.  In that way, the box serves an additional duty, providing a nice place for the wall sconce to bolt to.

   The plumbers are wrapping up the first and second floor installations, filling plumbing gaps with fire blocking expanding foam in every location where the pipe goes through another material.  This procedure was repeated at many places around the house and signifies that the plumbing work on the first and second floor is coming to an end.

   Although all the plumbing supplies and drains heading down to the basement, there's still lots of plumbing work to be completed.  Almost all the plumbing roughs have been installed for all in wall applications.  The only remaining puzzle is the master bathroom, where some work was needed configuring the expected four mixing valves that were needed in the small shower/bath wet wall.  We were going to use one for each, two showers, one hand held, and one tub filler but all the valves couldn't fit in the confined space so we decided that the handheld will be put on a diverter with one of the shower so the total count could be reduced to 3 mixers.  It was confirmed that our alternative tub selection would work, but the drain plumbing for that hasn't been installed yet.  We'll have to get the thing in place before we can choose the rub filler spout.

   Sorry for the dark picture, I think my camera setting dial got shifted for some of these shots.  The master sink roughs from Dorn Bracht were installed at the final height, so now we can chose appropriately proportioned medicine cabinets to install above them.  The wall mounted faucet has the control on the right and spigot on the left, which will pour into an under-mounted sink bowl.  The trim is a rectangular plate, and it looks like the mixer cartridge is pretty easily accessible should we need to fix it.  I didn't have time to touch the valve itself, so I'm not sure what the body material is made of.  I'll make sure to take a closer look at it when I go back.


   Even with the electrical walk through we have scheduled with Margaret this coming Wednesday, the electricians are still running wires to all the boxes on the second floor.  Work hasn't begun with box installations on the first floor yet.  There's a high level of confidence with the placements on the second floor, with only one or two items in question.  I made sure to take as many pictures of the wire runs as I could for future documentation, but I hope to never have to look at the wires again.  We're trying to plan everything the first go around so we won't have to renovate the lighting in the future.

   I think half of one pallet was used for all the ceder that was hung thus far, so it's looking like a good possibility that all the required ceder is on site, ready for installation.  With the speed they move, I think all the siding will be up by the end of the week and we can finally protect all the exposed ICF that should have been protected years ago.

   As I mentioned, we have a meeting with Margaret at the site to do an electrical walk through.  We've done it ourselves to address functionality, but it will be good to make sure all the lighting design elements we need in place will be present and Margaret is the one that can double check that.  Of course, Mike will be on site with the electrical installers and The Sound Vision is slated to begin work around that time too so it will be nice to have their expertise on hand.  Stair installers have started work on their workshop mock-up and we should have them in the house in a couple weeks!  Finally getting rid of the temporary stairs will be another large step because we'll finally be able to visualize the rotunda.  Porter and Heckman need to come back to complete the installation on the basement, but they've been bombarded with service requests.  Mike has been hammering them to return since he's looking at rough inspections in a couple week.  When that's completed, drywall installation can begin and the interior will look completely different.  Even with all the pace of the progress, Mike keeps saying that we're targeting June/July for completion, so if drywall is done mid February, that gives four months for finishing work.  Internet wisdom says drywall is the halfway point of house construction, but with our house, that doesn't mean much.  Maybe the speed of progress will slow down after the rough, but I hope it doesn't.

Wednesday, January 4, 2017

Mid week update: Full steam ahead

   I was debating whether or not I would make a mid week update considering I just posted an update yesterday, and I'll be revisiting the site this weekend, but so much is happening so quickly that I think I'll need more posts to cover the changes.
   I was scheduled for a meeting with Jonathon from The Sound Design today for the preliminary walk through on the distributed audio/video/data, lighting control, and security.  He showed up with four members of his team to review the plan and talk shop.  On top of two electricians, Mikes carpenter, two plumbers, and two siding installers, the house was a hive of activity.  I'll wait for the weekend update to post most of the progress pictures, but I can't wait to share some things now.

   The first thing I saw when I walked up to the house was a new delivery of lumber and siding sitting in the garage.  The lumber will be used in general areas and for the porch column finishing.  The other two stacks are for the cedar siding that is currently going up.  I'm not sure if there will be more deliveries or if everything needed is on site.

   A good number of boards and some thinner sheets at the bottom.  I didn't take a close look at it, but I think it's mostly rough sawn cedar and some pine.  I know some framing still needs to be completed on the great room and garage exterior doors so that's what the pine and sheets are probably for.  We're really nearing the end of rough lumber phase.

   At first I was confused about what this was for.  The box says "trim coil" and I have no idea what that is.  Turns out it's the aluminum for the flashing that will sit between the cedar siding and brick ledge.  It comes in rolls like this and is bent on site.  I figured it out when I saw it on the wall as they were installing it.

   Here's the label on the cedar siding covers.  It's western red cedar shingles, which I've read is more durable then white cedar shingles so that's good.  12 squares per pallet and the shingle has a 7-1/8" exposure, which is probably enough.  At least the stuff they installed while I was there looks good.  I still have a little apprehension about this product since it all relies on the durability of the plywood it's attached to.  For most of the house, it will be protected by porch roof.  I've read that southern exposures are the toughest for shingles, and that's the front of our house.  Only time will tell if it can hold up.

   All the additional posts have been installed and all the exterior porch lighting is in.  Some porch shrouding will be fabricated by the carpenter so we can agree on a design.  Initially we were thinking about using polyurethane columns to sheath the posts, but their dimensions didn't work out.  The bases and caps don't work well with the post positions on the deck.  It was decided that the post exteriors will be built on site out of exterior MDF and rough sawn cedar.  Exterior MDF?  I know, I've never heard of it before because everyone knows that MDF and water don't mix.  Rather, it mixes well into a pulpy slurry.  When we get the product on site, I'll take a look at it, but Mike gave the go-ahead, and I trust him.

   In addition to socket and switch boxes, and rough light boxes, the electricians are also installing bathroom vents.  Two in the master bathroom and one for each of the other bathrooms for a total of seven around the house, not including the unfinished basement bathroom.  I think the master water closet is the only one that has an integrated light.

   The Panasonic FV-08VQ are the fans that are going in and they have a great rating on Amazon.  They're rated at 80 cfm, LEED compliant, and only 0.3 sones which is as loud as a very calm room.  Can't wait to hear them in action.

   The plumbers wrestled the two, 300+ lb cast iron tubs up the temporary stairs into their respective bathrooms.  It's ironic that the two heaviest tubs were on the second floor since the two bathrooms downstairs will only be showers.  They don't need any concrete bed underneath since they're heavy and strong so I guess that's it.  I'm not sure if there will be any mechanical fastening or if it will just be held in place with the tile and mortar.

   The turret tub isn't in location yet, but it's in the bathroom.  By the time we revisit the house this weekend, this will probably be set in place.  I resisted the urge to sit in it this time, but I'll probably try it out next time.  As the reviews said, they're pretty shallow for a tub, but it's enough for young children to take a bath in and it's large enough for showers.  The bottom is slightly textured for anti-slip but not so rough to annoy skin.  I think the shallower depth will make it easier for ingress/egress since it will mostly be used as a shower.

   Electrician are in full swing with almost all lighting, socket, and switch locations in place.  I did an initial walk through, but we'll get another one with Margaret next week, and maybe a final walk through before drywall goes on.  Coordination with The Sound Design was great since the lighting control drastically changes how the light switches are installed.  Since the lighting control system can be programmed to make any Control4 switch control any room, all the lighting wires are run to the Control4 light control box, then each controller uses a low voltage wire to run to the switch location.  This makes it so the six gang light switch box in the master bathroom is changed into a single box that will control all lights and sound distribution in the room.  As I mentioned each switch doesn't necessarily have to control the room it's in.  We could have a switch in the master bedroom turn on all the house lights as a "panic" button.  We can also control all the connected lights with the phone app, touch screen, or TV remote.  I was also just informed today that Control4 has Amazon Alexa and Google Home integration for voice commands.  This should be interesting.

   Here's how the Hoffman Electric installs wire runs in the metal studs and ICF.  They're actually the electrical installers that Ken Trever used, so they're well versed in ICF installations.  The metal stud pass throughs are filled with a plastic protector to keep scraping and abrasion on the wire sheathing down.  The wall channels are cut out with an electric chainsaw.  Exterior wall boxes can only be two inches deep so even single gang boxes look like double boxes so there's space for wire nuts and socket boxes.  A hot knife can be used to cut out the channels but in rough construction, there's really no need.  I didn't ask if the channels will be refilled with spray foam, but it might be nice if they were.

   Here's what three trades and a builder look like on site.  Not shown is my car and The Sound Design fleet.  I was "previously" told that the trades don't like working at the same time, but there didn't seem to be any issue with getting in each others ways.  There was plenty of power runs for all the tools and a couple of air compressors in use.  It's amazing to see so much work going on at the same time.

   Parting shot as I walked to my car.  Here's where the siding installers started and how much they got accomplished in the few hours I was there.  I think they'll be done by next week.  The slower parts will be on the second floor where they'll need to cut around roof lines and decorative pediments, but it seems like we'll have it all up very soon.  Much faster than I would have thought.

   That's about it for now.  I'll have more pictures and another update soon.  We have an electrical walk through scheduled with Margaret next week to verify lighting placement and talk about finished electrical fixtures.  There are a lot of decisions coming up very quickly, but I wouldn't have it any other way.

Monday, November 7, 2016

Plumbing rough started and verifying exterior stone.

   We had a meeting with our builder Mike and Jeffrey Sykes at Old Country Stone to confirm/pick out the cobble stone, brick ledge, and fireplace stone for the exterior of the house and outside fireplace.  Old Country Stone is both the manufacturer and installer of the stone so they process the rocks and split them to the finished dimensions and install and design the fireplace.  The advantage is that this will be a one stop shop for the materials, and we have a little more flexibility when it comes to color selection since they're receiving truckloads of stone and can pick out the color palette we want.  After the stone meeting, we had a sit down with Mike to look over the budget for the rest of the build.  While it's coming in high, it's more in line with what we expected from the beginning, and within the boundaries of what's reasonable for a build like this.  There's not much room to move around on the budget, but it looks all inclusive, so we won't have to worry about budget overages as much as we did before.  The plumbers also came through on the initial planning walk through late last week and started drilling through on the second floor for drains and supplies.  This will be a tricky process, trying to rectify the plans with the concrete beams of the ICF, and I predict there will be some compromises along the way.

   Here's what the lower portions of the house will look like, minus the counter top.  The cobble stone is a granite cobble mined locally in Michigan and the brick ledge is a rough edge limestone.  We had the choice of smooth or rough edge and chose the latter because we like the rustic look.  The brick ledge is about 3.5" thick and the cobble stones range from 5-14".  We're really happy with the cobble because it contains less reds than the previous sample did.  Jeff said that there's less red in the stone because the iron content of the rocks from the area they're mined in is lower than other places, so we won't see the pink granite as much, which is exactly what we wanted.

   Here's a better look at the cobbles.  They're all back cut and applied to a wire mesh, which is mechanically fastened to the house.  There's no need for an intermediate layer between the mesh and the ICF and Old Country Stone has experience installing the product on ICF.  The corners are also back cut to wrap around the corners so it doesn't look like the wall is just a stone veneer.  The way things are going now, we're looking at a late winter or early spring install, but we'll be able to use a temporary ledger so the cedar shake can be installed before the stone.  We'll probably go with the finger-width morter joint as shown in this picture.

   Here's what the gazebo fireplace is going to look like.  The darker stacked stone on top will face the fireplace, seating, and barbecue area and the blue stone is representative of what's going on the back porch.  The blue stone will be similar to the rest of the landscaping and will have color variation between gray and blue.  They'll be in a random looking pattern of square and rectangles and the stone itself is almost 3" thick, which was a surprise to me.  The fireplace will be constructed of block, faced in the stone, with firebricks inside the fireplace.  We'll have to finalize the fireplace design so we can get a more accurate estimate on the cost.

   We got to the house to take a look at any changes and found a few from the plumbers and rough carpenters.  Mike gave me a call last week during the planning walk through with the plumbers to locate drains and supplies around the house and it looks like they started to implement some of the pass-throughs for the second floor.  Here's the water supply and drain box for the washer in the laundry room.  It's pretty common to have these in wall boxes now and we have something like this in our current home.  This is where the washer will hook up to the hot and cold water supply, and where the drain line for the washer will be.  I don't think this is height dependent so I'm not sure if I need to remind Mike that the washer and dryer will be on a pedestal.  It's marked on the stud for the gas supply/dryer vent box but I guess it doesn't hurt to remind but a quick glance at Google tells me that the install height doesn't matter.

   Here are some holes in the turret bathroom for the hot and cold water supply and sink drain.  They don't go all the way though for some reason but it looks like the beam is marked in pencil on the floor so it looks like they're doing a good job dodging them.  ICF floor makes installation a little more difficult since you can't drill through the wide concrete beams.  There's plenty of space to the sides of the beams, but if a large drain, like the toilet, happens to fall on a beam, then it will need to shift a good 6" left or right of it in a worst case scenario.  I think we might be okay for most of the house, but I really worry about the powder room since the room is so small and at an angle to the beams.

   Here's the toilet rough in for the same bathroom and it looks like they managed to get right or close to the desired install location.  Places like this can really get messed up as far as room arrangement goes.  I'll have to take a closer look when I visit the site, but the toilet should be centered under the large round window in this room.  Any slight deviation will probably be visible and I would be surprised if we were lucky enough to hit it dead center.

   This hole is placed in the 6" stud wall we built out in the master bathroom, but it might be the main drain for both bathroom vanities and the laundry room sink basin.  At the very least it's for the bathroom vanity sinks since there are also holes drilled in the studs to allow the right sink to drain to this point.  Since it's just on the other side of the wall from the laundry room basin, I'm guessing they'll all tie into here.  Again, I didn't see a hole in the ceiling below and there isn't a wall directly below this location in the dining room, but it's very close, so they'll either angle towards that wall, or run to the exterior walls to get to the basement.

   Here are some interesting drain and supply lines drilled into the sole plate of the wall where the master bathroom, master closet, and laundry room meet.  The wood stud wall in the middle of the frame is the wall against which the laundry machines will placed upon.  The stud wall in the right corner is the master bathroom vanity wall and the wood stud on the left of the picture is the door frame from the master bathroom to closet.  I'm guessing they'll take the drains and lines through the laundry room wall since the wall itself is probably sitting right on a concrete beam.
   Here's the master bathroom water closet.  You can make out the water up against the wall and the large toilet drain in the center of the room.  This is one room where the drain needed to be moved because it would have otherwise fallen right on the concrete beam.  We had to pull the toilet away from the exterior wall enough to get the drain between the concrete beams.  It's okay in this room because we'll just build an interior wall from floor to ceiling and you'll be hard pressed to notice the difference.  The overall design of the room is unchanged and we only lose about six inches in the room, which is large enough already.

   Moving on to other points of progress, the rough carpenters installed the headers across the openings to the butlers pantry.  This is more of a functional change rather than an aesthetic since we needed a good way to terminate all the crown molding in this room and the adjoining kitchen.  The wall to the left of the doorway also needed to be built up so the header could connect correctly.  Luckily, there wasn't much build up.  This is the area below the master bathroom where the vanity drains should run.  The master added stud wall that contains the drain sits proud of the elevator shaft, where as these walls sit flush with the shaft, so it will be interesting to see how the plumbers rectify this without resorting to bulkheads and soffits.

   Here's something from a previous update that I didn't get a picture of.  Luckily they left the pieces at the site so I could take a picture of it.  Here's the mock up of how the baseboard molding will be built up, and what the door casings will look like.  It's a clean design that I think fits the transitional look of the modern Victorian.  The windows will use the same build up, with the side and top molding like the door, and the sill like the baseboard.  There's no real need for a sill extension since the sills are already deep enough to sit on.  The wood is poplar, which is technically a hard wood and takes paint really well so it will be less damage prone than the more common pine moldings.  We can get any height we want and I think this is almost a 10 inch height, which is pretty high.  Taller moldings are generally seen as a sign of a higher end home, which I don't really understand, but I like the look.

   So that's it for this week.  The plumbers will continue the rough in and I heard today that the HVAC guys from Porter and Heckman are back on the job.  Mike requested that they stop for a bit until we could get the house sealed up since he didn't want to risk getting water in the installed ducts.  They really only have to finish the first floor duct installs since the second floor is done.  I need to get our future plans for the basement to them so they can rough in the future expansion for those rooms.

Monday, October 10, 2016

Copper roof started. Lots of progress elsewhere.

   A week into October and we're starting to see the begining of colder weather.  Temperatures are bouncing between nighttime lows of 40's F and daytime highs in the 70's, but progress is hitting a little surge.
   The copper roofers started on the turret roof on Friday, prepping the valleys where it meets the rest of the roof and covering the cone with an ice damn material.  They also started the drip edge flashing so I can show you pictures of how it's supposed to be done.  Hopefully the difference between the turret roof and curved porch roof won't be so blatant to be annoying.
   Lots of other progress from the carpenters around the outside and inside of the house.  All the windows are in, save for the replacement in the great room and laundry room, which we should see this week.  Exterior window and house trim is going up and missing interior walls are filling in.  At this rate, we'll be sealed in for winter.  What a difference from months previous. 

   Here's the state of the front of the house.  The turret windows have been installed on this side, but there are still two around the other side that have yet to be installed.  They'll probably go in this week, but the copper roofers have a scaffold set up in one of the window bays, so once they're finished, all the windows can be set.  Additional roofing membrane was finally installed on the turret roof.  The weather vane rod still needs to be installed, but the sky-lift was having some issues last week, so they couldn't get it done then.  It will go in before the copper roof work starts.  We'll be getting the actual weather vane in November, so the Dragon will be guarding the house well before we move in.


   Here's a little closer look at the turret from the ground.  You can see the additional membrane installed in the valley between the turret and flat roof.  This actually covers some of the copper flashing that protects the valley.  It's a generous overlay and well worth the effort.  The red metal hook is temporarily installed so the roofers can support their ladders on something solid.  The bolts secure under the shingles, so there's little chance they'll affect the waterproofness of the roof.

   Here's a close up of the valley, taken from the ground.  You can see where they started the copper drip edge and the same thing is done on the other side of the turret as well.  The copper valley is complete all the way to the top, so I think once they finish the drip edge, they'll install the standing seam roof.  It should take them a couple more days to finish, so the next update will have the final product installed.  The copper roofers will then finish off the asphalt shingle to meet up with the copper valley.

   Window trim is almost completely installed on all the windows around the house.  Here's the self adhesive flashing material they used over the nailing flange, under the trim.  The trim itself is a 1x4 pre-primed rough-sawn cedar, that will be painted white.  Originally we wanted Azek white trim everywhere for ease of maintenance, but since the HOA rules state that we couldn't have cement board shingles on the first floor, and we didn't want to mix the exterior materials between the first and second floor, we decided that we would use wood shingles everywhere on the house.  Once we knew we were going to have to deal with the painting maintenance of the house siding, it was a small leap and cost savings to change the trim to wood as well.  That way, the painters don't have to mask off the Azek to paint the shingle, which makes the painting labor easier and less expensive.

   Here's the exterior of the dining room window.  The top and bottom trim pieces are missing because they'll be treated differently.  There's just enough room at the top of the window to have the house trim, the piece that goes across the entire underside of the porch roof, act as the top trim piece for all the windows.  The bottom won't have a wood trim piece, but rather, a stone sill.  The stone will be the same material as the brick ledge, just dropped down for these windows.  There's a single piece of trim board installed between the two casement windows, which is a really nice touch, and makes the window look like one unit.  Attention to detail is important in this stage.

   Here's one of the side windows under the porch.  Again, the side window trims are installed with the top one being a single long trim pieces under the porch ceiling and the bottom will be the brick ledge.  The brick ledge will be a limestone material and acts as a flashing and border between the cedar shingle and granite cobble.

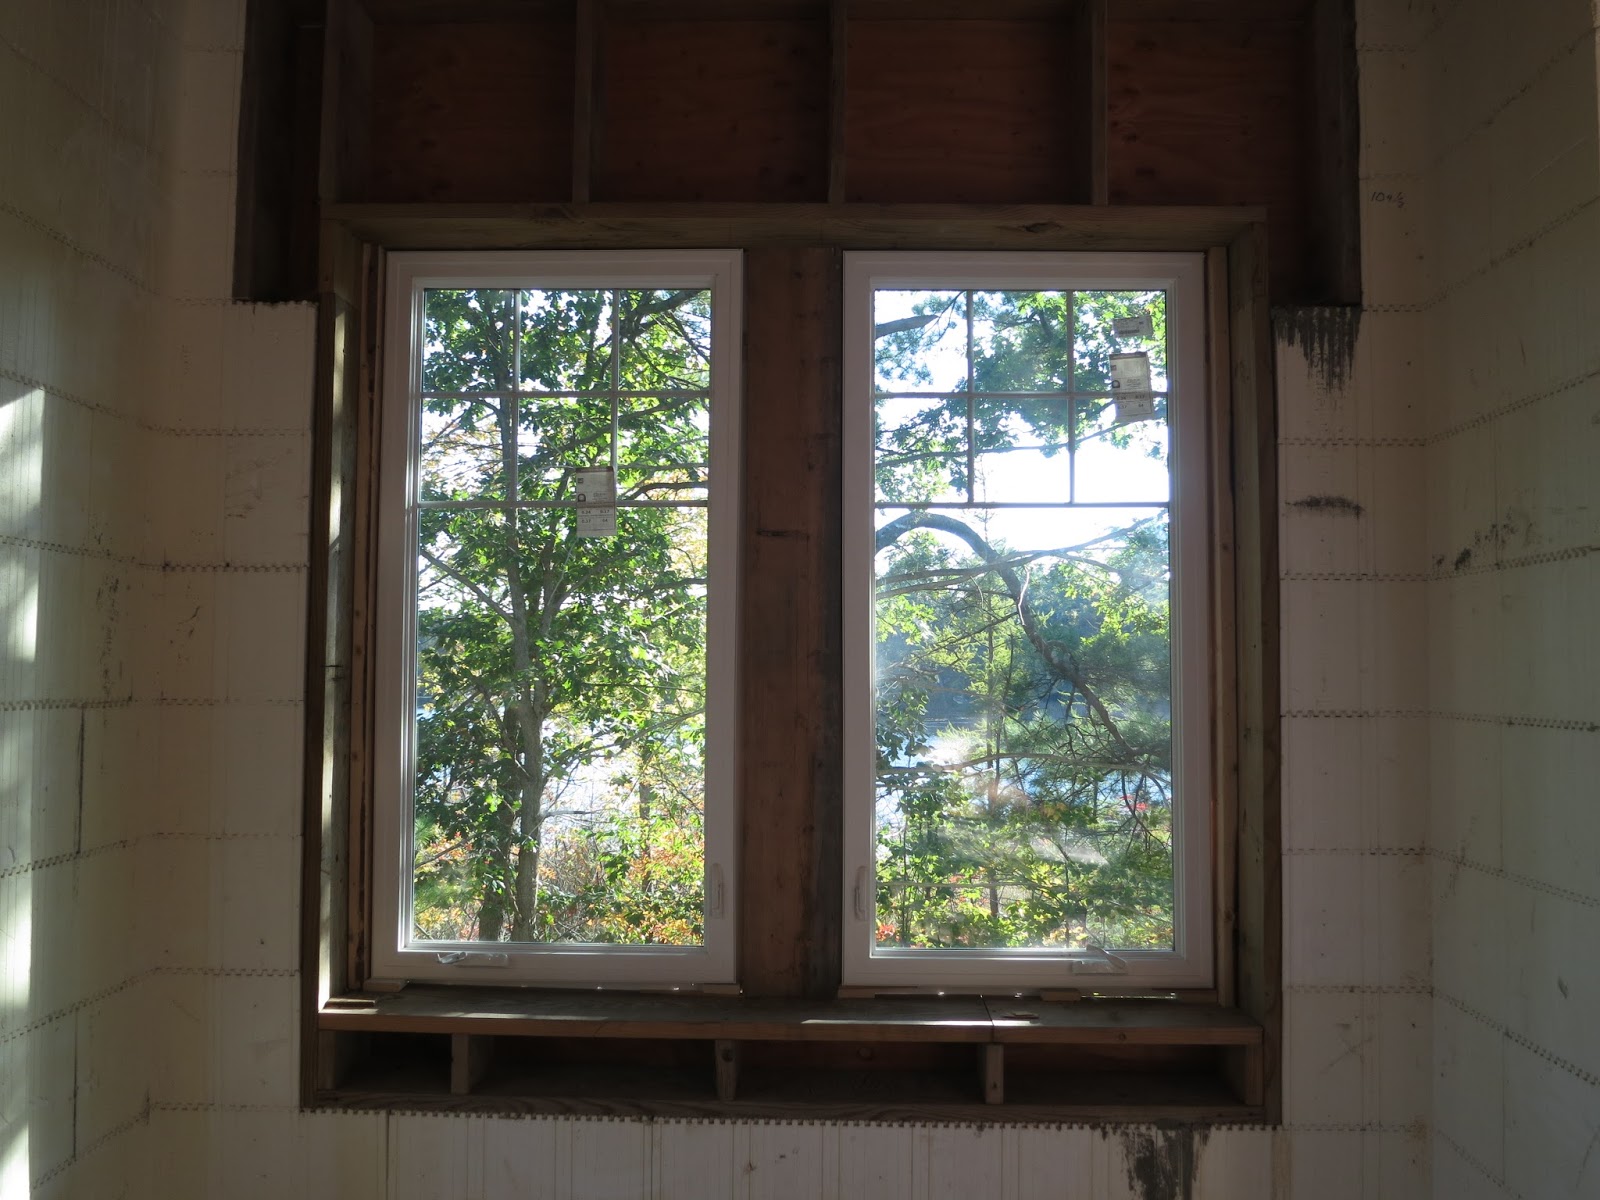
   Moving inside, almost all the great room windows have been installed.  The only one missing is one that arrived damaged, and will be replaced by Pro Brothers this week.  All the windows on the back wall are non-functioning.  We wanted the best view and casements would have closed in the frames.  The upper windows have internal mullions to carry on the look of the rest of the house windows.  The arches still need to be boxed in, but you can get a good feeling how they're going to look.

   The lower windows on the side of the great room are double casements.  The upper window is a non-functioning full arch, but I forgot to get a good picture of it.  I think having these two lower windows, one on each side of the room operable, will give us enough ventilation for the room, especially considering there's almost always a breeze.  Not only were these rear windows set, but they were also insulated with expanding foam.

   Here's a shot of the same window, down on the sill plate.  They just used a standard low expanding polyurethane foam for the joints, which should be good enough.  Sure there are newer methods and technologies for air sealing windows but this is the standard now.  I'll take the thermal camera to the joint during the winter to see how well this method seals up.

   Here's one of the non-operable great room windows, all sealed up.  You can see they added a 2x6 to the window buck to adjust the opening to fit the window, then foamed against that.  That 2x6 will have to be extended into the rest of the window opening for the window finish but that's up to the finishing carpenters to do.  The difference in noise and temperature is amazing.  Because of all the water surrounding us, we can hear a bit of road noise from the main road that runs about a mile away from us.  With the windows in place, the noise is gone and the temperature of the house is much more stable.  Winters here are going to be beautiful.

   Here's how they foamed in the oval window in the guest bathroom down stairs.  The gaps between the wood stud supports were filled with foam and trimmed down a bit.  I still need to discuss with Mike how these window openings will be finished.  I would expect there to be some kind of an oval "tunnel", which will be more difficult to make, but the correct implementation.  We just need to be on the same page.

   Besides windows, the carpenters built up some of the walls that needed to be moved.  Here's the final location of the turret bedroom wall, which needed to be moved because of the HVAC trunks going to the attic.  The same was done downstairs in the study but that room only lost the alcove rather than having the entire wall moved.  I'll have to see if we can get this duct space insulated, not only for energy efficiency, but for sound as well.
   Here's the study wall that was created to close off the alcove space.  Although we're losing the alcove, we'll probably make up for it by making this whole wall shelving/filing storage space.  The plan right now is to have and L shaped desk, that sits more towards the middle of this room so that we're facing into the room when sitting at our computers.  My back will be to this wall so I'll have a nice view out the front of the house.  We're making sure to get enough electrical and data pulled through the floor here so we don't have cable runs from the wall to the desk.  I'll have to make sure to keep a clean desk in the future because my current desk is a mess.

   All three sliding doorwalls have been installed.  The one pictured here is in the kitchen area and two more are downstairs in the basement.  The opening needed to be furred down to fit the height of the sliding door and although it looks and feels a bit low, it's a standard height sliding door.  In my next update, I'll detail the features of the door itself but my initial impression is positive. The door comes with a foot actuated lock and the door itself is lockable.  The screen has a latch as well, but it's not lockable.

   Here's what the doorwall looks like from the outside, on the back porch.  The door and screen glides smoothly on the track and I don't expect any troubles from them.  All the gliding hardware is stainless steel with multiple rollers.  The door handle is powder coated steel with a single thumb latch for the locking mechanism.  The frame, rails, and stiles are all foam filled for insulation, and the sill is aluminum.  We had the option of internal blinds, but decided to forego that feature. 

   Here are the numbers for the doorwalls, which are closely in line with the rest of the windows.  The air infiltration is 0.12 CFM, which is just about as low as the windows, which is impressive.  There aren't as many seals, and the by-pass design of the door inherently allows more air to infiltrate.  The glass spacers are non-metallic like the windows which reduces condensation on the interior.      Regardless, I'm happy with the numbers and don't expect the door to be overly cold.

  Here are the installed windows on the side of the garage.  Even though this is a great view, we decided to get casement windows here so we can vent the garage.  Looking back, it's probably not necessary since we have garage doors on both the front and back of the garage, but it still might be nice to have these operable.  I'm really looking forward to building a gardening workbench in this space and having a colder place to overwinter plants, or put seeding trays for the garden.  This south-facing windows will allow for great sun during the winter.

   Here's the work that was done on the master balcony.  There used to be a straight pony wall here, but we had the idea to make this wall angled down to the pitch of the roof.  When we finish this, we'll have triangular glass piece fabricated to act as the railing here with normal rectangular glass railing on the face of the balcony.  Angling this wall really opens up the balcony and allows more light through.  There's big difference to the feel of the space.


Here's what the inside of the turret looks like now that the windows are in.  Two to the right aren't installed yet to give the copper roofers some space to work.  We decide to go with a full grid in these windows and feel that it really adds some charm to this room.  I'm not sure how we'll do window treatments, but it will be a trick since there isn't much room between the windows for curtains.  The sills should be deep enough for blinds if we go that route but I think that would detract from the aesthetics of the tall windows, even when the blinds are open.

   Here's a single window from top to bottom.  They're actually comprised of two windows attached together with brackets and all together stand seven feet high.  We're not planning on installing any window benches here, but rather keep it open and put comfortable furniture in here when needed.  Each of these lower windows are casements and open to the left.  We're hoping this will make a nice little play room for the twins, so we don't have to have toys all over the house.  Wishful thinking?

Here's the second floor oval bathroom window from the outside.  You can see how they applied the window flashing in a overlapping manner to shed water downwards.  Also you can see some of the house trim that runs under the roof overhang, that will be incorporated into the window trim.  Here it cuts into the oval, as it does with the round window in the front.  The rest of the round trim will just meet into this house trim. 

   Here's how the window trim ties into the house trim on one of the regular second story windows.  I think it's an elegant solution to a tricky situation.  Ultimately, when the trim is painted, it will all match nicely against the gray cedar shingle paint.  All the trim is the same 1 inch thickness, just different widths depending on where it is.  

   Here's a shot of the side of the house looking forward towards the turret.  It gives you a good idea of how the house trim meets up with all the windows.  This will happen on both the first and second floor, as well as some corner trim on all outside and inside corners.  The trim needs to be installed first so it can be caulked and painted before the shingle goes on.  The shingle will butt right up against the trim.

   I climbed up on the scaffolding a bit to snap a picture of the copper valley that's being installed between the turret and the house.  This is how it should be done.  The copper is overlapped to shed water downwards, and the seams are soldered tight.  The valleys that the other roofer did overlapped properly, but are caulked, which might be okay in the short term, but in the long term will eventually fail due to the different expansion rates between dissimilar materials.

   Here's a close up of one of the solder joints.  This type of joint won't break with temperature fluctuations and will remain waterproof for at least 100 years.  It might look a little messy, but considering the joint itself is a couple inches wide, it's not too bad; you're just seeing the edge of the joint.  The copper sits under the ice and snow membrane a good six inches so I'm very confident in this valley. 

   Here's how the straight roof overhangs were boxed in and terminated at the turret.  These were left open by Matt and no that the turret roof is going up, they can be closed up and finalized.  It will all be painted white before the shingles go on, so even the old cedar boards won't be unprotected when the winter comes.  We'll have to make considerations for all the water that pours off the valley since it might hit this area.  We didn't think we would need gutters on most of the roof, but we might need something here.

   Here's a close up of the start of the copper drip edge around the turret and a fine example of how it should be done.  This is a single piece that is snipped on top and crimped below to form the curve.  The other roofer just used lots of 6" sections to form the curve, which is a much less elegant solution.  Also, make note of the nails...

   Hey look, stainless steel nails.  Remember that the other roofer used hot dipped galvanized (zinc) nails, which is a huge no-no on copper.  The best way to go is copper nails, with stainless steel nails coming in second.  The stainless steel is not too far away from copper as far as galvanic potential so they won't be eating each other up.  Do it once, do it right.

   Here's the exterior side of the great room.  The top windows are arched so they can match up with the arch of the rear windows.  Below is the operable casements.  This is one area where we will probably need some gutters so the water falling off the roof can be taken far enough from the house.

   This window opening will eventually be filled with glass block when the masons come through.  It's a window for the mechanical room in the basement, so we don't need anything fancy or clear, just something to provide good light.  Right now it's just boarded up to prevent access.

   Both of the sliding doors are installed in the basement, so with the plywood in the glass block opening, and all the other basement windows installed, the basement is now closed up.  I have one set of keys for all the sliders and kept the other with the doors.  The basement is the first floor to be completely closed up.

   Some of the metal studs are in the master bedroom, waiting for installation for the dividing wall.  It will be a little bit of a trick to pull off since it's a free standing wall.  Some of these studs might be used in the bathroom as well.  We might need to end up making more of a narrow box rather than a single thickness wall so it can remain rigid and self supporting.  

   These turkeys decided to check out our build progress.  Don't they know Thanksgiving is coming up?

   So that's it for this week.  The next week should see the completion of the copper roof, installation of the geothermal wells, and maybe the completion of the house and window trim.  We need to decide on steel doors for the garage entry doors and get final measurements on the exterior doors in the mud room and great room.  The carpenters are also framing out the garage door openings and all the interior door openings since they weren't quite at finished height.  We have a meeting with Mike this week to review the proposed budget and settle up on some of the work that has progressed outside the bank.  Things are definitely moving in the right direction now!