Well due to a well needed vacation, the last update was two weeks ago and there has been progress all over the house, some visible and some not. There was tons to look at and even more to be excited about as we push towards the August deadline. The biggest mover is the finished interior woodworking with nearly all the door, window, baseboard, and crown molding in and lots of progress on the more decorative elements. Tile installation began again and a huge delivery made it into the house. Exterior rough carpentry leaped ahead, completing all the arches on the front porch and slamming out many of the pillars in the gazebo. Exterior solid stain was applied to all the cedar shingle, but the trim remains unpainted, probably waiting for the completion of the porch pillars, which is fine because the gable pediment is on site, but needs to be installed. Fill sand for the front of the house was dropped and awaits distribution, but it's a huge step forward on the outside.

Let's start off this update with a few exterior shots since the exterior painters applied a coat of solid exterior stain to the cedar siding. Depending on the light and viewing angle, the color ranges from a light gray to gray-green, but the official color is Sherwin-Williams Earl Gray. Judging by the slight inclusions into the trim, it looks like it was applied with a sprayer and the coverage looks complete, despite the cracks and crags in the shingle.

Here's the house from the front. The color still appears a light gray in this picture, but in person, it's a little darker. Definitely more gray than the taupe gray initially sprayed on the trim. Even without the trim painted white, the white vinyl of the windows really pop against the gray. The white painted trim will enhance that visual. The same dumpster was present and nearing capacity, but is lasting longer than the last because all of the woodworking cut-offs are being burned rather than thrown away. There was an odd plastic mailbox in there, but I'm not sure if it was from one of Mikes other builds or if we had some local visitors. Nothing was caught on the security cam.

A closer look at the paint under the front porch offers a better representation of the paint color, which looks closer to gray/green here. The color variation in these pictures probably have to do with the automatic white balancing my camera does, but I didn't take a reference white before snapping these. I'll try to remember to do it next time.
Gracing the front yard is what looks like a truck load of fill sand in several large piles. From the tracks on the driveway, it looks like an excavator drove in the buckets from the street. Also, I've never seen a truck dump double rows of dirt like this, especially in the tight quarters we have here. Of course, I could be completely wrong, because, what do I know about dumping dirt? Each pile is about 5' tall, and I think this might at least be a good start to filling the deficit we have in this space.
A shot of the painted back shows how the Earl Gray looks different at different angles. The color on the greatroom exterior looks like a blueish gray while the same color on the back of the garage looks more green/gray. However you see it we're really satisfied with it and can't wait to see it pop against the white painted trim. I think once the porch posts are completed, we'll see the white go up and hopefully at that time, we can get the dragon up on the turret.

This shot of the back of the house makes the color looks more green/gray; almost a sage. Again, it might be because of the white balance picking up the color on the roof shingles. You can see the porch posts in various stages of finish. More on this later. I'll have to make sure they paint that white vent PVC pipe when they're up there painting the trim. I saw a rattle can of paint at one of the big box stores especially for this purpose but I'm not sure if it's formulated any differently for PVC vs. the standard paint, but it did come in a few colors.
While there wasn't any progress on the front porch floor, all of the front porch arches are completed and ready for the post wrap. It was a huge effort and they pulled it off really well. We're really happy with how these arches came out and I think every time we look at it, we'll remember the effort involved with pulling it off.
One of the posts on the front deck was mocked up with the full wrap to get our confirmation, which we happily gave. The wrap is made from MDO, which is like MDF, but with a water resistant binder, which makes it much more weather resistant than MDF, which swells and breaks down in the presence of even the smallest amount of water. The cove trim pieces are either pine or oak, and everything will be painted with the same exterior white used on the rest of the trim, offering some level of weather resistance.
Here's a close up of the cove trim piece in the column panels. Amazingly, it's slightly thinner than the MDO, which provides one more shadow line that might be obscured with paint. Finishing nails and glue were used for assembly and I'm expecting the whole thing to be caulked before painting.
The gazebo posts are getting the same wrap design as the front of the house, with most of them being completed. The nice thing about this design is that they can install the main body of the wrap, the panels and corners, then wait for the finished surface to be installed before installing the bottom trim piece. This allows for adjustability and customizability with respect to the finished surface, in this case the granite counter top of the barbecue space.
Every post in the gazebo has some level of completion, mostly with the main panels and corners, just awaiting the top and bottom trims. It really beefs up the posts and changes the entire feel of the space. You can see an incomplete post panel sitting on the barbecue, and the internal spacers needed to attach the wrap to the 4x4 post.
Here's the other side of the gazebo with all the posts wrapped. The bluestone floor on the gazebo will be installed right up against the wrap and the final bottom trim piece will sit on top of the bluestone, offering a tight fit. The panels are wide enough to accommodate a good width for the top rail, where needed. We're still working out what kind of railing will go on back here. Ideally, we would have a glass panel rail similar to what we're having on the master balcony, but I'm not sure it's currently in the budget. While the final grade will remove the requirement for a rail on this side of the gazebo, we might want one to keep with continuity.

While we're talking about the back porch, the quarter round trim above the mudroom exterior door was adjusted and I think this is the best it's going to get. The quarter round was trimmed to match the curve of the door. Doing it this way preserves the arch of the door trim and still allows some space for caulk to be applied between the trim and quater round. Since the master balcony door is being remade due to incorrect delivery size, we requested that it be shortened about an inch so we would avoid this issue up there.

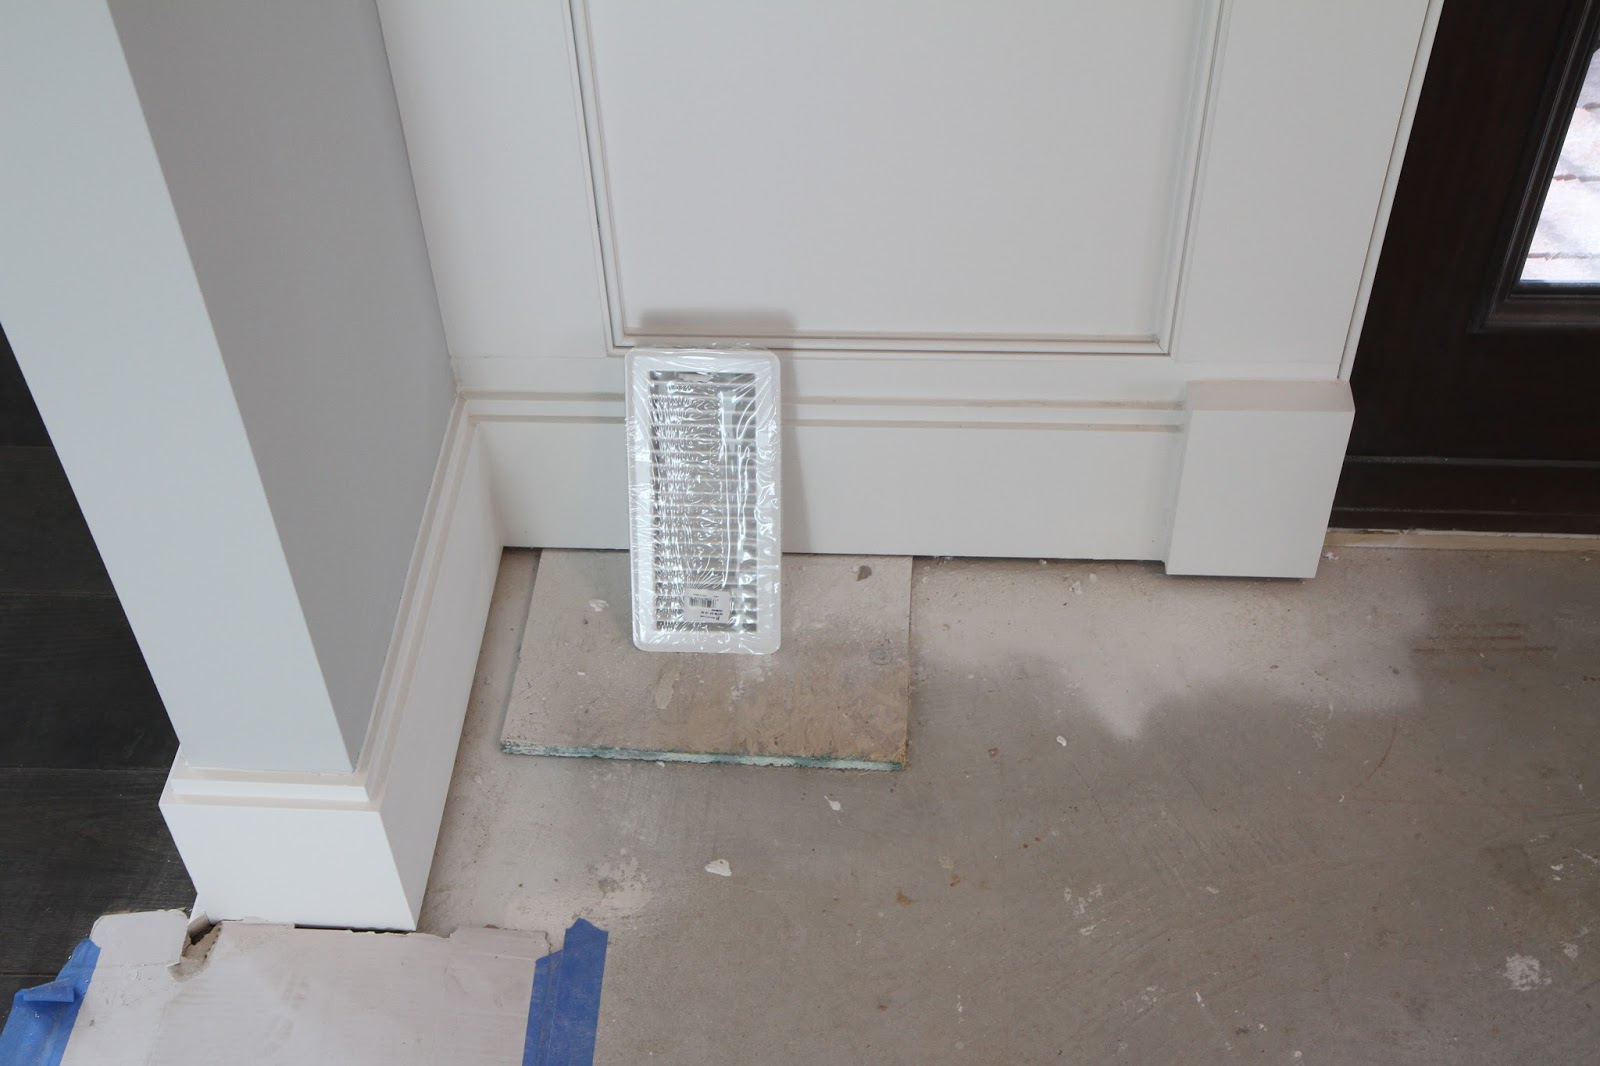
Little improvements elsewhere include this piece of trim, that has been missing for a while when Mike was still trying to figure out how to fix the little issues around the house. The overhang here was also replaced since it was warping a bit. There were other overhang areas around the house that Mike wanted to correct, but I didn't think to look for them this time. I'll take a look this weekend to see if they were also replaced, since many of them were in inconvenient places.
We also requested that this piece of trim be added to tie in the trim at the ceiling drop down on the back porch. It will all be painted white, and it didn't look right to our eyes to just terminate the trims without the vertical piece. It's an awesome feeling to know that you're being listened to and things you only mention once are remembered and implemented when appropriate.
Moving inside, progress was seen on the finished woodworking on the first floor since the second floor is completed. All enclosed rooms had completed door and baseboard molding and crown where applicable. Here's what the arched study door looks like fully trimmed out. The baseboard in the foyer and rotunda are still pending but the study, dining room, guest bedroom and kitchen area have theirs installed.
The study itself is being used to house the material used for the paneling in the greatroom and rotunda, and the post wraps for the front porch. There's a good amount of MDF/MDO in here so I think this is everything needed to complete all the fancy finished woodworking throughout the house. Week after week, the focus of the trim work gets smaller and smaller and I expect we'll see the end of the finished woodworking within the next week.
Here's what the crown and baseboard molding looks like in the study. Just like the rooms upstairs, the baseboard is curved on the curved section of wall. While every room doesn't have crown molding, we can decide if we want to add it some time at a later date. It's not too difficult to put up as long as there isn't a curved wall in the room.
There's still a good amount of building material in the dining room, but it wasn't in the way since Distinctive Designs installed the crown and baseboard in here too. There will be some ceiling detail exclusive to this room as well and we approved the design for it over vacation so after all the regular trim is done, the only areas left for finished woodworking will be the rotunda, dining room, and greatroom, which is nearly finished.

The powder coated tin ceiling was installed on the second floor rotunda. The diameter of the circle matches the opening of the rotunda to the second floor. We always suspected that the chandelier box was off centered in this space since it didn't line up with the front door or fireplace and they confirmed it during the installation of the tin ceiling. It's now properly centered and lands dead in the middle of a square of tin. We were hoping for a more silver look since this looks pretty dark so we'll see if they can buff some of the powder coating off to give some shine to the higher parts. I'm not sure if it's possible to do mechanically or labor wise, but it doesn't hurt to ask.

Two large stacks of boxes are currently sitting near the rotunda next to the fireplace. They were delivered last week and contain the tile for the fireplace column. It's from a company called "Island Stone" and the shipping cost was pretty substantial. The tile installer will be in this week to start so maybe by the next update, I'll have some progress to post.
More boxes of the fireplace tile sit nearby, completing the shipment. Since the tile is not only a stacked stone, but also vary in depth, it will need to be installed around the entire fireplace column in a layered manner rather than a face at a time. The stone wraps around the corners, so coordination between the faces is necessary.
Here's the label for the stone for posterity. They come in come kind of sheet or strip, and contain 10 pieces per box at 35lbs total. 53 boxes means 1,855 lbs of stone going up on the fireplace. That's nearly a ton of stone over the footprint of 4x8 feet. Good thing this sits on concrete that in return sits right above a steel beam with two posts that tie it to a concrete footing. This is probably the heaviest thing in the house.
Here's a poor example of what the stone looks like. The material color is true, but this isn't a good example of the varying thickness of the material. In the samples we saw, the thickness varies to what you see here, to two times as thick and they taper up to the thickness in a single piece so it gives the visual effect of bump outs or arches rather than sharp stacked stones. Careful application will be required to pull off this effect.

The greatroom saw a lot of change since the last update with the near completion of the paneling in the back half of the room. As shown, it encompasses all the windows into a single paneled unit, rather than having each window with individual trim. We need to start to think about interior paint since the house will be prepped for that stage in about two weeks, but I'm not sure what will happen here. The same paneling effect will be applied to the rotunda, and if it all follows the trim scheme, it will be painted white but a higher sheen than the walls. I really like how this turned out. If this were a more formal house, you would see dark wood stained panels, but since we're leaning more modern, we're going for a more monotone look.

Each panel is inset with this trim piece. I'm not sure what the profile is called, but it's kind of a corner bead, or at least a bead where the corner would be. Inset a bit from the panel frame, it provides three shadow lines in one piece, emphasizing depth, but keeping a clean look. I'm pleased with this design since it adds detail, but it's not too busy or presumptuous.
The rear speakers are inset into the walls, but Distinctive Designs framed them out within the panel, which looks amazing. Even with the speakers being near flush with the wall, they would still be obvious so why hide the fact they're there? The corner bead still needs to be applied here, so I'm excited to see it applied to that curve. The speaker grills will be painted the same color as the paneling but this detail will highlight their presence.
Here's a little closer look at how the panels act as the window trim, and how they integrate down into the standard baseboard trim that's used in the rest of the house. While every electrical receptacle isn't centered in the window, they're at least symmetrical across the room. One of them lands in the little square. The sill piece is continuous across all the windows and stands proud of the panel casing.
At the top, there's the coffer beam, a bit of crown molding, then the paneling. I didn't expect the crown, but it really ties in the coffer to the panels. This would look really stately if it was in walnut. I hope the detail isn't lost in the paint.
The crown terminates on a return at the end of the paneling space. The arch top windows are just trimmed in a thick arch frame without a panel. This visually separates the greatroom into two seating areas a bit, and we're planning on trying to define two sitting spaces, or at least a "fireplace side" and a "window side". Rotating seats may be involved.

The wood backer for the TV mount was attached above the fireplace in preparation for the stone install. We were trying to decide if we wanted a metal plate back there, since using a
Mantle Mount would make it visible when pulled down, but decided against it since we couldn't justify the cost vs usage. Having a formal plate back there is good enough and the number of times it would be visible just doesn't justify the expense of having a plate fabricated. At least there's something as a place holder should we ever want to replace it with something fancier.
These pre-made corners of MDF or MDO are sitting in the greatroom and I think they're for the columns. I don't see anything like these corners on the paneling so it's a safe bet to assume their purpose. There are still most of the columns on the front porch in addition to the post below the front porch to wrap, so there's still quire a bit of work to complete.
Distinctive Designs also completed our gable pediments for the gable above the laundry room window, and the end of the garage. These things are amazing. Made of solid yellow pine, complete with weep holes to shed water, they'll be painted on the ground and installed thereafter. I'm really impressed with the solid craftsmanship of these things and I think it would have been near impossible to find from another source at the same price.
Here's a close up of the gable pediments to highlight their quality. We've spent a lot of money on a lot of things for this house and I have to say that this is one of the best deals we've gotten so far. Mike from Distinctive Designs wanted to make them out of solid wood to avoid any issues with weather. I'll get some more time to measure the dimensions, but I think they're 1.5 to 2 inches thick on the curves and more on the frame. I submitted a 3d model to him and he made these two to the specific dimensions of our house. Amazing craftsmanship.
The door trim is going up around the greatroom exterior door. We still need to take delivery of the master balcony and front door to finish out all the trim work, so hopefully those will come through soon. I can't wait to finally have all the doors in the house complete.
The kitchen island cabinets got a layer of protection due to all the traffic that will be coming through for the paint, tile, and floor soon. Counter tops have been measured and the numbers are coming in there so I'm hoping we're not over budget. I'm not sure if counters or floors will go in first but either way, it will be a huge step forward towards a finished home.
A small shelf was put on the bottom half of the french door to the mudroom but we had some issue with opening the door. The shelf butts up against the door trim so it can't sit flat to the wall. The top half can, but the bottom can not. I'm wondering if we should cut a symmetrical notch on the shelf to bypass the trim or if this opening angle is okay.
After a few iterations, Mike had these garage entry stairs created. He tried having the stairs come straight off the door without a landing but it impinged too much upon the traffic pattern from the rear garage entry door. He thinks that a landing is more comfortable even if we have to deal with the 90 degree turn. I'll let it sit for a bit and see how it feels.
The garage storage has a straight landing since it's farther away from the rear garage entry door. It's unfortunate we can't get the symmetry of the two stairs, but having this one turn 90 degrees didn't allow for at least 36" between the two stairs. Another alternative is to have one set of stairs that lead up to to a catwalk between the two doors. It would go out into the garage as much as this staircase does, but will reduce the number of stairs.
The garage entry door has its trim installed and there's a simple baseboard molding going around the garage walls. No profile on top, just a squared off primed piece of wood to hide the bottom edge of the drywall. Functional and clean.
Moving upstairs, Omar the tile installer installed the subway tile in the second bedroom bathroom. A simple installation with a clean design. It still needs to be grouted, but he made quick work of this bathroom.
He added two radius shelves in here since the back wall is on the exterior and we couldn't add an in wall shelf like we have in the other bathroom. It might have been able to go on the back wall, but I think there's too many wires and pipes going through there. These shelves should work well.
The tile baseboard is just cut tile without a bullnose profile. I think the tops will be grouted or painted to hide the tile edge, but this is a functional finish that doesn't break the bank. The tiles line up perfectly with the floor tile, a feature lost in our current house. The grain runs the same direction as well. These are the hallmarks of a quality installer; attention to detail.
A hidden progress point is that we finally have insulation in the attic space. There's an R-30 batt covered with blow in to provide R-45 in the attic space. They're finishing up insulating the attic space above the garage today, completing the insulation in all spaces. Milestone passed.
Well that's it for this week. There's a short week until the next update, but I'm sure I'll have some incremental progress. We're in the middle of figuring out the final budgets for the next steps so we can glide in to a smooth finish, but it's these times that really test our limits. The end isn't in sight yet, but it's just over the horizon. 8 more weeks!