Every week there's something new and this one is a doozy. The problem with having so much progress is that it's hard to keep up with the blog, the blog posts are way longer, and I don't get to see the work in transition so I'm missing out on exciting pictures.
As mentioned in the last post, this week we had three crews running at the house at the same time. The carpenters were working outside, installing window trim and prepping for siding. They were also busting ass inside, making corrections to walls, prepping window openings, finalizing all the door openings, and finishing unfinished areas. We had the copper roofers installing the copper roof on the turret and installing the weather vane mounting rod. All that's left is to finish off the shingle near the turret and wrap the chimney with ice and water membrane. Lastly, the geothermal well drillers came and went, drilling six wells 140 ft deep each, connecting them up, and trenching the line to the house. Prepare yourself for a progress smorgasbord.

This greeted me as I pulled up to the house. Since the front of the house was dominated by the geothermal well work, this lumber delivery couldn't make it into the garage. With most of the previous lumber delivery almost exhausted, this load was required to keep the work moving. I can't say I know where everything is going, but considering it's unprimed, I can guess that it's not going on the exterior. It doesn't look like pine, and it's only .75" thick so it's most likely trim board. Maybe used for all the window bays.

Here's the state of the front of the house. You can see the copper roof completed, trim under all the second story fascia and on the outside corners, some new framing on the garage headers to bring them to height, and window trim on almost all the windows. The ground was disturbed by the geothermal trenching, bit is now flat and a little squishy. I'm really glad we went with real copper for that turret roof. I think it's a huge centerpiece to the house and it looks amazing driving up the driveway.
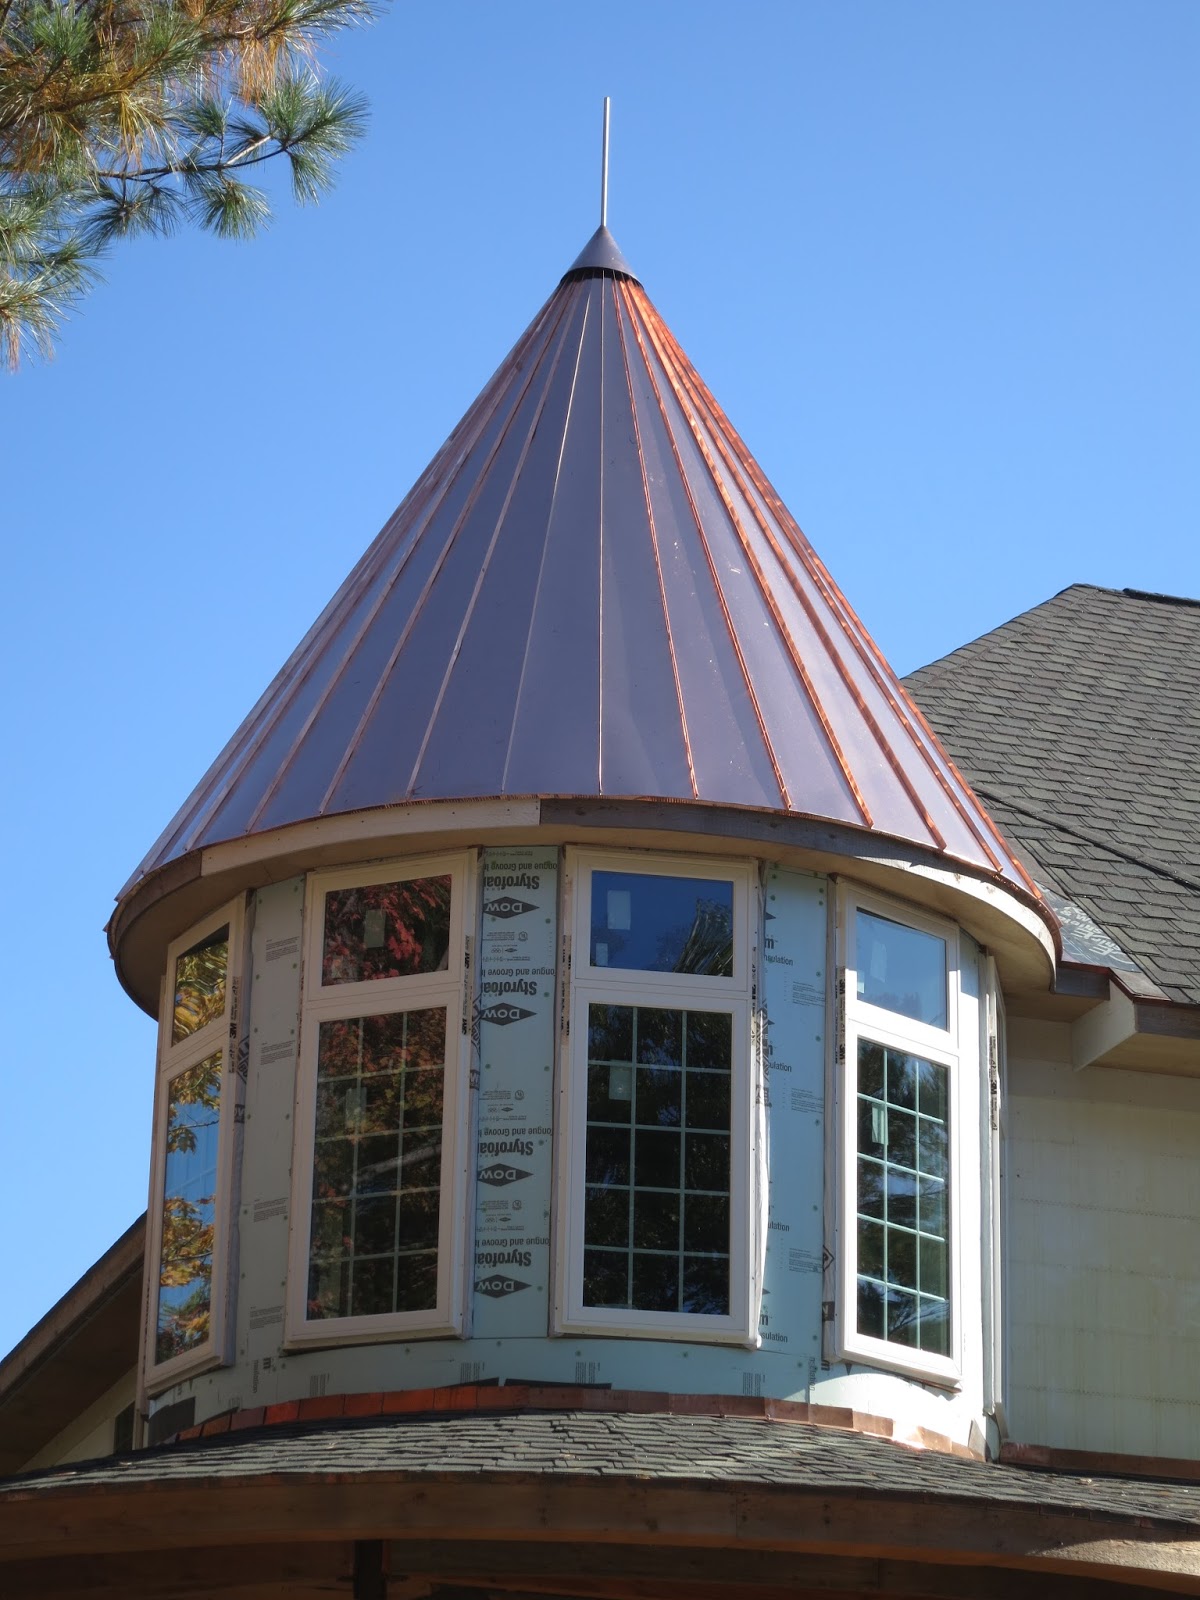
Here's a closer look at the turret roof. The carpenters replaced one of the curved fascia boards that was cracked. All the windows are now installed in the turret and the overhang is completed. Unfortunately it comes very close to the top of the windows, so some creative window trim design will be needed to make it look cohesive. The weather vane rod is stainless steel and goes right into the attic space, where it's held captive by a mounting bracket. I love the cone cap at the top. We have a 3 foot copper dragon weather vane coming in mid-November that will sit up there so we'll have to hang onto the sky-trac until then. We'll have to talk to the electrician to see if it needs to be grounded. There are some trees close by that are taller than the house, but copper is much more conductive.

I know it doesn't look like much, but underneath lurks the heating and cooling arteries of the house. On the right of the frame, in front of the cement and boulder retaining walls sits 6 geothermal wells, drilled down through 140 feet of sand and gravel. These are buried a couple feet under current grade, and will be buried under two more feet of fill sand when it's brought up to construction grade. On top of that will be the paver section of the driveway. Running to the house is trenched four feet down under the frost layer, two main pipes that breach the basement wall, bringing all the circulation liquid into the house. The lines are covered with sheets of foam to help block against surface coldness. A section of the porch was removed so they could access the basement wall and drill through. I wish I could have gotten pictures of it all, but they moved too quickly. The drilling took two days and the laying of the pipe and trenching was finished in one. The only trace that's left is two hoses coming through the basement wall and a newly scraped driveway.

Here's where they went into the house. It was always planned that something would come through here so Matt didn't fully install the deck joists in this section. We initially though that the water would come through here, but later changed it when it was decided the geothermal wells would be better placed under the driveway. We might keep this open still since Mike wants to install some proper water barrier on the ICF wall when Great Oaks comes to repair the heaving in the retaining wall.

Here are the lines that come into the house. They're sitting right above the drain sump and across the mechanical room from the furnace itself. I'm hoping they'll be able to route the lines really nicely since I hope to have a clean looking mechanical room. Besides the furnace, it will also contain a water pre-heater from the geothermal system, a water heater, our main electrical panels, and our server stack for data and audio/video distribution.

It looks like they drilled through the ICF and installed PVC sleeves, through which they ran the polyethylene piping. I'm not sure what the other drill hole is for, but it's filled with concrete. There are only two pipes, and I think they just run in a continuous loop going up and down each well in series.

One of the lines is capped off and the other has a pressure gauge installed on it with a quick connect fitting. The gauge is reading higher than 100 psi, which is higher than the 40-70 psi present during normal furnace operation. I'm not sure how long they'll run this pressure test for, but it has been holding for at least one day.

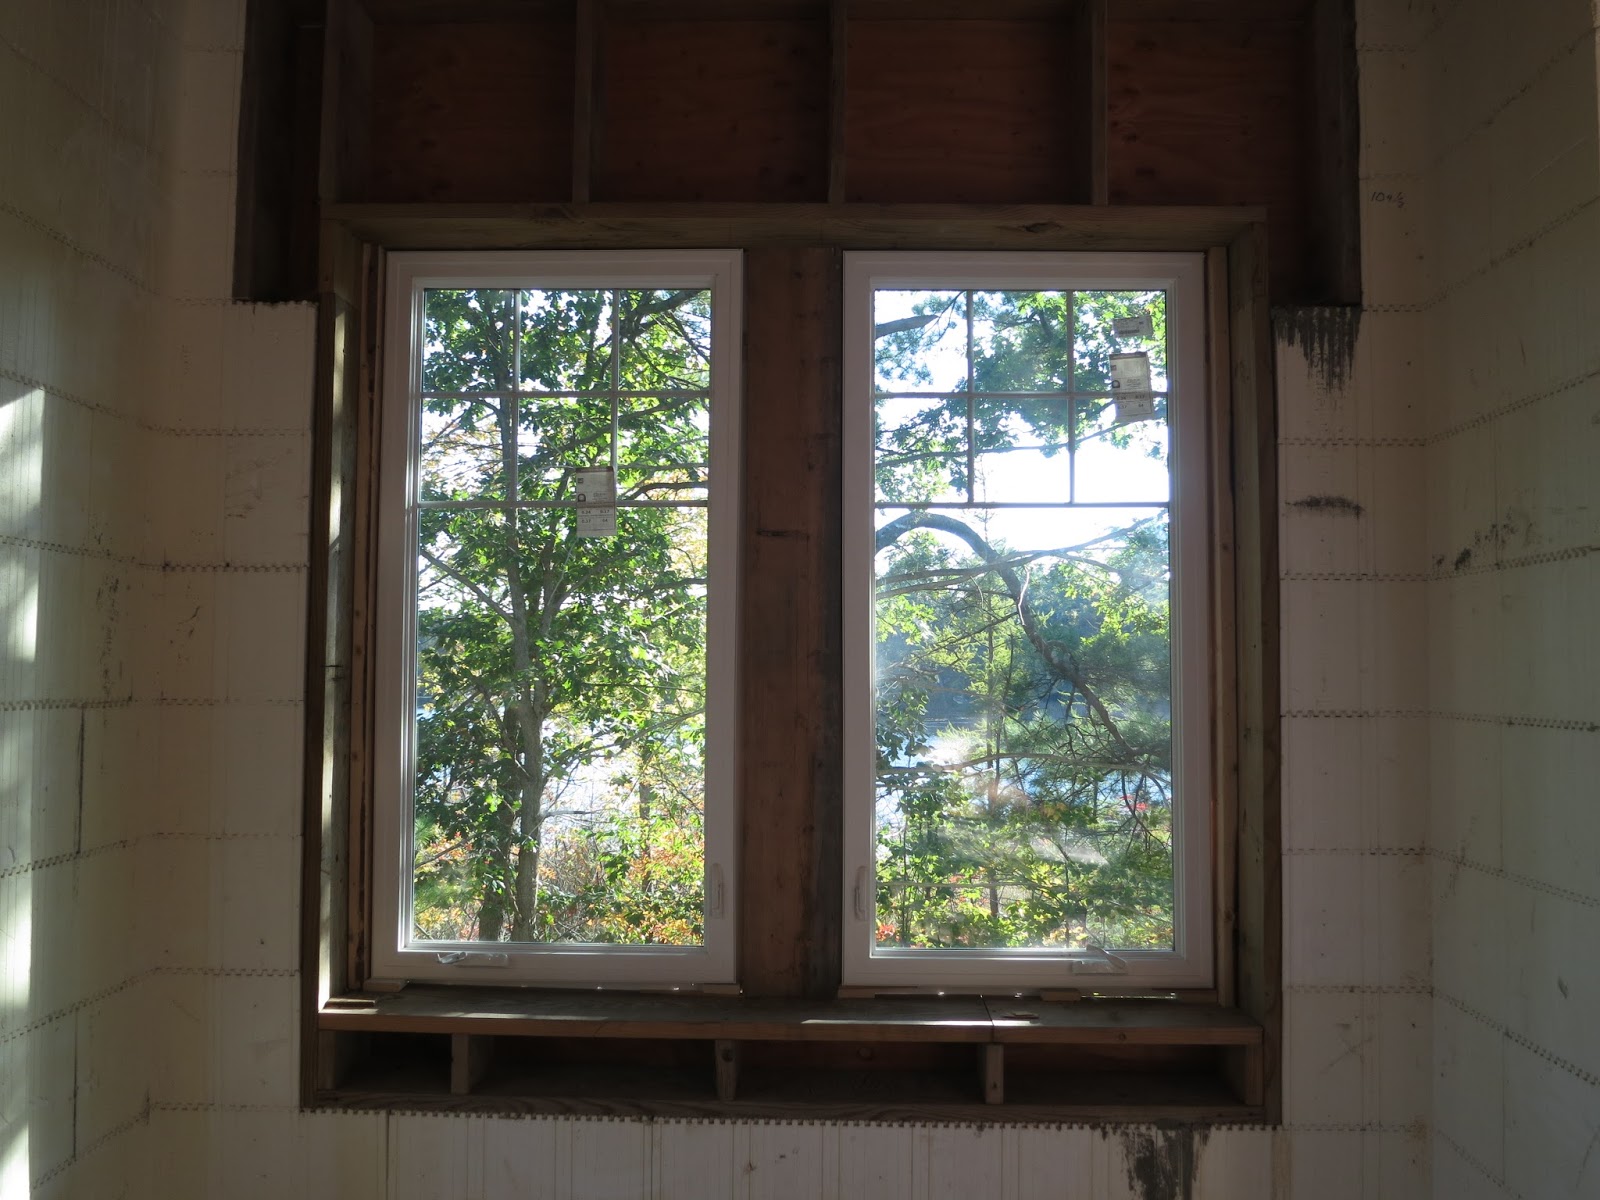
All the windows are being prepped for finishing carpentry work and drywall. Here's one of the double casement windows in the front of the house. Because of the width of this opening, this window is made up of two individual casement windows with wood in between. The window bucks have been furred for the final material and some framing has been installed in the middle stile. We're not really too keen on how far forward the center stile has been boxed out because, when finished, it will make the window look like two window bays rather than one window. We talked to Mike about this and we'll have to come up with a solution. There will still need to be some window sill taken up with the center stile, but we can probably make it thinner. We have to be able to fit insulation and final wood trim there, so maybe some 1.5" thick foam sheet and the final casement wood of half an inch would give us the look we desire. Mike has been awesome with accommodating changes and implementing them quickly. He's a real problem solver.

All the windows have been delivered from Pro Brothers, so we can finally get everything sealed up. The full arch window on the left of the great room and the eyebrow in the laundry room arrived damaged and have been replaced, delivered, and installed. The rough carpenters have boxed in the arches and spaced them to the interior dimensions. Those spaces should probably be insulated with either fiberglass batting or spray foam (preferred) but now you can get an idea what the interior walls will look like. You can see some furring strips installed on the bucks where the final interior casement will be installed.

Here's The view of the windows from the second floor. The great room will really look different when the catwalks are removed, but I think they'll probably remain through most of the rough mechanicals. It's very convenient to work from them for the window trim and probably much of the drywall installation. I'm really happy with how the windows turned out. We thought about using rectangular windows on the upper side, but felt the arch on the back would end too abruptly without arches on the side. The grid above and clear below mimics the rest of the windows and really adds character to an otherwise open wall. We're expecting a coffered ceiling in this room but haven't nailed down a design yet.

The dividing wall was started in the master bedroom but we'll have to make a design change. Since the master bedroom is so long, we decided to have a free-standing wall about the width of the bed to break up the space into the sleeping area and a sitting area. We'll be able to hang a TV on this wall on the bed side, and maybe some art on the sitting side. The only problem is that, since the floors are concrete, a free-standing wall isn't easily possible. If this were a wood construction, the sub-floor could be cut away and the wall joists could be tied into the floor joists, allowing the wall to stand freely without anchoring it to the ceiling trusses. Since we can only attach to the surface of the concrete floor, we needed to tie into the ceiling, otherwise the wall would be unstable. Since we don't like the look of the tie in, we've decided to add two short returns to each side so it makes more of an alcove facing the bed. Just a short 1 foot return will allow the wall to be free standing without supports to the ceiling, and we could use that alcove space for shelves or a built in if we want. There's about six feet from the foot of the bed to the wall so I'm not too worried about walking space. Another example of design vs implementation and solutions that need to be invented as the process moves forward.

Here's the free standing wall that will divide the shower from the rest of the bathroom. The master shower will have two zero threshold entrances and a curved free standing wet wall. The convex shower side of the dividing wall will have two shower heads and a hand shower with all the associated controls. We don't have a need for body showers amd since it's open, we won't have a steam shower. On the concave side will be the tub filler and controls, with the tub sitting perpendicular to the wall. This wall will be able to stand without ceiling attachments because it's curved. The wood pieces are just being used as spacers and will be removed when the wall is erected. I think special attention will need to be paid to this wall since curved walls usually require more studs, but there's so much plumbing involved there will need to be spaces.

The fireplace in the the up stairs has been roughed in, but we haven't decided on a specific fireplace up here so this might need to change. While we have the great room gas fireplace picked out, this one has fewer limitations so it's completely open as to which one we want. Picking one is on my to-do list.

Here's a close up of the blocking in the windows of the full arch in the great room. There's lots of space for insulation between the supports. The finishing materials will sit on the supports and butt up against the windows, overlapping the window sash. We'll have to figure out a good way to dust up here.

The laundry room window has been installed. This is made up of three individual components, the eyebrow across the top, and two square casements on the bottom. The dividing stile was necessary to prevent needing rectangular windows for the casements. Rectangular windows would have messed up the grid spacing. You can get a better idea of the separation stile, and how obtrusive it is when it's this thick. While not as thick as the ones on the first floor, it's also not connected to the top of the window opening, so it looks kind of odd. If we can reduce the depth a bit, I think it won't look like a column in the middle of the window and will blend a bit better.

The little broom closet in the second floor laundry room was added and I like how it came out. To the left of it will be a crafting table that will have to be designed at a later date. The closet will be big enough for an upstairs vacuum cleaner and maybe some other cleaning supplies so we don't have to lug all that stuff up and down the stairs. This was added as a revision when we discovered the room was bigger than we had laundry use for. All the laundry related things will be on the other wall, with plenty of room to spare.

The great room fireplace was roughed in, but will have to be adjusted since we have the intention to elevate the fireplace about a foot off the floor. We're not going to have a hearth, and since it's a gas fireplace, we don't need any fireproof materials in front of it. This will make it a bit more modern, departing from the traditional look. Elevating it will also allow a bit more eye line into the great room from the front door. There also most likely won't be a mantle on the great room side. We're undecided about this side and the second floor fire place, but we have a little time to decide. All that's needed for preparation is a backer board installed before the stone masons come in to set the stone.

Here's the great room side of the fire place. There's more than enough room to elevate the box a foot, and a plywood box will be built on the floor to support the fireplace. We will be mounting a TV above the fire place since it's the central focal point of the room and it will make furniture arrangement easier. This will be the primary TV watching area even though we'll have a few TV's in other rooms and a theater in the basement in the future. There needs to be enough space above the fire place for a sound bar, TV, and heat buffer space. I should communicate with Jonathon of the Sound Vision about how this rough is going since he'll need to run lines and prep for the TV mount. He'll probably need to communicate with Mike to install a mounting location so the stone won't be installed there.

All the door openings have been increased in height to accommodate the 8 foot doors we'll have installed. The rough openings weren't sized properly for an 8 foot door, so some work was needed on all the headers. The openings were 8 feet tall, and you can't install an 8 foot door in an 8 foot opening since you need door casing. We've pretty much nailed down the door design as arch topped, flat, 2-panel from Concept Millwork. It's a mix of MDF for the panels and LVL for the stiles and rails, which allows for good paint-ability of the panels and durability on the edges of the doors, where you'll normally see abuse. The doors are heavy so we'll use ball bearing hinges.

Here's a close up of the rough carpentry finishing work in the window bays. This is in the master bedroom and you can see the furring strips installed and ready to accept the final window casing wood, which will be painted white to match the windows. Probably a semi-gloss. There's wood installed on the sill, but I don't think that's the final finish since there's still so much gap between the sill and window.

Here's the master bathroom wall where the vanity will be installed. We had this furred out with 2x6 so we could run plumbing in the wall. The vanity will be floating so there's no space for plumbing in the cabinets through the floor so they have to go into a wall. There's no way all that plumbing would fit in the ICF layer of the elevator shaft so the wall was needed. It also adds the benefit of being able to get a deeper medicine cabinet in there and extra space for sound insulation against the laundry room.

Here's as close as I could get to the turret roof since all the scaffolding was removed. You can get a good look at the overhangs and how they meet up with the windows. Since all the trim will be painted white, I don't think we'll miss having trim on top of the windows. The roof installers did a great job crimping the drip edge all the way around and the copper looks brilliant. We'll bring them back for gutters when we figure out where they're needed. If the cost lines up, we'll install round copper gutters where necessary.


With the copper roof completed, all the overhangs can be closed up. We'll need to install some small round vents in the turret overhang for roof venting, but it's pretty unobtrusive. I guess they found a pretty good wasp nest up there so having everything sealed up will prevent all of that. Eventually, I'll need to get up there to install fiber optic lines into the turret ceiling. We're planning on making a starry field in there, but I'll have to drill through a lot of layers to pull that off. Luckily, the attic access is close by in the turret bedroom's closet.

Here's how the trim currently sits with the round window in front. You can see the top trim is cut around the circle so all the other trim will meet up with that top trim. I think all the straight trim has been installed on the second floor. That's outside corners and top trim. The trim on the first floor still needs to be installed, but they might be waiting until the porch ceiling is installed.
 Here's how the interior of the round window is roughed in, ready for the round tunnel finishing materials. It will be super interesting how they get from a hexagonal shape to round, and even more interesting to see how they'll bend the wood into a round shape. For anyone out there still in the planning stages of a build, curves are a budget killer. Materials aren't naturally curved and we're seeing budget hogs in the stairs, molding, windows, and walls. Just like the more exterior corners you have on a house increases the cost, the more curves you have increases the finishing costs.
 Here's how the interior of the round window is roughed in, ready for the round tunnel finishing materials. It will be super interesting how they get from a hexagonal shape to round, and even more interesting to see how they'll bend the wood into a round shape. For anyone out there still in the planning stages of a build, curves are a budget killer. Materials aren't naturally curved and we're seeing budget hogs in the stairs, molding, windows, and walls. Just like the more exterior corners you have on a house increases the cost, the more curves you have increases the finishing costs.
Here's what the corner trim looks like on the second floor. The piece of wood on the inside corner is only used as a back stop for the cedar shake siding. Having the trim this way makes the siding installation easier since you're only having to install on the flats and not having to worry about the corners. I think the next step on the exterior is to get the trim sprayed and protected before the siding goes on.

Here's how the trim around the laundry room turned out. From the elevation, there's supposed to be more header trim above the window, but I'm not sure if we'll be implementing that. There's more than enough space and it's all cosmetic, but I think it would need to be done before the siding goes on. I think it looks nice how it is now, but a larger header will add more character.

Here's how they'll construct the round trim for the circular front window. It's made from four pieces and a section of it will be removed where it meets the top trim of the house. Even through there are odd pieces of wood, you'll never see it after it's painted. The other arches and I suspect the oval windows will be trimmed out the same way.

Here's what the front yard looks like. I have to come up with a better name because technically it's not the yard since it's all driveway. The landscapers call it the motor coach, but that sounds pretentious so for now I'll call it the front yard or front area. Besides the softness, you would never tell the amount of work that took place here last week. The well heads and lines are buried and the ground is level. At a good time, Mike will bring in more fill sand to bring the level to construction grade and in the spring, Great Oaks will bring it final grade and install the driveway.

Here's the turret with all the windows installed. I don't have a wide enough lens on my small camera to capture all seven windows, but I have a few panoramas that don't translate well to blog format. If I can figure out how to embed a photo sphere, I'll have to throw those up in a separate post. It's pretty neat to be able to look all around.

The rough carpenters also finalized the gazebo ceiling trusses for final material installation. We'll be using the same bead board in here as we have in the rest of the patio and even though we couldn't take the ceiling up all the way to the peak, there's still about 14 feet of height in this area. There will be lights, a ceiling fan, and speakers up there when the thing is completed and having a ceiling gives us plenty of mounting space.

As promised, I've included some detailed pictures of the sliding doors that were installed last update. This is the one in the kitchen but the other two in the basement are the same. They're Softlite Kingsroyal sliding doors and have similar construction and insulation properties as the windows. We opted for the simple white handles but there are other finishes and looks available. There's a single locking lever in the handle, as well as hardware to install the toe bolt that prevents the door from sliding open. You can drill several locking points in the track to accept the bolt so you can crack open the door for ventilation while still enabling the bolt for security.

Here's a shot of the locking mechanism itself. It utilizes two bolts and a plunger above that prevents the locking lever from swinging if proper contact with the jam is not realized. This prevents "false locking" states where you think you close the door all the way and swing the locking lever only to have the locking lugs not engage, leaving the door unlocked. The lock is operable from the exterior with a key and each of the three doors is keyed differently.

Here's where the locks engage into. While it's true that the jamb is just vinyl, the locking plate is steel and screws directly into the wood bucks in the opening so it's fairly secure. I tugged on it pretty hard to test the deflection of the frame and was pleased by the results. If someone wants to break in, they'll just break the glass rather than trying to jimmy the jamb. The little hook to the left is the latch point for the lockable screen door. It's not robust, but hey, it's a screen door.

Here's what the "locking" latch for the screen door looks. I put locking in quotes, because it doesn't lock with a key, but it only has a latch from the inside, so if it's latched shut, you can't unlatch it from the outside. It's about as strong a defense as you can expect on a screen door since the door itself is easily defeatable. Regardless, it's nice to have this feature for keeping in crafty pets or wandering babies. I think our toddlers would be able to figure this out. The screen frame is aluminum and rigid enough to not feel wobbly on the tracks so I'm happy with the quality. The uses standard splines and is easily replaceable in cases of damage. The screen itself is a fine fiberglass mesh that should keep out all but the tiniest of bugs. We'll probably keep the glass door open and screen door closed for the best days of summer since we seem to always have a nice breeze.

Here's what the sill plate looks like on the door wall. The sill is aluminum capped for durability so the stainless steel rollers aren't just rolling on the vinyl frame. As with the windows, all the stiles and rails are foam filled insulated and there's a "triple fin" weather stripping to keep drafts and dust out. The rail the door rides on is fairly narrow, which will prevent binding should too much dust get in the track. The track is deep, so it looks like it might be a little difficult to clean, but a dirty track should impinge upon the operation of the door or screen.

As mentioned earlier in this post, the main garage door opening was framed down to accommodate the nine foot door height. The door height is a little bit more than standard, but a nice luxury to have, especially since we're having the corner of the door openings curve to match the radius of the windows in the garage door itself. This will give it a stronger carriage door appearance while still giving enough clearance on the edges for taller vehicles. We're hoping to to get the garage door rails as high on the ceiling as possible so that, when open, we can have the highest clearance from the door to floor. We're not really keen on having those overhead storage racks above the garage door so preserving that lofty feel when the door is open is the highest priority. We'll also be using Liftmaster 8500 garage door openers, which connect to the jack saft to lift the door rather than having a track and opener suspended from the ceiling so the only thing up there will be the door tracks. The Liftmaster 8500 mounts on the exterior wall and has lots of nice add-ons like remote monitoring and solenoid actuated locking bolts.

The smaller garage door opening has also been furred down to proper height. This will also have a curved carriage door appearance, and this bay will most likely house the smaller sports car or off season vehicle. I'll install the car charger on the wall between the two vehicle bays so a charging cable can reach either the left most spot in the large bay or the spot in the smaller bay.

The steel support beam for the master closet was also boxed in, ready for drywall. There's nothing we can do to hide this beam, and there's really no reason to hide it since it's in the garage so it will just be boxed in with drywall. Nothing spectacular or unique about it, but it's nice that they're prepping everything for finishing.

I know I'm jumping around a bit here, but the master balcony rough in was finished as well. Before, the decking was a mish-mash of temporary plywood pieces, not even covering all the holes and generally bouncy since it was a thinner material. Now, a 3/4" plywood was installed on the floor and under it, long shims were installed on top of the floor joists to give the whole deck the desired slope to shed water away from the door opening. The surface feels way more solid and of course it looks much better.

The slanted barrier wall was finished off and sheathed in plywood, ready to accept the final finishing materials. the wall will probably be sheathed in cedar shingles but I'm not sure what the top will be capped with. To remind you, we'll get a triangular piece of glass cut to make up the missing part and make a railing.

Here's what the balcony looks like from the bottom. If you look close, you can see the long wedges used to create the slope in the deck above. Of course all this will be hidden when the porch ceiling is in place, but it's nice to know that proper attention to detail was given. I can't remember if we decided what material we'll have on the balcony deck, but I think any material can be installed in the current state. The black insulated pipe you see is the ventilation from the powder room.

Here's the back of the house now that all the windows are installed. All the upper windows have the trim installed and you can see the trim going down the outside corners of the great room. They stop at the bottom of the lower windows because that's where the brick ledge will be. Above the brick ledge will be shingle and below the ledge will be cobblestone.

Here's the trim on the master bedroom windows that go over the bed. Again, the trim on the arch terminates into the top trim on the wall, but I don't think it looks too bad. All the windows are a bit taller than I would have expected so they all incorporate into the top trim, but at least it's consistent around the house. The trim might be simple, but I think it lends a clean look to the house. A traditional Victorian would have a lot of embellishments and profiles on the window trims, but since this is a modern Victorian, we can get away with a simpler look.

It's always great to see the crew cleaning up after every week, or at least making an attempt to keep things clean. You know it's a professional job when they have enough pride in their work and mindfulness about their own safety to keep the job site clean so they're not stumbling over materials and debris. There were a few other piles of sawdust around the house and there's always a dumpster on site.

Here's the trash pile so far. Mostly lumber cutoffs with some waste from the geothermal wells. Even just having a dumpster constantly on site is a great difference, but Mike says that's just the way it should be done.
So my finger are sore from all the typing this week and I think this is probably one of my longest posts. We'll be going back to Hardwood Bevel and Door to sort out our door order and get two more doors, the garage exit and master balcony french doors. We're also trying to meet with our neighbors to see if we can arrange to trench across their driveway to access the sewer tap, which would save us a ton of money and time. There was so much activity at the site so far this month that my wireless trail cam ran out of the allotted data transfer allowance. I know they're working there this week but I have no idea what's in store for my next weekend visit. I think the copper roofers will finish up with the asphalt shingle and the roof will be 100% completed. More rough carpentry work will be completed and I think we're getting door templates for the great room exterior and mudroom door. Things are picking up!