Tuesday, August 30, 2016

More HVAC prep. Good bye dumpster

  The Bank process is still on going, as is the initial quotes from Mike and his crew.  Both should be resolved very soon.  Mike is still sending an army of subcontractors to bid the build and I have good confidence that he's really working with our best interests in mind. We had one stone installer price the job, which Mike declined since he felt the bid was way over priced.  He's since found another installer to perform the work at a better price.  
We got a chance to go out there Monday after our meeting with Margaret.  Just enough time to hang out a bit and clean up the inside of the house.  While we were there, the water and sewer installer was walking the driveway to measure how long the trench will be.  The dumpster was also removed from the lot.  Even though the HVAC installers piled it high with removed floor foam, the dumpster transporter secured everything with a mesh tarp and hauled it away.
The HVAC installers, Porter and Heckman, were there during the week, prepping the basement ceiling for the supply runs.  Lots of foam was removed so the ducts could be installed up above the eventual drywall layer.  The basement is full of ducts and foam, but at least Porter and Heckman have the decency to put it in garbage bags rather than just dropping it where they cut it.
As mentioned, we had a long meeting with our interior designer Margaret for matters of doors, trim, and lighting.  If there's any questions to if you should hire an interior designer, let me dispel them.  Margaret has been the most useful member of our build team hands down.  Not only does she quickly distill design choices to the architecture of the house and our personal tastes.  I couldn't imagine having to wade through the millions of choices out there on every aesthetic design element.  She listens to our suggestions and either works them into the design or tells us why it would be a bad idea.  Not only has she helped us with the design elements, she introduced us to Mike.  So she acted as a vetting service since she has worked extensively with him in the past.
Our meeting with Margaret took place at Bolyard Lumber.  Mike showed up in the beginning of the meeting to give us samples of the Azek bead board we're using for the porch ceiling, and give us some pamphlets for columns.  Since he knew we were choosing doors, he gave us an opinion on what to look for.  We spent a couple hours looking at interior doors, molding and trim, ceiling treatments, and the lighting plan.
For interior doors, we looked at the difference between an all MDF door and a MDF skinned door that uses laminated veneer lumber (lvl) for all the striking surfaces.  Obviously the later is more expensive at about $150 more per door but Mike said he prefers these, from an installation perspective.  He said the MDF gets damaged easier on the edges and are a little more difficult to patch.  From our perspective, I think once the door is hung, the changes of damage are minimized, but if we're looking for something longer lasting, the lvl door would be the way to go.  Since we're painting all the interior doors, there's no need to consider a wood door.  We're going with a simpler shaker style, two panel door, which ties in the design choices with the kitchen cabinets.  
We looked at baseboard molding and door trim casings and decided to go with a similar transitional clean lined look.  We'll use crown molding in the dining room, master bedroom, rotunda, and maybe the turret room.  The rooms that have curved walls will need a rubber molding, which looks like wood (we're going to paint it) but is flexible.  It feels like a very heavy rubber and you wouldn't be able to tell that it's not wood unless you can touch it.  Pretty awesome stuff.
We wrapped up the meeting by going though room by room and looking at the lighting plan Margaret devised.  I'll post more on the subject when I have pictures to show, but suffice to say, it's exhausting and complete.  When we bought our current house, there was minimal COP lighting installed in each room.  Basically one flush dome light in each room, two eyeball recessed cans in the great room, and a ceiling fan/light combo in the master bedroom.  Considering we moved from an apartment that didn't have any ceiling installed lights, save in the kitchen and bathroom, it was luxurious.  Eventually, I installed more lighting in every room, but to design a house and consider the lighting requirements of each room, and have them installed before move in is going to be great.


   Here's the dumpster after some of the HVAC work in the basement.  Large sections of the ICF foam is cut out to make chases for the supply and return ducts. They stacked as much as they could in the dumpster and bagged up the rest in the basement.  It looks like all the chases are cut in so there shouldn't be much more to come out.  

   Here's what one of the return chases look like.  In a wooden house construction, the returns run through the walls like ours does, but the space between the floor joists is hollow, so an HVAC installer will just use the empty space and screw sheet aluminum to the underside of the floor joists, closing in a box.  This will run to the return duct, which supplies air back to the furnace. Since our floors are ICF, we can remove some of the foam, which can then be used as the return chase.  I'm not sure how they'll close this off, but I imagine it will be something similar since both 2x6 nailers are still in place.  My only concern is how the drywall will be laid over the return chase aluminum.

   Here's the future work out room, which sits under the great room.  If you look closely, you'll see the chases for the supply ducts that run to the back of the house.  There's a beam here that the ducts will have to dip under, but there's no getting around that.  We'll just have to figure out a creative way to box those in, which shouldn't be too difficult.  There are four supply vents in the great room but there are more than four chases here, so I'm not sure what the other chases are being used for.  The returns for this room aren't that far back on the wall so I know it's not that.  There will be some speaker wire run to this wall, but I doubt they carved chases for them.  Maybe they're carving out for electrical since there will most likely be wall sockets on this wall.  I'm hoping that after the ducts are installed, we'll get the chance to spray foam around them and seal the chase back up.

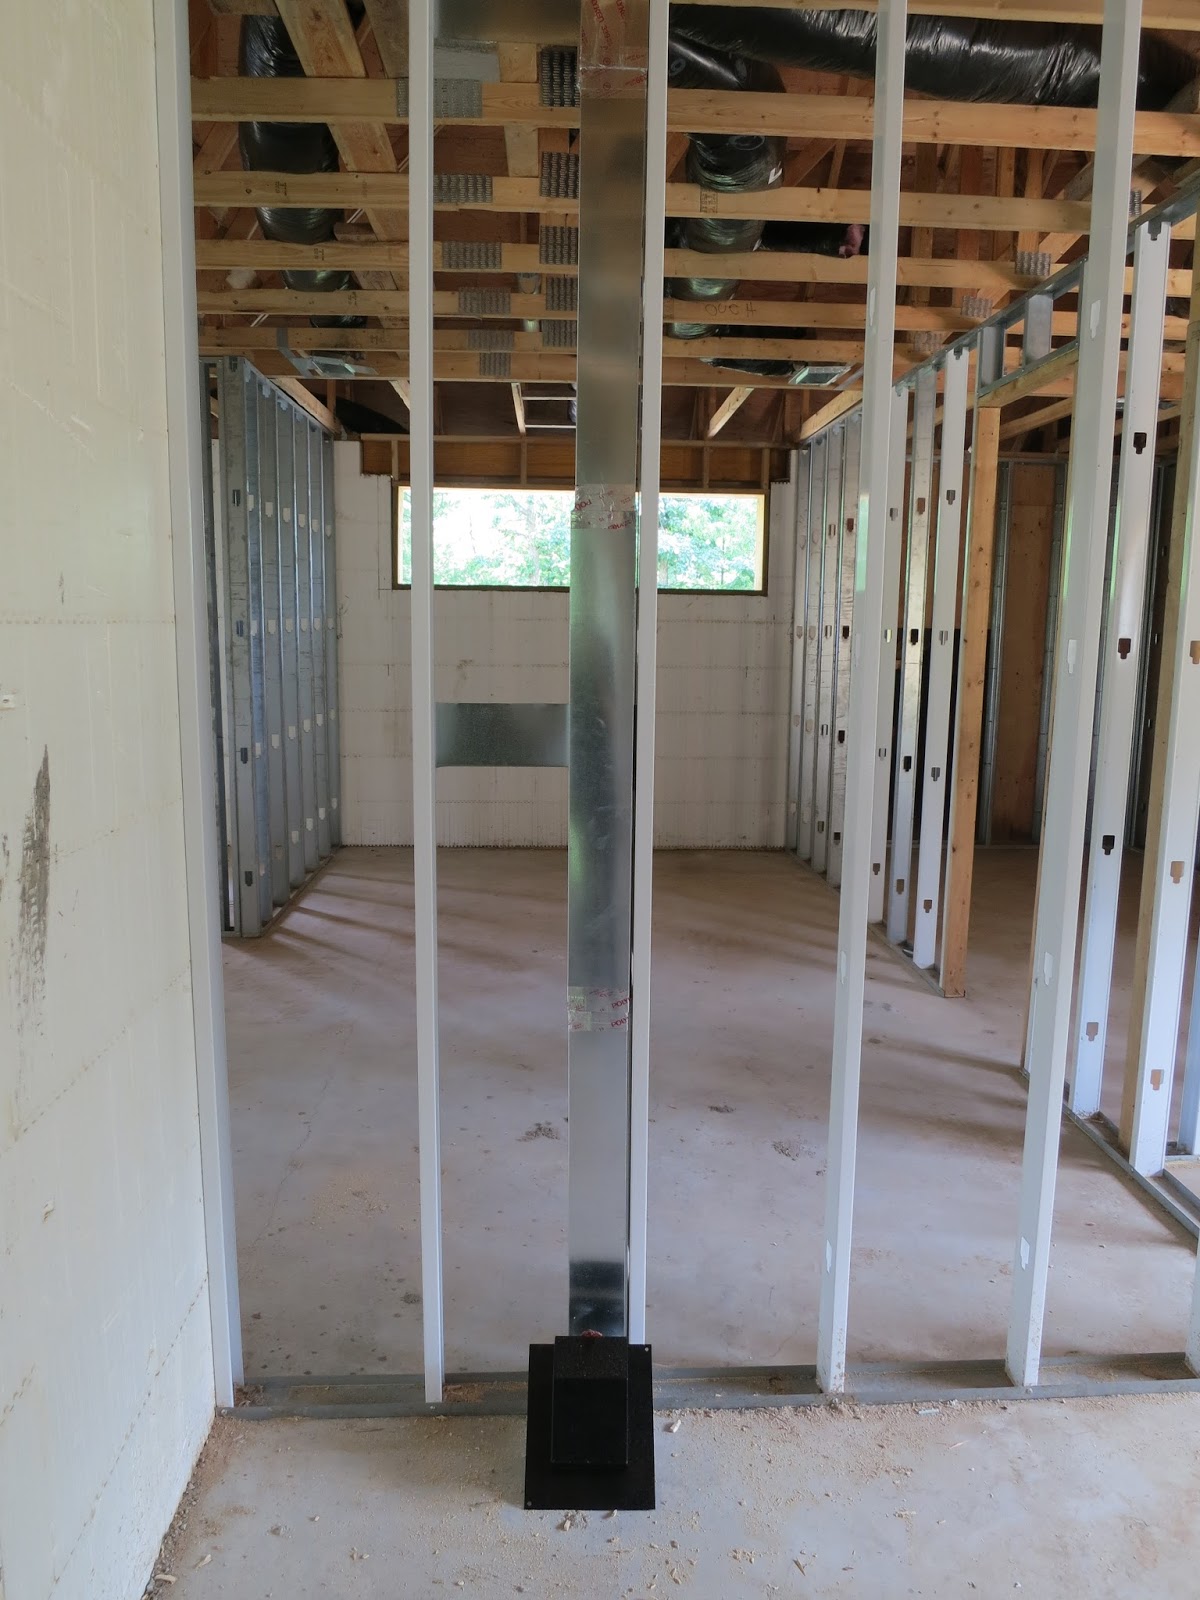
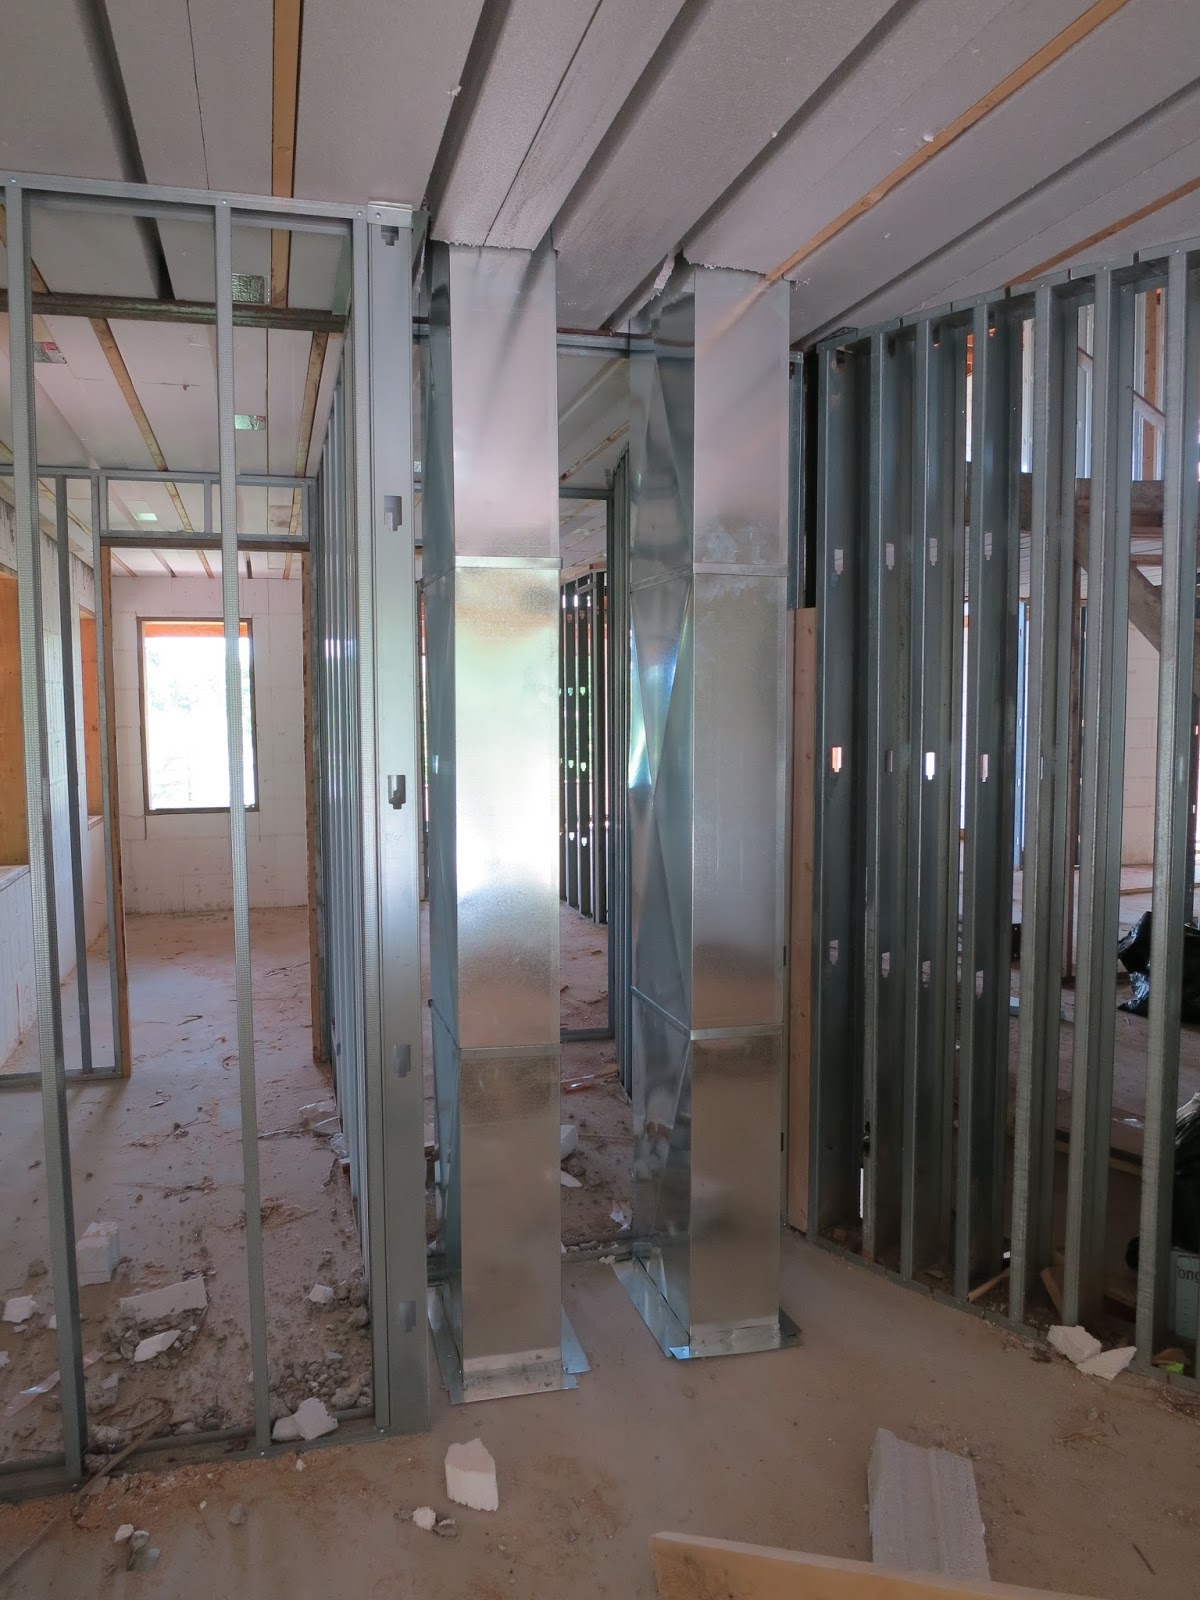
   Here's some of the duct work that will be installed.  There will be two supplies and two returns that will hook up to the furnace.  Each pair of supply and returns will run across the house, under the level of the ICF floor, one in the front of the house and one in the back.  We arranged it this way to minimize the number of ducts that need to pass under the main beams that go down the middle of the house.  You can also see some boxes of smaller diameter ducts and some of the garbage bags full of ICF foam.  I didn't peak in the boxes to see if it was rigid duct or soft, but I imagine it's going to be rigid.

   Here's the bonus space behind our master closet.  The soft duct you see is from the mudroom bathroom and it comes through this space to the soffit roof overhang in the back of the house, or at least it will when it's all connected together.

   Here's a better look at what's going on with the mudroom bathroom vent.  It runs in the ICF chase, through the garage wall and through the ICF floor in in the master closet.  Usually it can't pass over a beam since the concrete slab and pour usually ties into the beam, but in this case, the ICF sits on top of the beam, so I don't think there's an issue with it passing through here.  It's probably the best solution to running this vent.

   Here's where the bathroom vent duct exist the bonus storage space.  It sits in the attic space and it will exit through the roof soffit overhang.  We'll have to make sure to either spray foam or hard foam these walls before the ceiling is closed up.  Even though we don't have HVAC running to this space, it wouldn't hurt to insulate it, especially since it's outside the envelope of the house.  I think if we insulate this wall, then insulate the interior closet wall, it will provide enough air tightness and energy sealing.
Porter and Heckman revisited the HVAC supply and return ducts to seal up the cracks.  They applied a gray mastic paste to all the seams and joints.  The nice thing about mastic is that it stays flexible so  years from now, it won't become brittle and crack.  Because of the cold and warm air that flows through these ducts, they're subject to a lot of expansion and contraction.  The mastic provides flexible sealing so we're not losing air through these joints.  Another method of air sealing is to use a foil tape.  The mastic is good enough, but personally, I would love to see joint tape, as well as getting the ducts spray foamed.  All good engineering is over engineering.

   Here's a close up of the mastic on a section joint.  Although the mastic isn't as thick as I would like, it's not too bad.  Maybe I'll just come back and apply some foil tape to it to ensure air tightness.  The general rule of thumb for mastic application is "a nickel thick".  I think it's thick enough in the spaces that need it and we're just looking at tin areas in the spaces that don't need it.

   Yet another angle of the mastic application.  The corners of the duct snap together and there's often a soft neoprene gasket in the channel where the two surfaces meet.  Even still, exterior sealing is very prudent.  Although it doesn't look like there's a lot of mastic in the joint, it's sufficient. I'll probably tape it up myself.

   The end of an era, well two years at least.  The dumpster that I ordered and filled with the garbage Matt and his crew left in the front of the house is being taken away.  You can see the mesh cover they used to ensure that nothing blows out during transport.  When they tipped it up like there, a ton of water poured out, which is good since they charge for over weight dumpsters.  A few of the pieces of foam fell out when they were installing the tarp, but they'll have to wait for the next dumpster.  Amazing concept; having a dumpster on site so garbage doesn't get blown all over the place.

   Bye bye dumpster!  The front of the house is the cleanest it has ever been, ever.  Even during the beginning of the build, there was a site built "dumpster" but now that that's all gone, we could get the geothermal well diggers in, we could get landscaping to come in and grade.  Water and sewer is going in the side of the house so they're no longer reliant upon this area being clear.  Maybe if I can get all the nails out of the area, I could even drive my car up there.  What a difference.
   So there it stands this week.  We'll probably be getting in numbers soon and I'm pressing to get the business with the bank finished up before the end of the month.  Once the financials settle down, we could start to look at getting the copper roof installed on the turret, provided that the rough carpenter doesn't need to perform any fixes.  Mike is going to meet with Jonathon of the Soundvision on Friday so they can get on the same page.  Now that we have a lighting plan, he can start to create lighting schemes, which will be vital in multi purpose areas like the kitchen.  So much back end planning.

Monday, August 22, 2016

All clean and back end progress

   We got a chance to finish up the removal of the trash in the front yard and do a little cleaning inside the house in preparation for the new construction.  There was one pile of the three left, and I think it was the nastiest of the bunch.  It consisted of all the cardboard boxes the roof shingles came in, along with some shingles and adhesive tubes.  We had the foresight to put a tarp that we found in the pile on top of the cardboard to allow it to dry off and it was well rewarded.  Only 30% of the cardboard was soaked with rain this time, which sped up the cleaning time.
   There was also some planning progress this week as Mike continues to ramp up his sub contractors.  I think everyone is on board now and formulating a battle plan to get this house done.  We just need to clear up business with the bank and we'll be all set to build again.

   Here's the last trash pile as I left it the week before.  It doesn't look too big, but it took about seven, 50 gallon contractor bags to move, which was by far the best way to do it.  Some of it was still wet which added a lot of weight and inconvenience because wet cardboard doesn't like to stay in one piece.  While I was peeling away the layers of cardboard, I found more beer cans in multiple strata.  This confirms that, not only it was the roofers that were drinking, but they were likely drinking on the job and throwing the empties on the pile as they piled on cardboard from the consumption of the shingles.  Great work ethic.

   Here's after a good four hours.  This is the cleanest the site has been in months and there's still some random construction debris scattered around.  Eventually all the construction trash will be taken care of and once Mike and his crew on are site with the constant presence of a dumpster, we'll be able to get rid of all the trash.  Tanja started to clean the inside of the house, removing all the loose nails, screws, and dirt from the stud wall cavities.  It's a monumental task and there will be a lot more dust created when they start building, but it's good to get a jump on it.  Next time I'll bring the shop vac out so she doesn't have to sweep everything.  There's still a black plastic tarp that contains some construction debris.  I think I'll have to just dump and sort it since it contains both concrete, which we can't throw away, and foam/wood, which we can't use as driveway base.  Huge pain in the ass.

   I originally requested a 40 yard dumpster, but they only had a 30 yard, which was just big enough for the trash in the front yard.  I managed to get some of the foam in the basement into bags and in the dumpster, but we're pretty much full.  There was a lot of cut offs for the steel studs, which I put on the side in case we want to recycle or scrap them for some cash.  They're not very heavy so it won't be worth a lot in scrap, but it's something.  We have the dumpster until next Friday, but I'll probably call the company to pick it up early since we don't need it any more.  I think if I stacked the waster lumber better, we would have more room, but it does the job.  If only we could figure out how to dispose of tree stumps.

   Mike met with the geothermal well digger contracted by Porter and Heckman to nail down the well locations.  Originally, we planned to have the wells along the side of the house and enter the house above ground near the furnace in the mechanical room.  Through discussions with Mike, it was decided that, while this location could serve as a back up, it would be better to have the six wells drilled under the driveway, near the retaining walls.  The lines would then run into the front of the house under the porch and there would be less of an eye sore.  When I asked if there will be an issue with repair, the driller said that they've never had to repair the loops in a well before.  All the lines are chemically welded and the system is pressure tested to 90 psi, while the furnaces runs at 30 psi.  I know from a fact of life that no system is immune to failure, so this location isn't too bad considering that it's under the proposed paver circle rather than the asphalt.  I think it would be more of a hassle to tear up the landscaping in the original location than the paver driveway/paver base.  This will also allow the water/sewer to exit the side of the house.  The sewer already penetrates there so it makes sense to run the water along side it.  So here's the new location of the geothermal wells.  You can just make out the green flags that are used to mark the well location.  The heads will be five feet under ground so that protects them from any driveway construction.

   Here's another shot of the geothermal well location.  You can see that black plastic tarp full of construction debris I was talking about before.  I think this location will be great for the wells.  I don't think they'll be heating the ground enough to melt snow during the winter, but wouldn't that be nice?  Mike handled all the communications with the well digger and Porter and Heckman, but included me in the call when they were finalizing the location.  All I needed to do was sign off on the details.
   So a little recap with what else has gone down over the past week.  Last Tuesday, I had a meeting with Mike at the house with all his subcontractors.  Mike wanted to bring his subs through to evaluate the build and come up with a preliminary budget.  This was also a good time to get on the same page with our expectations of the build and any unique features we need to inform the subs about. First we met with his trim carpenter so he could do a walk around and work out some details about finishing expectations.  We talked about flooring, molding and trim, ceiling treatments, interior doors, and drywall.  Next, Porter and Heckman stopped in to give details on the rest of the HVAC install and iron on other details like gas lines, and kitchen hood venting.  While they were still there, the plumbing subcontractor stopped in to get a walk around for plumbing locations and coordinate with HVAC runs. We talked about the various bathroom requirements, pex vs copper, tree and branch vs home runs, recirculating loops and control requirements.  The electrical subcontractor showed up and also coordinated with HVAC for the furnace requirements and got the walk through.  Although Margaret is working on a lighting plan, we walked through the primary requirements for special outlets, concentrating on exterior porch lighting since Mike wants to get that all closed up first.  We discussed the high amperage charging in the garage and running a line out to the front of the property for lights and gate power.  Mike suggested we install a sub panel in the garage so when we get the pool installed, we can just tap off that panel rather than running all the way to the main.  Great idea I hadn't thought about.  My point is that more planning and ideas were thrown around in that one meeting than have been in the past two years.  It really gives me confidence that the build were move forward at a good speed and that it will be implemented properly.  I'm incredibly impressed by Mike and his organization and planning and it was what we expected this whole time.  His responses to emails and texts are almost instantaneous.  His demeanor is professional and direct.  His subs are friendly and professional as well.  Amazing contrast.
   We have a meeting with Margaret on the 29th where we'll hammer out details on the lighting plan and look at finishing wood.  Mike is working hard with his rough carpenters to get the windows installed so we can lock up the house, and we have an excavator working out the permitting for the grinder pump we'll need for sewer.  Things are boiling under the surface which will soon turn into a flurry of activity.  

Monday, August 15, 2016

Clean up


   Planning with Mike Perri is moving forward quickly as he gathers his sub contractors to evaluate our house.  We have a meeting with him and some of his guys this week but paramount to his tasks is to get the trim carpenters in so we can get the windows installed and have the house in a lockable state before the end of the month.  To do this we need to know the house exterior material since this will dictate window placement in the sill.  Mikes second priority is to get water and sewer installed so the stone masons can have water on the site to put up the cobble stone on the exterior.  If we can't get water installed fast enough, we'll need to get a tanker in so they have water for their mortar.  The paperwork change over with the bank probably won't happen quick enough for the window install so Mike suggested we have some cash on hand to pay the carpenters to set the windows so we can meet our insurance deadline criteria this month.

   In the mean time, I ordered a dumpster that will remain for two weeks so I could put in some sweat equity and get rid of all the construction material from the front of the house.  When Matt's crew clean up the house, then just ended up putting it in piles in the front yard.  To their credit, they put it in organized piles, so we had one pile of shingle cut-offs from the roofers, one pile of waste lumber, and one pile of cardboard boxes from the shingles and other stuff that was cleaned out of the house.


   Here's the dumpster I got.  I wanted a 40 yard, but they only have a 30 yard available, but I have it for 2 weeks.  It costs $395 and unfortunately, we can't throw any concrete or tree stumps in there.  I still have to figure out how to dispose of out tree stumps, but maybe that's a job for Great Oaks or Mike.  For the concrete, since we're going to be adding so much fill to the front of the house, I can just dump the concrete chunks near the retaining wall and use it as base material.


   Opening the door is pretty easy.  You just have to remove a pin that traps the handle the holds the back of the dumpster closed.  Most of the stuff we're throwing away is light enough to hoist over the sides of the dumpster, but there are a few bags full of saw dust from inside the house that were really heavy.  Unfortunately, there was a rain storm that blew through the day before so all the cardboard was wet, and there was a good amount of water in the dumpster.  Having the door open allowed us to use our wheelbarrow to dump the heavier stuff.  It's fortunate there was enough lumber to make a nice ramp.

   This is after four hours ow work.  I missed taking a picture of the trash piles before, but they're probably in earlier posts.  That's with all the shingles, lumber, and most of the miscellaneous pile in there.  We have a bit more but I should be able to fit it in the remaining space.

   What's awesome about most of the lumber is the rusty nails.  Most of the 2x4 in the pile was used on the roof as footing for the roofers.  Long pieces with regularly spaced rusty nails since they've been sitting out for almost a month.  I managed to have a piece take a swing at me after I threw it in and, although it didn't stick in, it caught my forearm causing a good leak.  I tied it off with a clean cloth, but today it's hurting a bit and there's some swelling so it might have gotten muscle.  I'll get a prescription for some prophylactic antibiotics.

   Here's what's left of the cardboard pile.  It's just the boxes from the shingles but in a wet condition, it makes it hard to move efficiently.  We found a tarp in the pile so we decided to cover it to keep any more rain off.  Hopefully it will dry off enough for this weekend so we can finish the clean up.  There's also some nasty solvent smelling stuff in the pile. I think it's the disposed tubes of construction adhesive.  
   There's still some concrete and foam chunks in the basement from the HVAC cut-throughs so I should try to get that out.  The wheel barrow will get some use there, but again, we'll just use the concrete as base for the driveway area.
   Mike has already contracted all the suppliers we have inventory with so I have full confidence in his planning and execution abilities.  We'll probably use the garage as the staging area for the windows, and plywood up doorways we don't have doors for.  We'll keep the laundry room window open so the drywallers can hoist their panels to the second floor.  To date Mike said he contacted 3 excavators for the the water/sewer, plumbing, electrical, carpenters, and a stair guy.  Once the bank stuff calms down, we'll get the metal roofer on the job and get the house completely dried up.  The Sound Vision will meet with us on Tuesday to get everyone on the same page.  Margaret will shoot us some ideas for lighting, finishing trim, doors, and flooring materials.  I love not stagnating. 

Wednesday, August 10, 2016

No physical progress this week.

   I don't have any physical progress to report on this week since we're still in the process of switching builders.  There was some roof cleanup performed by the roofer so that's pretty much settled.  We contacted the copper roofer and told him our intent to hire him once the financials with the bank settled down after the switch, but if we have enough money, we might try to implement it sooner.
   
   We had a meeting with Mike Perri, our new builder.  We met on site to do a walk through of the blueprints and house to tell him our initial expectations for room layout, flooring materials, and other concerns.  He said that he'll have to come in with his subcontracting crews to determine what needs to be done to bring the house into a "progessable" state, and he'll come up with the budget estimate for the rest of the build based on our requirements. Since he has a working relationship with Margaret, they can easily coordinate material selections.  I provided information on all the suppliers we've had contact with so far and he's taking it upon himself to contact them to get updates on their statuses.  Even before I got home, he called to tell me that the excavator we expected to trench our water and sewer to the street, whom I was told was working on detailing the grinder sump, had no connection to the project.  Two things, it sucks that I was told incorrect information about the status of the trench, and two, it's awesome that Mike is so quick with working things out.  He came to the meeting with a project binder full of all the invoices I sent him and it's refreshing to have that level of organization and preparedness.  This is how things should have gone for the past two years.

   So the next steps.  Since it's paramount that we get the house in a lockable state, Mike is working quickly to get his carpenters in to evaluate the window install.  Insurance requires that the house be closeable by the end of the month, so while the bank situation might not be settled by then, we'll have to pay out front to get the windows installed.  This is an acceptable stop-gap measure before we get the project off the ground again and it will be progress nonetheless.

   During our walk-around, Mike stated that the cedar fascia on the roof should have been primed and painted before the roof went on.  Painters could have sprayed the wood, but now that the roof is on, they'll have to paint it by hand to avoid over-spray on the drip edges.  Just another example of how the organization of the construction of this house has gone awry.  Mike said there are a few other areas that need to be addressed and possibly redone.  He said it's not going to be an easy task, but it's not impossible.  Again, it's so refreshing to have someone that actually communicates and is proactive in their decisions.  I can tell that when I'm talking to him, the gears are moving in his head and he's looking at all aspects of the information.  Through Margaret, he already has plans for the cabinets and her estimation for interior finishing.  Gone are the days of personally talking to subcontractors and suppliers to get things done.  In no uncertain terms he said "If there's something you want to see in the house, just give me a picture or manufacturer, and we'll figure out how to implement it.  I really feel confidence in the build and I can't wait to get things settled with the bank.

   Garbage remains in the front of the house and I contacted Matt Lincoln to see if he was taking responsibility to get a dumpster and clean it up.  If not, I can probably do it in a day so maybe I'll go out there this weekend and get it cleaned up.  There really isn't that much clean up to do, but there are tree stumps that we need to get rid of.  I think those can be taken care of eventually since we'll need heavy machinery to remove them.  Here's to looking forward. 

Monday, August 1, 2016

Cut slab, clean house

   Not a lot of progress on the construction front this week, but things are moving behind the scenes.  This build is nearing it's two year mark from the first foundation pour so we've decided to go another direction with another builder.  I'll provide more information once we get the ball rolling again, but suffice to say, we really were never happy with the pace and organization of the build.  We always had suspicions that things should have run differently, but since this is our first build, we didn't have any outside information on how a good project is run.  Or concerns were confirmed when we met with another builder to review the construction so far and it was discovered that, indeed, our build experience was not efficient or typical.  I'm not sure how long the change over process will take, but hopefully we'll come to a quick conclusion and begin building our dream house again.

   Despite the setbacks, there was some progress on the house.  The garage slab crew came back and cut the expansion joints after their pour.  Part of the builder separation involved cleaning up the house and getting it to a good state for the next builder so the house is the cleanest it has ever been.  There was a little progress on the HVAC as they finish up their rough in.

   Here's what the garage slab looks like.  There was a ton of concrete dust from the expansion joint cuts so I used a broom that was sitting around and blew it out with my leaf blower.  There's still a good amount of dust in there, but nothing that will cause any troubles.  We're planning on getting an epoxy finish applied to the garage floor and I've seen some applications where these expansion joints are filled with a flexible compound, which seems to be a good idea.  We were day dreaming about this space on this visit noticing that, if we kept it clean, we could pull out all the cars and have a great place to have a party.  The space between the double and single doors really add a lot of width.  We figure that if we ever get a small CUV we could probably park it in that space.

   Here's the aftermath of the clean up.  Surprisingly not as much garbage as I would have expected, and more lumber scraps than anything else.  There's still a big pile of broken Styrofoam and concrete in the basement from the HVAC pass-throughs but I don't think they'll need an overly large dumpster to haul it away.  I could probably do it myself on a good day.  The plan right now is to have Matt and his crew complete the final clean up as per the contract and bill it in the next draw.


   Gone are the random piles of wood cut-offs and piles of sawdust.  Usable wood is stacked nicely either in front of the house or in the study.  You don't have to dodge construction trash to walk around the house.  You can actually feel what the space is like without being distracted by all the plastic bottles and garbage bags.  It's amazing the difference one day of cleaning will make and it's telling that this wasn't completed sooner.  The concrete is new, and I'm not sure what it was purposed for, but if it's for the front porch, I thought there would be more.  The stack of metal in the corner is the cut-offs for the wall studs.  They can probably be recycled or sold for scrap metal.

   Here's the great room after the clean up. There's some standing water because we had a huge thunderstorm roll through the day before.  Although we have the roof on, it doesn't stop the rain from coming in the window openings.  There must be a slight low spot in the middle of the floor.  You can see the steel posts that were never reinstalled.  I guess that will have to be something the next builder takes care of.  Most noticeable from the clean up is the lack of random nails and screws all over the floor.  I could almost consider bringing the twins to the site now without having to worry about having them pick up a sharp piece of metal.

   Here's a shot of the pantry ceiling and the bathroom venting that needs to run through it.  Since the rotunda powder room is lined up with the greatroom, we can't just take the bathroom vent straight out along the concrete beams.  The only two solutions are to drop the vent duct down under the concrete beam in the kitchen area or in the pantry.  I think I'm okay with the latter solution, as it's installed in this picture.  we'll just bring the height of the ceiling down a bit and since it's a small room, you probably wouldn't notice the difference.  I'm not sure how they're going to handle it on the bathroom side though. They make a wall mounted vent fan, but I think it would be pretty ugly to have it on that wall considering it's right where the feature wall of the powder room will be.  I think I'll have to call Porter and Heckman to run over some things.

   Here's the laundry room, and another unfortunate issue. It's not Porter and Heckman's fault since the blueprints I gave them has an incorrect location for the washer and dryer.  What you see here is the dryer exhaust vent.  It runs in wall up to the attic space and it's connected to a flex duct that will probably run out to the roof.  The black piece is a roof duct.  Unfortunately this is not the correct location for the dryer so I'll have to notify them of the change.  I should probably also ask if they're planning on installing the kitchen hood vent duct too.  I wasn't aware that they were going to do the dryer vent.

   Another issue I have with the dryer vent install is the connection.  It's pretty common to have just a duct extending from the wall, to which you connect a metal flex pipe to the dryer.  The problem with this kind of installation is that the duct sits out from the wall and the flex pipe can't bend in a tight radius so you end up having to keep the dryer a good distance away from the wall.  I need to communicate to P&H that I want an in wall dryer box to solve these issues.

   So that's about it for this week.  As I said earlier in the post, I don't expect much movement this coming week but I'll try to post a status update with all the internal workings so I can document all the trials and tribulations that come with building a new house.  I hope you don't ever have to deal with this when you get to build your house.  Building is stressful enough without having all this other stuff included.

Monday, July 25, 2016

Garage slab and HVAC roughs completed

   We finally have the garage slab poured and it looks like they did a pretty good job of it.  We were green tagged for the slab on June 14th so a month and a week later we got concrete to cover the underlayment and light rebar mesh.  We were a little worried about the state of the slab prep since it sat around for so long and we didn't get to watch the pour but the surface of the slab looks like it turned out well.  Most of the HVAC rough openings have been installed and ducted with the remaining work left in the basement for the primary supply and returns.

   Here's what our awesome garage looks like now.  They drove down rebar rods to hold back a 2x6 buck for the slab.  This was done on all the doorways.  It looks like they used power float since you can see very slight sweeping marks.  The surface of the slab is smooth, not rough brushed like a driveway.  You can see the slab went right up to the garage door bucks, so the height is spot on.

   Here's what the garage looks like from the single car bay.  There's a slight slope towards the front of the garage and notice that there aren't any crack relief lines cut into the slab yet.  I think they come back with a power diamond saw to cut grooves into the slab so if it does shift or settle a bit, the cracks can propagate in a controlled manner.  Just eyeballing off the ICF layers, it looks like there's a 4"-6" drop from the back of the garage to the front, which is good for drainage.  We're just around 30" from the garage slab to the house floor so online stair calculators put that at 4 steps up to the house with 3 treads.  The stairs will have a total run of 31 inches.  Considering before we raised the garage floor by 12", there would have been 5 steps and 4 treads with a total run of 42 inches, I'd consider raising that slab well worth the money over our entire life time.  Not only is the number of stairs decreased, but the space it protrudes into the garage is decreased by almost a foot.  We still might need a railing since there are 4 risers, but I'll find out what code is when the time comes.

   Here's the garage from the corner close to the house, showing both front bay doors and the bump out.  We had to adjust the height of the window in the bump out so we could have enough height to install a garden work bench.  Since this is the southern exposure, I think it would make a great place to over-winter plants.  The garage is, of course, insulated, but not climate controlled, so we shouldn't get frost, but it will still be cool enough to make plants dormant.  In the spring, this might be a nice place to put seed starter greenhouses for our garden.

    Here's the long shot of the garage.  We have about 11.5' from floor to ceiling in this garage.  This is mainly due to the amount the house came out of the ground to achieve the basement height we desired.  Since the rooflines of the garage needed to match up with those of the house, the garage ceiling needed to be at the same height as those in the house.  Since the garage floor needed to be close to grade, that means we have much more height in the garage than we do in the house.  Pretty simple, but also pretty awesome.  The garage doors will be about 9' high, which is a bit taller than standard so the scale will feel correct.  Right now, it feels super high, but I love it.

   Here's the door to the storage space that comes off the garage.  You can see how Porter and Heckman is running the bathroom ventilation through the Lite Deck floor.  This one is going out into the garage, but I'm not sure where it will go from there.  It should vent outside, but it can't go across the beams unless it goes underneath them.  It can't continue to go across the garage since there's a laminated and steel beam there.  It can't go up because the unconditioned storage space off the master closet is there. I guess we could sacrifice a bit of that space to run the pipe up through, if it meant not having an odd box in the garage.  In that space the vent could come out the front or back (preferred) roof overhang.  Although this will be covered with drywall, I would love it if it was also spray foamed for sound insulation, but it's not a requirement.  

   Here's the mudroom wall that's shared with the mudroom bathroom.  In this case, rather than coming through the floor to supply this space with conditioned air, we've decided to come through the wall, since there really wasn't a great space to come through the floor.  We have a few of these kinds of wall registers in our current house and haven't had any troubles with them.  The duct isn't currently connected to anything below but it looks like all the floor pass-throughs and second floor ducts are completed.  There's a fair bit of duct work that needs to happen in the basement, but I think that's the next phase.

   Here's how the return registers are connected to the return ducts on the second floor.  Again, the silver foil wrapped ducts are used for the returns and the black poly wrapped ducts are used for the supply.  This is a really short run to the main trunk in the attic.  I believe there's a rigid aluminum flange that's cut and screwed to the duct box to which the inner flexible duct pipe is clamped to.  I'm not sure if they come back and tape this seam.  The last time I was out there, they were asking what kind of insulation was going in the attic.  We're looking into the budget to see if we can spray foam everything up there, but if not, P&H said they installed the attic ducts so we could at least spray foam the duct system, rigid and flexible all together.  This would probably seal up any air leaks in the attic ventilation and provide a much better insulation than what's installed now.

   Here's where the powder room vent will exit the house.  This runs straight across the kitchen and will run in the porch roof out to a vent, either in the overhang or on the porch roof.  As I mentioned before, all the bathroom ventilation on the first floor should be embedded in the ceiling and can only run forwards and backwards because of the concrete beams.  This doesn't look like it will present any problems.  The second floor bathroom vents are run in the attic space so they can just take the shortest path outside.  I'm hoping that we'll be able to run all the gas, electrical, and water to the second floor in a similar fashion.  It will take some fancy planning to accomplish this without any first floor soffits.
   This is the guest bathroom vent run to the back porch.  Pretty much the same concept as the other first floor bathrooms.  If we can't get some spray foam up there for sound isolation, at least we could get some fiberglass insulation stuffed up there before the drywall is installed.  Since it's rigid piping, I worry a little about the fan vibration propagating through the duct.  It doesn't look like there's enough space to run a short piece of flexible vent to isolate the vibration so we'll have to install insulation to mitigate any sound.

   This is the same guest bathroom vent run.  It's a 6" duct, so you can see how much space is available to us to run the other mechanicals.  We can cut out the foam on in every concrete beam gap.  There's also a couple of inches of foam under each beam, which I think can be removed to run the smaller diameter mechanicals like gas, plumbing, and electrical.  Once the concrete is hardened, the foam is just insulation so as long as the concrete beam is intact, the foam can be removed.  This will help with running the second floor utilities, but doesn't help much with larger diameter things, like bathroom drains.

   Here's how they cut the air return for the first floor study.  Larger rooms and areas should have appropriately sized air returns and since this room has two air supply vents it needs a larger air return.  This is pretty much standard in wood constructed houses as well.  The stud spaces in the wall are used as an air chase,  The wall will have a vent plate up high and the system will suck the air through the vent and wall into the return trunk it's connected to below.  In our current house, the installer just used a hole saw or large bore drill bit to cut holes in the wall sill plates and plywood floor.  For both all constructions, as long as the wall isn't sitting on a floor joist or beam, you're good to cut through.  Below, the floor joists are sometimes used as the HVAC return chases.  All they have to do us screw some sheet aluminum to the bottom of the joist and the whole cavity is used to move the return air.  In this house, we might need to have ducts installed in the basement for every return.

   Here's the single return in the dining room.  This room only has one air supply vent and it's pretty open to the rest of the house, so it should only need one return vent.  It looks a little narrow because the foam isn't completely cleaned up.  Also, you'll never see it once everything is installed, so as long as it's clean enough to function properly, it's okay.


   Moving back upstairs, it looks like all the supplies and returns have been connected.  Here's one of the laundry room vents connceted up with the black poly flexible ducts.  It's a pretty sizable air supply vent compared to those normally found in a house, and there are two of them for this room.  You can get a glimpse of the pipe clamp or zip tie used to connect the duct to the vent.

   Here's what the mudroom supply looks like from the basement.  One nice thing about this ICF floor system is that all the gaps you see between the foam and ducts can be spray foamed when the installation is complete.  It will really lock in the ducts, provide vibration dampening, add insulation value, and seal any air leaks that inherently exist with the rigid aluminum ducts.  Ideally, all the seams are taped with aluminum tape, and these still might be, but it's nice to gain all the other positive attributes of filling the gaps.  In a wood joist or even open web steel joist floor system, these ducts aren't really surrounded by much material so you need to install a fiberglass blanket for insulation, strapping for vibration mitigation and use other methods to ensure an air tight installation.

      So that's about it for this week.  There's a bit of turmoil going on behind the scenes, which I might be able to comment on when it's all resolved, but hopfully, the resolution will bring about enough change that will move this project forwards quicker.  There's still a ton left to do, and it's nice to see progress every week, but we really need to kick this into high gear if we're going to try to finish this year (still crossing our fingers).  July is almost over and we'll already be into August, so we really need to turn our attention towards buttoning up the house and getting the other mechanical trades through.

Monday, July 18, 2016

Lungs are going in.

   If the walls are the bones of the house and the roof is the hair, then the HVAC is the lungs, and they're going in quickly.  Porter & Heckman worked hard last week to cut through our concrete floors on the first floor and route the main supply and return for the second floor.  If you're looking for a great HVAC installer, I can recommend them.  They don't hesitate to call and ask me for my input when the design needs to change and I really appreciate that.  A few supplies on the first floor needed to be moved from their original location, and some wall redesign was needed to run the second floor supply and return, but we worked through it together.  I'm hoping they'll complete their work this week and we can move on to other subs.

   Here's one of the holes cut in the first floor for the supply.  Since P&H needs to dodge the Lite Deck concrete beams, they drill a test hole to gauge their position in the floor then mark and cut the slab with a diamond blade in an angle grinder.  A good number of swings with the hammer and the concrete comes out.  All they have to do cut and clean up the foam then run the duct work through.  There's a light metal mesh in the concrete that also needs to be cut, but that's no match for the diamond blade.  There's no rebar in the places between the beams so we don't have to worry about those.
   Here's where we needed to make some modifications to the original floor plan in order to get air to the second floor.  Usually, when you have a forced air system on the second floor, you need to run supply and return ducts against the ceiling in the first floor.  Since we used the ICF Lite Deck, if we wanted to run these supply and returns perpendicular to the concrete beams, the would have to sit below the finished ceiling level, which necessitates ugly boxes hidden in obvious soffits.  Another way is to run a second floor supply and return up to the attic space and supply the air through the ceiling.  This cleans up the design, but comes at a slight cost of efficiency since you're running HVAC through the unconditioned space of the attic.  Any air leak or radiant energy loss goes into the attic instaed of into the living space.  It's not he ideal way to do it, but in this case, probably necessary.
   So here we have our second floor supply and return.  It's sitting in what used to be our study nook, where we were going to install some built-in cabinets and shelves.  There's a steel beam just on the other side of those ducts, so we couldn't move them back.  If we were to go on the other side of the beam, it would have drastically reduced the closet space in both the guest bedroom downstairs and second bedroom upstairs so we decided that the nook could be sacrificed.  Fortunately, it sits right above the mechanical room in the basement so there's minimal head pressure loss running to the second floor.

   Here's the closet wall in the guest bedroom, just on the other side of the second floor trunks.  That wall sits right on a beam and there's another one above it.  While a walk in closet isn't important for the guest bedroom, we couldn't take away space from the second bedroom upstairs.  It wouldn't be nice for that room to not have the turret feature AND not have closet space.  I could hear children's' arguments ringing from the future about who has to stay in that room, right before I put them in a cardboard box outside (just kidding).  There's still finishing work that needs to be completed on these trunks but it looks like this was the last thing they did before they stopped working last week.  In a good installation, seams are taped with aluminum tape and hopefully we'll get some rigid insulation on the boxes.

   Here's what the boxes look like coming out of the second floor.  Unfortunately, the turret bedroom wall that shares the second-bedroom bathroom.  Since the turret room wall doesn't sit right on the study wall below, we'll need to furr-out the existing wall in order to wall in the second floor trunks.  That means that the turret room is losing a few inches, but when it's closed up, you'll never know. We could gain that space in the second-bedroom bathroom but since it's right where the tub will go, we'll have to see how the drain lands on that beam.
   Here are the trunks as they enter the ceiling.  It's unfortunate that we need to dodge a roof truss because every bend in the pipe adds some head pressure and flow loss, but as beds go, I think these are pretty benign.  You can see they've already installed rigid insulation on these boxes and taped up the seams. On top of this will also be the blown-in insulation, but I might investigate getting some spray foam up there to seal and insulate the trunks more.  Attic spaces are really hot in the summer and really cold in the winter and the greater the temperature differential, the greater potential for radiant energy loss.

   Here's another first floor hole after it's all cleaned up.  Supplies are cut into the floors as close to windows as possible.  I think they do that to help with condensation in the winter time and help equilibriate the temperature in the room.  If you had it on the wall opposite the window, you might get hot or cold spots in the room if there's not enough circulation.  Likewise, returns are best placed on the wall opposite the supply vent so you're not sucking in newly conditioned air to be returned to be reconditioned.  All the supplies on the first floor are placed high in the walls and use the stud cavity as a plenum.  As such, the floors inside the walls need to be cut or drilled and connected to the return trunks.  On the second floor, the returns are in the ceiling and connect to the return trunk in the attic space.

   Here's one area where the vents needed to be reconfigured due to the ICF concrete beam placement.  It was initially planned that there would be two vents on the big window wall, and one vent in front of each of the side windows.  Because the beams are placed right next to the side walls, we couldn't place the vents there, so we decided to place a vent in front of each window.  This works out since the returns are on the opposite walls, so it creates a good circular airflow to the room.  You can see that they've cut the floor, but haven't removed the light mesh or ICF foam to open to the basement.  It's a little unfortunate that they couldn't get the ducts placed equally in the window opening, but again, that's function of where the concrete beams fall.  In a standard wood construction or web truss, the supports are narrower, so it allows some more flexability, but you still need to dodge them.  If you're very particular about where your vents sit, then you might be able to space the joist, but it would take a lot of fine detail planning before any implementation takes place.

   Here's what a second floor return looks like.  It's in the master bedroom and it's a really large box when compared to the supplies.  The return ducts use this silver jacketed flexible insulated duct that probably has an R6 value, which isn't a ton but it helps.  As long as it's air tight, any additional insulation in the attic space will add to the R-value.  I don't believe this is something that can be spray foamed.  Each room has a return sized appropriately to the space and there's one more in the rotunda to catch the general area air.

   This is how the flexible return ducts look when they attach to the return trunk.  You can see that the return trunk is insulated with Owens Corning Quiet R duct board type 475, which is 1" thick and has an R-value of 4.3.  Again, it's not great, but it's something and I think we can spray foam around the duct to increase the R-value and decrease any air leaks the tape might have missed.  They did a thorough job tape sealing it from a visual inspection.  Since it sits on the attic joists, we would have to have the drywall installed first, then maybe spray foam could be applied in between and around the duct, then blow in insulation could be installed.  It would be a pretty small job, so it shouldn't be too cost prohibitive.  

   Here's what the supply runs look like.  These are the supplies to the laundry room and a black 6" diameter R-8 flexible duct is used.  I'm not sure why they use the silver metalized on the returns and black poly insulated on the supplies, but at least the supplies have a higher R-value.  The number of supply runs to a room is size dependent.  For our laundry room, we have only these two runs.  For the master bedroom, we have three.  Some houses have retro-fit A/C installations that use small 3" holes for vent supplies and really force the air to create good room circulation.  Because of the size of these vents, this more akin to a traditional HVAC installation so the air won't jet out.  It will be interesting to see how even the rooms warm up during the winter since the supplies and returns are in the ceiling.

   Here's what the supply register looks like.  As noted, this is a 6"x8" register and it's one of the two in the laundry room.  The flange on the register accounts for the ceiling drywall thickness and the register diffuser will screw into the register, and looks like a regular floor air distributor.

   In addition to running the supply and returns, Porter & Heckman is also responsible for running the bathroom vents.  Here in the master bathroom, you can see the smaller black poly-wrapped insulated duct in place to hook up to the bathroom vent.  This just goes out to a small round vent in the roof overhang.  It's well protected there and removes the need to cut through the roof to vent the bathroom.  There are actually two in here, one in the water closet and one in the main bathroom.  Since these are in the attic space, we can run across ceiling joists to the overhang.  On the first floor, they'll need to run along side the cement beams towards the back of the house.  The foam between the beams can be cut out to run pipes so these duct lines will still up in the ceiling.

   Here are most of the supplies for the master suite.  From front to back it's one of the master bedroom supplies, then the water closet vent, followed by one bathroom supply, the other bathroom vent, another bathroom supply, and finally the master closet supply way in the back.  Most of the other rooms still need their supply and return runs but I imagine that will be installed this week.  It's much easier than cutting hard aluminum ducts and piecing and taping them together.

   This is the box that the supply duct comes in.  Nothing fancy, just wanted to include it for future reference.  

   It looks like Porter & Heckman is using a two man crew, one is working on cutting on the concrete and another is upstairs installing the flexible ducting for the second floor.  Last week, I installed a wireless trail camera so I can monitor the site to see if we're getting unannounced visitors (haven't caught anyone yet) and I see the P&H guys there every day just around 9 o'clock so another bonus about these guys is that they're punctual and hard working.  
   We'll be meeting up with Margaret tomorrow at the site to run over some design information.  Unfortunately, Pro Brothers backed out of our window installation, but they're still going to deliver and perform a final walk through of the install to ensure the mechanics of the windows are functioning properly.  Because of this, we're trying to scramble to find a window installer so we're meeting with Margaret's general contractor to see if we can take on this job.  It seems like Matt has been busy with other houses since we're still waiting on the garage slab pour and water/sewer trenching.  Maybe getting in another GC will get things done faster.