Showing posts with label Concrete. Show all posts

Monday, July 25, 2016

Garage slab and HVAC roughs completed

   We finally have the garage slab poured and it looks like they did a pretty good job of it.  We were green tagged for the slab on June 14th so a month and a week later we got concrete to cover the underlayment and light rebar mesh.  We were a little worried about the state of the slab prep since it sat around for so long and we didn't get to watch the pour but the surface of the slab looks like it turned out well.  Most of the HVAC rough openings have been installed and ducted with the remaining work left in the basement for the primary supply and returns.

   Here's what our awesome garage looks like now.  They drove down rebar rods to hold back a 2x6 buck for the slab.  This was done on all the doorways.  It looks like they used power float since you can see very slight sweeping marks.  The surface of the slab is smooth, not rough brushed like a driveway.  You can see the slab went right up to the garage door bucks, so the height is spot on.

   Here's what the garage looks like from the single car bay.  There's a slight slope towards the front of the garage and notice that there aren't any crack relief lines cut into the slab yet.  I think they come back with a power diamond saw to cut grooves into the slab so if it does shift or settle a bit, the cracks can propagate in a controlled manner.  Just eyeballing off the ICF layers, it looks like there's a 4"-6" drop from the back of the garage to the front, which is good for drainage.  We're just around 30" from the garage slab to the house floor so online stair calculators put that at 4 steps up to the house with 3 treads.  The stairs will have a total run of 31 inches.  Considering before we raised the garage floor by 12", there would have been 5 steps and 4 treads with a total run of 42 inches, I'd consider raising that slab well worth the money over our entire life time.  Not only is the number of stairs decreased, but the space it protrudes into the garage is decreased by almost a foot.  We still might need a railing since there are 4 risers, but I'll find out what code is when the time comes.

   Here's the garage from the corner close to the house, showing both front bay doors and the bump out.  We had to adjust the height of the window in the bump out so we could have enough height to install a garden work bench.  Since this is the southern exposure, I think it would make a great place to over-winter plants.  The garage is, of course, insulated, but not climate controlled, so we shouldn't get frost, but it will still be cool enough to make plants dormant.  In the spring, this might be a nice place to put seed starter greenhouses for our garden.

    Here's the long shot of the garage.  We have about 11.5' from floor to ceiling in this garage.  This is mainly due to the amount the house came out of the ground to achieve the basement height we desired.  Since the rooflines of the garage needed to match up with those of the house, the garage ceiling needed to be at the same height as those in the house.  Since the garage floor needed to be close to grade, that means we have much more height in the garage than we do in the house.  Pretty simple, but also pretty awesome.  The garage doors will be about 9' high, which is a bit taller than standard so the scale will feel correct.  Right now, it feels super high, but I love it.

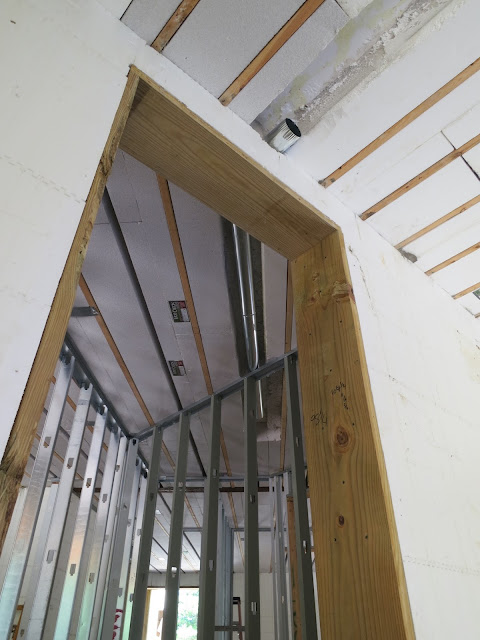
   Here's the door to the storage space that comes off the garage.  You can see how Porter and Heckman is running the bathroom ventilation through the Lite Deck floor.  This one is going out into the garage, but I'm not sure where it will go from there.  It should vent outside, but it can't go across the beams unless it goes underneath them.  It can't continue to go across the garage since there's a laminated and steel beam there.  It can't go up because the unconditioned storage space off the master closet is there. I guess we could sacrifice a bit of that space to run the pipe up through, if it meant not having an odd box in the garage.  In that space the vent could come out the front or back (preferred) roof overhang.  Although this will be covered with drywall, I would love it if it was also spray foamed for sound insulation, but it's not a requirement.  

   Here's the mudroom wall that's shared with the mudroom bathroom.  In this case, rather than coming through the floor to supply this space with conditioned air, we've decided to come through the wall, since there really wasn't a great space to come through the floor.  We have a few of these kinds of wall registers in our current house and haven't had any troubles with them.  The duct isn't currently connected to anything below but it looks like all the floor pass-throughs and second floor ducts are completed.  There's a fair bit of duct work that needs to happen in the basement, but I think that's the next phase.

   Here's how the return registers are connected to the return ducts on the second floor.  Again, the silver foil wrapped ducts are used for the returns and the black poly wrapped ducts are used for the supply.  This is a really short run to the main trunk in the attic.  I believe there's a rigid aluminum flange that's cut and screwed to the duct box to which the inner flexible duct pipe is clamped to.  I'm not sure if they come back and tape this seam.  The last time I was out there, they were asking what kind of insulation was going in the attic.  We're looking into the budget to see if we can spray foam everything up there, but if not, P&H said they installed the attic ducts so we could at least spray foam the duct system, rigid and flexible all together.  This would probably seal up any air leaks in the attic ventilation and provide a much better insulation than what's installed now.

   Here's where the powder room vent will exit the house.  This runs straight across the kitchen and will run in the porch roof out to a vent, either in the overhang or on the porch roof.  As I mentioned before, all the bathroom ventilation on the first floor should be embedded in the ceiling and can only run forwards and backwards because of the concrete beams.  This doesn't look like it will present any problems.  The second floor bathroom vents are run in the attic space so they can just take the shortest path outside.  I'm hoping that we'll be able to run all the gas, electrical, and water to the second floor in a similar fashion.  It will take some fancy planning to accomplish this without any first floor soffits.
   This is the guest bathroom vent run to the back porch.  Pretty much the same concept as the other first floor bathrooms.  If we can't get some spray foam up there for sound isolation, at least we could get some fiberglass insulation stuffed up there before the drywall is installed.  Since it's rigid piping, I worry a little about the fan vibration propagating through the duct.  It doesn't look like there's enough space to run a short piece of flexible vent to isolate the vibration so we'll have to install insulation to mitigate any sound.

   This is the same guest bathroom vent run.  It's a 6" duct, so you can see how much space is available to us to run the other mechanicals.  We can cut out the foam on in every concrete beam gap.  There's also a couple of inches of foam under each beam, which I think can be removed to run the smaller diameter mechanicals like gas, plumbing, and electrical.  Once the concrete is hardened, the foam is just insulation so as long as the concrete beam is intact, the foam can be removed.  This will help with running the second floor utilities, but doesn't help much with larger diameter things, like bathroom drains.

   Here's how they cut the air return for the first floor study.  Larger rooms and areas should have appropriately sized air returns and since this room has two air supply vents it needs a larger air return.  This is pretty much standard in wood constructed houses as well.  The stud spaces in the wall are used as an air chase,  The wall will have a vent plate up high and the system will suck the air through the vent and wall into the return trunk it's connected to below.  In our current house, the installer just used a hole saw or large bore drill bit to cut holes in the wall sill plates and plywood floor.  For both all constructions, as long as the wall isn't sitting on a floor joist or beam, you're good to cut through.  Below, the floor joists are sometimes used as the HVAC return chases.  All they have to do us screw some sheet aluminum to the bottom of the joist and the whole cavity is used to move the return air.  In this house, we might need to have ducts installed in the basement for every return.

   Here's the single return in the dining room.  This room only has one air supply vent and it's pretty open to the rest of the house, so it should only need one return vent.  It looks a little narrow because the foam isn't completely cleaned up.  Also, you'll never see it once everything is installed, so as long as it's clean enough to function properly, it's okay.


   Moving back upstairs, it looks like all the supplies and returns have been connected.  Here's one of the laundry room vents connceted up with the black poly flexible ducts.  It's a pretty sizable air supply vent compared to those normally found in a house, and there are two of them for this room.  You can get a glimpse of the pipe clamp or zip tie used to connect the duct to the vent.

   Here's what the mudroom supply looks like from the basement.  One nice thing about this ICF floor system is that all the gaps you see between the foam and ducts can be spray foamed when the installation is complete.  It will really lock in the ducts, provide vibration dampening, add insulation value, and seal any air leaks that inherently exist with the rigid aluminum ducts.  Ideally, all the seams are taped with aluminum tape, and these still might be, but it's nice to gain all the other positive attributes of filling the gaps.  In a wood joist or even open web steel joist floor system, these ducts aren't really surrounded by much material so you need to install a fiberglass blanket for insulation, strapping for vibration mitigation and use other methods to ensure an air tight installation.

      So that's about it for this week.  There's a bit of turmoil going on behind the scenes, which I might be able to comment on when it's all resolved, but hopfully, the resolution will bring about enough change that will move this project forwards quicker.  There's still a ton left to do, and it's nice to see progress every week, but we really need to kick this into high gear if we're going to try to finish this year (still crossing our fingers).  July is almost over and we'll already be into August, so we really need to turn our attention towards buttoning up the house and getting the other mechanical trades through.

Monday, June 20, 2016

Garage ready to pour, still no roof.

    Another hot weekend and a little progress has been made, but not as much as I would have liked.  Work is moving forward on three fronts, front porch roof, greatroom fireplace, and garage slab.  I guess added together, it's an okay amount of progress.  Seeing how it was fathers day, I got some extra time to myself and took the "drone" up to get some areal movies.  If I figure out a good way to post them, I'll share them here.

   Subtle changes to the front of the house, but nothing drastic.  They finished the fascia and overhangs for the curved roof but still need to put up the roof decking.  There isn't any venting in the curved overhang, and that should be fine. You usually only need venting if the space below is conditioned.  I'm not sure why they put venting on the other parts of the porch.

   I found an inspection tag in the garage dated last Thursday, so it looks like the garage slab is good to pour.  Since we'll have good weather this week, I'm hoping they'll get this poured soon.  We've been talking about how we want to finish off the garage space.  In our current house that we bought new, we epoxied the garage floor with a DIY kit and it has held up well for the past 10 years.  This time around, we'll either get the floor professionally epoxied, or install linoleum or vinyl composite tiles, but I've read mixed reviews about the latter.  We would have loved to installed a floor drain in the garage, but I think it's against code, so we didn't push it.

   Here's where the curved roof porch meets the rest, near the door.  You can see the installed fascia and how it still needs to connect to the rest of the roof.  I still have to talk to Matt about how we're going to conceal those straight beams.  It has been a busy week.  


   Here's the same spot from above.  The laminated beams are installed in an odd way.  Since they're sitting on the same plane as the steel beams, they're just notched to mate up and hang on the beam.  I would usually expect to see some kind of steel tie or something, but his might be an acceptable application since the roof load isn't too high.

   Here's the other side of the curve.  They've connected the fascia and overhang on this side so it's a preview of what's to come.  I'm really hoping that they'll get the decking installed this week so we can get the roofers in since we're taking delivery of the cabinets next week.  Cobblestone Cabinets can warehouse the delivery for us for about a month, but that means we need to get a roof, windows, HVAC, electrical, plumbing, and flooring in, in that month, before the cabinets can be installed.  That's a really tall order.  We might be able to push to get the kitchen done but I doubt it.  With windows installed, we could possibly stash them in the basement and they might be secure down there.  It's a pretty safe area, but it still doesn't make me comfortable.

   Last shot of what the finished overhang looks like from the "inside".  There won't be anything in this roof so it will remain hollow.  I'll have to ask Matt or Ken if we need to thermally insulate the ends of the concrete beams since they're sitting in the porch roof airspace, which is unconditioned.  There's a potential for the cold air to leech into the concrete beams and propagate into the turret, which is an already difficult area to climate control.

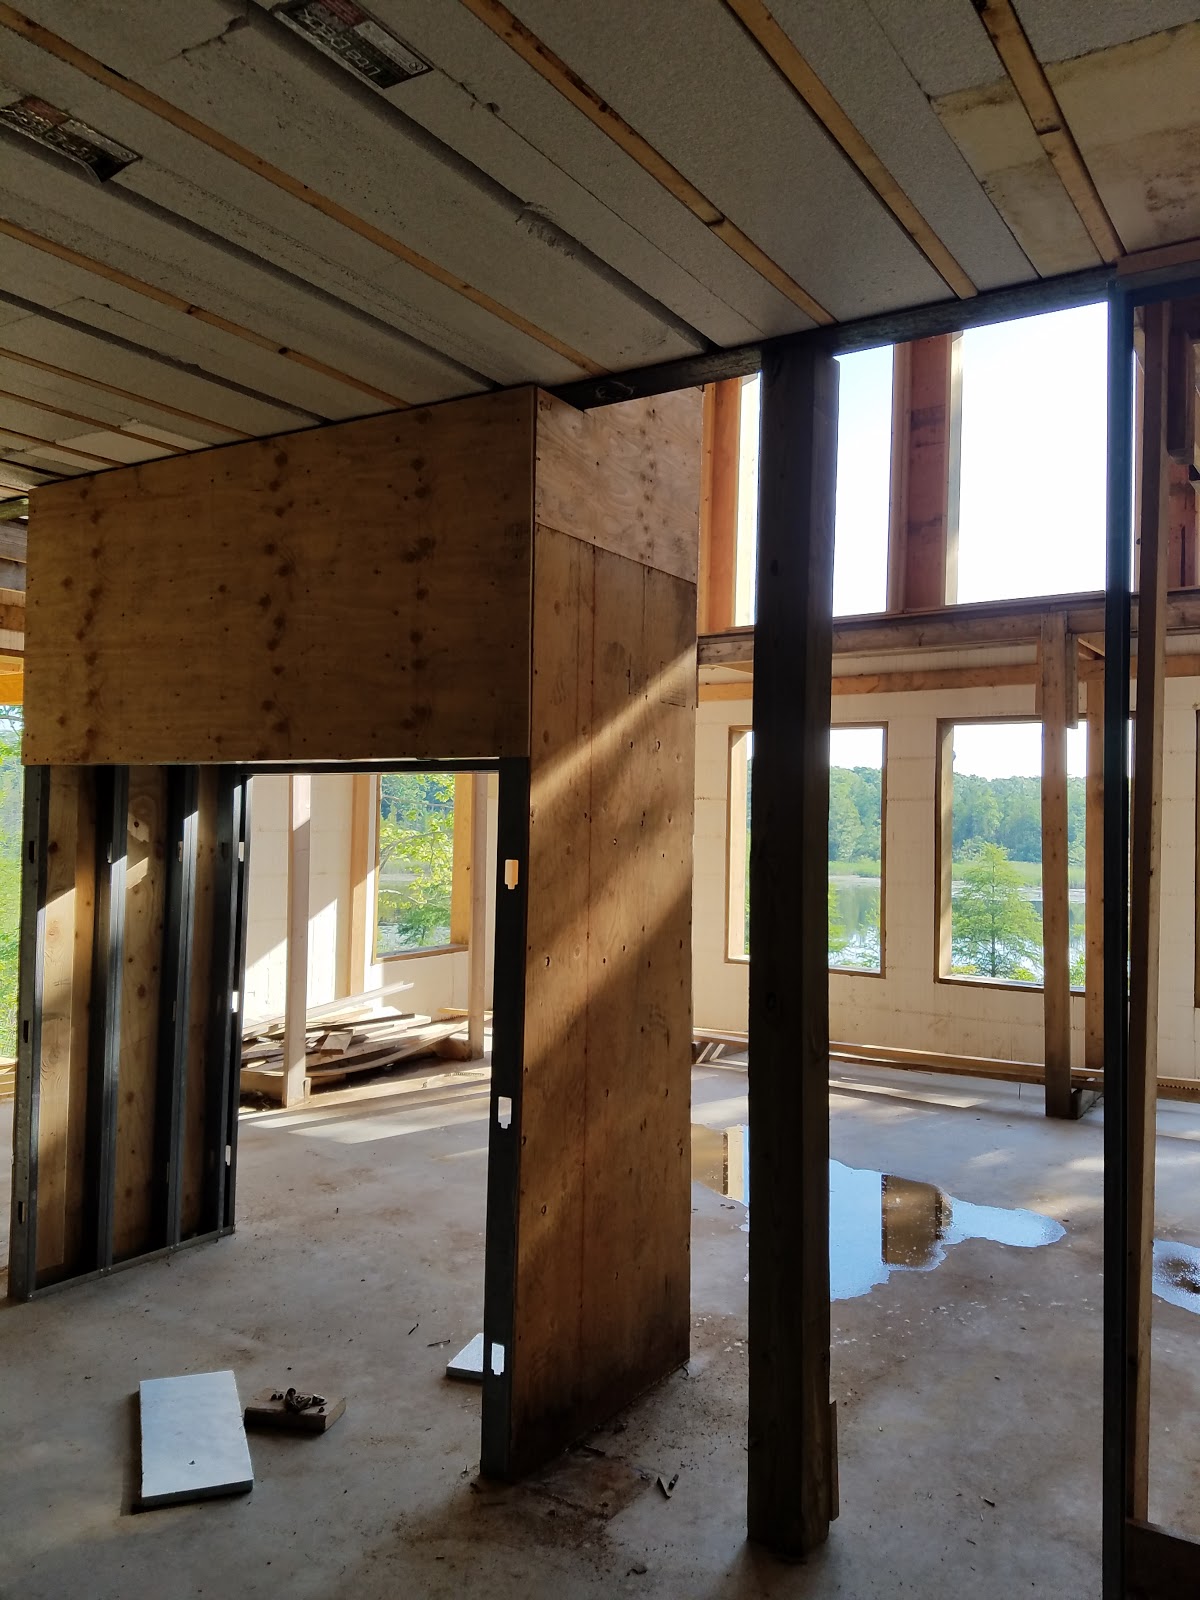
   Moving inside, here's what's going on with the greatroom fireplace column.  I guess we got the go-ahead to move the posts that support the second floor beam, because they're on the floor right now.  The beam is being supported temporarily by the 6x6 posts, and I guess they'll figure out how to put them into the fireplace column footprint.  That's good news for the aesthetics of the room since we don't need to take up more opening to conceal the posts, both on the first and second floor.

   Here's where they cut the bolts that anchored the post to the concrete.  I don't expect it will be filled or anything since it will be hidden by the finished floor.  The beam welds have already been ground down, but they'll need to reconstruct the fireplace column to accommodate the floor mounting plate for the post.  If this was just a spec house, I think a detail like this would have been overlooked.  In this respect, it's nice to have a custom construction so we can work things out as we go along.

   Minus the temporary post and add a two way fireplace, this is what the space will look like when it's completed.  Since the fireplace doesn't fill the entire space, we can pretty much put the posts anywhere inside the column.  I already gave Matt the specs of the fireplace we want, so we should be able to find the best place for installation.

   So that's if for this week.  I'll try to micro update with the aerial footage, or at least some nice captures from above.  We won't be able to make it to the site this weekend so the next update won't be for a while.  Hopefully we'll have a TON or progress to report on.


Tuesday, June 7, 2016

Our house has a face (well maybe a skull?)

   Temperatures are cooling a bit this week, but we visited the site for a late afternoon meeting with Porter and Heckman, and Matt to verify the HVAC supply and returns, and discuss the routing o fthe main supply and return trunks in the basement.  Besides that, work is progressing well on the front porch and I expect them to be completed by the end of the week.  There are still some tricky parts to complete around the turret and it needs to be tied into the garage roof, but Matt and his crew are already installing the overhang and fascia on some of the completed sections.

   The front porch roof is quickly coming together, so we can finally see what the house will look like when completed.  You can see how the barrel vault in the porch ceiling above the door will look.  I like how it follows the arc of the door itself.  We'll have the barrel vault blocked from the front by the triangular facade, which will also allow us to have a hanging light that will be shielded from the elements a bit.
   So here's the house, now that it has the front porch roof mostly in place.  We're still trying to nail down a roofing contractor but we're finding it difficult.  More on that later.  The grade of the garage approach has be increased to prep for the garage slab pour so that should be happening pretty soon.  


   A little more detail on the turret area.  You can see the initial curved support for the roof trusses.  The wood that's sticking through is the wood that was mechanically attached to the turret support beams.  These indicate the final roof fascia location, so there's a nice overhang to the porch decking.  The roof decking supports will be radiused around the turret.  I think the beams will be hidden by deck fascia, and it will be interesting to see how that will be done around the curve.

   Here's the front porch looking towards the garage.  The large window is two crank casements that look into the dining room.  I'm standing just in the barrel vault area where some of the concrete for the garage slab will go, to finish off the section under the front porch.  After that bit is poured, the final 6x6 posts can be anchored to hold up the front porch here.  Even though this area is in front of the dining room window, it will still be a neat place.  We'll have to think ahead a bit to see if we want to install some attachment points for a porch swing or something.

   Here's the front porch under the turret, looking back towards the back of the house.  The large window here is one of the two in the study.  There's a good amount of roof decking that still needs to be installed here but that's a quick job.  Not much else has changed on this side since my last update.

   Same area, but looking forward towards the front of the house.  It was pretty rainy today so even though the roof decking is up, there are planned expansion gaps in the plywood so water can still infiltrate the house.  We would have liked to have been dried in with roofing felt by now, but no one will install it without installing the roof soon thereafter.  There's a bit of a delay on the roof because of our current choice in material.  

   Another good sign of the times, an almost full dumpster.  There was still a good amount of dirt and scraps inside the house, but you can see that a lot has been cleaned up and thrown out.  There were some nice pieces of the laminated beam stacked on the other side of the dumpster, and I'm not sure if they were throwing them away, or waiting to use them somewhere else.  Those things are pretty flat and dead straight, so they're nice to use in other places.  Maybe I'll have to snag some if they're just going to throw them away.  It's amazing how much waste can go into creating a house.

   Some progress has also been made inside the house, with the erection of the dining room wall to the foyer.  The original plans called for an open area with two pillars.  Very common look in houses this size, but we really didn't like the look, so we're mirroring the study entry.  Both openings might be arched as well to mimic the door shape.  
   There's a little alcove that's created on each side of the opening to the rotunda and we're trying to decide what to do with them.  You can kind of see it to the left of the yellow bucket, where the curved wall of the rotunda meets the straight wall of the dining room.  We could make little nooks there, each holding an orchid lit from above.  Or we could flatten and enclose the space with walls and hang something on each side. Still trying to decide.
   Finally, here's the garage, prepped for concrete.  At last, we'll be done with concrete!  As with the basement slab, there's a layer of waterproof plastic and thin gauge wire mesh that's imbedded in the slab.  I didn't look close enough to see if there's also a layer of foam under this slab, as there is in the basement.  If it's not poured this week, I'll take a look.  We would have liked floor drains to facilitate cleaning, but I think there are environmental issues with that.  The entire floor was raised about a foot before this prep was completed so we could reduce the number of stairs into the house.  As it is now, there's three feet to the house slab.  Figure about three inches for slab, we're looking at 4 steps or 3 treads at an 8.25" rise for each step.  The total run will be 31.5" into the garage, which is also something we wanted to reduce since it takes up valuable floor space.   Four steps is a good amount, but it's better than the six we would have needed if we didn't raise the floor.

Roof
   Soooo roof woes.  Our original plan was to go with a slate composite like Inspire Classic Slate roofing, but we're encountering two issues: Cost and timing.
   Timing: We need to get the roof on before HVAC will come in to work, they're the first of the mechanicals.  We need to have a roof on before windows can go in.  We're also trying to squeeze in the completion of the landscaping after the roof is done.  The Inspire roof installs like real slate, minus most of the weight.  Set the desired overlap then put one or two nails in it.  That's more work than a traditional asphalt shingle, and much more weight.  Because of this, we're hearing from two different contractors that they don't have the manpower to complete our 90 square (9000 sq foot) roof.
   Cost: Inspire comes at a crazy premium.  We're seeing quote for around $60,000 for our 90 sq roof, not including labor, flashing, and drip edge.  That's materials alone.  It roughly translates to $650 per square for materials.  Compare this to $120-$190 per square for a high quality asphalt roof.  The quoted labor cost for installation of the Inspire is from $300-$1000, which is a ridiculous amount. All together we're looking at the worst case scenario of $100k for the roof alone.  Since we only have $18,000 in the budget for a roof, a ton would have to come out of pocket.
   Because of these two reasons, we're looking into alternatives.  There are some companies that make asphalt shingles that do a pretty good job of mimicking slate.  It's not great, but it will do.  This is one of those "not-the-bones-of-the-house" items that we can skimp on now and replace in the future if we really wanted to.  Here's the short list of slate-like asphalt shingles:

   Owens Corning: Berkshire (~161/sq)
   GAF Grand Slate II (~194/sq)
   Certainteed Grand Manor (~190/sq)

   We might have been able to handle two times the up charge for the Inspire but if these quotes are true, then I think we've been priced out of the product.

HVAC
  We also did a walk-through of the planned routing for the supplies and returns run in the basement.  Since we're planning on finishing the basement, we really wanted a say in where the large HVAC trunks will be run along the ceiling.  These ducts would be boxed in with drywall so making them as unobtrusive in their placement is paramount to a nice basement design.  Luckily, the guys with Porter and Heckman are great and we planned out the routing to have a clean look.  I'll discuss this more when it's installed and I can provide pictures, but basically, we'll have to run three main trunks, one for the rear of the house, one for the front of the house, and one that goes to the attic space for the second floor.  The front/rear house split was because we wanted to try to avoid as much passing-under-the-beams in the basement as possible, for the vent supply branches.  If we only used one trunk for the first floor, we would have to pass under two beams, which makes for some ugly boxing.  This is one of the perks of building yourself, you get complete control in the final product.  I would highly recommend Porter and Heckman for HVAC if you're in the market.

   The twins birthday is this Saturday, so I'm not sure if I'll be able to get out to the property or not.  I'm hoping I can swing out there on one day and see the progress on the front porch and peek at the garage slab one more time.