Showing posts with label Finished Electrical. Show all posts

Monday, January 29, 2018

Foyer Tile Installation and Fireplaces

   An unexpected family adventure day ended with a visit to the house on yet another unseasonably warm winter day.  Even though it's still January, temperatures this weekend are in the 50s with some clear skies and sun.  Knowing Michigan weather, we can probably expect at least one more snow dump, but at least we can enjoy a hint of spring.  The tile installers were in full force today with five guys working to finish up all the tile installations.  Back splashes were being grouted, tile was being installed, and finishes were being refined.  We also saw more progress on the final touch ups, but the wood floor in the turret bedroom remains missing.  Mike says that the wood is delivered so we can hopefully expect installation this coming week.  A few more visits from the electrician puts us a bit closer to perfecting all the lights and now the circuit to the car charger is connected.  We're still waiting on a meter, but everything is in place on our side.


   The packed in ice is finally gone from most of the driveway, and is at least clear in the front of the house.  Three trucks were at the house today for all the tile installers and Mike, recovered from his hospital visit earlier in the week from flu like symptoms, was present to supervise.  As warm as it was this weekend, we're expecting a snowstorm early next week with a chance it will all melt away later in the week again.  I wish mother nature would make up her mind.
 

The tile installers were on site during the weekend to start laying the foyer floor tile.  They prepped the floor earlier in the week by leveling and applying a scratch coat.  The day were visited, they were dry-laying down the tile so we could confirm the spacing and orientation of the tile.  Since it's best to have a full pattern tile layout in the center basket weave center, they started in the center of this field and worked their way outward.  There will be a 17" border around the basket weave that will be made up of three layers, a large white tile edged by a thinner marble border tile.  The border will be installed after the center field is set and the white tile will be cut to take up any variance between the sides.  The diagonal walls that house the foyer art nooks aren't perfectly 45 degrees (of course) so unfortunately, the tile cut at these locations won't follow the 45 degree tiles in the pattern. 

   Once the position of the basket weave was confirmed, the tile installers carefully removed the tile while keeping the reference straight edge in place near the door.  The used this reference to start applying thinset to the concrete floor and carefully place each sheet of the mosaic basket weave into place.  They work pretty quickly, managing to install the entire field be the end of the day.

   The tile installers work wasn't isolated to the foyer.  While three workers were installing in the foyer, one was grouting all the backsplash tile that had been previously installed in the other bathrooms.  This is the finished tile in the second bedroom upstairs, with the matte mosaic tile and dark pencil edge top.  All the tile is now completed in this bathroom.


   The glass mosaic tile in the mudroom has also been grouted, completing the tile in this room.  One of the tilers was working in here when we arrived and it looked like he was also cleaning up the floor tiles.  We had concern in this room about how the tops of the baseboard tile would be completed.  The tile installers confirmed that it's not a good idea to apply grout to the top edge of the tile since it would most likely just fall off, so Mike said we'll have to paint it.  I think this will be an acceptable solution.  The faucet in this room also still needs to be replaced.

   The round glass tile has been installed in the turret bathroom, but not yet grouted.  The tile comes on a 12"x12" sheet, but the tile installers didn't want to install half a sheet, cutting through the rounds.  Instead, they removed each round from the sheet and installed them in the thinset by hand.  The tile isn't installed on the side like the tile in the other bathrooms, but we confirmed this design with Margaret. I'm not sure if it will be odd to deviate from the other bathrooms, but this vanity is also a bit different, with two columns of drawers in addition to the door cabinets.  I think having the tile only on the back makes the vanity look more like a piece of furniture, rather than a fixture so there's some justification in that design.  The grout on this tile should be installed by the next update.

   The fireplace installers returned to confirm the installation of the gas fireplaces and install the screens and bezels.  There's a protective screen on both fireplaces to prevent someone from burning themselves on the hot glass.  The screen gets warm during normal operation, but not dangerously hot.  This is the first time I'm seeing these in operation and I like the appearance.  The "embers" below the fire are lit with LEDs and there are two orange halogen bulbs inside that throw light against the side of the fire box for an added ambiance.  Additional "brick" needs to be installed on this side of the fireplace to complete the installation

   Here's the greatroom side of the fireplace with the additional brick pieces installed between the glass and screen.  When installed, it gives the illusion that the glass isn't there and the screen is the only thing between the fire and the room.  There's still a little condensation on the glass that gets burned off each time the fireplace is used and the flame height isn't set very high but everything looks functional and the fireplace provides a good amount of heat.

   Here's a closer look at the "embers".  The under lighting and transparency of the embers gives a pretty realistic effect.  I'm happy with the over all appearance of the fireplace and the performance it provides.  I think there's a way to turn on the lights only without the flame so you can have the ambiance of the glowing embers without using gas.  Since our house is so efficient, it will be interesting to see how running the gas fireplaces will heat the entire house.

  All functions of the fireplace are controlled with these remotes.  I wasn't aware, but there's actually more buttons on the remote and the white is just a shell to protect those buttons.  Next time I'm at the house, I'll have to play around with the other features as I understand it, the flame height and temperature settings are adjustable with those other buttons.  The remotes act as a thermostat and can adjust the height of the flame depending on what you set the temperature to.

   Here's the fireplace on the second floor.  I'm not sure if the log arrangement is final but I'm hoping that they'll adjust some of the logs so they're not so far forward.  If not, then I'll figure out how to get in there and make my own adjustments.  There are also some fingerprints on the left side of the glass that need to be cleaned up, and are only visible when the fire is on.  This fireplace doesn't have halogen bulbs, but the embers do glow.

   Here's a close up of the glowing embers.  If they weren't so perfectly contained in the fireplace, I could mistake them for real.  This fireplace also performs well and looks great.  We originally had some other fireplaces picked out, but Mike decided to purchase these due to availability and his good experience with the installer. I'm satisfied with his decision.

   The replacement mullions for the glass front cabinets in the kitchen were installed this week.  They're just loosely held in currently and will be attached permanently when the glass is installed next week.  Apparently, Mike and Margaret weren't satisfied with the slight gaps in the curve pieces and got them replaced.  The Sound Vision and the electrician also got the puck lights in the upper cabinets operational.  They weren't controllable by the Control4 system and it seems that something wasn't connected.  While he was there, the Sound Vision diagnosed some issues we've been having with our rotunda lighting.  After diagnosing and conversing with Control4, it was determined that the controller itself was at fault and will need replacement.

   The electrician sourced puck lights that can work with the amperage output of the mis-installed transformers in the butlers pantry.  Unfortunately there are now holes where the light strip was mounted, so those will now need to be touched up some how.  If it were up to me, I would drill them out a bit bigger and glue in a dowel to color match the wood.  It shouldn't be too visible through the seeded glass that will be installed in the door but we'll still be able to see it when the door is open.

   The final PEV meter hasn't been installed yet, but the circuit is ready for installation.  DTE came to the house, but didn't have access to the inside of the house and didn't want to be responsible for energizing the circuit.  They requested that the circuit breakers are turned on and left small metal bars that should be installed across the meter contacts.  Basically the circuit is live and the DTE technician will remove the bars from the live circuit and  install the meter.  I'm surprised that's how they want it done since it's dangerous to work on a live circuit, but that's their requirement.  As a result, the Tesla charger is powered and "free" energy is being supplied.  I plugged my car into the charger but found only 12A being supplied, so it seems like the electrician didn't set the charger to the correct output amperage.

   The shutoff breakers next to the Tesla charger have been switched from 80A to 100A as per my request.  This matches the rest of the circuit going to 100A so the charger can output a maximum of 80A.  With the opening of the Supercharger near me, high amperage home charging isn't much of a necessity, but it is a luxury.  I'm opting for a flat monthly rate of $45 since I calculated that this will be the less expensive option with my daily commute.

  The breakers in the basement for the dedicated charger have also been changed out to 100A.  The other circuit is correctly at 50A for the NEMA 14-50, which can be used with the travel charger or any other battery vehicle, as well as welders.  If we ever get another battery vehicle, both chargers could be used at the same time and the cost would be the same monthly, greatly saving money.  If we get another Tesla, we could install another dedicated wall charger and daisy chain them together since they communicate and can balance the charging between the two vehicles.

   That's about it for this week.  Next weeks update should show a finished foyer tile, and probably finished tile in general.  Hopefully a finished wood floor installation and continued touch ups.  Like I said, we're getting really close, but we're also going into February so one more month has passed us by. 


Tuesday, January 16, 2018

Final Electrical Inspection Passed

   After a brief thaw of 50F during the week with a good amount of rain, winter returned to freeze all the precipitation into a dangerous icy sheet.  The once cleared driveway is now a treacherous sheet of ice under a crunchy layer of snow.  Mike called someone out to plow the snow off, but it didn't look like they could penetrate the ice.  Temperatures are dipping down into the single digits at night and barely breaking double digits during the day so salt is useless.  Despite the ice and cold, progress continues in the house as we push towards the finale.  The first step of the final four steps has been completed, a passing final electrical inspection.  Next week will be the plumbing and HVAC final inspection.  After all the touch ups and installations are completed will be the final building inspection after which we'll obtain our COO and can move in.  It's getting real folks.


   Nothing is sweeter in the house building business than those lovely green stickers.  Previous rough inspection stickers were just put on the sliding door glass, but this one was placed on the EV charging panel.  There are three panels in the basement so I'm not sure why they decided to put it on that one, but I'm happy it's there.  The electricians got the EV charging circuits installed so I called DTE to have the PEV meter installed.  That will happen on the 22nd.


   Here are the two circuits in the EV panel.  The top double breaker is 80 amps and powers the dedicated Tesla wall charger.  The lower is a 50 amp circuit and is connected to the NEMA 14-50 socket in the garage.  It can be used to power a welder, or any other car charger.  The 80A on the Tesla charger means that with an expected 10% drop, I'll be getting 72A at the plug, which is exactly what my car can charge at outside of the Superchargers.  The 50A is similar to what I have currently and charges at 40A in my car.


   Here's the installed NEMA 14-50 socket in the garage.  There a local cutoff switch but it's not as convenient as a throw switch.  I won't be using this on a daily basis for charging, but we have the option to use it if we ever get a second electric vehicle.


   Here's the dedicated Tesla wall charger that I'll be primarily charging on.  I'll have to get some cable management installed since I won't always be using the full length of the charging cable unless I back into the garage.  With the circuit at 80A, I'll get 40 miles of charge per hour so my daily commute should charge in one and a half hours.  I did specify a 100A circuit and Mike confirmed that the wire installed can handle 100A so we'll have the electrician swap out the breaker for a higher amperage, which will net me about 45 miles per hour of charge.

   The singular dome light was installed above the rear garage door.  It had to be lower profile than the other LED shop lights because of the garage door clearance.  Looking from the ground, it doesn't seem like there would be an issue with ceiling clearance, but Mike said the LED shop lights installed around the rest of the garage couldn't fit in the space between the door and ceiling when it was open.  There's more than enough light, but the dome will help illuminate the space a little bit more.


   This metal vent was sitting on the board that's blocking the heat duct in the foyer.  The tile for the foyer has arrived so we should be expecting the tile installers to come in one more time to finish grouting the back splashes and install the foyer tile.  There's still some design decision needed in the foyer.  We're pretty sure we want the interface between the foyer and rotunda to match the curve of the rotunda, but Mike was trying to convince us to make the interface straight.  Straight makes some sense, since the transitions between the office and dining room to foyer is straight.  Unfortunately, there isn't a straight line across the rotunda, so the tiles will need to be cut to make the pattern square.  A curve will automatically take up that correction.  That will be decided this week.

   The electricians reinstalled the foyer sconces after finally getting them repaired from the manufacturer, and after replacing the glass that the painters broke.  Unfortunately, one of the sconces was returned without the chrome metal stem.  They also installed the hanging light in the barrel vault on the front porch, but I forgot to take a picture of that.  All the worry about the height of the light was for naught as we don't have any friends that would ever bump their heads on the light.

      The pucks in all the art alcoves are connected to the Control4 system and functioning.  We've had some issue with the installation of these pucks.  We were hoping that they could be installed more flush, or recessed into the box a bit.  We had to have the electricians adjust them because the installation hole was put on the front of the installation.  Also they're not perfectly flush against the box ceiling so they don't look great.  I'm hoping it will be fixable.

   A few pieces of walnut quarter round is being stored in the great room.  I think these will be used for the shoe molding around the kitchen island and butlers pantry cabinets so they match the cabinet materials.  There isn't a lot and those are the only two areas where walnut cabinets touch the floor.  Distinctive designs is hard at work installing the remaining shoe molding around the house.

   The wood vents were installed on the first floor in all the floor vent locations.  We've had these stashed away somewhere, but they were in the raw wood form.  Now they're stained to match the wood floor color and secured in place.  The first floor is the only level with in-floor vents since the second floor and basement have in ceiling ducts.  The vents don't seem to impede the air flow much and they're not closeable, which isn't a good idea anyways.


   The remainder of the hardware has finally been delivered to the house so we'll finally get the full hardware implementation.  We were missing handles in the master bathroom, guest bathroom, and some in the kitchen.  These are the handles being installed in the guest bathroom.  I couldn't remember what handles we chose for this room, but the probable reason why they were delayed was because we wanted the two-tone look to match the floor tile.  They're a clean and simple handle, and will look nice in this bathroom.

   The stainless steel panels were finally installed on the fridge and freezer columns this week.  They're still protected with a black sheet of plastic, but cut outs were made to fit the handles and other access points.  One of the panels arrived damaged, but since the installers that Mike hired to set the appliances are Wolf/Viking certified installers, they could quickly obtain a replacement and warranty their installation.  I'm not sure if it's up to us to remove the film or if Mike will remove it when there's no more risk of damage.  I wouldn't mind removing all the film.  The fridge and freezer are currently operational, but turned off.  I haven't tried running the filtered water but I'm assuming both the water and icemaker are hooked up properly.

   The electricians finished installing the wall receptacle plates in the kitchen.  We went with a white plate that was devoid of any face screws for a cleaner look.  We have sockets installed at a good interval so we shouldn't have any issue with power.  We considered installing power strip under cabinet things, but decided against them.  They may seem convenient because you can install power where ever you want and aesthetically they get rid of the plates on the walls, but we didn't like the idea of having to bend down to look under the cabinet just to plug something in.  We're not planning on having anything permanent plugged in and sitting on the counter top so the number of plugs we have installed should be just fine for us.

   To be installed next week, the air switch for the garbage disposal is sitting near the sink.  PMP stone is supposed to come back this week to drill the hole this switch will be installed in.  It's an air switch because pressing the button pushes air in a tube connected to the electrical controller for the garbage disposal.  I'm not sure why this needs to be an air switch, but I suspect it has to do with electrical switches in the surface of a wet location.

   Other electrical installations were completed in the kitchen.  This plug was installed at the end of the kitchen island, closest to the sink.  The microwave drawer in the island is the only thing that will be plugged into this and it's fairly inaccessible and not convenient to plug anything else into.  I'll have to take a look at the breaker panel in the basement to see if this is also tied into the island receptacle on the other side of the island and I suspect they are.  A microwave doesn't pull enough current to warrant it's own breaker.


  Now that the microwave drawer plug is installed, the microwave drawer finally has power.  We've never had a drawer style microwave so it will be interesting to see if it's more or less convenient to put things in from above rather than take them out from the front.  The drawer opening and closing is powered, actuated with a touch surface press.  All buttons are on the front, so there is a small element of bending over a bit to read the buttons but the timer is pretty clearly visible from the standing position.  We don't generally use all the built in cooking features in our current microwave, so I'm not sure how useful these features will be in the new one.  There's no turntable in drawer units, and generally there isn't a need for it.  In counter top microwaves, the magnetron is located in the side of the microwave and the normal wavelength for the microwave is about 5 inches.  That means that across a standard plate, the amount of energy imparted varies within 5 inch increments, which is why you can have hot and cold spots in dish cooked in a microwave.  A turntable will rotate the dish moving the food in and out of these varying locations, allowing the energy to be imparted more evenly.  The magnetron in drawer style microwaves is located in the top, pointing down.  This means that, unless the food you're heating is greater than 5 inches deep, you'll get a fairly consistent heating across the width of the dish, and more variation from top to bottom.  Since food on a dish is relatively thin, there's less variation in temperature across the cross section.  Sorry for the science deviation.  The drawer opens fully in about 3-4 seconds which seems slow enough to not spill soup.  I think it will be pretty convenient.

   The bottom hinge plates of the swinging pantry doors were masked and painted.  There was a can of black paint in the pantry that was probably used on the hinges that were previously silver.  I'm fine with this addition and wouldn't have been offended by either color.  It would have been easier to paint the hinge plates before installing them, but it was some kind of last minute design decision.


   An unexpected design change again.  The electricians replaced the LED puck lights that were installed in the upper butlers pantry cabinets with the LED under cabinet strip lights installed in other locations.  I'm not sure why these were changed, but we're not sure we like how it looks.  There might have been some voltage issues that prevented it from lighting properly, but we were not notified about the change.  They're installed in a very visible location in the middle of the cabinet and while they provide good, even light, they're kind of distracting.  I think a better implementation might have been closer to the doors so you don't see the light, and maybe make it shine back into the cabinet for more indirect lighting.  I'll have to see what we can change.


   Moving upstairs, Distinctive Designs has started installing the shoe molding on the wood floor.  They've already finished the installation in the master bedroom and have plenty of pre-painted molding the basement ready to install.  There's less to install on the second floor since we don't have a space above the great room, so installation of this should happen quickly, if the wood floor installers can every finish.  There was no progress on the wood floor installation this week and they still have the turret bedroom left to finish.  Apparently, after needed to order 300 square feet more of flooring, much of the delivery was ordered from the wrong dye lot and had to be returned.  I'm not sure who's error it was, but I'm hoping it will be resolved quickly and we can get past this bottle neck.


   The triangular piece of tempered glass railing was also delivered and installed this week, completing the railing installation everywhere around the house.  This piece was previously measured or cut incorrectly and had to be replaced.  I'm happy with the outcome here and really glad we spent the extra money to get glass railing on the master balcony.  The view is so much better with glass, especially since it will allow better view from the seated position, which I plan on being in for the majority of my time on the balcony.

   Here's the piece of wood that will be used for a flooring transition between the master bedroom and bathroom.  It's wider than the piece used between the master bathroom and closet, which allows for a nicer foot feel.  It will be stained to match the floor and won't be covered by the door when it's closed.  I'm okay with this implementation and the difference between the closet and bedroom doesn't bother me.


   Waiting installation is the replacement shower heads for the second floor bathrooms.  We replaced the square shower heads after trying them out because they're too much like a rain shower with a low flow and we wanted something with a a higher stream.  The plumber will be back this week to install four shower heads on the second floor.  I don't think there's anything else left for them to do in the house so we're all set for the plumbing inspection.

   A minor note, the switch plate in the master closet was installed, but still needs to be painted to color match to the walls.  It looked like this location was going to be too tight to fit a plate, but they either installed a narrower plate or the install was better fitting than expected because there it is.

   The washer and dryer were hooked up and set in place last week.  There was some water in the washer, so it looks like they run through a cycle to test the connections.  I didn't run the machines, but I did power them up and play with the controls.  They look like they're going to be nice machines and are easy to use.  One snag, the latch on the dryer pedestal is broken and needs to be swapped out.  They open with a push and the broken one isn't latching at all.  Mike would have preferred a new latch, but Witbeck is sending a whole pedestal as a replacement.  It's probably easier to send a whole unit then to order a single part.

   The backsplash tile for the turret bathroom has finally arrived and is waiting to be installed.  We have a meeting on Thursday with Castro, the tile installer, to go over the foyer tile layout so I'm assuming that's when they'll be in to install this tile and grout the other backsplashes.  Mike had to actually go online and hunt this tile down since they discontinued it.  The sheets will probably be cut in half for the actual backsplash height and will be topped with a frosted pencil glass tile.  When this and the foyer gets installed, we'll be done with all the tile installation.

   Well, that's about it for this week.  Next week should see more Control4 programming, hopefully more wood floor installation, most likely more progress on the shoe molding and touch ups around the house, and probably more tile installation.   If we pass the final HVAC and plumbing inspections schedule for this week, the last inspection to be performed will be the final building inspection and we can finally get a COO and move in!  Just because we have a COO doesn't mean all the touch ups and floor finishing will be completed, so we'll have to wait for that to be completed, but at least there's no more red tape to cut before the house is ours.  It won't be long now!


Thursday, November 30, 2017

We Have Running Water!

   We visited the house the day after Thanksgiving this week for a meeting with Mike and Margaret and found the house full of electricians and general installers.  We couldn't have asked for a nicer day with temperatures in the low 50s and sunny.  The air was still brisk but the clear skies helped lift our spirits as did the buzz of activity around the house.  Plumbers came through earlier in the week and got the water running in most of the bathrooms, showers and sinks, but we're still waiting on toilets.  Mike said he likes to wait on those because once they're installed, people like to use them.  He'd rather the installers stick to the port-a-john, so toilets will be one of the last plumbing fixtures to go in.  Not much movement on light programming but they're expecting a disbursement check this week so Mike is going to insist that we get all the lights controllable before that money is disbursed.  Castro and the tile installers are slowly moving forward by completing all the time installation in the master bathroom, but still have some grouting left.  There's plenty of tile work needed in other places around the house, so they have their work cut out for them.  Mike is still pushing to get all inspections done in the month of December.  Whether the installers let that happen remains to be seen.

   The lake wasn't frozen during this trip since we had a little warm up, but we don't have many of these sunny, blue-sky days left.  I couldn't help but take a pause from checking everything over to look out on the view we'll have for the rest of our lives.  Whether it's from the side porch, as shown in this picture, the greatroom, back porch, master balcony or even the front retaining wall, you can't help but stop and take it all in.

   On to the progress.  In just one day, the electricians installed nearly all the exterior power receptacles.  Since they're on the exterior, they're weather protected with covers, even though they're all under porches.  This will protect them from water spray when I need to power wash the house.  This one is actually in the ceiling of the back porch, all wired on a circuit controlled by a timer.  We'll use these for holiday lights.  We don't have these sockets wired to the Control4 system, which would have made more sense, but we didn't think of it at the time.  It still might be possible to install wireless switches in lieu of the timers, which will integrate the sockets into the system.

   The weather protected receptacles on the cobble stone walls are fit as best as possible and may need to be caulked to the mortar.  These receptacles will be used in temporary situations for power tools so the little door won't be too obtrusive when in use.  There's nothing we'll need to plug in long term so these doors will always be opened situationaly and short term.

   The copper gooseneck Carson lamp from Rejuvenation was finally installed over exterior storage.  I'm looking forward to finish off this unconditioned storage space under the back porch.  We purchased this light a couple of months back and it has been sitting in the house.  I'm not sure where the light switch for this light is.  It might be one of the dumb switches up at the kitchen sliding door, which would be convenient, or it might be just inside this door.  Either way, it will be nice to have a light here on the rare occasion when we'll need to access this space when it's dark.

   The remaining recessed exterior lights were installed in the back porch.  These are just retrofits into standard incandescent recessed cans, so there's nothing tricky about the installation but Mike left it up to the electricians to finish.  These lights are also not yet controllable so the Sound Vision will need to get them operational before we can test to see how they look.  They're the same lights as on the front porch, and completely dimmable so I'm expecting the same performance as those up front.

   The correct light was installed on the rear garage walk out so all nearly all the exterior lights are installed.  We're still waiting on getting the front hanging light back from the Coppersmith since we needed to change the hanging implementation.  All these lights are controllable, but the naming is a little odd.  The exterior walk out light is labeled "Gen Cones" under the equipment room heading and the back garage door is labeled "Garage Coach" under the Exterior heading.  These labels are only programmable by the Sound Vision so we'll need to get them to name them properly so it's less confusing.

   The light is the "Cavo" from Hubbardton Forge in the tall configuration.  It takes a single standard base bulb that we filled with an Edison looking LED bulb.  There were options for seeded glass, but we opted for clear.  There's also a multitude of metal finishes to choose from, but we found one that most closely matched a weathered copper since we have the real copper lights hanging near by, next to the garage door.

   The lights on the two basement walkouts were also installed and are currently wired to the standard switches just inside the door.  They're from the same Hubbardton Forge Cavo line, but are shorter and only a single mount.  They also use a standard bulb and we installed some spare LED bulbs with a normal look.  Unlike the long mount, these are easier to change so if we want a nicer look, we can just reach up and change them.  We'll one day have a paver patio here, but it will be one of the last elements of landscaping installed.  These will be the primary light source for this space but there might be some landscape lighting as well.  The landscape lighting will have a much lower light output and isn't sufficient for general lighting.

   The Cavo lights share the same loop characteristic which adds continuity to all the exterior walk out doors.  Some of the stone and mortar had to be chipped away so the lighting plate could be mounted.  These fixtures are capable of using a 100 W incandescent so we could put a higher equivalent LED if we find one that looks good.  These will suffice for now.

   Here's what the single Cavo lights look like on the rear basement walkout.  These two bulbs should provide enough light.  Final landscaping plans have a small paver patio installed in this location so a little lighting is needed.  The catwalk and dock will meet up with this patio so it will probably be more used that the other walkout.

   Moving to the progress inside, our replacement glass light shade for the Framburg ceiling mounted light came in.  The one that was originally sent was too small.  A replacement was sent, but arrived broken.  This one looked intact and was installed as we waited and watched.  The shade is made from glass and look like ropes of glass poured in loops in an open lace.  A nice departure from the standard crystal glass, it's a clean and modern light that fits well in the foyer.

   The fixture takes four bulbs and provides more than enough light in this space. The glass is transparent enough that we need to be careful about how the lightbulbs look. I found some clear LED bulbs that are shaped like the standard light bulb, but have the thin LED filaments inside.  They filaments are yellow when turned off, but they're not too visible through the glass shade.  I might replace them with the standard frosted bulbs.

   With every passing weekend, more functioning lights are giving us a better idea how the house will look when we're finally moved in.  The sconces in the foyer were confirmed to incorrectly manufactured.  The base that is supposed to support the glass is too small so the glass precariously perches on the base.  We have the option to wait 4-6 weeks to get new fixtures, or send our current fixtures back to Framburg to be fixed, with a shorter turn around time.  We're opting for the later since the results should be the same.

   All the rotunda railing and base have been stained and the final polyurethane coat has been applied.  The finish is very smooth and without blemish and the color is a perfect match to the wood floor that will be installed next to it.  The baluster base does have a satin polyurethane finish on it so the reflective sheen is a little bit more than the oil/wax finish floor that will be installed next to it.  The stair treads will be stained near the end of the build, when there are fewer people to walk all over them.

The staining balcony overlook railing to the greatroom has also been completed.  Again, there's a smooth coat of satin polyurethane on this wood.  You can see how similar the colors are between the railing and the wood floor.  The only difference between the two will be the amount of surface shine.  I'm surprised at how closely the wood floor, exterior doors, balusters, and second story mantle color all match.  They're all sourced from different vendors, but they're close enough to look like they came from the same place.

   The polyurethane finish has also been completed on the dining room built in.  The wood species is already walnut so no stain was required to achieve this color.  All the internals and have been coated with the same finish so the only finishing touches needed are the final hardware.  We chose some interesting handles for these and the office doors and I can't wait to see them installed.  We have a dining room table designed for this space, but it won't be fabricated in time for move in.  We'll hopefully be able to get it soon, but since we're probably going to miss the holiday season, it's not a high priority.

   The circuits to the lights going to the basement were connected, but I don't have great control over them yet with the software.  They're programmed into the "all on" function currently implemented into the Control4 switches so that will have to do until The Sound Vision completes the lighting programming next week.  The lights use a smaller base candelabra bulb and I opted for a clear LED type, but I might need to switch it with something brighter since these two are the only two in the stairwell.  It's unbelievably difficult to find bright LED candelabra bulbs, especially frosted ones so I might need to purchase them online.

   Almost all the showers and sinks have been hooked up to water and are operational.  The guest shower, shown here, has the hand shower holder installed where we requested it to be installed as with the other shower locations.  The only two bathrooms still unplumbed is the mudroom and master bath.  I tested the functionality of this shower.  The head doesn't spray really hard, but it has a large spray pattern.  There's also a spray pattern selector that I didn't play with so it might just be on a setting that sprays a more gentle pattern.  The top selector nob is for on and off, the lower knob sets the temperature, so this can keep a favorite temperature so there's no more hunting for that perfect shower.  The control lever on the shower head can select between the shower head, hand shower, or both at the same time.

   The guest faucet is also plumbed in and functional so now we can wash our hands when we visit.  The faucet sprays directly down and almost perfectly hits the drain plug, which actuates from a small lever on the back of the faucet.  This counter top actually had to be re-drilled since Solid Surfaces initially drilled it for a single hole installation.  Mike called them and they responded the same day and sent someone out to drill the other two holes.  Excellent service.

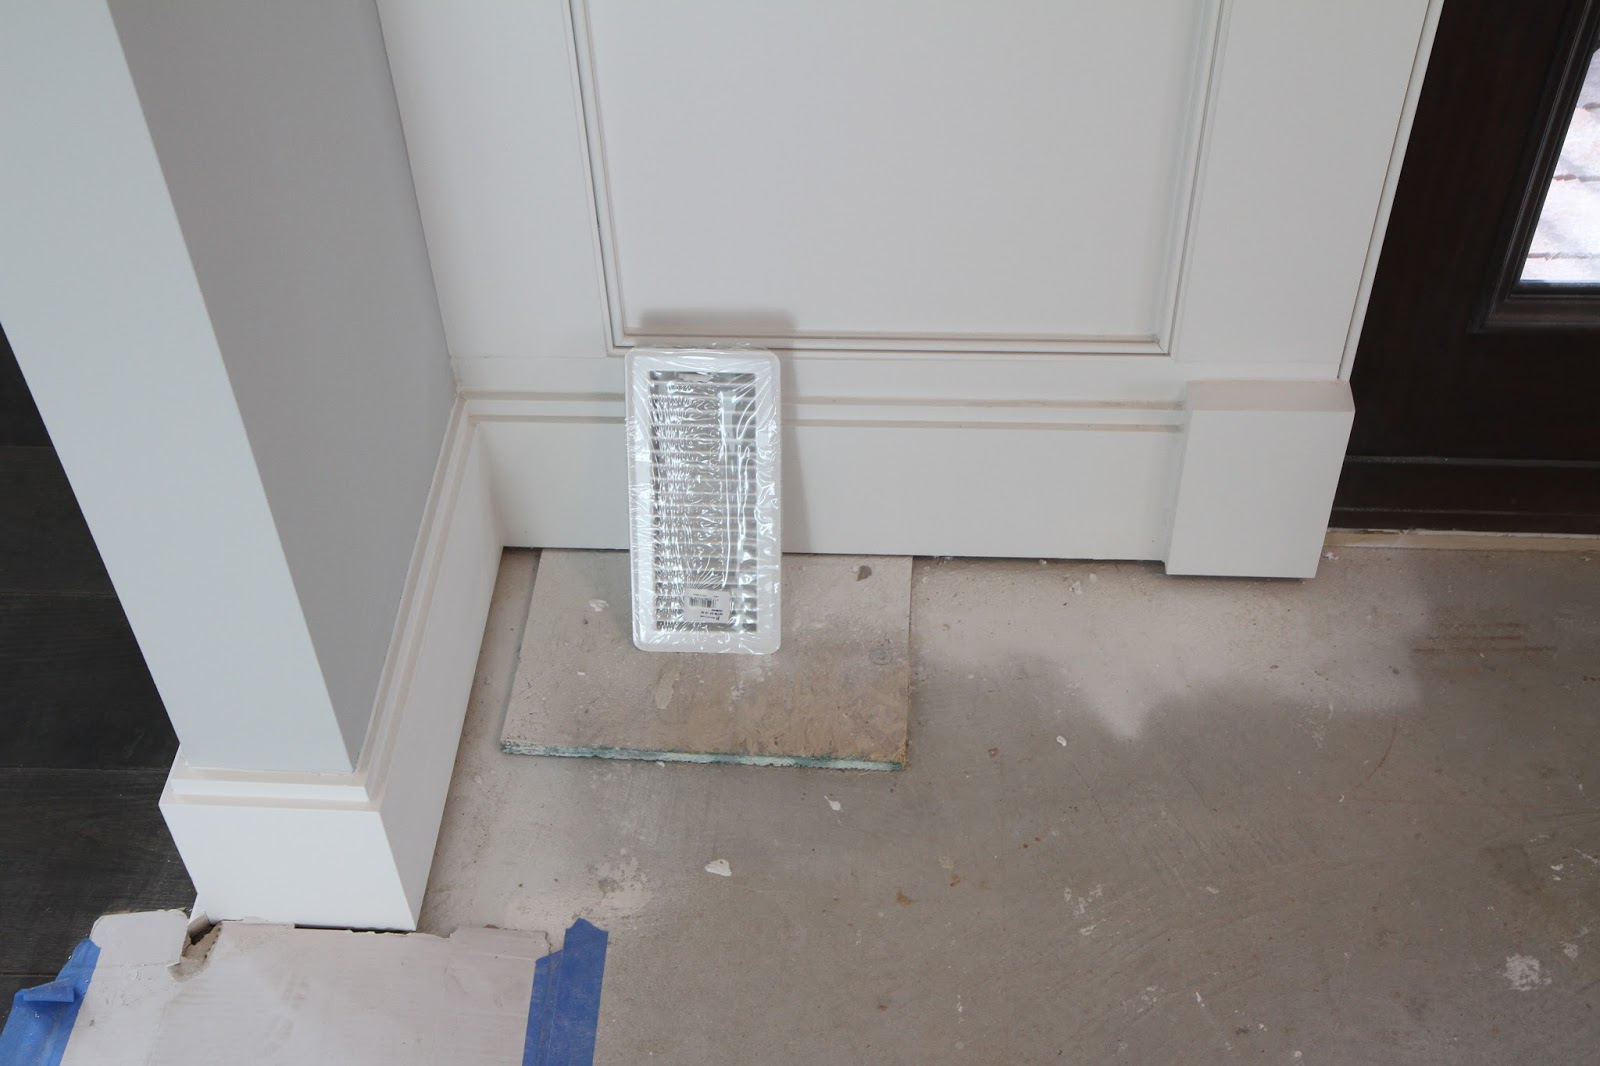
   Any of the faucet installations on exterior walls will have a drain setup similar to this one in the guest bathroom.  Since we can't run pipe in the exterior walls, the vent needs to be installed in the sink cabinet.  Other sinks on the exterior walls have the same type of venting, but interior wall sinks have proper venting in the walls.

   The extensions for the Theta have arrived and are ready to be installed.  This should drop the light fixture a good amount, placing it exactly where we wanted it to be.  Unfortunately, the scaffolding is gone so it will either have to be brought back in to install the extensions, or they'll have to find a safe way to remove the lighting fixture and install the extensions.  We're expecting the light will be able to hang down lower, bracketed by the railing on the balcony overlook.  That would put it at the perfect height to be viewable from the greatroom floor without craning your neck too far.

   The kitchen faucet was installed, but only temporarily, which is a good thing since it looks a little crooked.  It's not hooked up to water yet and the garbage disposal isn't installed yet.  I'm not sure if they'll remove the faucet for the tile backsplash installation or if the tile installers can work around it.  We'll also have to call PMP back in to drill one more hole in the counter so the air switch for the garbage disposal can be installed.

   Besides lighting, the electricians installed all the smoke/carbon monoxide detectors around the house.  They're wired in with a back up battery and all wired together, so if one detects smoke and sounds the alarm, they all sound the alarm.  I think that's pretty much code for new builds.

   All the tile has been installed and grouted in the shower and everything has been cleaned up.  We're still waiting for the shelves to be installed in the shower nooks and the supports for the bench aren't cut to final dimensions, but things are wrapping up nicely in the master shower.  The plumbers should be able to get in here soon to do their final installation.  Lights are still not functional in this room but we're expecting The Sound Vision to swing by this week to get some more work done.


   Here's a closer look at how the tile in the eyebrow window of the shower turned out now that it's finally grouted.  There's a little variation in the setback line it makes with the window as it follows the curve, but I think it's acceptable.  The window sill at the bottom doesn't return around the corner so the stone molding tile doesn't land on it.  It's not too much of an odd look, but it's different that the rest of the wood molding around the house.  I'm not sure why the sill wasn't cut with a return, but it was made to spec, so we can't complain.  There's little chance for water to get up here, but if it does, everything looks well sealed enough to prevent any damage.


The penny round tiles in the nook is grouted, but the main shower tile itself isn't.  I'm not sure why they did one and not the other since I'm pretty sure the grout colors will be the same between the two.  The shelf still needs to be installed so the penny round tile will need to be cut away, so it makes even less sense that it's already grouted.  The tile installers are taking a pretty long time getting the work done, but their completed product looks good.   Mike and Margaret were telling us about one of their best tile installers who produced excellent quality work.  He could look at a space and determine how the tile should be laid out, all in his head.  The only problem is that he takes a really, really, long time to get the job done.  We might use him when we finish off the special curved tile on the dry side of the dividing wall.  Speaking of which, we decided that since we're going to be installing that tile in the near future, it doesn't make sense to install the tub, which would get in the way.  So for move in, we'll forego the tub and get it installed when we have the money to install the tile, which is a considerable amount.

   All the tile has been installed around the master bathroom vanity, both above and below the vanity.  There still needs to be some grout floated on the wall but there's enough done for the electrician and plumbers to get started with their installs.  Still no sign of the Robern medicine cabinets on site, so I better confirm with Mike to see if he's purchasing them or if we are.

   Misplaced in the master bathroom, we found the pot filler for the kitchen.  This is one of those things that we didn't think we wanted, but it was suggested we get, just because every other house in our price range has one.  I can see it being kind of useful since you can fill the pot on the stove without taking up the sink, but it's not so useful since you still need to carry the water from the stove to the sink to dump it out.  It will be nice to have it, as long as it doesn't fail.

   The faucet in the laundry room is finally installed.  I think this was one of the first finished plumbing pieces on site, but almost one of the last installed.  It's a simple affair, meant to be more utilitarian than flashy.  It does have a pull down nozzle which might be useful for hand washing clothes.  The sink is a good size for a laundry basin, but it's not as big as the white plastic tub basins you generally find in a laundry room.  I think it will suit our purposes and I don't intend on cleaning paint brushes like I do in our current laundry tub.

   The turret shower handle was mounted to the right of the shower controls.  This was the only bathroom we could do this in since all the others have a corner shelf that would get in the way.  This will currently be a heavily used bathroom since both our girls are staying in this room.  We don't have plans for a shower door on move in, but will hang a shower curtain.  A shower curtain provides more access to more of the tub, so bath time for the two will be easier with this setup.  Once they get older, we might consider a sliding shower door in here since we generally dislike shower curtains.

   Not much change in the basement except for the final hookup of the house main PEX to the copper main coming from the meter.  I have no idea why they put a bend and two additional sections of PEX in but as long as it doesn't leak, I'm okay with it.  I almost wonder if they left it this way in case we want to tie in an irrigation system or something.  It would make it easier to install a "T" in the line since the junctions already exist.

   That's about it for this week.  Next week should be a big one with the delivery of all our appliances, installation of closet organizers, some landscaping installation, and continued progress on the tile, lighting, and plumbing installation.  Wood floor installers have been MIA for a while and I'm not sure what their hold up is.  Mike said it would only take a day or two to install all the shoe molding after the wood floors are in, so that's good news, but they obviously can't get started until the wood floors are completed.  Like I said, the tile installers are taking their sweet time to finish things up and they're the rate limiting factor on the kitchen hood installation so I hope they get moving again soon.  We're going into December at the end of next week and I'm not hopeful for being in by Christmas.  Even if we get COO by mid-December, we still have to consider the time it takes to clean up our old house and move.  If it does happen, at least I won't feel as guilty about staying at the house.  Here's hoping.