Showing posts with label tile. Show all posts

Sunday, February 11, 2018

Cleaning Up

   Okay, winter is really starting to get ridiculous now.  We were hit with a few inches earlier in the week, then socked in with 7 inches yesterday, 2 today, and an expected 2-4 inches tomorrow.  At least the forecast is predicting temperatures in the mid 40s next week so maybe some of it will melt off.  Good thing Mike has someone plow the driveway or else we might get stuck in the snow on the driveway up to the house.
    This week saw some more limited progress, but all essential steps towards the completion.  All the tile in the house has been grouted, completing all the tile installations, also completing all the flooring installation.  The second floor paint touch up has been completed and there are a few more rooms on the first floor to complete.  The house is getting cleaner and cleaner every visit and soon will be ready for final inspection.

   The tile installers returned during the week to grout the foyer and turret bathroom so that's the official end of the flooring installation and the tile installation simultaneously.  It's a huge milestone that seemed so far away in the beginning.  Now that we've passed that threshold, there are only a few things that need to be completed before we can file for the final inspection.  Despite the harsh weather, two cleaners were working on the Saturday that I visited.  They were cleaning all the bathrooms, kitchen cabinets, butlers pantry cabinets, and all windows they could reach.  I don't think they were responsible for cleaning the wood floor and I didn't see any high reaching equipment to clean the high greatroom windows, so I'm not sure when those will get cleaned.

   The grout is light in color, closer to the white tile than the gray.  It's the better way to go because you wouldn't want dark lines in the white border tile.  Mike said he requested a couple tiles replaced, but I didn't notice any difference from the previous week.  I think the cleaners cleaned the tile because there was a bucket and mop near by.  I asked Mike about the lack of the Schluter edge, and he said it wasn't necessary since the joints between the wood and tile are tight and the floor was perfectly leveled so the two materials are flush.

   There ended up not being an extra pieces of shoe molding installed between the tile and door.  I guess the joint was clean enough and the gap was filled with a caulk to allow for some movement.  Since the stones are natural, we'll probably need to seal the stone at least once a year, depending on how much we used the front door.  We'll generally enter through the garage door so this will be used less, and mostly for guests.  It's probably a good idea to seal this on the same schedule as the master bathroom tile.

   Paint touch ups have been completed on the second floor, but the first floor still has some locations that need to be retouched, specifically the dining room, shown here, and the mudroom.  Next week, Mike the installer will come back and touch up the cabinets and adjust all the doors for final fitment.  The painters will finish touch-ups by Tuesday then clear out all the equipment so the final floor finish can be applied.  We'll get another walk through to see if all the paint and wall issues have been addressed, but there will still be another touch up in the spring after the house had a bit of time to settle after all the installations.

   The stair tread protectors have been removed in preparation for the final stair finishing.  The risers and stringer need to be painted white and the treads will be stained to match the floor.  This will happen to both sets of stairs, and should happen before the floors are finished.  I'm not certain they'll be able to accomplish this before Tuesday so we'll have to see how this plays out.  This is the first time I'm laying eyes on the actual treads since they were covered ever since they were delivered and installed.  I can't wait to see them finished off.

   Most of the painting supplies are being carefully stored on tarps in the greatroom.  These should be cleared out this next week as they complete the rest of the touch-ups and will definitely need to be cleared out before the floors can be finished.  The fireplace still needs to be finished up, and they'll be back on Monday as well to install the last few pieces and clean up the gas log arrangement.  Distinctive Designs will also be back on Monday to install the additional trim pieces needed to fill the gaps in the fireplace surround.  I played around with the fireplace controls a little more and found more functionality in the remotes.  You can actually remove them from the white cases to find more buttons where you can access the flame fireplace height, control for the secondary lights, and fan controls. I don't think we have blower fans installed since there isn't an intake vent, so it's just a control that doesn't do anything.

   The glass bubble tile in the turret bathroom has been grouted with a gray grout that's very close in color to the paint on the wall.  I think I like the way this bathroom turned out.  The round tile adds a little whimsy to the room and the gem-like glass tile makes it a little blingy.  I hope the decision to not install tile on the side wall was the right one.  The only concern I have is that, since this is a kids bathroom, excess water will come in contact with the drywall and cause issues.  We'll just have to be careful about how they use the sink.

   The tape has been removed from all the toilets so the cleaning people could clean them.  They'll remain open until we move in.  It might not seem like much, but it's just another little thing that's signaling the end of construction.  We still need to finalize the door stops and get them installed, but that will be the last thing we need to do.

   The PEV meter was installed on the left.  I opted for the flat monthly rate of $45 regardless of how much power I use.  I calculated that with my daily commute five times a week every week, it was better off with the flat rate, even with higher efficiency summer driving.  The bus fuses aren't installed in the garage 14-50 plug, but I opened up the dedicated Tesla wall charger and adjusted the output amperage to the full output of 80A.  I confirmed the installation by plugging my car in and seeing the full 72A getting into the car, which is the max the internal charging circuit can handle.  That gives me about 45 miles of recharge range per hour.  This translates to my daily commute charged in about two hours.  Ironic that a Tesla Supercharger is opening pretty close to me.

   All the extra tile is being stashed in the basement.  There's a little bit from every room and we'll keep them just in case of damage.  The stacked stone we used on the fireplace column might be reused in the powder room.  We'll probably just end up storing the tile in the storage room in the basement and will hopefully never need to use them.

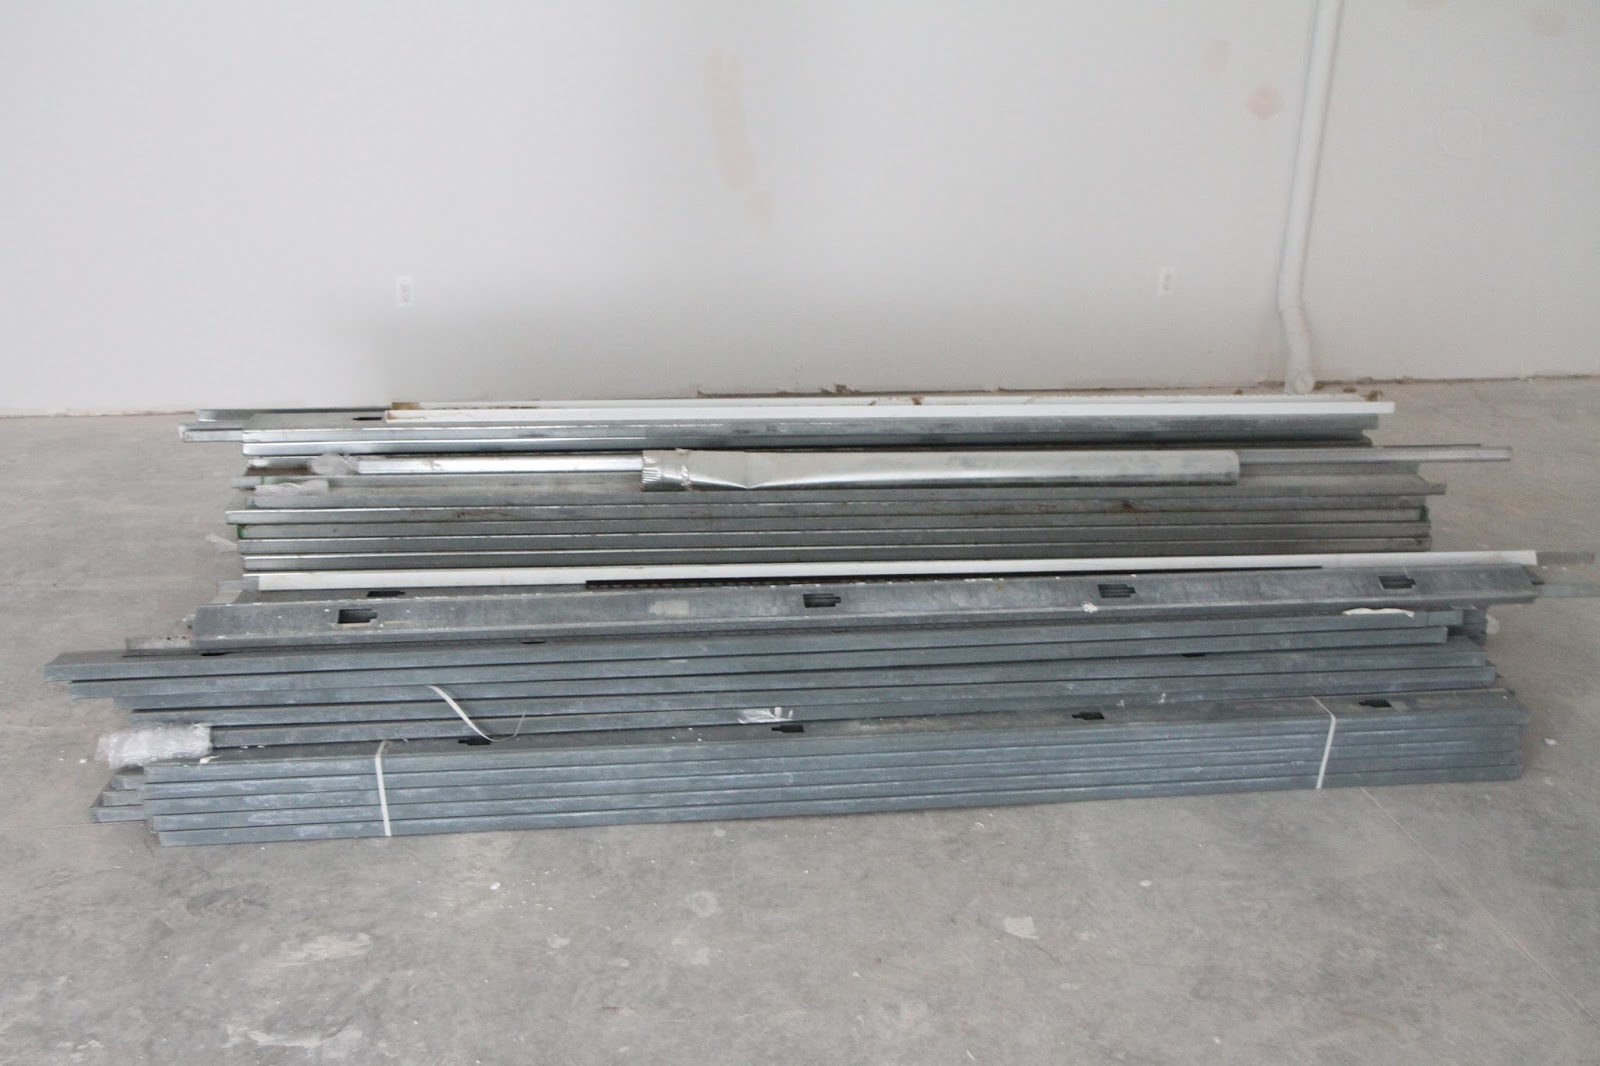
   Here's the pile of unused metal studs left over from the interior wall construction phase.  We'll probably use them in the basement when we start to wall it off.  They're not 10' tall, which is the height of the basement, but I think they can be combined to get to the full height of the walls.  We're not putting up many walls down there, but we'll probably need more than what's here.

   That's about it for this week.  The painters are expected to finish early next week and the floor installers are scheduled to come in on Tuesday to start finishing the floors.  Cabinet and interior doors will be adjusted and cabinets will be touched up.  The electrician will come back one more time to tighten up some light fixtures and we might see the plumber come back to examine issues with the sewer ejection pump.  Mike estimates that we have about a week and a half left for work, then we can file for final inspection.  The clock is ticking down quickly now!


Tuesday, February 6, 2018

Foyer and a Clean Floor

   Winter hit back with a vengeance after teasing us with spring like weather.  The forecast for the next week has temperatures below freezing with a few inches of snowfall today and some later in the week.  I made sure to take my big snow shovel out with me to clear some of the snow up near the house.  It was good that I did, but turns out, Mike hired someone local to take care of plowing the driveway.  I got the front of the house cleared and he took care of the long drive to the street.
   The finishing touches continue to me applied throughout the house but we're finally getting out of the final installations of the floors.  The foyer tile was laid but still needs to be grouted and the turret bedroom finally has its wood floor installed.  Signs of floor cleaning are evident throughout the house so once the painters finish with the touch ups and repaints, the final finish on the floor can be applied and we can finally be done.

   Castro and his tile installers made quick work of the foyer during the week and cleared out their tile cutting saws since the were no longer be needed ever again at this house for as long as we own it.  They delivered on the design as planned and did a great job with the implementation.  You can't tell that there's a slight variance in the white border tile between the left and right side and the angle between the wood floor and tile interface going into the rotunda is difficult to spot.  The only way you can pick up the slight dissymmetry is at the white tile basket weave tiles on the angles.  A very slight difference only a very observant person could make.

   Here's what the foyer looks like.  The grout will be light colored so what you're seeing here is pretty much what it will look like when the grout is applied.  We finally get to see the foyer in all it's finished splendor.  The tile has a polished finish so I'm not sure how well it will grip with wet shoes, but we'll probably need to have some kind of door mat or something on both the inside and outside.  There's a white metal supply register in the floor to the left of the door so that's not a great place to put a shoe carpet, but the door swings to the right so that's not a great place either.  Chances are that we won't be swinging the door full open so we'll probably end up putting guest shoe storage on the right.

   Here's a closeup of the transition between the foyer tile and the rotunda wood floor.  I thought they were going to put a strip of bronze metal Schluter between the two, but it doesn't look like it was installed.  The Ditra is used between the tile and wood floor in the bedrooms, so I'm not sure if it's more of a structural thing or appearance thing.  If the primary concern is appearance, then this looks pretty good.  The joint is tight and even with very little gap.  The Schluter is used more often between the tile floor and carpet transition, where there's risk to the edge of the tile next to a soft surface.  Maybe it's not needed in this application.

   One of the good things about having the tile installation delayed in the foyer is that the tile can be laid to exactly match all the baseboard molding designs.  This block was installed as a decorative termination block for the baseboard and shoe molding.  Speaking of which, the shoe molding is installed in the foyer.  I'll have to look back to see if it was already installed and the tile was installed to meet it or if they installed it after the tile was laid.  Kind of odd to have the shoe molding in before the grout is floated, but it shouldn't cause any troubles.  The way the tile design follows the moldings is a really nice touch and screams custom build.  Similar attention was paid to the door moldings around the office door.  The strip of walnut molding is just a place holder for the shoe molding that will be installed in front of the door to finish off the tile to door transition.

      Elsewhere in the house, the wood floor is being cleaned in preparation for the final oil/wax finish.  All the extra building materials and tools have been consolidated to the greatroom.  The majority of the construction dust has been cleaned up and there's evidence of floor scrubbing in some parts of the house.  I saw a mop and bucket, but there's a special soap that's supposed to be used to clean the floor and I'm not sure if that was used or just water.  The floor looks mostly clean, but it's not a pristine clean that you get from a newly installed floor, such as that in the turret bedroom.  I'm hoping that there's more cleaning to do or that the final oil/wax finish will remove the slight haze that's on the floor.

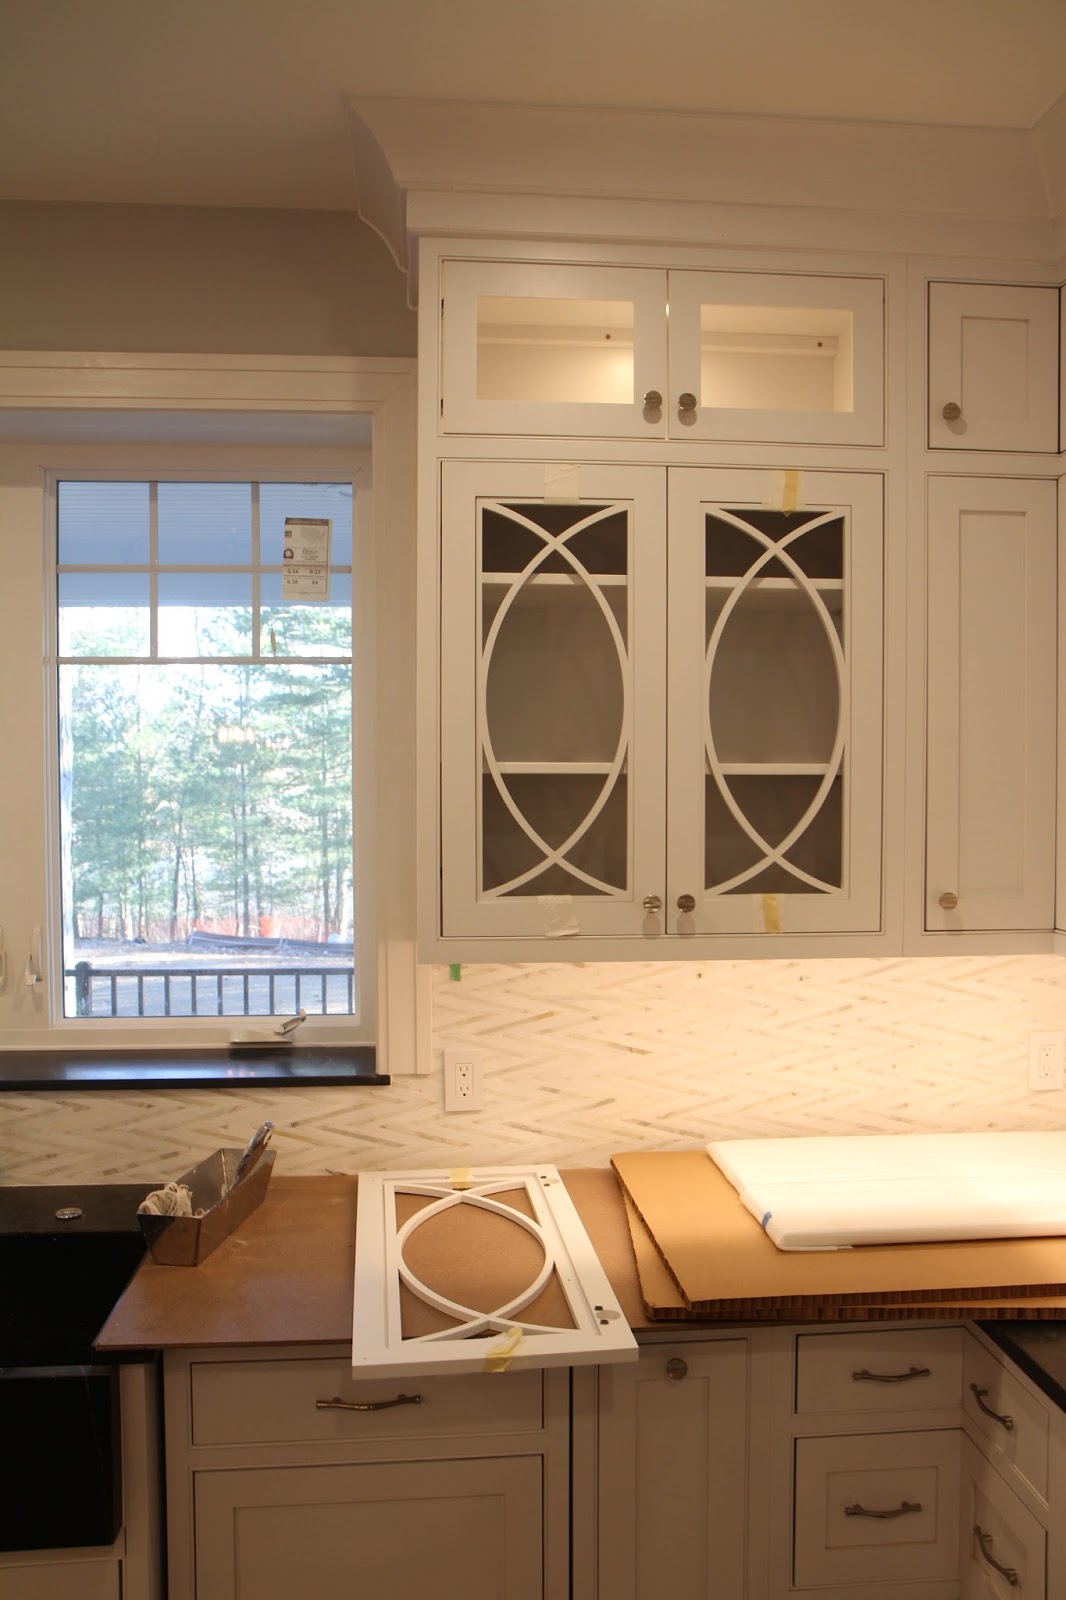
   Alco glass came during the week to install the glass in the cabinet doors.  We decided to use the water glass over the seeded glass since it matches the glass style in the butlers pantry.  Four cabinet doors in the kitchen and 12 in the butlers pantry got this glass.  It obscures the contents of the cabinet, but probably not the color.  I'm still not sure what we'll put in these cabinets, but since the glass does a good job of obscuring the shape of whatever's in there, I'm pretty sure it won't be used to decoratively display anything.

   The corners of the glass panes are curved off to match the curve on the inside of the cabinet door.  This didn't end up costing as much as I through it would, so rather than squaring off glass recess, we just went with the curved glass.  The glass is held in with silicone, which surprised me.  I'm not worried about the holding power of the silicone, but I though there would be window glazing pins inserted or something.  Silicone will prevent the glass from rattling and should be easily removable if we need to replace the glass.

   All the cabinets in the butlers pantry have a glass front and they're all now installed.  I think we're just going be putting various serving glasses in these cabinets so the water glass provides the perfect amount of obscuring.  Good thing the strip light was replaced with the puck lights because I would be worried about installing them after the glass was in place.  The in cabinet lights come on with the under cabinet lights here to simplify the controls.

   Here's another look at the butlers pantry cabinets with the glass installed.  One note for people looking at using inset cabinet doors:  There's no stile between the doors so the slight gap between will allow light through if you have interior lighting.  The glass is smooth on the outside and textured on the back side which is determined by how the glass is made.  They probably float the molten glass over a water textured cooling table so the glass is textured by the table and flat due to leveling.


   The wood floor has finally been installed in the girls turret bedroom.  It's the last room in the house to get the floors installed, so when the grout is floated in the foyer, I can officially say that we're done with flooring install!  This room probably has the cleanest floors too since touch ups haven't been completed in here and there shouldn't be any drywall sanding as there was in other rooms in the house.  the only equipment left in this room belongs to the painters, one of whom was working on the Sunday afternoon that we visited.  He was reinstalling door handles after they repainted all the interior doors to remove paint drips.  I think there will be the least amount of touch-ups required in this bedroom so the floors shouldn't pick up much dust.

   The floor installers finished early enough in the week for Distinctive Designs to install the shoe molding in this room, which completes all the molding installation in the house, except for the piece at the front door.  The picture is a little blown out, but there are nail holes from the pin nailer used to install the shoe molding that need to be filled and painted.  As is the norm with Distinctive Designs, the installation exceeds our expectations.  The miters are tight and the curve of the turret is matched perfectly.

   A minor note, I don't think the electrician came back last week, but we must have missed the swap out of the white sockets and plates  for the gray and stainless plates in the master bedroom dividing wall.  Either the electrician did it, or Mike did it, since you don't really need an electrician to change a wall socket.  This was a minor nitpick item that Tanja caught and asked Mike to do, which he got done without a second thought.  Chance are you won't see it since it's going to be behind a TV eventually, but it's a detail that Tanja wanted implemented.

   Another item on the list of "minor things that needed to be completed" is the installation of the deadbolt on the garage entry door to the house.  It's from the same Emtek lockset as the rest of the interior and exterior door handles around the house so it matches the look at finish perfectly.  the knob has a short throw, moving maybe only 25 degrees in the arc to securely latch the bolt with a satisfying "thunk".  There's no play in the bolt handle and it feels solid overall.  Overall, I'm very satisfied with the quality and feel of the Emtek hardware.

   Another first for the house: first time parking my car in the garage.  The garage has been cleaned of extraneous packing material and tools so I thought it was a good time to get in there and test out the fit and chargers.  The PEV meter will be installed this week, but the circuit is energized, so I can plug in my car to validate the installation.  Unfortunately, the dedicated charger is still set at 12A and the fuses are missing from the 50A 14-50 plug, so I couldn't validate much.  Both the portable and dedicated charging cables are more than long enough to plug into when pulled head in, in the single bay.  I could back into the double bay and still have the cables reach, but I'm not sure that's possible in the single bay.
   Pulling into the single door bay of the garage feels a little tight, but I don't have much experience doing it so it's probably just my perception.  I pulled in as per my normal procedure, look in the rear camera and stop when I'm past the garage door rails.  It's what I have to do in our current garage so I can get as much walking space in front of the car as possible.  Doing the same thing in this bay yields probably about the same results since we have stuff against the back wall in our current garage.  The double bay spots add a couple of feet to the depth and I won't normally be parking in the single space so there should be plenty of room.

   The other fitment test for the garage is clearance to the Falcon Wing doors.  I requested that we get the garage door rails installed as high as possible for the maximum clearance of the doors and it might be a bit overkill.  The rails are at the same height in both the single and double bay doors and they're way above the Falcon Wing doors at full extension.  The roof sensor didn't even detect the ceiling of the garage and open at less than full extension.  I didn't try to open the doors with the garage door open, so I'm not sure if the car will detect the garage doors and open at less than full height.  I'm not in the habit of driving with the doors open but I think they might not clear the garage door opening themselves in t he fully open position.

   So that's about it for this week.  Next week should bring more paint and finish touch ups, but I'm not sure when we'll see the final application of the floor finish.  The stairs still need to be painted and stained, which will happen after all the touch ups are done, and before the final floor finish, so that's a good indication for when we'll be completely done.  The greatroom fireplace still needs some adjustment and the mudroom faucet still needs to be swapped out, but all the lights have preliminary programming and everything is finally functional.  It's getting really close to being done.


Monday, January 29, 2018

Foyer Tile Installation and Fireplaces

   An unexpected family adventure day ended with a visit to the house on yet another unseasonably warm winter day.  Even though it's still January, temperatures this weekend are in the 50s with some clear skies and sun.  Knowing Michigan weather, we can probably expect at least one more snow dump, but at least we can enjoy a hint of spring.  The tile installers were in full force today with five guys working to finish up all the tile installations.  Back splashes were being grouted, tile was being installed, and finishes were being refined.  We also saw more progress on the final touch ups, but the wood floor in the turret bedroom remains missing.  Mike says that the wood is delivered so we can hopefully expect installation this coming week.  A few more visits from the electrician puts us a bit closer to perfecting all the lights and now the circuit to the car charger is connected.  We're still waiting on a meter, but everything is in place on our side.


   The packed in ice is finally gone from most of the driveway, and is at least clear in the front of the house.  Three trucks were at the house today for all the tile installers and Mike, recovered from his hospital visit earlier in the week from flu like symptoms, was present to supervise.  As warm as it was this weekend, we're expecting a snowstorm early next week with a chance it will all melt away later in the week again.  I wish mother nature would make up her mind.
 

The tile installers were on site during the weekend to start laying the foyer floor tile.  They prepped the floor earlier in the week by leveling and applying a scratch coat.  The day were visited, they were dry-laying down the tile so we could confirm the spacing and orientation of the tile.  Since it's best to have a full pattern tile layout in the center basket weave center, they started in the center of this field and worked their way outward.  There will be a 17" border around the basket weave that will be made up of three layers, a large white tile edged by a thinner marble border tile.  The border will be installed after the center field is set and the white tile will be cut to take up any variance between the sides.  The diagonal walls that house the foyer art nooks aren't perfectly 45 degrees (of course) so unfortunately, the tile cut at these locations won't follow the 45 degree tiles in the pattern. 

   Once the position of the basket weave was confirmed, the tile installers carefully removed the tile while keeping the reference straight edge in place near the door.  The used this reference to start applying thinset to the concrete floor and carefully place each sheet of the mosaic basket weave into place.  They work pretty quickly, managing to install the entire field be the end of the day.

   The tile installers work wasn't isolated to the foyer.  While three workers were installing in the foyer, one was grouting all the backsplash tile that had been previously installed in the other bathrooms.  This is the finished tile in the second bedroom upstairs, with the matte mosaic tile and dark pencil edge top.  All the tile is now completed in this bathroom.


   The glass mosaic tile in the mudroom has also been grouted, completing the tile in this room.  One of the tilers was working in here when we arrived and it looked like he was also cleaning up the floor tiles.  We had concern in this room about how the tops of the baseboard tile would be completed.  The tile installers confirmed that it's not a good idea to apply grout to the top edge of the tile since it would most likely just fall off, so Mike said we'll have to paint it.  I think this will be an acceptable solution.  The faucet in this room also still needs to be replaced.

   The round glass tile has been installed in the turret bathroom, but not yet grouted.  The tile comes on a 12"x12" sheet, but the tile installers didn't want to install half a sheet, cutting through the rounds.  Instead, they removed each round from the sheet and installed them in the thinset by hand.  The tile isn't installed on the side like the tile in the other bathrooms, but we confirmed this design with Margaret. I'm not sure if it will be odd to deviate from the other bathrooms, but this vanity is also a bit different, with two columns of drawers in addition to the door cabinets.  I think having the tile only on the back makes the vanity look more like a piece of furniture, rather than a fixture so there's some justification in that design.  The grout on this tile should be installed by the next update.

   The fireplace installers returned to confirm the installation of the gas fireplaces and install the screens and bezels.  There's a protective screen on both fireplaces to prevent someone from burning themselves on the hot glass.  The screen gets warm during normal operation, but not dangerously hot.  This is the first time I'm seeing these in operation and I like the appearance.  The "embers" below the fire are lit with LEDs and there are two orange halogen bulbs inside that throw light against the side of the fire box for an added ambiance.  Additional "brick" needs to be installed on this side of the fireplace to complete the installation

   Here's the greatroom side of the fireplace with the additional brick pieces installed between the glass and screen.  When installed, it gives the illusion that the glass isn't there and the screen is the only thing between the fire and the room.  There's still a little condensation on the glass that gets burned off each time the fireplace is used and the flame height isn't set very high but everything looks functional and the fireplace provides a good amount of heat.

   Here's a closer look at the "embers".  The under lighting and transparency of the embers gives a pretty realistic effect.  I'm happy with the over all appearance of the fireplace and the performance it provides.  I think there's a way to turn on the lights only without the flame so you can have the ambiance of the glowing embers without using gas.  Since our house is so efficient, it will be interesting to see how running the gas fireplaces will heat the entire house.

  All functions of the fireplace are controlled with these remotes.  I wasn't aware, but there's actually more buttons on the remote and the white is just a shell to protect those buttons.  Next time I'm at the house, I'll have to play around with the other features as I understand it, the flame height and temperature settings are adjustable with those other buttons.  The remotes act as a thermostat and can adjust the height of the flame depending on what you set the temperature to.

   Here's the fireplace on the second floor.  I'm not sure if the log arrangement is final but I'm hoping that they'll adjust some of the logs so they're not so far forward.  If not, then I'll figure out how to get in there and make my own adjustments.  There are also some fingerprints on the left side of the glass that need to be cleaned up, and are only visible when the fire is on.  This fireplace doesn't have halogen bulbs, but the embers do glow.

   Here's a close up of the glowing embers.  If they weren't so perfectly contained in the fireplace, I could mistake them for real.  This fireplace also performs well and looks great.  We originally had some other fireplaces picked out, but Mike decided to purchase these due to availability and his good experience with the installer. I'm satisfied with his decision.

   The replacement mullions for the glass front cabinets in the kitchen were installed this week.  They're just loosely held in currently and will be attached permanently when the glass is installed next week.  Apparently, Mike and Margaret weren't satisfied with the slight gaps in the curve pieces and got them replaced.  The Sound Vision and the electrician also got the puck lights in the upper cabinets operational.  They weren't controllable by the Control4 system and it seems that something wasn't connected.  While he was there, the Sound Vision diagnosed some issues we've been having with our rotunda lighting.  After diagnosing and conversing with Control4, it was determined that the controller itself was at fault and will need replacement.

   The electrician sourced puck lights that can work with the amperage output of the mis-installed transformers in the butlers pantry.  Unfortunately there are now holes where the light strip was mounted, so those will now need to be touched up some how.  If it were up to me, I would drill them out a bit bigger and glue in a dowel to color match the wood.  It shouldn't be too visible through the seeded glass that will be installed in the door but we'll still be able to see it when the door is open.

   The final PEV meter hasn't been installed yet, but the circuit is ready for installation.  DTE came to the house, but didn't have access to the inside of the house and didn't want to be responsible for energizing the circuit.  They requested that the circuit breakers are turned on and left small metal bars that should be installed across the meter contacts.  Basically the circuit is live and the DTE technician will remove the bars from the live circuit and  install the meter.  I'm surprised that's how they want it done since it's dangerous to work on a live circuit, but that's their requirement.  As a result, the Tesla charger is powered and "free" energy is being supplied.  I plugged my car into the charger but found only 12A being supplied, so it seems like the electrician didn't set the charger to the correct output amperage.

   The shutoff breakers next to the Tesla charger have been switched from 80A to 100A as per my request.  This matches the rest of the circuit going to 100A so the charger can output a maximum of 80A.  With the opening of the Supercharger near me, high amperage home charging isn't much of a necessity, but it is a luxury.  I'm opting for a flat monthly rate of $45 since I calculated that this will be the less expensive option with my daily commute.

  The breakers in the basement for the dedicated charger have also been changed out to 100A.  The other circuit is correctly at 50A for the NEMA 14-50, which can be used with the travel charger or any other battery vehicle, as well as welders.  If we ever get another battery vehicle, both chargers could be used at the same time and the cost would be the same monthly, greatly saving money.  If we get another Tesla, we could install another dedicated wall charger and daisy chain them together since they communicate and can balance the charging between the two vehicles.

   That's about it for this week.  Next weeks update should show a finished foyer tile, and probably finished tile in general.  Hopefully a finished wood floor installation and continued touch ups.  Like I said, we're getting really close, but we're also going into February so one more month has passed us by. 


Monday, January 22, 2018

HVAC and Plumbing Inspections Passed

   Although there's no sign from the wood floor installers, finishing work continues around the house as we push towards completion.  The turret bedroom still needs to have the wood floor installed and after the material mix up, we should see it happen this week.  All the tile for the foyer has been delivered and Castro is ready to install it.  We had a design meeting last week to lay out the final design pattern so everything should be squared away.  We passed final HVAC and plumbing inspections last week, so all that remains is the final building inspection.  As for remaining tasks, all that's left is the remaining tile install, turret wood floor, installation of the rest of the shoe molding on the second floor, final paint and touch ups, then final floor finishing.  It's getting really close now.


   Mike was worried about the final building inspector flagging the front step urn pedestals since they could be misconstrued as steps when walking off the front porch so we needed to purchase something to put there.  Rather than wasting money on something temporary, we purchase these Nichols Bros Heller House Vases.  They're stone cast, meaning they're made in molds from stone materials and will weather like stone.  They come in three sizes, 22", which we purchased, 33", and 44".  The pedestals could have supported the larger sized urns, but we wanted room to sit.  They're large enough to prevent someone from accidentally walking onto the pedestals, but still allow enough space to sit.

   Here's a picture of the hanging light from Copper Smith, installed in the front door barrel vault.  It's the same style as the copper lights flanking each garage door and also has the Weiyan LED flame simulation bulb.  We were concerned about the hanging height and initially wanted the yoke installation so we switched to a straight pipe installation.  It hangs high enough that I can barely touch the light so I don't think we have to worry about anyone hitting their heads.

   Sitting to the sides of the foyer are the two piles of tile that will be installed in the foyer entry way.  Some prep work to flatten the concrete will need to be performed before the tile can be installed, but at least all the material is on site.  Castro and his team will begin installing the tile this week and hopefully finish grouting all the back splashes in the bathrooms as well.  The tile picture here is the basket weave tile that will fill the field of the tile "rug".  They're mounted with a film on the surface that's removed after the tile has been set.  The basket weave will be laid with the pattern perpendicular to the front door and will be bordered by three layers of tiles.

   The office is storing the border tiles, carefully packed in these styrofoam boxes.  The large white tile will be sandwiched between two narrower courses of marble tile.  These layers will run the perimeter of the foyer and will frame the basket weave.


   We spent a good amount of time on Thursday deciding on how the tile will be laid out.  Ideally, the basket weave tile would be installed so it landed on a full pattern when it hits the border tiles.  We found the center of the front door and started laying tiles out from there.  Turns out that none of the four borders of the room are square with each other and the room is slightly trapezoidal shaped.  To combat this, we'll slightly alter the width of the large white tiles in the border and keep the basket weave tile dimensions static across the floor.  That way, you don't see differences in the tile pattern on any of the sides.  Careful cutting will be needed to make the transition of the white tile border width seamless as you go around the room.  The plan is that the tile will be dry laid so we can confirm the implementation, then give the go ahead to mortar it in place.

   The LED puck lights in the art nooks around the house have been recessed into the nook box.  When they were surface installed, they weren't flush with the surface and in general not visually appealing.  Since the electrician didn't want to take responsibility for modifying the drywall in the boxes, Mike took it upon himself to recess the puck and we're very happy with the results.  There's just some touch up work needed to the surfaces and these will be completed.


   The finished bezels and screens were brought out of storage in anticipation of the fireplace installers this week.  They'll be coming in to perform the final log setup and installation test.  By next week, we'll have functioning gas fireplaces.  Distinctive Designs is making some filler pieces for the metal fireplace surround since the inside edges were cut a bit short.  We thought the bezels would cover this, but it during the last dry fit, Mike realized the gaps would still be visible.  The original fabricator of the metal surrounds is being difficult to reach so Distinctive Designs, once again, stepped up to the plate to fix something.


   The hardware was installed on the guest bathroom vanity last week.  Elsewhere in the house, the new touch up painters were hard at work filling, sanding, caulking, and repainting all the small blemishes that the original painter made or that were made during floor installation or house settling.  We're seeing a lot of movement in the house that's affecting the finish.  The round windows on the exterior wall had to be recaulked a few times since they were separating from the wall.  The crown molding on the kitchen wall cabinets had to be recaulked as they were also separating from the wall.  We're not sure where the source of the movement is, but it's a little disconcerting.  I'm just hoping that all the problems are resolved and we're not looking at a seasonal shrinking and expanding.

   Although it's still getting chilly at night, we're seeing some warmer temperatures this week.  The day we visited, daytime temperatures were in the 40s so we finally got the opportunity to light a small fire in the gazebo fireplace.  The fireplace performed well and drafted all the smoke up the chimney, but it will take a much larger fire than what we had to give off an appreciable amount of heat in this cold.  Still, it was nice to pretend we were already living in the house and enjoying the fruits of our labor.  When we left, we drove to the neighborhood across the lake to see what the view of our house was.  I was able to turn on and off the exterior and interior lights to see how much visibility there was.  It was a nice view, and unless someone has high powered optics, we have a good amount of privacy.

   Short update this week.  Lots of changes are in the form of touch ups and don't make for good visual updates.  I'm hoping we'll see the foyer tile installed next week, but the tile installers seem to work on the same schedule as the wood floor installers.  Speaking of which, we should be seeing the turret room completed if they decide to make it to our house next week.  I was looking forward to having the EV meter installed this week, but got news that there's one more thing the electrician needs to install in order to have the meter hooked up.  I think he's coming back so I'll need to reschedule the meter install.  Not much else left to accomplish before final inspection so these next updates might be a bit boring.  At least it's a good kind of boring since it means we're almost done!