Monday, January 16, 2017

A Jungle of wires


   Work continues to push forwards towards the goal of starting drywall by the end of the month.  With only a couple of weeks remaining, everyone is working hard to get in and out as quickly as possible and luckily, there seems to be enough room for everyone at once.  Rough electrical is wrapping up on the second floor with both Hoffman Electric and The Sound Vision installers running their lines everywhere.  Electrical work hasn't started on the first floor yet, but I think it will happen this week.  Plumbing continues to complete the hook ups in the basement and connecting the available tubs.  Some snags are still being worked out for the master tub, as we're trying to find a tub we can use in the space.  Porter and Heckman should be getting back in soon to complete the HVAC but they're busy fielding "system non-starts" for customers now that the cold is here.  Carpenters remain busy completing their punch lists and the cedar siders are nearing completion on the exterior.  

   It might look sunny, but the sun does very little to warm anything.  The driveway is a solid sheet of ice, but there's enough new gravel poking through to get traction driving in.  Walking takes some care and more than once I almost lost my footing.  The area in front of the house is thawed from the constant parking of hot trucks.  If you look closely, you can even see the melted, ghostly outline of the vehicles on the ground.  Frost coated the exterior of any window that wasn't in the sun but the inside of the house was bearable even without the heat turned on.  Despite the cold, a sunny day is always welcomed.

   The cedar siders have worked their way around the back of the house, to complete the walls exterior to the master suite and kitchen below.  This gives us our first glimse at what the finished product will be when we lounge in the back yard, and I like it.  I'm beginning to like the variation of the cedar, and I'm strongly considering a semi-transparent stain to preserve that.  The back of the garage will continue the same look with the cedar installed above the stone, but the stone will be higher relative to grade since it will be at the same level as the stone on the house.  The front of the garage still needs to be clad in siding and this will most likely happen this week since the blocks for the brackets are installed.

   The siding installers didn't get around to the back of the great room yet, and since there's a lot of cutting, I think it will take a good amount of time to complete.  Coupled with it being so high off the ground, it won't be a fun job.  Again, that whole area is a slick sheet of ice so they'll have to be careful planting ladders.  Temperatures will reach above freezing this week, so it will be a good time to get the rest of the exterior finished if we can stay dry.

   The carpenters installed all six blocks for the decorative brackets and sconce mounts on each of the three garage doors.  We recieved the polyurethane blocks on Saturday and I dropped them off during my visit, but I'm not sure if they'll be installed before stone goes on or after, to prevent damage.  We also took delivery of all the corbels that will be installed around the turret.  We've since decided to forego cedar siding on the turret and use wood between the windows to differentiate the turret from the rest of the house.  This will make installing the corbels easier since we won't have to block off any siding.  The detil blocks for the rest of the house are still on order, but should be today.  Hopefully we'll get them in soon so the siding can be completed.

   Here's all that remains of the cedar siding.  One entire pallet has been consumed so far with one pallet remaining.  I think the only places left on the house are the back of the great room, up at the master balcony, the gable on the front of the house, and the garage.  We'll see how much is left over in the end.  Hopefully I can retain some in the event of damage.

   The Sound Vision ran two coaxial lines from the attic space to the garage attic area.  These lines will be used for two of the security video cameras included in the installation.  One will be pointing towards the back yard and the other towards the front for full coverage.  There will be other cameras around the house, providing 360 degrees of visual security.  All this data will be recorded and accessible remotely.

   Moving inside, the plumbers have hooked up the drains for the two cast iron tubs and installed some the trim and mechanisms for the drain plug.  A pretty good sized hole was needed to get all this plumbing through to the second floor so I'm hoping that they'll be able to get some sound blocking or spray foam in there to seal it back up.

   Here are the trims that were installed in the tubs.  They clean up well and you can finally see the white color of the tubs.  The drain plugs and overflow trim still needs final installation.  The tub is using the matching Kohler push button  overflow/drain tub control.  From the website, it looks like the drain plug is controllable by either pushing or turning the overflow trim piece.  Pretty cool.

   Here's shot of the drain plumbing for the cast iron tub in the other upstairs bathroom.  It's a clean design for the overflow and drain control.  It's nice that it allows for the replacement of the visible trim pieces so if we wanted to update the look it's an easy procedure.  There are some really nice designs  available so we should be able to find any look we want.

   Some electrical has made its way to the first floor.  This is one of the niche boxes in the foyer and the reason why it's connected is because it will be on the same lighting circuit as the central rotunda chandelier.  The rotunda has two circuits, the general lighting, and the ambiance lighting.  These circuits will be on the lighting control system so they could also be controlled at the same time.

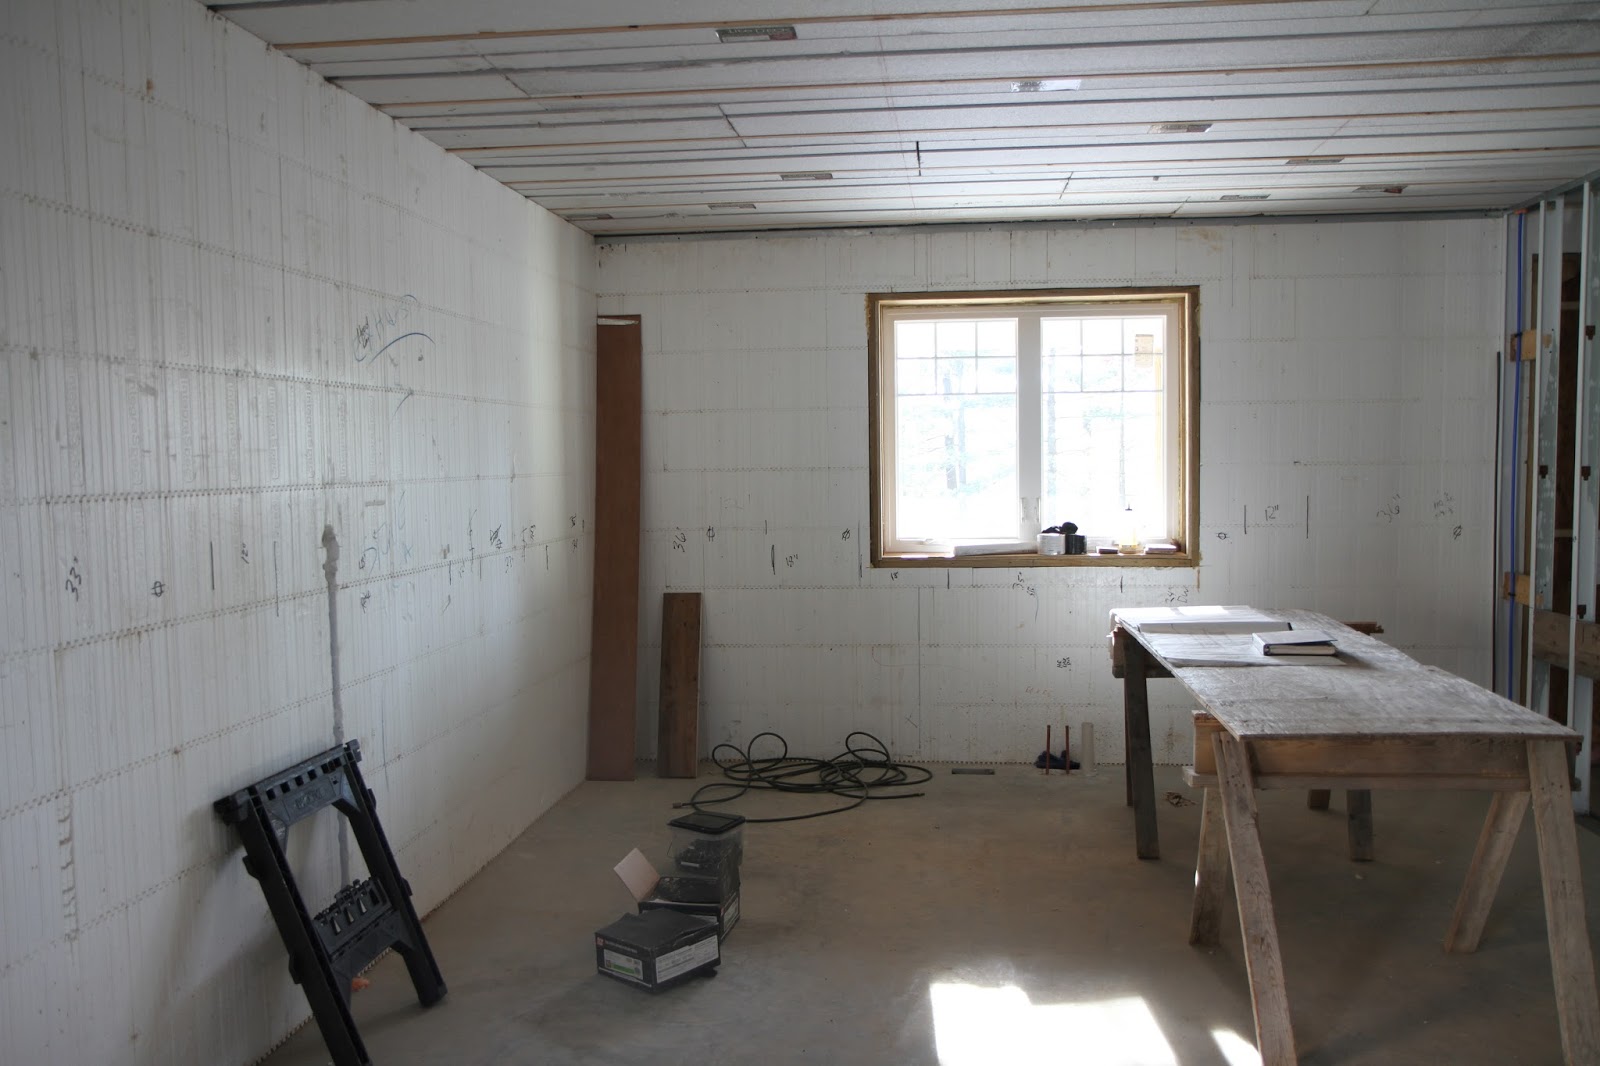
   Kitchen walls have been marked with cabinet dimension so the electrical installers can start running lines for sockets, under cabinet lights, and in cabinet lights.  It's nice to have the cabinet lines on the wall because it helps visualize the space usage a little bit.  Once the drywall is up, the plan is to install 3/4" plywood under the cabinet locations and get them installed before the floor. I doubt the counter tops will be installed right away since they're damageable, but just having the cabinets in will be interesting.
   Second floor light circuits on the Control4 lighting system are interesting.  All the lighting supply circuits are run to the laundry room rather than basement, and low voltage lines are run to the wall switch locations that will be using Control4.  Of course the wall sockets and lighting systems not being controlled are still run down to the basement so we can't avoid all of the home runs.  Any wall switch box that has the blue RG-6 lines will be connected to the Control4 system. Upstairs, this includes the master suite and rotunda lights for a total of 6.  Since these are programmed, it's totally possible to have a switch in the bathroom turn on the rotunda lights if desired.  The switches have 1-6 LED backlit buttons, three of which will be used for music (on/off volume up and volume down).  The largest primary button will probably used to control the room you're in, and the remaining two can be used for lighting schemes or control of other rooms.  Of course this is all controllable from the wireless touch pads or phone app too.


   The dividing wall in the master bedroom has this big bundle of cables hanging down for all the A/V connections in the right box.  The left box is for power to the TV that will eventually be hanging here.  The A/V bundle is for signal in from the video distribution, as well as a data line, since TVs are so connected now.  There will be in ceiling speakers in the master suite so the TV or music can be piped through to the room.

   Here's a closer look at the bundle hanging down here.  I think this will be the same in every bedroom, regardless if there's in ceiling speakers or lighting control.  This is the standard drop for the A/V distribution in the house.  I think the two whites are CAT-5e, the blue is CAT 6e, the black is quad shielded coaxial, and the yellow is audio.  I didn't take a look at the count of each one but considering we'll also have a good distribution of wireless access points around the house, I think we'll be covered and future proofed.

   The carpenters boxed in the location for the two Robern medicine cabinets that will be installed and the electrical installers roughed the power that will be supplied.  The Roberns we landed on are 23-1/4" wide 30" high and 6" deep. They have sockets and usb inside for charging, a night light on the exterior, and defogging features for the mirror.  There is a model with a built in TV, but I don't think we'll need it.  The electrical boxes for the sconces were installed and due to the spacing of the mirrors, we opted for three rather than four.  The vanity itself is floating and there will be lighting under it so electrical had to rough a connection down there for the low voltage transformer.  It looks like all the roughs for the vanity are in place.

   Here's the wet wall for the shower and tub in the master bathroom.  The two rough boxes on the outsides are for the showers and the middle one is for the tub filler.  The hot recirculation loop is at the bottom of the hot lines, which are in turn connected to all three rough boxes.  The rough box on the left has two outputs, the overhead shower and the hand shower.  The right and middle boxes only has one output each.  I like being able to see the internal routes for the plumbing because it's an intricate design that I'll most likely never see again if things go right.

   Here's where the low voltage lines and all the runs for the controlled lighting circuits will land in the laundry room. There will be a panel here to which all the upstairs low voltage controller lines and high voltage lighting circuits will run to the controllers.  I imagine that there will be multiple high voltage lines run up from the basement to power everything, but I'm not sure how many controller lines run down to the basement.  This area of the laundry room is slated for a hang drying space, so the panel won't get in the way of anything.


   There's a large bundle of cables going down from the attic, all the way to the basement.  These look to all be A/V cables so I think all the distribution is done in the basement rack with no secondary distribution upstairs.  I haven't seen where the high voltage runs go to the basement yet, but I think it will probably be through this HVAC chase.

   These little clips are used to secure the low voltage wires to the metal wall studs.  I think there are different code requirements for securing high voltage vs. low voltage lines since these seem less stable than regular cord clips used for wood stud installations.  All the video distribution can be run on the CAT 6e, including 4k video and beyond so we're future proofed unless the required bandwidth reaches fiber requirements.  In that case, everyone house will need renovation.

   I think this is the first light switch installed in the house, which is the attic space switch.  This just controls one bulb right at the entrance to the attic space and I hope to never need to use it.  Getting all the lighting installed in the beginning means that shouldn't need to get up there to install anything else.  Hopefully the roof system will be good enough that we'll never have to worry about a leak.

   Here's the HVAC chase where the bundle of cables comes down into the first floor.  There's another one like it in the floor, going down into the basement.  The conduit isn't contiguous so any new wire runs in the future would require a wall opening which isn't bad since the wall shares a closet space.  Sometimes solid conduit is run to ease snaking a new line.  It might be a nice feature to have, but I don't think we'll need it in this case.

   Here's where the Sound Vision is storing all the lines that will be used in the house.  Here's what the boxes say:

Yellow box: Audio cable 14/4 Oxygen Free Copper
Blue: CAT6E 550 MHz CMR unshielded twisted Pair
Black: RG-6 Quad 3.0 CMR GHz Tested

   From this, I gather that the yellow lines are used for all the distributed audio to the in ceiling speakers.  The blue lines are used for video distribution since each TV has a box that connects to the distribution hub in the basement.  They might also be used for data lines, but that's overkill.  I think there are CAT 5e wire spools floating around somewhere for that purpose since I've seen white lines on the second floor.  The black lines are quad shielded coaxial cables generally used for video distribution but since that will be handled by the CAT 6e, these might be installed for redundancy.

   The beam across the stairwell to the basement has finally been cut.  It's something that should have been done months ago before Mike took over, but was just another one of those things that they never got around to doing.  The beam was needed before the first floor pour and was always slated for removal to provide enough headroom for the stairs.  Now that the stair installers are getting started, Mike got his crew to cut out the beam.  Maybe I should set one aside for a future anvil or something because how often do you get to have a big chunk of I-beam?

   Here's where the beam used to span the stairwell.  Since there are posts on both sides, all the floor is supported.  The steel is structural studs so the weight of the roof is transferred all the way down to the huge basement stair footing.  Mike noticed some bowing in the steel studs, closer to the great room and we determined that because of the curve of the staircase, some of the rotunda floor is more dependent upon the concrete beams rather than the steel.  As such, we'll be adding some supports int he basement to help carry the load more.  Nothing to be alarmed about, but good practice.

   Now that the stair installers are starting up, This will be one of the last times I'll be able to look from the basement to the roof.  The removal of the steal beam opens up the view even more.  Jonathon said there was one job he had where the rotunda was open all the way from the second floor down to the basement, which would make me nervous.  I'll miss this view, but I'll feel safer when it's closed up.

   Looking down is equally stomach churning since it's about a 20 foot drop to the hard concrete below.  I should measure the drop, but it's about 9 feet for the first floor, 2 feet for each floor between and 10 feet for the basement.  There will be some extra storage space under the basement stairs, but since we have so much in the basement already, I'm not sure what we'll use it for.  It's a long narrow space and we won't be able to remove the side walls since they're load bearing so no creative solutions.

That's it for this week.  I think the siding will be finished by next weekend and electrical will be starting up on the first floor.  Rough plumbing should be finished this week so as long as HVAC gets back in to finish, we'll be good for this month.  Water still needs to be hooked up by the county and we'll need that to start the finishing work around the house.  The target is August for occupancy and that's coming from Mike, so I believe it.  That would make one year on the job for him, which would be phenomenal.


Monday, January 9, 2017

"It's starting to look like a house instead of an Igloo cooler"

   Progress keeps moving full steam ahead with tons of changes present even since the few days I last saw the house.  Plumbing, electrical, and exterior siding all pushed forward with their installs and the carpenters are hard at work trying to stay ahead of it all.  Mike is three steps ahead, looking at the finish work and seeing what needs to be implemented now in order to fulfill his vision.  We're finding that we need to make decision on finished plumbing and lighting very quickly so everything can be lined up for their respective installations.  Everything is on track and almost every problem from the previous construction team is solved, under control, or has some kind of a solution in the works.  Mike has basically take the build from a very rough state with many issues to a state where everything is in its place to be completed with a foreseeable end date.

   One of the items the Mike and the carpenters are hard at work is how the final porch columns will look.  The porch was constructed so that we couldn't implement the initially desired round column post wrap, so an architecturally sound alternative was needed.  We came up with a shaker style panel like the one picture above, but only on the bottom half.  Mike mocked up this full column example from available construction pine, but the final will be constructed from Medium Density Overlay (MDO), which is like MDF, but with a weather resistant resin overlay, so we shouldn't have issues with moisture.  It's supposed to be more durable than plywood, but takes paint better, which is what we're doing, so I think it's a good alternative.

   We had some issue trying to figure out a square post that would work on our modern Victorian house and I think the shaker style is the closest we could get.  Alternatives were the tapered Craftsman style, which we definitely didn't want so shaker it is. Maybe only the haughtiest of architects would have a beef with the design fusion.

   They also included a design mock up of the final beam headers that will be applied to the front and back of the porch beams.  We wanted an arch from post to post and this is how they'll implemented it in rough sawn cedar.  Of course, there will be a full piece of wood the length of the beam and the arch will be continuous, peaking at the center of each distance.  The beam fascia is dropped down from the porch truss to account for the bead board thickness of the ceiling.  The underside of the beam will remain flat and not follow the curve of the arch as it approaches the post.  All the trim will and columns will be painted white to match the rest of the trim around the house.

   This is pretty exciting.  The cedar siding installers completed the front and side first floor, most of the second floor on the side, and one side of the great room already.  I think this is two days worth of work.  We almost like the clear cedar color, but will most likely use a semi-transparent or solid stain on the siding.  If this was a shingle style house, then the clear cedar might work, but we don't have the architecture or intent for that look.  It's getting easier to imagine what the stone will look like below the ledge.

   Even though the trim boards are the wrong color, I'm glad they are painted because it makes it easier to imagine how it will look when painted with final colors.  This wall has been white Styrofoam for so long, it's great to finally have something that resembles the final look.  All the trim sits just about flush with the bottom of each course of shingle, but has some reveal at the top of the shingle.  I think this will work fine as long as there's enough room on the shingle to caulk against the trim.  A little more reveal would have been nice, but I think the color differentiation between the trim and siding will go a long way in the looks department.
   Here's the entire side of the house from the basement level grade.  There's one strip left at the top right to finish off the side.  There are corbel blocks that will be installed up there and the only prep for the carpenter to do is to install a little piece of trim so the siding guys can cut around them.  Since this siding is already up, we can come back and cut out the siding to install the blocks to which the corbels can be attached.  They're still on order but should arrive in the next couple of weeks.  It's one of the things were implementing to try to capture the Victorian look, since we're not going with all the porch details.
   The entire side of the house was completed, including the great room!  Everything below the cedar will be real cobble stone, separated with a limestone ledge.  A scaffold or skytrack wasn't needed and they just used ladders to get up to the high great room side.  I initially thought the arch top window trim going into the house trim was a little odd looking, but now that the siding is up, it looks good.  There's going to be a lot of stone going up the side of the house, and the prep work for that should start soon.  The distance from the basement grade to the cedar about fourteen feet but is the most exposed side of the house.

   Bracket mock ups were also created so we could visually see what it would look like.  The bracket itself is made from polyurethane and the box behind it is created on site.  We needed the box to get the bracket off the wall and mark where the cedar shingle doesn't have to go.  Initially, I wanted the box to go down to the stone ledge, but Mike said it wouldn't work out right since there's a bit of a slope on the ledge.  You're just inviting water infiltration into the wood if it sits on the stone.  I think this look good too.  We'll one of these on each side of each garage door and it also acts as a base for the hanging style wall sconces, yet to be picked out.  In that way, the box serves an additional duty, providing a nice place for the wall sconce to bolt to.

   The plumbers are wrapping up the first and second floor installations, filling plumbing gaps with fire blocking expanding foam in every location where the pipe goes through another material.  This procedure was repeated at many places around the house and signifies that the plumbing work on the first and second floor is coming to an end.

   Although all the plumbing supplies and drains heading down to the basement, there's still lots of plumbing work to be completed.  Almost all the plumbing roughs have been installed for all in wall applications.  The only remaining puzzle is the master bathroom, where some work was needed configuring the expected four mixing valves that were needed in the small shower/bath wet wall.  We were going to use one for each, two showers, one hand held, and one tub filler but all the valves couldn't fit in the confined space so we decided that the handheld will be put on a diverter with one of the shower so the total count could be reduced to 3 mixers.  It was confirmed that our alternative tub selection would work, but the drain plumbing for that hasn't been installed yet.  We'll have to get the thing in place before we can choose the rub filler spout.

   Sorry for the dark picture, I think my camera setting dial got shifted for some of these shots.  The master sink roughs from Dorn Bracht were installed at the final height, so now we can chose appropriately proportioned medicine cabinets to install above them.  The wall mounted faucet has the control on the right and spigot on the left, which will pour into an under-mounted sink bowl.  The trim is a rectangular plate, and it looks like the mixer cartridge is pretty easily accessible should we need to fix it.  I didn't have time to touch the valve itself, so I'm not sure what the body material is made of.  I'll make sure to take a closer look at it when I go back.


   Even with the electrical walk through we have scheduled with Margaret this coming Wednesday, the electricians are still running wires to all the boxes on the second floor.  Work hasn't begun with box installations on the first floor yet.  There's a high level of confidence with the placements on the second floor, with only one or two items in question.  I made sure to take as many pictures of the wire runs as I could for future documentation, but I hope to never have to look at the wires again.  We're trying to plan everything the first go around so we won't have to renovate the lighting in the future.

   I think half of one pallet was used for all the ceder that was hung thus far, so it's looking like a good possibility that all the required ceder is on site, ready for installation.  With the speed they move, I think all the siding will be up by the end of the week and we can finally protect all the exposed ICF that should have been protected years ago.

   As I mentioned, we have a meeting with Margaret at the site to do an electrical walk through.  We've done it ourselves to address functionality, but it will be good to make sure all the lighting design elements we need in place will be present and Margaret is the one that can double check that.  Of course, Mike will be on site with the electrical installers and The Sound Vision is slated to begin work around that time too so it will be nice to have their expertise on hand.  Stair installers have started work on their workshop mock-up and we should have them in the house in a couple weeks!  Finally getting rid of the temporary stairs will be another large step because we'll finally be able to visualize the rotunda.  Porter and Heckman need to come back to complete the installation on the basement, but they've been bombarded with service requests.  Mike has been hammering them to return since he's looking at rough inspections in a couple week.  When that's completed, drywall installation can begin and the interior will look completely different.  Even with all the pace of the progress, Mike keeps saying that we're targeting June/July for completion, so if drywall is done mid February, that gives four months for finishing work.  Internet wisdom says drywall is the halfway point of house construction, but with our house, that doesn't mean much.  Maybe the speed of progress will slow down after the rough, but I hope it doesn't.

Wednesday, January 4, 2017

Mid week update: Full steam ahead

   I was debating whether or not I would make a mid week update considering I just posted an update yesterday, and I'll be revisiting the site this weekend, but so much is happening so quickly that I think I'll need more posts to cover the changes.
   I was scheduled for a meeting with Jonathon from The Sound Design today for the preliminary walk through on the distributed audio/video/data, lighting control, and security.  He showed up with four members of his team to review the plan and talk shop.  On top of two electricians, Mikes carpenter, two plumbers, and two siding installers, the house was a hive of activity.  I'll wait for the weekend update to post most of the progress pictures, but I can't wait to share some things now.

   The first thing I saw when I walked up to the house was a new delivery of lumber and siding sitting in the garage.  The lumber will be used in general areas and for the porch column finishing.  The other two stacks are for the cedar siding that is currently going up.  I'm not sure if there will be more deliveries or if everything needed is on site.

   A good number of boards and some thinner sheets at the bottom.  I didn't take a close look at it, but I think it's mostly rough sawn cedar and some pine.  I know some framing still needs to be completed on the great room and garage exterior doors so that's what the pine and sheets are probably for.  We're really nearing the end of rough lumber phase.

   At first I was confused about what this was for.  The box says "trim coil" and I have no idea what that is.  Turns out it's the aluminum for the flashing that will sit between the cedar siding and brick ledge.  It comes in rolls like this and is bent on site.  I figured it out when I saw it on the wall as they were installing it.

   Here's the label on the cedar siding covers.  It's western red cedar shingles, which I've read is more durable then white cedar shingles so that's good.  12 squares per pallet and the shingle has a 7-1/8" exposure, which is probably enough.  At least the stuff they installed while I was there looks good.  I still have a little apprehension about this product since it all relies on the durability of the plywood it's attached to.  For most of the house, it will be protected by porch roof.  I've read that southern exposures are the toughest for shingles, and that's the front of our house.  Only time will tell if it can hold up.

   All the additional posts have been installed and all the exterior porch lighting is in.  Some porch shrouding will be fabricated by the carpenter so we can agree on a design.  Initially we were thinking about using polyurethane columns to sheath the posts, but their dimensions didn't work out.  The bases and caps don't work well with the post positions on the deck.  It was decided that the post exteriors will be built on site out of exterior MDF and rough sawn cedar.  Exterior MDF?  I know, I've never heard of it before because everyone knows that MDF and water don't mix.  Rather, it mixes well into a pulpy slurry.  When we get the product on site, I'll take a look at it, but Mike gave the go-ahead, and I trust him.

   In addition to socket and switch boxes, and rough light boxes, the electricians are also installing bathroom vents.  Two in the master bathroom and one for each of the other bathrooms for a total of seven around the house, not including the unfinished basement bathroom.  I think the master water closet is the only one that has an integrated light.

   The Panasonic FV-08VQ are the fans that are going in and they have a great rating on Amazon.  They're rated at 80 cfm, LEED compliant, and only 0.3 sones which is as loud as a very calm room.  Can't wait to hear them in action.

   The plumbers wrestled the two, 300+ lb cast iron tubs up the temporary stairs into their respective bathrooms.  It's ironic that the two heaviest tubs were on the second floor since the two bathrooms downstairs will only be showers.  They don't need any concrete bed underneath since they're heavy and strong so I guess that's it.  I'm not sure if there will be any mechanical fastening or if it will just be held in place with the tile and mortar.

   The turret tub isn't in location yet, but it's in the bathroom.  By the time we revisit the house this weekend, this will probably be set in place.  I resisted the urge to sit in it this time, but I'll probably try it out next time.  As the reviews said, they're pretty shallow for a tub, but it's enough for young children to take a bath in and it's large enough for showers.  The bottom is slightly textured for anti-slip but not so rough to annoy skin.  I think the shallower depth will make it easier for ingress/egress since it will mostly be used as a shower.

   Electrician are in full swing with almost all lighting, socket, and switch locations in place.  I did an initial walk through, but we'll get another one with Margaret next week, and maybe a final walk through before drywall goes on.  Coordination with The Sound Design was great since the lighting control drastically changes how the light switches are installed.  Since the lighting control system can be programmed to make any Control4 switch control any room, all the lighting wires are run to the Control4 light control box, then each controller uses a low voltage wire to run to the switch location.  This makes it so the six gang light switch box in the master bathroom is changed into a single box that will control all lights and sound distribution in the room.  As I mentioned each switch doesn't necessarily have to control the room it's in.  We could have a switch in the master bedroom turn on all the house lights as a "panic" button.  We can also control all the connected lights with the phone app, touch screen, or TV remote.  I was also just informed today that Control4 has Amazon Alexa and Google Home integration for voice commands.  This should be interesting.

   Here's how the Hoffman Electric installs wire runs in the metal studs and ICF.  They're actually the electrical installers that Ken Trever used, so they're well versed in ICF installations.  The metal stud pass throughs are filled with a plastic protector to keep scraping and abrasion on the wire sheathing down.  The wall channels are cut out with an electric chainsaw.  Exterior wall boxes can only be two inches deep so even single gang boxes look like double boxes so there's space for wire nuts and socket boxes.  A hot knife can be used to cut out the channels but in rough construction, there's really no need.  I didn't ask if the channels will be refilled with spray foam, but it might be nice if they were.

   Here's what three trades and a builder look like on site.  Not shown is my car and The Sound Design fleet.  I was "previously" told that the trades don't like working at the same time, but there didn't seem to be any issue with getting in each others ways.  There was plenty of power runs for all the tools and a couple of air compressors in use.  It's amazing to see so much work going on at the same time.

   Parting shot as I walked to my car.  Here's where the siding installers started and how much they got accomplished in the few hours I was there.  I think they'll be done by next week.  The slower parts will be on the second floor where they'll need to cut around roof lines and decorative pediments, but it seems like we'll have it all up very soon.  Much faster than I would have thought.

   That's about it for now.  I'll have more pictures and another update soon.  We have an electrical walk through scheduled with Margaret next week to verify lighting placement and talk about finished electrical fixtures.  There are a lot of decisions coming up very quickly, but I wouldn't have it any other way.

Tuesday, January 3, 2017

New Year!

   Despite only being a few days after the last visit and even with the New Years holiday, some work has progressed towards the goal of installing the cedar siding on the house.  I got the chance to visit the site on the Monday after New Years and found Mike and his helper at the house, installing additional posts to the porch.
   The last time we visited, we decided that three more posts were required on the front porch, two on the front and one at the back.  They're not going to be structural but will bridge large gaps that the railing couldn't span.  Mike was quick to implement the plan with one post installed when I got there and another being worked on.  They also installed some of the corner trim on the first floor so the cedar shingle installers could get to work installing the siding.  I'll never cease to be amazed at how dedicated Mike is to completing this job.

   The templates for all the exterior doors were dropped off a couple of weeks ago by Hardwood Door and Bevel and Mike and his crew is getting around to installing them in the door spaces.  They'll need to be in place for the siding installers since they'll butt the siding right up against the template.  The door should be the same size as the template so once we get it installed, we'll just need to caulk the siding to the door jamb and it will be all set.  Here's what the installed template looks like from the inside of the mudroom.  This is an eight foot door and the top half will be glass since it will be the only window in this otherwise dark room.  Mike and his crew had to fabricate the arch above the door, which will be insulated and trim finished on the inside.  It looks like the door molding will be pretty tight to the walls here but there's plenty of clearance to the ceiling. 

   Here's how the same door looks from the outside.  The top trim is the same that is installed around the entire porch, but since the porch ceiling is around eight and a half feet, the door cuts up into the trim more.  We'll have the same issue with the exterior door off the great room too since it also sits under the front porch.  It looks odd, but I think it will look better once the real door is installed.  The thing that's missing from the template is the door frame, and it looks funny because it looks like the entire door will take up the space.

   The top and corner trims have been installed on the first floor so the cedar siding installers have a frame to install against.  All the siding will be framed by the 1-by cedar since it's on all the corners and windows.  The siding will be caulked against the frames and painted.  There shouldn't be a reason to replace the caulking no a short term schedule.  Maybe once every other painting if the paint lasts eight to ten years.

   Here's what the actual siding looks like.  It's rough sawn cedar shingles stapled to a plywood backing board.  There's a water wicking membrane between the shingle and the plywood so any water that happens to penetrate the single will hit this layer and keep the plywood dry.  The shingles are stapled to the backing board with two staples.  I couldn't tell what the staple material was so I'm not sure if there should be concern about staining or corrosion.  I think it's advised to use stainless nails in real cedar shingles because of the acidity.

   Here's a shot of the side of the shingle system.  Mike had some from another project so he brought it by so I could take a look.  The full shipment should get here this week.  Each later overlaps the one below by an inch or so, and provides about an eight inch reveal.  As you can see, the membrane also overlaps the layer below so water can wick out and on top of the layer instead of staying behind the shingles.

   Here's the back of one of the pieces showing the quarter inch thick plywood backer, the water proofing membrane, and the cedar shingle from front to back.  Also keep in mind that there are channels in the ICF so if any water gets all the way through behind the plywood, it can just wick down.  Since it's ICF and concrete, we don't have to worry about vapor from the house condensing behind the plywood.

   Since I was there, Mike cut a couple pieces and tacked them to the wall so I could see how it would look.  I'm still a little apprehensive about using a natural material for the siding but because of HOA rules, there's no getting around it.  The siding will be painted a yet to be determined gray and all the trim will be white.  I'm hoping the combination of a good paint and good painters will help with the durability of the siding.  Lots of houses on the ocean coast use cedar siding and they seem to weather it well.  It remains to be seen if I'll have woodpecker problems like my neighbor does.

   A little more detail on the two cast iron tubs.  Here's one of the little feet that are on the bottom.  I'm not sure if this is all it sits on or if a concrete bed needs to be poured under it. They'll be moving the tubs into position this week for the rough inspection.  The master tub still isn't on site and I think that's probably needed for the inspection.  I'm anxious to see that installed since I still have yet to see the drain routing and also because we had to change the tub selection to fit the install.


   On the underside of the tub is the size and model number, part of the casting mold.  I'm not sure how the tub will be protected once in place but I'm sure there's a standard way since installers tile around finished tubs all the time.

   I didn't get a shot if it last time, but here's the Roxul that's being installed in all the plumbing chases.  I have no illusions about complete sound proofing, but I think it's a good measure towards sound dampening the noise of  water rushing through the pipes.  The house I grew up in had cast iron stacks and no insulation and even with the mass of the pipes, flushing toilets were audible.  In our current single story house, I can hear every tickle of water moving through the pipes when I'm in the basement.  Hopefully this stuff will help mitigate that sound.

   One more shot of the back porch, standing in the gazebo.  The corner trim and some of the top trim is new.  We'll be replacing the space above the sliding door with a transom window so the siding installers won't be able to complete that part until the window is installed.  Everything else should be accessible and the siding goes up fast so there should be some dramatic changes to the exterior soon.

   So that's about it for now.  Lots of activity this week.  Electrical installation is moving forward with plugs and lighting.  Siding is starting to go up today.  I have a walk through with Jonathon from The Sound Vision tomorrow so it's perfect timing to get coordinated with the electrical installers and bring everything up to speed.  We're still waiting to hear back from the bank underwriters about the extension of the loan, but once that comes through, the last piece will fall into place.  This is totally happening!