A short thaw last week melted much of the snow at the site, but a longer freeze quickly turned the water into the ice that's coating most of the ground around the house. The driveway in is a sheet of ice and if not for the ruts, would be difficult to traverse by car. Fortunately, the daily traffic of work vehicles have melted enough ice to make passage possible which allowed our weekly visit to the house.
Last week, we had a 5 hour marathon meeting with Margaret at
Virginia Tile to finalize all the tile and counter top selections. I'll make a separate blog post later this week to document our choices.
This week saw more rough electrical installation, gas connections, rough plumbing testing, exterior stone, and most excitingly, the basement stair installation. Rough inspections are scheduled for this Tuesday so after that, the house will be cleaned up and prepped for drywall installation. The first floor stairs should be installed soon.

Defying the cold, the stone masons at Old Country Stone (old-country-stone.com/) have been hard at work finishing the exterior stone siding around the great room but they also installed almost all the cinder block around the back deck to furr out the wall. Last week they installed the angle iron used to support the block and this week saw the completion of the installation. I'm not sure if they need to parge this before they attach the exterior stone or if the cinder block is enough prep surface. I didn't take a close enough look, but I'm guessing the cinder block is tied to the ICF with straps of some kind that don't visibly protrude through the mortar joints. The plumbers also roughed in a hose bib in that odd corner between the garage and porch. I can't think of any other purpose to that space, save for a rain barrel.

The cinder block continues around the gazebo, but stopped short at the fireplace location. The fireplace slab was cleared of fill dirt so that OCS can begin to install the fireplace. It will be a wood burning fireplace that we would like to integrate into seating and a barbecue area. We submitted rough plans to OCS for refinement and price quoting.

Here's a render I created and sent to OCS to give them an idea of what we're trying to accomplish. We always envisioned that the raised fireplace hearth would be 18" high and seamlessly mesh into the perimeter benches. The surface would then raise to counter top height at the corner, which would be where the barbecue would be. I'll have to get opinions on the safety of having the barbecue under the roof; I'm not sure if there's enough gap to vent the heat or if the paint will be adversely affected. I've also entertained the idea of a wok burner out there, but might save that option for a later date. The counter top will probably be a dark granite of some kind, for easy cleaning and weather resistance. As I said, it's a rough plan that I'm hoping OCS will be able to refine.

The excavator removed the fill dirt at the outdoor storage door location and cleaned up the dirt from the footing so that OCS can start to install on that side. They already installed the expanded metal lathe on the side, but not under the porch. We'll need to remove the brick ledges in these locations to install the stone properly. The grade at this point will be 2 feet up from the walkout grade, but the stone will still probably go down to the footing. The hill on the left of the door, up to the gazebo, will be tiered with retaining walls. Great Oaks will eventually install this wall and it will be made of the same caramel mint stone. This will probably be the second to last landscaping implementation since we need to work from the backyard forward. Until then, I hope to grass the hill to avoid soil erosion.

OCS completed and de-tented the side of the house under the porch. This portion of the wall is completely mortared and cleaned so this is the final look of the house. They still have to install above the porch level and will probably complete this when the weather warms up a bit since it will be harder to tent. I'm really loving the look of the stone and I'm glad we went with OCS. The color selection and implementation is perfect.
Here's the front corner of the house where the landscaping stones were removed from. There's a bit of parging up at the top near the beam, but I don't think they plan on installing below grade at the landscaping wall. The corner is completed and that's all that's really needed. I'm also not sure how much will be completed under the deck on the front of the house. The grade does fall away a little towards the retaining wall and the exterior wall will be visible from the lower elevation so I'm thinking that they'll finish the entire space.

Here's what still under the tent. The side of the great room looks completed with filled mortar joints and installed stone ledge, but the back still sports unfilled joints. With warmer weather coming this week, and water installed in the house, I'm sure they'll make quick work of this section. Future landscaping will see the installation of a paver patio under the deck in this area. It extends around the corner to the said basement walkout and offers yet another nice place to convalesce. We're considering if we need some kind of water diversion system in the deck above, to keep this area dry.

Here's a closer look at the installation of the stone sill below the window. It's made up of two sections of limestone and fits perfectly in the space left by the stone installation. The surface is honed and feels slightly rough, which is perfect for this setting. There's currently an extension cord coming through the partially opened window if you're wondering what the cable is. While there's a live electrical receptacle on each floor on the interior, none of the exterior sockets are live.
Here's a pallet of limestone sill sections ready to be installed. I'm not sure if these are going to be used under all the windows, or if there are longer sections for the first floor stone ledges. They're fairly heavy and being made of stone, not prone to break free flexing, so it might be possible that these short sections will be used for the majority of the house.
There's a pallet of corner pieces in the garage waiting for installation. It's amazing to think that these were once small boulders that were cut on two sides. I'm sure there will be more needed than these for the entire house but this seems like it's enough for most of the house. They won't be needed on the gazebo since it's a larger angle than 90 degrees. It will be used on the back porch, around the garage, and on the front of the house above the porch.

Here's what's completed on the back of the great room basement level. This is the walk out for the exercise room and it's mostly completed. I think all that's left is to fill the mortar joints and add the stone ledge under the windows. I don't see any flashing installed above the windows so I'm guessing that the mortar and window flashing is enough to waterproof the exterior. There will eventually be another stone patio at the walkout, but not as extensive as the side walk out. All these patios will be connected with a blue stone path, which will in turn lead to the outdoor storage and back yard.
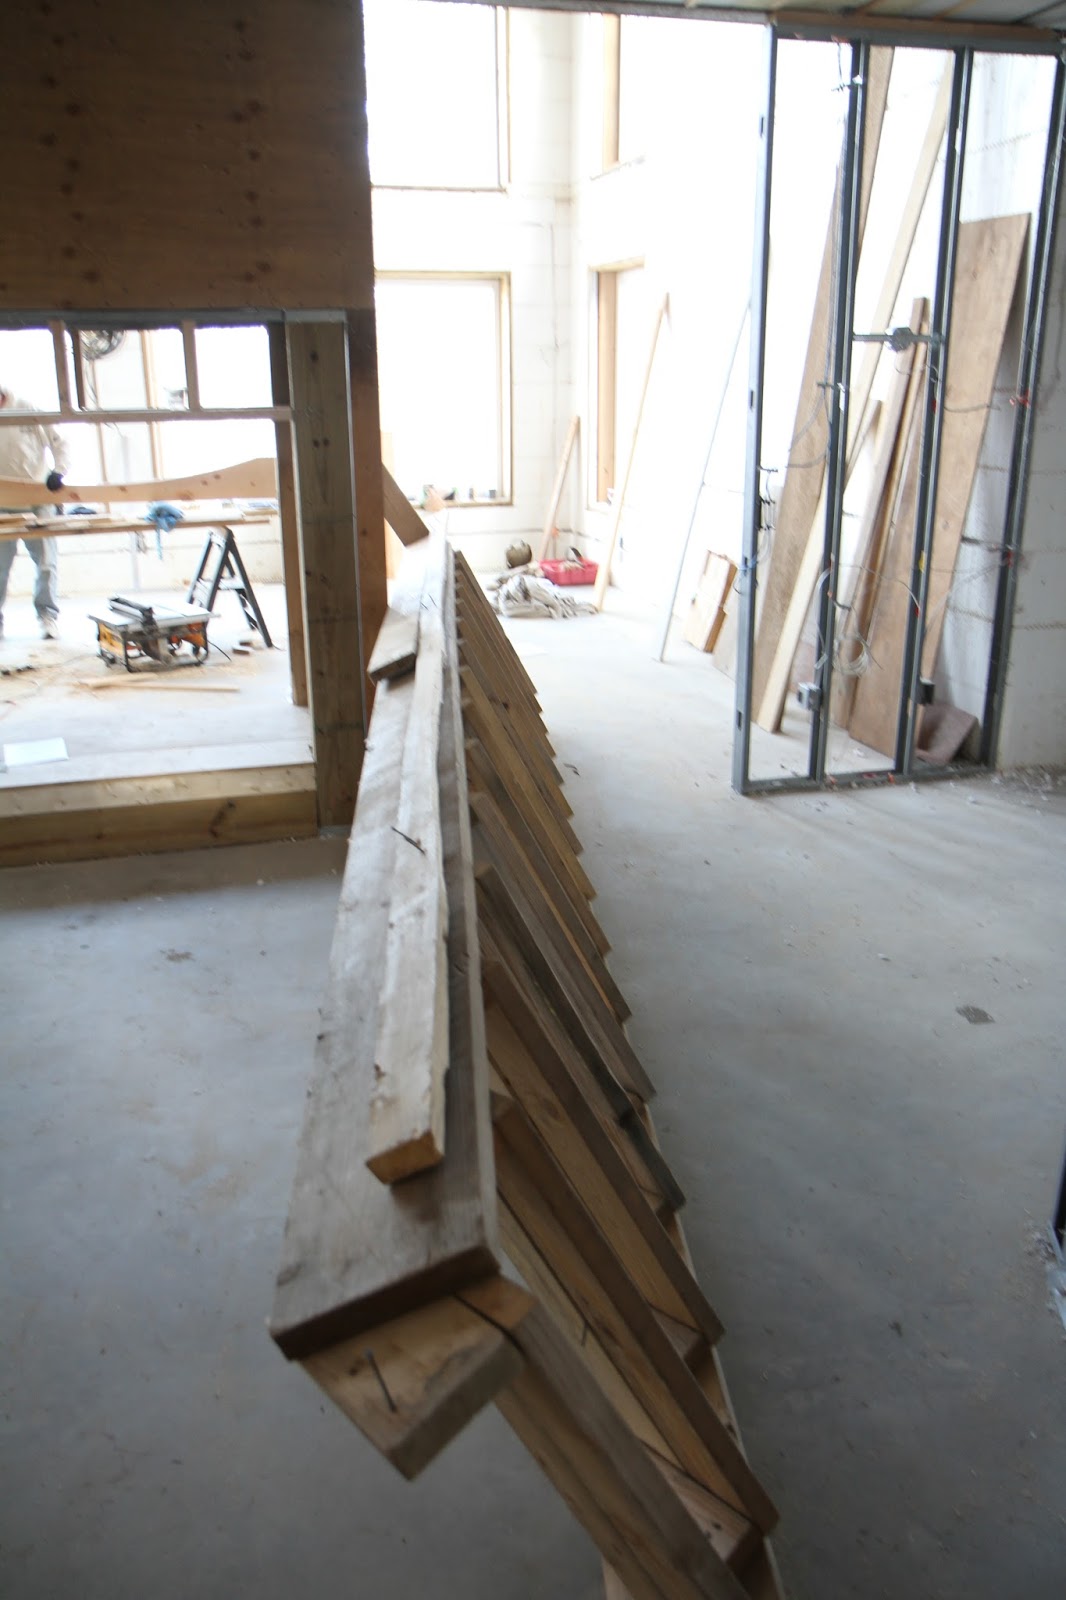
The carpenter is still hard at work cutting and installing the arches. He's there everyday whittling down his to-do list and these arches are pretty demanding. The spaces between the posts aren't consistent around the porch, but to keep the look of the arches consistent, the ratio of arch to post needs to be similar. A lot of calculation is required to pull this off.
The arches are installed on both the back and front of the beams and will look like they sit on the top of the post once the post sleeves are constructed. We're having some trouble figuring out how these arches will extend around the round portion of the porch, so Mike is bringing in an architect to get some ideas on how to complete the look, ensure structural integrity, and provide a good final product.

On to the inside, the stairs to the second floor were temporarily removed so the electrical installers could finish the rotunda lights. We're hanging a large chandelier from the center of the rotunda, so an electrical box was required. The installers weren't comfortable with spanning the rotunda with platforms so the temporary stairs were removed so they could use a tall ladder to install the rough box. I'm not sure if they removed the stairs so the stair installers could get the basement stairs in since I didn't get to watch the procedure. The temporary stairs were reinstalled a few days later so the inspectors could regain access to the second floor without climbing a ladder.
The biggest addition this week, in terms of size and cost, was the curved stairs to the basement. The stairs were constructed in their workshop and installed as one pieces. I'm not sure if they went through the basement or front door, but the thing has to weight a ton and I can't imagine how they did it.
The stairs are a consistent width up the stairwell but since it's a section of a large spiral, they're curved in two planes. The treads are solid oak and the risers are oak plywood. If I recall correctly, we'll have the treads stained to match the floors and the risers painted white. There's something very liberating about walking up and down stairs in your own house for the first time.
The sides of the stairs are constructed from veneered bent and twisted laminated beams. I don't know if they formed up the laminations in the shop or purchased a laminated beam and bent it to match the curve radius, but if I had to guess, I would guess the former. I don't know a lot about stair construction, but I've seen pictures of curved stairs being made in a shop, and they make a template that mimics the walls and construct the stairs within the template. It's entirely possible they built up the laminations in the template then filled the treads and risers when those were completed.
The treads are protected by a sheet of polyethylene sandwiched under a quarter inch lauan sheet so construction traffic won't mar the final wood. The lauan is stapled to the tread so before the tread is stained and finished, it will probably be lightly resurfaced. Each lauan piece is cut to the same dimension as the tread so the full coverage ensures that no damage will come to the stairs.
Here's the underside of the stairs, to highlight the construction technique. A plywood support block is nailed and glued to the inside of the laminated stringers and a wedge is installed on top of that to ensure the tread is level. A vertical wedge is installed to ensure the riser is plumb since the support block can be installed off-square. Blocks are installed where the front of the tread and riser meets to secure the two together. It looks like glue is used between every joint to help prevent squeaking but after time, some adjustment might be necessary.

This view won't be available when the basement is completed, but I'm not sure if drywall will be installed on the studs before move in or if it's up to us to get it done during the basement finishing. The stair stringers form a double helix as they go up the stair well and it's a shame that shape will be hidden. We'll get a little under-stair storage, but we're not sure what we'll use it for yet since we have a whole area devoted to basement storage. It's curved, so nothing particularly long can fit in there. Maybe I'll just make some curved shelves to line one of the walls.

Another view that won't be possible once the first floor stairs are installed. This is a shot down from the top of the rotunda. The supports were there for a piece of plywood and are generally not needed anymore, so I'm not sure when they'll take them away. Yes I bumped my head on it. There will be fewer first floor stairs since they only have to ascend 9 feet plus the thickness of the floor, rather than the 10 ft plus thickness, for the basement. The design of the first floor stairs will also be different. The first floor will have an open stringer on the inside of the rotunda rather than a solid stringer. Of course, there will also be a railing and balusters that will connect to the railing around the inside of the rotunda on the second floor. As with the treads, the railing will be stained to match the floor color.

One more shot of the under-stair storage in the basement. I've seen some creative storage solutions for the space under stairs, but since the steel stud walls are structural, we can't cut in doors or drawers to the sides. Any solution will need to be from this opening, which is made to support a door. The distance to the designated basement storage room and this space is basically the same, so it doesn't offer any distance advantage.

The outlet floor penetration for the kitchen make up air has been cut, but the ducting hasn't been completely installed yet. This will sit under the base cabinet for the cook top and provide passive air make up when the kitchen vent hood is turned on high settings. The gas for the cook top was also installed, through some trouble. The gas pipe installer verified the pipe path with Mike, but decided to change the install, which took the pipe path through the middle of the theater room ceiling. We've been working hard to keep the ceiling clear of mechanicals so we could maximize the height in the room. I spoke to the installer about moving it, and he was super reluctant to do it. It would have involved cutting and re-threading the pipe, which he didn't want to do. A quick note to Mike set him on the installer to do it right and the installer acquiesced. Nothing like having a bulldog in your corner.

The supply of the make up air duct has been installed in the basement wall, but again, the duct run itself hasn't been installed. Unfortunately the duct will have to go under the beam, but we'll find a creative way to box in the entire beam and hide the duct. At least there's a good chance it won't impinge upon the basement ceiling.
Porter and Heckman were busy completing the HVAC installation in the basement to the first floor since the second floor is complete. Part of this is to install the ERV, pictured here. What this does is provide fresh air to the house while recapturing the energy in the exhausted air. It's an energy exchanger between the conditioned and exhausted interior air, and the unconditioned fresh exterior air. It looks like some kind of industrial unit and as cool as it looks, I'm glad it's hidden in the mechanical room.

One of the big questions remaining was how the second floor would be zoned separately from the first floor. Since the first floor uses the in-duct inflating bladders, there was questions as to how the second floor would work. Here's the answer to that question. It looks like P&H installed a solenoid actuated baffle in the supply trunk that goes up to the second floor. The solenoid will receive signals from the heater supply controller and open when the second floor thermostat requests heat. Since the blower is variable speed, I don't think we'll need a bypass duct. In systems with a single stage blower, a duct is needed from the main supply to the return so that extra air velocity can be blown off somewhere when the second zone baffle is closed. In our system, when multiple thermostats call for service, the blower can increase in output velocity to supply more open ducts. There should be some kind of indicator on the duct to show how open the baffles are, so I'll keep my eye out for it in the future.

An impressive number of supply ducts have been installed that supply the first floor and basement. All joints are sealed with mastic, which is code now. When installation is complete, a blower door test will be performed to evaluate the amount of leakage in the system.
Here's a shot of the current state of the mechanical room. Eventually, the temporary furnace will be removed, opening the center of the room, but we still need to place and install the desuperheater, water heater, and A/V/D equipment. Even still, the room is filling up fast.
Porter and Heckman has nearly completed connecting all the basement ducts through the floor penetrations on the first floor. There are many places where the air will be supplied through the toe kick of a base cabinet, and in these places, appropriately bent ducts are installed. In cheaper installations, these will often be open to the base cabinet and the installers will simply use the base cabinet cavity as a heating chase, cutting a vent in the toe kick. I'm not sure if it's code, but it's a pretty bad way to route condition air since some of it will be lost to the cabinet space. This duct will be extended to the toe kick vent when the base cabinets are installed so all the condition air will reach the room.

Here's the sticker for the rough HVAC inspection approval, performed on 1/26/17. I must have missed it in previous visits. HVAC rough inspection is one of the easiest since the inspector is just looking for floor penetrations and return openings, not final duct installation. The rest of the inspections are coming this week and Mike says that the drywallers are on standby for installation so we should be closing up walls soon.
The gas pipe has also been installed to supply the two fireplaces, as well as the dryer on the second floor. This installation is clean and falls within one of the cavities left after the temporary support was removed. Besides the gas supply to the back porch barbecue, I think all the gas has been installed in the house.
Here's where the gas pipe comes up and branches off for the first floor fireplace. I found the spec for our fireplace sitting in the area, so installation location was performed with the final product in mind.
Here's where the gas pipe terminates at the second floor fireplace location. Again, there was a fireplace spec here, so I'm not worried about installation. Both fireplaces will have a blower to help circulate the heat. I'm hoping that with all the steps we're taking for insulation and air penetration efficiency, we would be able to heat the entire house with these fireplaces.
Initially, the gas installer encountered some problems running the gas line for the second floor laundry room. The wall between the laundry room is situated right on a beam so a direct penetration couldn't be done. The water lines run in the garage storage space and in the first floor ceiling to reach the necessary locations on the second floor. Mike used the mechanical chase created in the garage storage to route the gas line up to the second floor without any issue.
Here's where the gas pipe comes up into the second floor and to it's final location. The mechanical chase below is matched above where the master closet meets the laundry room. Although it wasn't initially planned as a mechanical chase, it worked out well. Word of advice for those in the planning stages, look for cavities to run mechanicals in. It will make your life easier.
All of the basement drain plumbing has been attached to the sewer system. I found this particularly interesting looking. It's the plumbing stack for the first floor guest bathroom. There's an unconnected vent pipe in the ceiling in place for the future basement bathroom. I was confused at it's purpose at first, when I saw the capped off PVC pipe, but then realized what it did when I traced it up to the attic.
Here's the single roof penetration for the drain vents. They disconnected it and put on a temporary cap and pressure gauge. I guess both the supply and drains are pressure tested for leaks so the connection to the grinder pump must be closed off some how.
This is the result of Mike negotiating with Porter & Heckman about the sufficiency of the supply in the turret room. Mike was concerned with the number of windows in the turret creating a cold draft during the winter and suggested another supply duct be installed. The two ducts that supply the room were initially placed in the ceiling. During the design phase, P&H ran a schedule J to determine air supply load so they insisted the two ducts would be sufficient. The compromise was to move the two ducts to the turret itself so that any cold air from the windows will be tempered with heated air. This will work well since the air return is on the other side of the room. This also works well to hide the air supply vents.

The electricians were also hard at work trying to complete all the installations around the house. I still haven't seen the cable run from the car EV panel to the garage, but this high gauge wire was run to the kitchen for the double electric stoves. We also requested a 220V at the stove top location just in case we want to switch to electric induction in the future, which has yet to be installed. Not much more left to complete before inspection this Thursday.
The county finally got out to turn on the water and they painted the valve the standard blue. There's one spigot currently installed in the basement and it is functioning so our house officially has water! Just in time for the drywall installers. Mike also finally got a sign up at the street. Too bad we're kind of isolated from the main traffic because he deserves more exposure.
That's about it for this week. Next week should see the completion of all rough inspections and maybe a drywall delivery, but that might be premature. The weather should be a bit more mild this week so we'll probably see progress on the exterior stone. I'm not sure when the second set of stairs will be completed and delivered, but I'm excited to see them go in. The porch storage access door will be cut on Thursday so we'll finally get to see what's in that tomb. Next weekend should see some pretty exciting developments.