Showing posts with label Wood Floor. Show all posts

Monday, February 26, 2018

Finished Floors. Small Tasks Left and the Road Ahead

   After two weeks away from seeing the house so the floor finisher could do his thing, we were eager to visit the house to see the progress.  Things are starting to move forward at the old house with all the cleaning and packing so we're starting to gear up for full on moving mode.  We found the floor finisher working on the Saturday that we visited  It was just one older gentleman, but I think he usually has a helper during the weekdays.  He was just finishing up the last sections of unfinished floor in the kitchen when we left.  Once completed, the floors will be done.  There are still some small paint touch ups here and there, and a bit more work on the stairs.  Small things here and there and we'll be finished.

   We were greeted with this sign hanging across the mudroom to kitchen doorway, but that was only applicable after he finished the kitchen floor, where he was working.  Access to the house can be gained from the front door, but this oil/wax finish really only needs 6-8 hours before it can be walked on, after which it's buffed with more oil.  The floor is fully finished after 36-48 hours.


   Here's the wax/oil product being applied for the final finish on the floors.  The floors were already treated once with the product from the manufacturer, but needs one more final finish after installation.  It's WOCA Master Floor Oil in a natural color.  It's rolled or brushed on in small sections, then polished with a red floor buffer pad until the wood looks saturated.  After leaving it for 6-8 hours one more application of the oil is applied and a hardening wax can be applied for a more protected surface.  This is the product that's recommended by the floor manufacturer and there's another product from WOCA for refreshing the floors, which we'll have to do from time to time in the higher traffic areas.


   A few bottles of Pall-X 96 were sitting in the mudroom along with the WOCA oil.  I think it's being used as a top coat after the WOCA oil.  It's a satin protective finish that supposedly makes repairing scratches easy.  They might be using this product in place of the hardening wax top coat.

   Here's the floor finisher buffing out the newly applied WOCA oil to the floor in the kitchen.  He was hand applying it to the floor using a brush, after which he would use the floor buffer to even out the oil and allow it to penetrate.  While we were there, we heard the buffer turning on and off so he worked in small sections to ensure the application was even.

   These are some of the used red buffing pads the floor finisher was using to spread the oil.  I'm not sure if we'll need to get a buffer like this so we can refresh the floors, but I think I've seen smaller models that might be more appropriate.  It looks like the top one is used and the one underneath is a fresh one.  I'm not sure how he knows to swap them out and if it's just a matter of using it until it gets too clogged or something.

   Here's the finished floor between the rotunda going into the great room.  We weren't allowed to walk into the greatroom since that was freshly applied that day so if a top coat is going to be applied, it hasn't been applied yet.  The surface still reflects light, but it's very diffused with the matte finish, just the way we wanted it.  We installed some wood floors in our current house that came with a factory applied satin finish and found it to be pretty glossy.  Many brands of wood floors advertise the hardness of their finish, adding in aluminum oxide compounds to increase the wear resistance.  While it may be true, dropping a metal utensil can still damage the finish as the wood fibers below the finish get crushed, creating a bubble between the two.  Resurfacing of a factory applied finish is difficult because you need to sand off the entire finish and reapply a polyurethane that will not be as durable as the factory finish.  With the wax/oil finish, dings become part of the floor and can easily be concealed with a reapplication of the wax/oil local to the damage.  This house will be lived in so we're expecting damage so hopefully this finish will suite our lifestyle.

   Here's a view of the great room from above.  There's some variation in the color of the floors due to the type of wood represented on the surface.  Sap woods, wood closer to the bark, will appear lighter while heart woods will stain darker due to the different absorption rates inherent to the wood.  Even still, there's not much variation between the two, with some places in the house having a larger variation.  I'm absolutely in love with the color of the wood, but I'm hoping that it won't easily show dust and dirt.  Judging by how easy it is to see the dusty footprints currently on the wood, I wouldn't be surprised if frequent cleaning is necessary.

   The floors in the dining room were fairly recently coated, but the finisher said that if we don't drag our feet, we can carefully walk across the floor.  You can see a little more variation in this floor, but it's not distracting.  They installed the receptacle plate above the built in, but the door bell still needs to be installed. We're planning on integrating in the door bell chime to the Control4 system so we'll be able to hear it wherever we are in the house, including the gazebo.  We won't be able to integrate the doorbell until we have all the gate controls installed, and I'm not sure when that will happen.  Maybe a physical doorbell can be installed in the interim.

   The rotunda flooring was recently waxed so we had to be careful stepping over it from the foyer to the stairs.  The stair treads were stained and polyurethaned earlier this week but there's some issue with obtaining an even absorption on the highest three treads, so there's still some work to do there.  The painters also need to come back in to make a few more touch-ups around the house and paint the risers and stringer of these stairs.  I didn't go into the basement this trip so I didn't take a look at the stairs leading down, but I would think they would be in the same state.

   The study was another room that was recently coated so we couldn't step foot in there, but we could open the door and take a quick picture.  Even with the room closed, there's only a faint scent to the coating and it's not really offensive at all.  It's good because when we need to refresh it in the future, we'll actually be living in the house, so being able to tolerate the process is a good thing.


   The second floor was completed earlier in the week so there was not risk of damaging anything walking around up there.  Here's the second bedroom that sits across from the master bedroom in all its finished glory.  Unless there are some minor paint touch ups in here, there's really nothing left to complete in here.  All the floor has been laid, tile grouted, and hardware installed.  Finishing this house is becoming a reality.

   I think the floors in the master bedroom was the third area finished on the second floor.  There's still some craft paper on the floor since we still need to receive shipment of the two medicine cabinets but that's all that remains in the master suite.  The wall plates in the master closet were paint matched to the walls but there are some minor touch ups to the paint still required.  Of course, there's still tub and feature wall in the master bath to install, but that won't happen until after move in.

   Here's the bed side of the master bedroom.  You can see the vacancy in the wall of the master bathroom that will be populated with the Robern Medicine cabinets.  I think they're still a couple of weeks out from delivery and apparently don't have an effect on the final inspection.  The Sound Vision scheduled a walk through for this Friday, where I think we'll talk about the light switch implementation and any tasks that still need to be completed.

   The last handles on the dummy drawer fronts were installed in the master bathroom.  After the medicine cabinets are installed, the master bathroom will be complete for move in.  We'll get the tub later in the year when our finances calm down a bit.  Now that we have more bathrooms, it's no imperative to have one in the master bathroom, but we do like to take the occasional bath.  All that's needed is to install the fancy tile on the curved wall, hook up the fixtures, and install the bath tub.  I'm glad they added the dummy hardware because it adds continuity to the face of the drawers.

   Other touch ups around the house were apparent in every room we were in.  The mudroom bench had all the nail holes filled and color matched to invisibility.  Most of the paint issues around the house have been addressed.  The separation between the crown molding and ceiling here in the laundry room has been filled, hopefully never to return.  We'll have to monitor these things throughout the seasons to see if things continue to expand and contract and I'm hoping that it was just a one time thing and we'll reach some stability.

   The paint touch ups in the girls room were completed and the only thing we need to install in here, as with the rest of the house, are the door stops.  Paint touch ups were minor in here and there was no separation between any windows or surfaces.  We've started measuring and planing the layout of the room and the girls will be graduating up to twin sized beds with better mattresses.  We'll make sure to include them in the decorating of the room so they can really make it their own.

   Another angle of the turret bedroom. We're planning on putting the two twins in the corner on the right with a corner piece separating them.  We contemplated placing the beds perpendicular to the walls but found that it really took a bite out of the room.  We still have that option later, removing the corner piece or even building lofts so they can have their own private space should they feel the need.  The ceilings are 9ft high so it would be pretty easy to fit lofts.

   That's about it for this week.  We're seriously at the end of the primary building phase.  I use that term because we still need to implement the powder room, tub in the master bathroom, elevator installation, basement finishing, and landscaping so even though we'll be moved in, there will stil be updates to this blog as we continue into the future.  This Tuesday should see the fireplace inspection with Friday being the final inspection.  Hopefully everything will pass with the final inspection and we'll get our Certificate of Occupany.  We've completed the intial junk purge from the old house and will have some more things to throw away as we go room to room packing and cleaning.  Initial contact with realtors to sell the old has been made and we have a working time table for moving, renovating and selling.  If we can obtain the COO right away, we can try to push to move by the middle of next month, removing things that we don't want in the initial house listing photos and augmenting the staging as the realtors see fit.  It will be a delicate balance that will require laser accurate timing to pull off without a hitch, but will be worth it in the end.  Almost there...  Almost there.

Monday, February 19, 2018

Finishing the Floors: Barred From Visiting

   Although we're just only rounding the corner on February, if feels like we're beginning to see the light at the end of the winter tunnel.  After a good dumping of snow the previous week, temperatures will be a more mild 40F-50F with rain expected in the forecast.  It will be a good time to make sure the basement stays dry during the rainy season.  Just like the changing of the seasons, we're almost done with the house construction.  All touch up painting has been completed and we're not in the final floor finishing stages.  It's a bit trickier than expected (of course) but at least the floor installers are in there every day during the week.  It's the last step before we file for the final inspection and can really start to think about moving in.  Since the floor finishing is so time consuming, Mike requested that we not visit the house this week to keep down on the dust entering the house.  As such, the only pictures I have for this weeks update were two that he took last week, so this will be the first weekend in nearly three years that I didn't visit the house.

   Mike said that the installers have finished the floors in the turret bedroom and master closet, but it looks like they also did most of the second floor rotunda.  I don't think anything has been finished on the first floor, but the floors down there have been cleaned and prepped.  Much of the issue they've encountered so far stems from the pre-treatment and getting the floor coloring to look even with the pores of the floor opened up.  I really want to swing out there when the floors are being worked on so I can watch the technique and record what product they're using.  They're masking off the painted surface of the baseboard trim and polyurethaned wood of the railing when applying the finish.  I think the finish is non-tinted, and just a finishing coat, so I'm not sure what affect it would have on those two finished surfaces.

   Here, you can see the difference between the coated and uncoated floor.  I'm not sure about the application process and why they masked off the floor.  Maybe they wanted to demarcate the floor where they were stopping for the day or something.  You can see the difference between the darker, rich colors of the floor on the right vs the lighter colors on the left.  The reflected light from the laundry room seems to confirm that the finish is matte and the darker planks closely match the stain on the rotunda railing.   They worked three days last week and I think the whole house was prepped and probably half the second floor completed.  They still need to finish the master bedroom and second bedroom before moving to the first floor where they'll have much more square footage to complete.

   Unfortunately, that's it for this week.  Although I haven't visited the house, from the security camera views, I can see that the doorbell hasn't been installed yet, so I'm not sure if the electrician has made his final visit.  I'll probably stop service on the port-a-potty this month so we don't have to pay for another month of service.  That thing as been with us for three years and predates the house.  I won't miss it.  We also have a dumpster at the old house so we can purge all the junk in the basement we'll no longer need and don't want to move to the new house.  Old furniture will be donated, but there's flat pack desks we won't need, stuff we literally haven't touched since we moved in over 10 years ago.  It will be a ruthless and cathartic experience, but will give us a new prospective and fresh start.  Next weeks update should have all the floors completed (hopefully) and maybe even a final walk through before we start moving stuff in.  This project is finally winding down to completion.

Tuesday, February 6, 2018

Foyer and a Clean Floor

   Winter hit back with a vengeance after teasing us with spring like weather.  The forecast for the next week has temperatures below freezing with a few inches of snowfall today and some later in the week.  I made sure to take my big snow shovel out with me to clear some of the snow up near the house.  It was good that I did, but turns out, Mike hired someone local to take care of plowing the driveway.  I got the front of the house cleared and he took care of the long drive to the street.
   The finishing touches continue to me applied throughout the house but we're finally getting out of the final installations of the floors.  The foyer tile was laid but still needs to be grouted and the turret bedroom finally has its wood floor installed.  Signs of floor cleaning are evident throughout the house so once the painters finish with the touch ups and repaints, the final finish on the floor can be applied and we can finally be done.

   Castro and his tile installers made quick work of the foyer during the week and cleared out their tile cutting saws since the were no longer be needed ever again at this house for as long as we own it.  They delivered on the design as planned and did a great job with the implementation.  You can't tell that there's a slight variance in the white border tile between the left and right side and the angle between the wood floor and tile interface going into the rotunda is difficult to spot.  The only way you can pick up the slight dissymmetry is at the white tile basket weave tiles on the angles.  A very slight difference only a very observant person could make.

   Here's what the foyer looks like.  The grout will be light colored so what you're seeing here is pretty much what it will look like when the grout is applied.  We finally get to see the foyer in all it's finished splendor.  The tile has a polished finish so I'm not sure how well it will grip with wet shoes, but we'll probably need to have some kind of door mat or something on both the inside and outside.  There's a white metal supply register in the floor to the left of the door so that's not a great place to put a shoe carpet, but the door swings to the right so that's not a great place either.  Chances are that we won't be swinging the door full open so we'll probably end up putting guest shoe storage on the right.

   Here's a closeup of the transition between the foyer tile and the rotunda wood floor.  I thought they were going to put a strip of bronze metal Schluter between the two, but it doesn't look like it was installed.  The Ditra is used between the tile and wood floor in the bedrooms, so I'm not sure if it's more of a structural thing or appearance thing.  If the primary concern is appearance, then this looks pretty good.  The joint is tight and even with very little gap.  The Schluter is used more often between the tile floor and carpet transition, where there's risk to the edge of the tile next to a soft surface.  Maybe it's not needed in this application.

   One of the good things about having the tile installation delayed in the foyer is that the tile can be laid to exactly match all the baseboard molding designs.  This block was installed as a decorative termination block for the baseboard and shoe molding.  Speaking of which, the shoe molding is installed in the foyer.  I'll have to look back to see if it was already installed and the tile was installed to meet it or if they installed it after the tile was laid.  Kind of odd to have the shoe molding in before the grout is floated, but it shouldn't cause any troubles.  The way the tile design follows the moldings is a really nice touch and screams custom build.  Similar attention was paid to the door moldings around the office door.  The strip of walnut molding is just a place holder for the shoe molding that will be installed in front of the door to finish off the tile to door transition.

      Elsewhere in the house, the wood floor is being cleaned in preparation for the final oil/wax finish.  All the extra building materials and tools have been consolidated to the greatroom.  The majority of the construction dust has been cleaned up and there's evidence of floor scrubbing in some parts of the house.  I saw a mop and bucket, but there's a special soap that's supposed to be used to clean the floor and I'm not sure if that was used or just water.  The floor looks mostly clean, but it's not a pristine clean that you get from a newly installed floor, such as that in the turret bedroom.  I'm hoping that there's more cleaning to do or that the final oil/wax finish will remove the slight haze that's on the floor.

   Alco glass came during the week to install the glass in the cabinet doors.  We decided to use the water glass over the seeded glass since it matches the glass style in the butlers pantry.  Four cabinet doors in the kitchen and 12 in the butlers pantry got this glass.  It obscures the contents of the cabinet, but probably not the color.  I'm still not sure what we'll put in these cabinets, but since the glass does a good job of obscuring the shape of whatever's in there, I'm pretty sure it won't be used to decoratively display anything.

   The corners of the glass panes are curved off to match the curve on the inside of the cabinet door.  This didn't end up costing as much as I through it would, so rather than squaring off glass recess, we just went with the curved glass.  The glass is held in with silicone, which surprised me.  I'm not worried about the holding power of the silicone, but I though there would be window glazing pins inserted or something.  Silicone will prevent the glass from rattling and should be easily removable if we need to replace the glass.

   All the cabinets in the butlers pantry have a glass front and they're all now installed.  I think we're just going be putting various serving glasses in these cabinets so the water glass provides the perfect amount of obscuring.  Good thing the strip light was replaced with the puck lights because I would be worried about installing them after the glass was in place.  The in cabinet lights come on with the under cabinet lights here to simplify the controls.

   Here's another look at the butlers pantry cabinets with the glass installed.  One note for people looking at using inset cabinet doors:  There's no stile between the doors so the slight gap between will allow light through if you have interior lighting.  The glass is smooth on the outside and textured on the back side which is determined by how the glass is made.  They probably float the molten glass over a water textured cooling table so the glass is textured by the table and flat due to leveling.


   The wood floor has finally been installed in the girls turret bedroom.  It's the last room in the house to get the floors installed, so when the grout is floated in the foyer, I can officially say that we're done with flooring install!  This room probably has the cleanest floors too since touch ups haven't been completed in here and there shouldn't be any drywall sanding as there was in other rooms in the house.  the only equipment left in this room belongs to the painters, one of whom was working on the Sunday afternoon that we visited.  He was reinstalling door handles after they repainted all the interior doors to remove paint drips.  I think there will be the least amount of touch-ups required in this bedroom so the floors shouldn't pick up much dust.

   The floor installers finished early enough in the week for Distinctive Designs to install the shoe molding in this room, which completes all the molding installation in the house, except for the piece at the front door.  The picture is a little blown out, but there are nail holes from the pin nailer used to install the shoe molding that need to be filled and painted.  As is the norm with Distinctive Designs, the installation exceeds our expectations.  The miters are tight and the curve of the turret is matched perfectly.

   A minor note, I don't think the electrician came back last week, but we must have missed the swap out of the white sockets and plates  for the gray and stainless plates in the master bedroom dividing wall.  Either the electrician did it, or Mike did it, since you don't really need an electrician to change a wall socket.  This was a minor nitpick item that Tanja caught and asked Mike to do, which he got done without a second thought.  Chance are you won't see it since it's going to be behind a TV eventually, but it's a detail that Tanja wanted implemented.

   Another item on the list of "minor things that needed to be completed" is the installation of the deadbolt on the garage entry door to the house.  It's from the same Emtek lockset as the rest of the interior and exterior door handles around the house so it matches the look at finish perfectly.  the knob has a short throw, moving maybe only 25 degrees in the arc to securely latch the bolt with a satisfying "thunk".  There's no play in the bolt handle and it feels solid overall.  Overall, I'm very satisfied with the quality and feel of the Emtek hardware.

   Another first for the house: first time parking my car in the garage.  The garage has been cleaned of extraneous packing material and tools so I thought it was a good time to get in there and test out the fit and chargers.  The PEV meter will be installed this week, but the circuit is energized, so I can plug in my car to validate the installation.  Unfortunately, the dedicated charger is still set at 12A and the fuses are missing from the 50A 14-50 plug, so I couldn't validate much.  Both the portable and dedicated charging cables are more than long enough to plug into when pulled head in, in the single bay.  I could back into the double bay and still have the cables reach, but I'm not sure that's possible in the single bay.
   Pulling into the single door bay of the garage feels a little tight, but I don't have much experience doing it so it's probably just my perception.  I pulled in as per my normal procedure, look in the rear camera and stop when I'm past the garage door rails.  It's what I have to do in our current garage so I can get as much walking space in front of the car as possible.  Doing the same thing in this bay yields probably about the same results since we have stuff against the back wall in our current garage.  The double bay spots add a couple of feet to the depth and I won't normally be parking in the single space so there should be plenty of room.

   The other fitment test for the garage is clearance to the Falcon Wing doors.  I requested that we get the garage door rails installed as high as possible for the maximum clearance of the doors and it might be a bit overkill.  The rails are at the same height in both the single and double bay doors and they're way above the Falcon Wing doors at full extension.  The roof sensor didn't even detect the ceiling of the garage and open at less than full extension.  I didn't try to open the doors with the garage door open, so I'm not sure if the car will detect the garage doors and open at less than full height.  I'm not in the habit of driving with the doors open but I think they might not clear the garage door opening themselves in t he fully open position.

   So that's about it for this week.  Next week should bring more paint and finish touch ups, but I'm not sure when we'll see the final application of the floor finish.  The stairs still need to be painted and stained, which will happen after all the touch ups are done, and before the final floor finish, so that's a good indication for when we'll be completely done.  The greatroom fireplace still needs some adjustment and the mudroom faucet still needs to be swapped out, but all the lights have preliminary programming and everything is finally functional.  It's getting really close to being done.


Thursday, December 21, 2017

Accessories, tile, and floors.

   Still in the icy gasp of winter, we gained a good snowstorm over the last week, dumping 6-8 inches of snow on the house.  Thankfully, that didn't stop the tile and floor installers from coming to the house to do their much needed work.  This week saw progress on the remaining tile backsplashes as well as the start of wood floor installation on the second floor.  Installation of bathroom accessories makes the house feel one step closer to a legitimate living space, something we don't even have in our current house.  Nearly all the cabinet hardware is installed but we're still waiting for some of the pieces to be delivered.  One more week until Christmas, but there's the time between Christmas and the new year when a lot can happen.  Finishing tasks are winding down, but there's still some large items left to complete.

   The replacement exterior light for the barrel vault at the front door was delivered to the house.  We needed to get a replacement because the original didn't include a yoke to mount the light from above.  We also decided that the yoke installation would place the light too low, so we went with a simpler rod hanging mount.  Margaret thinks it will still be a little low, but we'll see once it's installed.  I should be able to shorten the mounting rod if it's an issue so I'm not worried about getting that perfect height.

   The fixed Framburg sconces were also delivered.  If you'll recall, the glass wasn't fitting properly in the light and it was determined that the correct glass base wasn't installed.  We could have either reordered the light or sent them back for repairs.  We chose the later option since the former would have been another 4-6 week turnaround.  I made sure to check these myself and found them to be correct.

   The foyer sconce location as its drywall patch but needs some mud patching and painting before it disappears.  Hopefully that won't take long so we can finally see what these things look like properly.  The Sound Vision and the electrician should be visiting the site this week to finalize all the electrical installations.  I know I've said that before so I'm really hoping this will be the last time we'll need to have them back on site.  Some line voltage rooms still need to be connected to the basement panel and many of the lights need to have the finished programming performed before we reach preliminary functionality.  After we move in, we can call Sound Vision back to start setting up scenes and multi function buttons.

   More wood floors were delivered to the house and are staged in the office.  An additional 300 square feet of flooring needed to be ordered to complete the second floor.  The installers didn't want to start the work until the additional material was delivered so they could mix the contents of all the boxes as they installed, just in case there were color deviations in the boxes they could distribute across the entire floor.

   The dining room is also being used to store some of the wood floor for the second floor.  Additional boxes are already on the second floor near the fireplace.  It's difficult to judge how much area these boxes will cover, but we have the three bedrooms and the rotunda walkway to cover so I'm hoping we won't run into any more delays with this installation.  Nearly all of the plumbing and tile work is completed on the second floor so  there's no reason why we shouldn't see the completion of this  by the end of the week, as long as everyone shows up every day to work.

   The backsplash tile in the kitchen is completed... well nearly completed.  All the tile that's installed is grouted but there's a small gap between the top of the tile and the ceiling, behind the cooktop.  Mike said they need a few more sheets to finish this part off and then we can finally get the hood installed.  I really like how the backsplash turned out despite all the turmoil with tile direction.  I don't think it's too trendy and I think it will age well, hopefully never needed replacement.

   Here's a closer look at the tile with the grout installed.  We used some kind of a white grout, but there were so many variations of white, I'm not sure which one it was.  The grout lessens the the definition of the tiles so that the only obvious visible lines are the darker tiles.  I think there's a bit of grout at the bottom of the tile up against the soapstone counter.  I didn't touch the corner between the two, so I'm not sure if it's caulk or grout.

   The fridge and freezer still need to be installed because the plumber and electricians weren't on site last week.  Hopefully this is something that will be completed in the coming week.  Here's a look at the entire kitchen with the backsplash installed.  The lights will be adjusted this wee and the hood should start to be installed now that most of the tile is up.

   Here's a view of the kitchen backsplash and the little bit that needs to be completed.  The pipe sticking out of the wall is for the pot filler.  I'm hoping the rest of the tile will come in quickly because we can't fully install the chimney that will cover the pipe until that tile is in place.  Since the stone is natural, we'll probably have to seal it occasionally with sealer to help protect against grease splatters from cooking.   Hopefully the powerful hood will help take care of some of that.

   Here's the other corner of the kitchen with the ovens, dishwasher, and sink.  All the tile here is installed and grouted, mostly completing this part of the kitchen.  The appliances are still not powered on, but I'm not sure if that's because they didn't turn on the ciruit, or if it still needs to be wired up in the panel.  Really all that's left for most of the kitchen is hardware install and glass in the upper cabinets that flank the sink.

   Even though we're still waiting for the hardware in the kitchen, the hardware in the butlers pantry has been installed.  Like the kitchen, we have two kinds of hardware installed in this area, knobs for the doors and handles for the drawers.   Finished in a brushed stainless steel, the knobs are a little chunky with a light ripple on the surface.  The ripples are oriented horizontally but could also be turned vertically.  I think horizontal works better with the cabinets and wood grain direction.
  The handles are the same brushed stainless steel material and fairly simple in design.  They're basically tubular handles with a little profile to them.  Nicely rounded, they feel great in the hand and soft to the touch.  No hard edges to really catch anything on, I think they offer a nice compliment to the clean hard lines of the shaker cabinets.


   The mudroom hardware has also been installed.  We went with more of a craftsman or arts and craft look here with the visible  through mortise and square pins holding the pieces in place.  We wanted something a little more utilitarian looking in here since the purpose of this bathroom is such

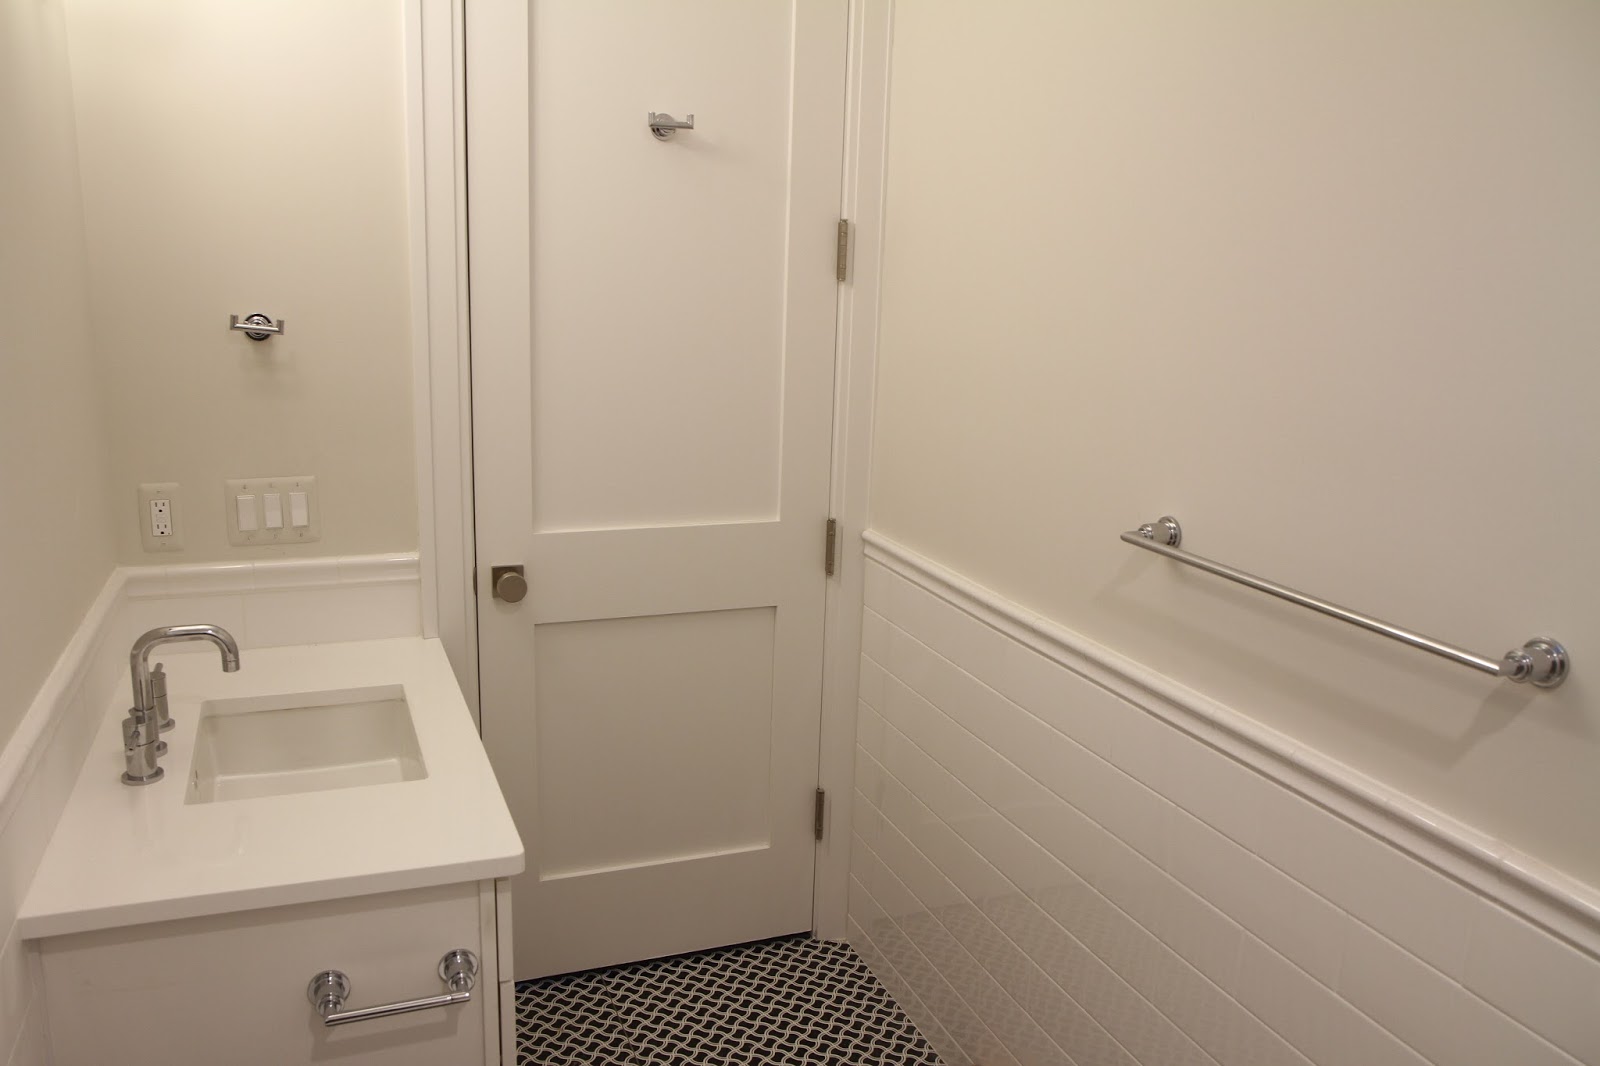
   All the bathrooms now have all the bath accessories installed.  Most of the bathrooms have the same style accessories except for the master bathroom.  We went with a more simple tubular design, which matches well with the various sinks around the house.  These match especially well in the guest bathroom since we're using a three hole faucet in a similar style.  In general, we got towel bars, toilet paper holders, and a few hooks placed around each bathroom.  All the door knobs have also been installed around the house.  I think every door is now populated with the Emtek doorknob, but we'll still need to sort out door stops.

   Wood floor installation on the second floor has begun with the longest section on the floor.  As with the first floor, the longest section is installed first so it can be guaranteed that the floor will be straight and contiguous through all the rooms it goes through.  If you started installing using one room's wall as reference, it might not end up being parallel with another room's wall, which would be glaringly obvious.  Since we don't have to worry about putting a nail through the floor's tongue, the floor can be installed in both directions.  There isn't much flooring to be installed in the second bedroom, but the installers do have to contend with the angular and curved walls so it's not a simple installation.  The planks have to be installed within at least a half inch of the baseboard so the shoe molding can cover the rest of the gap.  As with the rest of the house, it's a glue down, so there's no need to worry about expansion and contraction.

   There are 6 courses of flooring laid in the second bedroom upstairs but it looks like the floor is cleaned and prepped.  I'm hoping they'll be able to make short work of the second floor, but from experience, they don't seem to come to the site to work every day during the week.  If we could only get them here on a regular basis, I'm sure the floor would be finished quicker.

   The rotunda landing is finished up to the greatroom overlook and connects the flooring from the second bedroom all the way into the master bedroom.  The rotunda floor has been cleaned and there might be some new leveling compound on down.  It will take a little more time to work on the rotunda since there will be short installed sections involved between two curved borders.  Straight cuts, even on an angle, are easier to make than curved, but at least it doesn't have to have finished carpentry level accuracy since the edges will be covered by a shoe molding.

   There are 12 courses laid in the master bedroom.  They'll have to carefully lay the flooring around the dividing wall and pick it back up on the other side.  If there's any deviation from parallel, there will be gaps in the floor.  The wood floor in the master closet required a riser molding from the wood floor to bathroom tile transition.  I'm pretty sure we'll have to have something like that in this room too since the tile build up was much more than the thickness of the wood floor.  Maybe if we didn't have the in floor heating in the bathroom, the two floors would be flush without any height transition.  It's not much of a transition; less than that of the stone thresholds we have in our current house, but it's not as smooth as the other rooms.

   The bed area of the master bedroom is currently being used as the cutting station for the second floor.  I'm not sure if they'll try to finish the master bedroom before moving onto the rotunda hall and turret bedroom, or if they'll keep this as their cutting area and finish all the other rooms first.  I know Distinctive Designs is itching to come in and finishe the shoe molding.

   The second bedroom also has all the bathroom accessories installed.  We opted for towel hooks next to the sinks rather than towel rings.  It's a definite improvement from our current "leave the towel on the counter" method and we'll have to buy a lot of new linens to populate all the new bathrooms.  It's nice to start out with all the bathroom accessories already installed.  In the 13 years since we've bought our house new, we just barely managed to install hardware in the kitchen, let alone towel racks in the bathrooms.  I wonder if I'll need to install something before we move out.

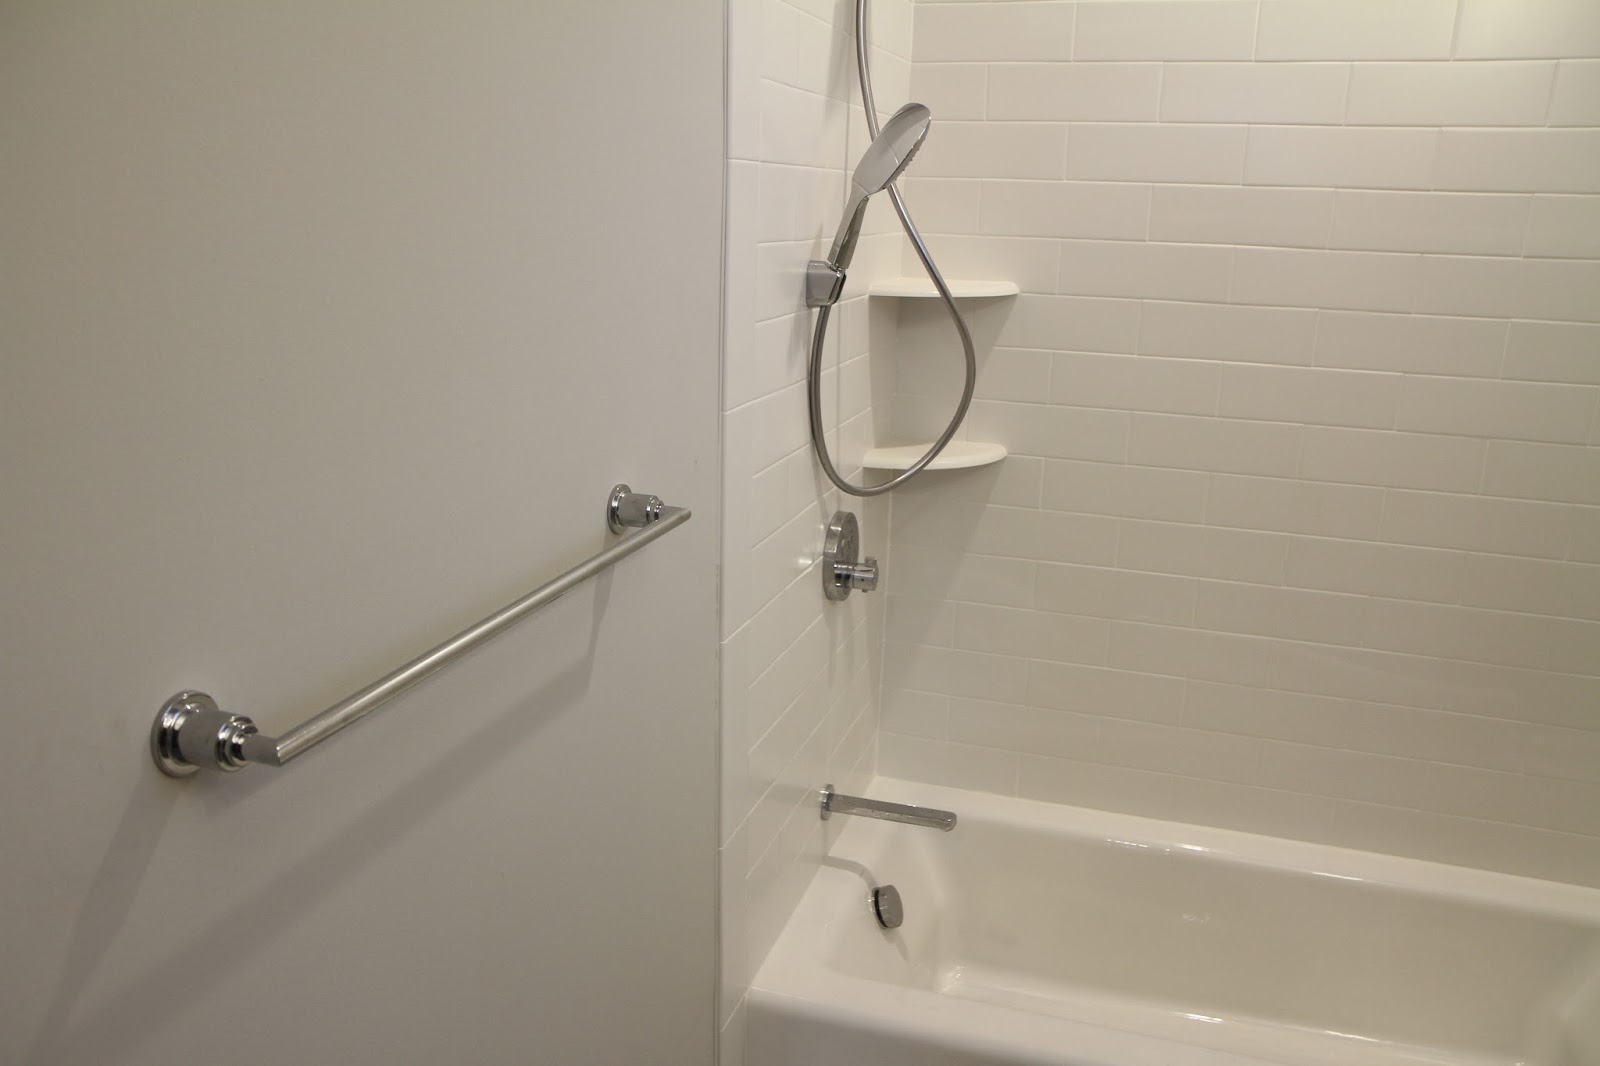
   This bathroom also has a towel bar large enough for one towel unfolded or two folded.  We've still decided on shower curtains for the two upstairs bathrooms, until the kids get older, but we've gotten quotes for the guest and mud bathroom shower doors.  With all the additional building costs, those will have to be something that's installed a bit later, but definitely on the agenda.

   The location of the toilet paper holder was a little difficult.  I wasn't sure if I wanted it on the side of the cabinet next to the toilet or across from the toilet in the wall.  On the side of the cabinet, it's a little bit of a twist to reach.  It's easier to reach when it's attached to the opposite wall from the toilet, but then it juts out a bit into the main walking space of the bathroom.  You can get semi flush toilet roll holders, but they're not as nice looking.  These are nice because to don't have to deal with spring loaded toilet roll holders.  Once side is hinged and the rod swivels up.  No more excuses for leaving an empty roll on the holder.

   The master bathroom has more hooks than I know what to do with.  Each side of the vanity has two hooks installed on the wall.  Maybe one for a robe and one for a hand towel?  We didn't get a hook installed on the side of the tower cabinet, which would be a good place for a hand towel, but we can always install something later.  We have to be a little careful with opening the cabinet doors in the tower because they can hit the hooks.  Margaret said we could install hinge limiters so the likelihood of damage is less.

   Towel bars are present at each of the shower entries.  The one not pictured is a little farther away from the shower door since the water closet is just adjacent.  In our current house we just drape our towels over the edge of the bath tub.  It will be nice to have a formal place to hang our towels.  We didn't opt for a towel warming or anything fancy.  It's not something we've really experienced, so it wasn't high on the list of things to install.  We've never really had a problem with our towels being particularly cold.

   The laundry room got a bit of bling in the form of these stainless steel tiles.  They're actual stainless steel over some kind of mineral backing tile.  They install in sheets like other small format tiles and seem to cut well.  This laundry room keeps getting fancier and fancier.

   The metal tiles are still not grouted, but I think we're getting some kind of gray grout in there.  It will be interesting to see how they float the grout without scratching up the surface of the tiles with the fine, sandy particulate matter in the grout.  We don't have any undercabinet lighting on these cabinets and we really don't need to.  There's a ton of natural light in this room and more than enough overhead lighting.  The metal tile does offer a reflective surface to help shine light on the counter top, so there's really no need for undercabinet lights in here.

   The turret walk in closet got the same bubble glass knobs that are in the adjoining bathroom, installed, completing the closet in here.  I think of all the spaces in the house this is, unfortunately, the most awkward one.  The closet isn't large enough to have the door swing flat to the wall and it makes accessing half of the closet difficult.  A pocket door might have solved this, but we have a bottle nook in the wall to the left and not enough wall on the right.  The girls will just have to learn to live with it.

   The basement is being used as a painting center for the shoe molding.  Not all the molding is pictured here and with all the wood floors in the house, there will be a lot to come.  It will install pretty quickly, but there's so much of it, it will still take some time to get it all installed.  I think it will be installed before the final wax/oil finish on the floor and will signal the end of all the flooring installation.

   That's about it for this week.  Next week should see the final installation of all the electrical features with both the Sound Vision and the electricians coming in.  The rest of the appliances should be installed and hopefully more tile and flooring will be completed.  Unfortunately, the foyer tile is on back order and not expected to arrive until January, so we'll have to install something temporary to obtain COO. Every week brings us much closer to move in.  I'll probably rent a dumpster over the break to begin the house purging and prepare for the move.  When the time comes, I'll probably take some time off to get the house moved and we can finally close this chapter of our lives.