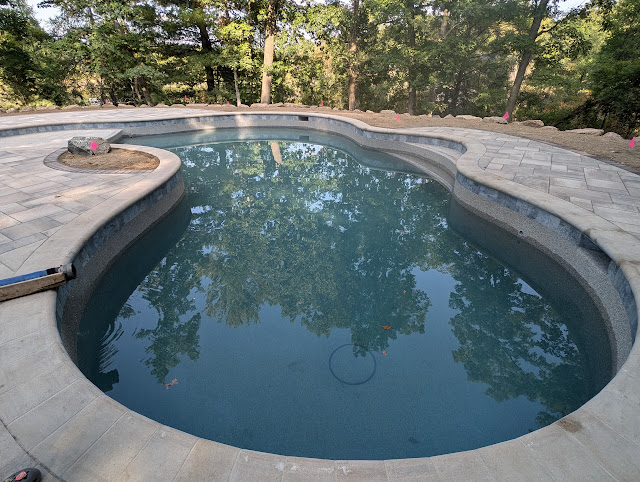
Sunday, September 29, 2024

Containing the Pool


   Fence install began later in the week with the delivery of supplies.  The installation began in earnest the day after and will probably take a few days to complete.  The installers are using a stand behind dozer to move material around.  It also has a auger drill attachment to drill down for the fence posts.  The fence is around four feet high, so maybe it will act as a minor deterrence to the deer that like to feast on our landscaping.

   Here's one of the pallets of fencing that was deposited in the back yard.  The larger boxes contain sections of fence and the smaller ones are obviously the fence posts.  The posts are secured in the ground with concrete, which I think is being deposited dry in the holes and saturated with water to set.
   Here's where the fence joins up with the corner of the garage to enclose one side of the yard.  It's not attached to the house itself, which is nice.  The fence is made of powder-coated aluminum and closely matches the railing around our deck.  Instead of a handrail at the top, it has a double top rail.  I'm happy with the look.
   Here's the long length of fence along the side of the yard.  It makes me a little sad to enclose the yard and have a fence running through the woods.  It's not much of a physical barrier since we'll have multiple gates, but separating the house from the forest creates more of a mental barrier.  It's a necessity in my state, so it has to go in, and it's visually better than just fencing off the pool area.
   We'll have a double gate here so we can easily blow leaves out of the yard, into the forest, to be naturally processed.  I'm always amazed at the amount of leaves we collect in this area every fall, which quickly decays into the forest floor.  While I do mulch in some of the leaves into the lawn, I'm glad we don't have to have the leaves taken away by truck, like other houses do.
   By the end of the second day, the fence is nearly completed.  All that's left for the last day of work is to complete the circuit near the back corner of the house and hang the gates.  We'll need to have the door alarms in place before the inspector comes for final inspection, then our pool installation saga will be complete.
  I've been diligent monitoring our pool water quality every day so far and have been battling high (basic) pH levels.  I think the high pH is due to the curing of the plaster so hopefully it won't always be such a struggle.  Also, I've been needing to add chlorine on a regular basis to maintain healthy levels.  Since the pool mortar is new, we're not allowed to use our saltwater system.  It should be easier to maintain the chlorine levels when we have the salt system running next year.


Monday, September 23, 2024

Finally Swimming

   The day has finally come.  The Jandy rep showed up and, with Eli, performed the last of the setup on the filtration system.  This involved connecting the system to my network, setting up the bubbler valve actuator, turning on the pump and heater, and setting various speeds for the variable speed pump.  The pump will run at one speed while the heater is on, which is specific to the heat exchange rate of the heater and my system.  Another speed for general filtration.  Since we have a variable speed pump, we can run the pump at lower rpms, but for 24 hours a day, to save on electrical cost and wear on the pump.  Lastly, a speed for when the bubbler is turned on, since more flow is required for that water circuit.  The entire setup took a few hours, but in the end, I was left with a fully functioning pool and the kids took no time jumping in.

   Here's the pool at the final water level, after topping it off a bit with the garden hose.  There's a whole 28 day regime I have to do for the warranty on the plaster.  It involves keeping the water chemistry correct, brushing down the plaster, and not using salt in our salt system.  So for this short end of summer swim season, I'll be using chlorine, like a normal pool.
   The water filling company came later in the day to remove their hose.  The color of the pool can vary between light blue to almost a little green depending on how much sun there is.  We're currently setting the temperature of the pool at 80-82 degrees, but also turning the heater off at night, which only causes a 2 degree drop.  The air temperature differential at night is almost 20 degrees from the set temperature, so it doesn't make sense to burn gas trying to keep it at the set temperature when no one is using it.

   The lights are controlled via the iAqualink app.  With the lights we got, there are a dozen preset colors we can choose some and a hand full of color cycling programs.  Although they're RGB LEDs, we don't get infinite color control, which is a little disappointing.  Jandy does sell another system that has a color wheel interface and I'm not sure why they software limit these to set colors.  The other odd thing about these lights is that they have to cycle to the color you pick, so if your desired color is 8th in the list, it always has to cycle through seven colors before it changes to the color you desire.
   The bubbler valve is set up to always pump a little water, to circulate water on the sunshelf.  It's not enough to introduce a lot of air, but it does make a nice gurgling water sound.  When I turn the bubbler on with the app, it creates a foot high plume of water.  The kids love it and it makes a really nice atmosphere in conjunction with the lights.
   That's about it for now.  We got a couple good days of swimming on the weekend with temperatures in the 80s.  It will get a little colder, but still swimmable this next week.  Speaking of this week, we should see the fence installed at the end of the week with the final inspection the following so I have at least one more post for the pool updates.


Thursday, September 19, 2024

Plaster Done. Just Add Water

   Day two saw the completion of the plaster and filling of the pool with water.  The plaster crew arrived early in the morning as per the usual but with a much smaller team of three.  They removed all of the plaster in the settling pond and power and acid washed the pool plaster.  They finished their work right before the water trucks showed up and started to set up.  By the end of the day, the pool was filled with water.  The temperature of the first truck of water was not too cold at 71 degrees so I'm sure we'll be at least taking a quick dip in it tonight.

   Here's what the power washing process looks like near completion.  Most of the pool was washed at this point and you can see the bottles of muriatic acid sitting on the pool edge.  They used a small water pump to remove any water and sediment from the power washing process.  The color of the plaster is noticeably different as the aggregate gets cleaned off.
   Here's how much plaster overage is made in the plastering process.  It was dry and drained when they came back today and they had to use a small jack hammer to break up the chunks for removal.  You can see the plastic and plywood they used to make the settling pond.
   Here's the Eclipse main drain with the plaster protectors removed and the center cap installed.  The trench is a large diameter circle, making it safety compliant since no one part of the body can block the whole drain and cause suction.  It's a clean drain design that doesn't sit up off the pool bottom and cause a toe stubbing obstacle. 
   This is the state of the pool after the plaster crew left.  They also power washed the deck again to make sure any plaster dust was removed.  There are a few voids in the pavers that will need a little more polymeric sand, but I'll probably make that repair myself.  It doesn't hurt to have extra sand on hand too.  I just used the last of my 15 year old sweeping sand I had from a diy paver project at the old hose, to repair my mother-in-laws collapsing paver patio.
   Here's the cleaned pool from the shallow end.  By the end of the day, this will be filled with water.
   When the blue plaster is removed from the surface, the darker aggregate really shines through, darkening the pool when dry.  When it's under water, it will take on a bluer appearance.  I think the more natural colors will be nice in our very natural setting.  Eli sent me a whole 28 day regiment for the initial care of the plaster.  It involves lots of water testing and chemical balancing to ensure the water doesn't quickly degrade the new plaster. 
   Here's the 6" hose that ran the length of the driveway from the street to the pool.  The water trucks are too heavy for the driveway with 9000 gallons each so this was the only option.  They had enough hose, so it seems like they're prepared for something like this.
   For the initial water flow, they installed this loose tarp so the falling water didn't pound the plaster too much.  After the first load was done, they removed the sock and just let the water flow.  Eli estimates at least three, 9000 gallon trucks, with maybe some topping off from the house.  That's how we'll calculate the rough volume of the pool for chemical purposes.
   Here's how much of the pool that was filled after the first 9000 gallons.  It took a good 15-20 minutes to pump the water out of the truck, and maybe an hour or so for the round trip to get it filled back up and pumping again.
   Here's the water level after 18,000 gallons.  We ordered three trucks so it looks like it will fill the pool just about to where it needs to be, maybe a little topping off with the hose for the water present in the pipes.
   Here's the water level at 27,000 gallons, which is right on the money.  We'll be able to use this as the total volume for future chemical calculations.

   One more shot of the pool color with all the water added.

   Tomorrow will see the start up of the pool filtration, heater, and all the automation software connected.  A representative from Jandy will be on site to get it set up and running and I'll start all the initial pool water care. 

Tuesday, September 17, 2024

Plaster Day 1

   Plaster day commenced bright and early on Tuesday and completed before lunch.  The plaster crew was already setting up when I was getting the kids ready for school.  They worked full tilt using two of our hose bibs for water supply and didn't stop until they were done.  Tomorrow they'll return to power wash the surface to expose the aggregate and clean up loose plaster, then water will quickly follow around noon.  It won't be long now until we're finally swimming.

   I counted no less than eight guys on the plaster crew.  One was manning the mixer and the rest were spreading and smoothing the plaster.  They set up a guy line across the pool so their tool hoses could hang from them to prevent rubbing on the newly plastered finish.   They laid plastic tarp over all the patio surfaces to prevent the plaster from adhering to the finished surface.
   Here's the mixer for the plaster and the guy that was manning it.  Three things went into the mixer tub at the top, something contained in bottles in that box, the white plaster bags, and the brown aggregate bags.  After the contents mixed, it would swivel and dump into the hopper on the back, which pumped the mixture through the brown hose to the pool location.  The mixing was super dusty, so he was wearing proper respiration PPE.
   And here's the preliminary results.  Remember, that tomorrow, they'll come back and power wash the surface, so the color will slightly change.  I didn't step on it, but it's all smooth with curved transitions in all the bottom corners and step edges.  The surface is incredibly uniform considering it was all done by hand.
   Here's the shallow end and sun shelf.  Note the flags around the pool.  We had American Lawn Sprinkler come out yesterday to evaluate the damage and lay out the irrigation for the new planting beds.  Luckily, there was very minimal damage.  We'll be able to combine the two lawn loops onto one valve, and use the existing valve for the new bed irrigation loop.  Pipe will still need to be excavated into the landscape, but at least we won't have to worry about adding another valve to the valve box.
   Here's what the color looks like in the sun.  There are still some wet areas and a dusting of plaster on the aggregate, and the actual color will vary with the depth of the water, but this area will be the most shallow and so, closes to the plaster color.
   The close up of the plaster is very close to the color of the sample we initially obtained.  This mixture, called Tahoe Blue, has some glass pebbles for a little sparkle, but not as much as some of the other lines from PebbleTec.
   The plaster was brought up to the level of the tile, making it about half an inch thick.  I'm not sure how they keep the thickness in areas not near a tile but they probably have some method.  All the plaster is hard to the touch, but I haven't stepped on it yet.  Although it will be washed tomorrow, I didn't want to risk contaminating or damaging the surface.
   All the corners of the sunshelf and every step has a radius on it, making it very comfortable to sit or walk on.  It will also help prevent chipping of the plaster.  Speaking about durability, in the past, most pools were coated with only plaster, which provided a very smooth surface, but wasn't very durable.  It was prone to chipping and flaking with age.  This PebbleTec surface should provide improved durability because of the smooth stone aggregate.  The stone is more resistant to damage, but since they're polished, should also feel nice on the skin.  I think the most expensive, but durable, option would have been to tile the entire pool. 
   The pool finish continues into the bottom surface of the skimmer, sealing the concrete right up to the tile.  This area will still be under a little water but might be exposed during the winter time when the water is drained down.  I don't think exposing the plaster to air will damage it.
   The plaster around the pool return fitting is a little rougher than the tiles, but I think there will be another jet that screws into the fitting to clean up the appearance.
   The plaster work around the lights are also a little rougher, but not horrible looking.  Maybe when they power wash happens, some of the plaster and aggregate on the light flange will clean off and make it look more circular.  It's a minor thing though.
   This temporary slough tank was constructed of plywood and tarp.  I think it's used as a settling pond for the washed out liquid and plaster during the plastering process.  It will probably be used to settle out the power washed plaster tomorrow as well.  The water can be drained off and the tarp removed along with all the settled out plaster.
   That's it for today.  Tomorrow is the big day with the plaster being cleaned and water finally getting into the pool.  I'm not sure if the filtration system will be up and running tomorrow, or Thursday, when a Jandy installer will come and set up the automation hardware.  The gas inspection passed today so the gas line can be hooked up to the heater and we can get the water warmed up for swimming.  The forecast predicts some 80F degree weather for the rest of the week, with next week being in the mid 70s, so we'll at least have some swimming weather before the end of the year.


Saturday, September 14, 2024

Pool Electrical Done

   The end of the week saw the completion of the electrical work for the pool.  The gas is still awaiting to be inspected by the city for proper installation and inspections are only on Tuesday and Thursday, so that will happen next Tuesday.  Plaster is slated for that same Tuesday with water in on Wednesday so we'll be swimming by the middle of next week, if we don't mind swimming in super cold water.

   Here's the completed panel.  The wires on the ground are just cutoffs that I later cleaned up, but the rest of the installation is pretty clean.  There's enough space lower on the pylon for a landscape lighting control box that I'll probably install myself.  The little box on the right side is a power transformer.  There are two items dangling from the bottom of the box.  The small white one is a temperature sensor, probably for the air temperature.  The other is some kind of controller box that I'll need to do some research to identify.  The pits at the base still need to be filled in, but I think that will be done after inspection.
   Here's the pool side power outlet.  It doesn't sit too far off the ground, which will probably be brought up a few inches with mulch anyways.  We haven't officially figured out what the edge of this bed will look like, but we have an idea.  The box will be sitting in the bed, which some low plantings around it.  If we do eventually end up getting a pool cleaning robot, this is where it will be plugged in to recharge.  The box is secured with a galvanized pipe on the back, but I'll have to plug up the pipe hole so we don't get wasps making nests in there.
   Here's the conduit that was passed through the wall, demarcated by the painted rebar.  It was used for the bonding wire to hook up to and pass down to the panel.  I might be able to run some landscape lighting down through it before it gets covered so I can have a clean run up into the bed from the electrical pylon.
   Here's what the back of the pylon looks like.  The conduit contains all the pool lighting and runs up to the junction box at the top, where the power from the transformer is provided.  It's all low voltage LED lighting, but three of the lights take 12W and the bubbler takes 24W so the transformer has to provide at least 60W of power for the lighting.
   Here's what the electrical runs look like to the pump and chlorinator.  All the runs are screwed into the pad to keep them clean.  You can see bare grounding wire on both devices, but there's also another temperature sensor going to the pipe between the pump and filter.  Very clean installation.

   Here's the little water temperature sensor between the pump and filter.  It looks the same as the one dangling in the air.  There's a little probe that sticks down into the pipe and an o-ring to keep it all sealed.  The pipe clamp is the only thing keeping the senor strapped down and keeping water in the pipe.  This sensor is used in conjunction with the heater to keep the water at what ever temperature we set it to.

   The only device what wasn't connected was the valve actuator for the bubbler.  I confirmed with Eli that he will connect this, but I'm not sure why the electrician didn't do it.  Maybe it has something to do with configuring if we want the valve slightly opened when the actuator is in the off position or something. 

   This is what the inside of the box looks like.  I have yet to be aquainted with the all the functionalities of the top two devices, but the bottom section is clearly breakers for the various devices.  Right now only the pool side plug is on, and I'm not sure what "Screen" is.  The top left device is the AquaLink is the main controller for the pump, heater, valve actuator, and lights.  The device on the left is the chlorinator controller.  It looks like the chlorinator has sensors for salinity and can control how much chlorine is produced.  It also has a display for sensor life so this will be the thing I monitor closely, in conjunction with water test kits, to maintain good water quality.
   That's it for this week.  Things are almost done!  We'll get a couple of quiet days on the weekend and Monday then work will start up again on Tuesday for the final push. 


Thursday, September 12, 2024

Wrapping up the Big Stuff

   This continue to push forward, quickly to the finish with Eli's crew finishing up all the retaining walls and grading.  Initial gas and electrical inspections have passed and the trenches have been filled in.  Everything is tidy and all the big equipment is gone.  The crew expertly graded everything they touched, not just in the back yard.  The areas around the driveway have been used for boulder storage and a pathway for the heavy equipment.  The Tango Pools equipment trailer has been parked next to the swingset for the better part of a month and the initial dump of boulders have torn up the grass in the street.  Everything was made right with smooth grading and strawmat at the street to help protect the grass seed.  Tango Pools has provided once of the most professional jobs we've experienced at the house and it has been a pleasure to work with them.  It's not all done yet though, as gas and electrical need final hook up and inspection, plaster is still scheduled to go in next week, and we have to get a pool fence and water in before we can finally take a swim.

   The pavers that were removed for the trenching have been repaired and you could never tell they were missing.  The pool side power conduit has been plugged until the electrician comes to run the wires.  All the ground is graded nicely so we can determine where the planting bed and grass will meet.  Lawn irrigation is coming on Monday to provide a quote for repairs and installation of the new bed irrigation.  After they're through, I'll amend the soil with good compost and get some mulch on the beds so we can plant them in the spring.
   The crew got a nice rock in the middle planting bed.  We're planning on putting a nice dwarf maple on the right to add some zen to the pool.  We'll mulch it, so it won't be a rock garden, but there will be lighting in there.
   Here's the repaired section of patio.  Without the presence of extra mortar spill over, you would never know it was missing.  Maybe the pavers are a little cleaner, but it will all blend in when I take a power washer to the pool.
  Here's the boulder wall in the completed state.  We've always planned for some land retention here, and reserve the rest of the space for future construction.  The plan is to get stone steps installed sandwiched between this wall and the walls closer to the house, as the incline is too big to comfortably keep.  I'll grass it to prevent erosion and hopefully we'll soon save up enough money to complete this section.
   A small amount of trench remains so the electrician and gas installers can have access.  The small gray conduit sticking out of the base of the wall is for the pool side socket.  This post will actually be a combination of two days since things are moving so fast.  The initial visit for gas and electrical has happened, so this picture is a day behind.
   There's a painted rebar to denote something, and a copper ground wire sticking out of the ground.  I don't think it's the bonding wire, but the electrician said something about the pool side power.  We'll see what happens to it later.
   So here's where the electrical and gas are currently.  Eli said electrical will finish up tomorrow, making it a two day job and gas is currently pressure testing and will remain like this until next Tuesday, when the city inspector can come and pass it.  The large gray box is the main pool controller box.  It will house all the connections and control board for the pool functionality and automation.  It controls the lights, pumps, heater, chlorinator, and hooks into the little wireless bridge on the upper left.
   The gas pipe is currently pressurized to 16 PSI and it should be able to hold at least 15 PSI until Tuesday when the inspector comes.  After that passes inspection, the gas can be connected to the heater via the pipe at the top of the picture.  A hot water blow valve was installed on the other side in the manifold.  It's similar to a pressure valve on a hot water heater.
   Here are the penetrations in the under deck storage space for the electrical and gas.  Code requires house penetrations to be a certain height above grade and these will mostly be hidden from view by the raspberry and blackberry bushes we're planting in the location.
   Here's a final shot of the entire pool area, final grade.  Plaster will be early next week and water mid week.  Eli said that as per the pool finish warranty, you can't add salt to the system for 28 days.  You also have to have weekly water test performed at a pool company with a print out to ensure the plaster has time to set in a correct water environment.  Since we're so late in the season, that means we won't be using the salt water chlorinator this year, but will instead be using traditional chlorine, before we close the pool.  Next year, when we get the pool water up to 70 degrees consistently, we can add the salt and use the salt water chlorination.  He's also going to put us in contact with a pool maintenance company, which we'll probably use this first winterization.  We'll need to get a cover tarp and it would be good to have the pool professionally closed the first year.  I'm planning on maintaining pool water chemistry and opening/closing myself in the future but it will be good to have it done the first year.
   That's it for now.  Tomorrow will see the electrical completed.  Next Monday will be plaster, Tuesday will be power washing to expose the pebble aggregate followed by water the same day.  Gas inspection will also be Tuesday so hopefully we'll get the system running.  A Jandy automation rep will be around to get everything setup and the pool fence will be in later in the week so the entire setup can be inspect for final inspection.  The end of next week should see everything completed.