Monday, June 20, 2016

Garage ready to pour, still no roof.

    Another hot weekend and a little progress has been made, but not as much as I would have liked.  Work is moving forward on three fronts, front porch roof, greatroom fireplace, and garage slab.  I guess added together, it's an okay amount of progress.  Seeing how it was fathers day, I got some extra time to myself and took the "drone" up to get some areal movies.  If I figure out a good way to post them, I'll share them here.

   Subtle changes to the front of the house, but nothing drastic.  They finished the fascia and overhangs for the curved roof but still need to put up the roof decking.  There isn't any venting in the curved overhang, and that should be fine. You usually only need venting if the space below is conditioned.  I'm not sure why they put venting on the other parts of the porch.

   I found an inspection tag in the garage dated last Thursday, so it looks like the garage slab is good to pour.  Since we'll have good weather this week, I'm hoping they'll get this poured soon.  We've been talking about how we want to finish off the garage space.  In our current house that we bought new, we epoxied the garage floor with a DIY kit and it has held up well for the past 10 years.  This time around, we'll either get the floor professionally epoxied, or install linoleum or vinyl composite tiles, but I've read mixed reviews about the latter.  We would have loved to installed a floor drain in the garage, but I think it's against code, so we didn't push it.

   Here's where the curved roof porch meets the rest, near the door.  You can see the installed fascia and how it still needs to connect to the rest of the roof.  I still have to talk to Matt about how we're going to conceal those straight beams.  It has been a busy week.  


   Here's the same spot from above.  The laminated beams are installed in an odd way.  Since they're sitting on the same plane as the steel beams, they're just notched to mate up and hang on the beam.  I would usually expect to see some kind of steel tie or something, but his might be an acceptable application since the roof load isn't too high.

   Here's the other side of the curve.  They've connected the fascia and overhang on this side so it's a preview of what's to come.  I'm really hoping that they'll get the decking installed this week so we can get the roofers in since we're taking delivery of the cabinets next week.  Cobblestone Cabinets can warehouse the delivery for us for about a month, but that means we need to get a roof, windows, HVAC, electrical, plumbing, and flooring in, in that month, before the cabinets can be installed.  That's a really tall order.  We might be able to push to get the kitchen done but I doubt it.  With windows installed, we could possibly stash them in the basement and they might be secure down there.  It's a pretty safe area, but it still doesn't make me comfortable.

   Last shot of what the finished overhang looks like from the "inside".  There won't be anything in this roof so it will remain hollow.  I'll have to ask Matt or Ken if we need to thermally insulate the ends of the concrete beams since they're sitting in the porch roof airspace, which is unconditioned.  There's a potential for the cold air to leech into the concrete beams and propagate into the turret, which is an already difficult area to climate control.

   Moving inside, here's what's going on with the greatroom fireplace column.  I guess we got the go-ahead to move the posts that support the second floor beam, because they're on the floor right now.  The beam is being supported temporarily by the 6x6 posts, and I guess they'll figure out how to put them into the fireplace column footprint.  That's good news for the aesthetics of the room since we don't need to take up more opening to conceal the posts, both on the first and second floor.

   Here's where they cut the bolts that anchored the post to the concrete.  I don't expect it will be filled or anything since it will be hidden by the finished floor.  The beam welds have already been ground down, but they'll need to reconstruct the fireplace column to accommodate the floor mounting plate for the post.  If this was just a spec house, I think a detail like this would have been overlooked.  In this respect, it's nice to have a custom construction so we can work things out as we go along.
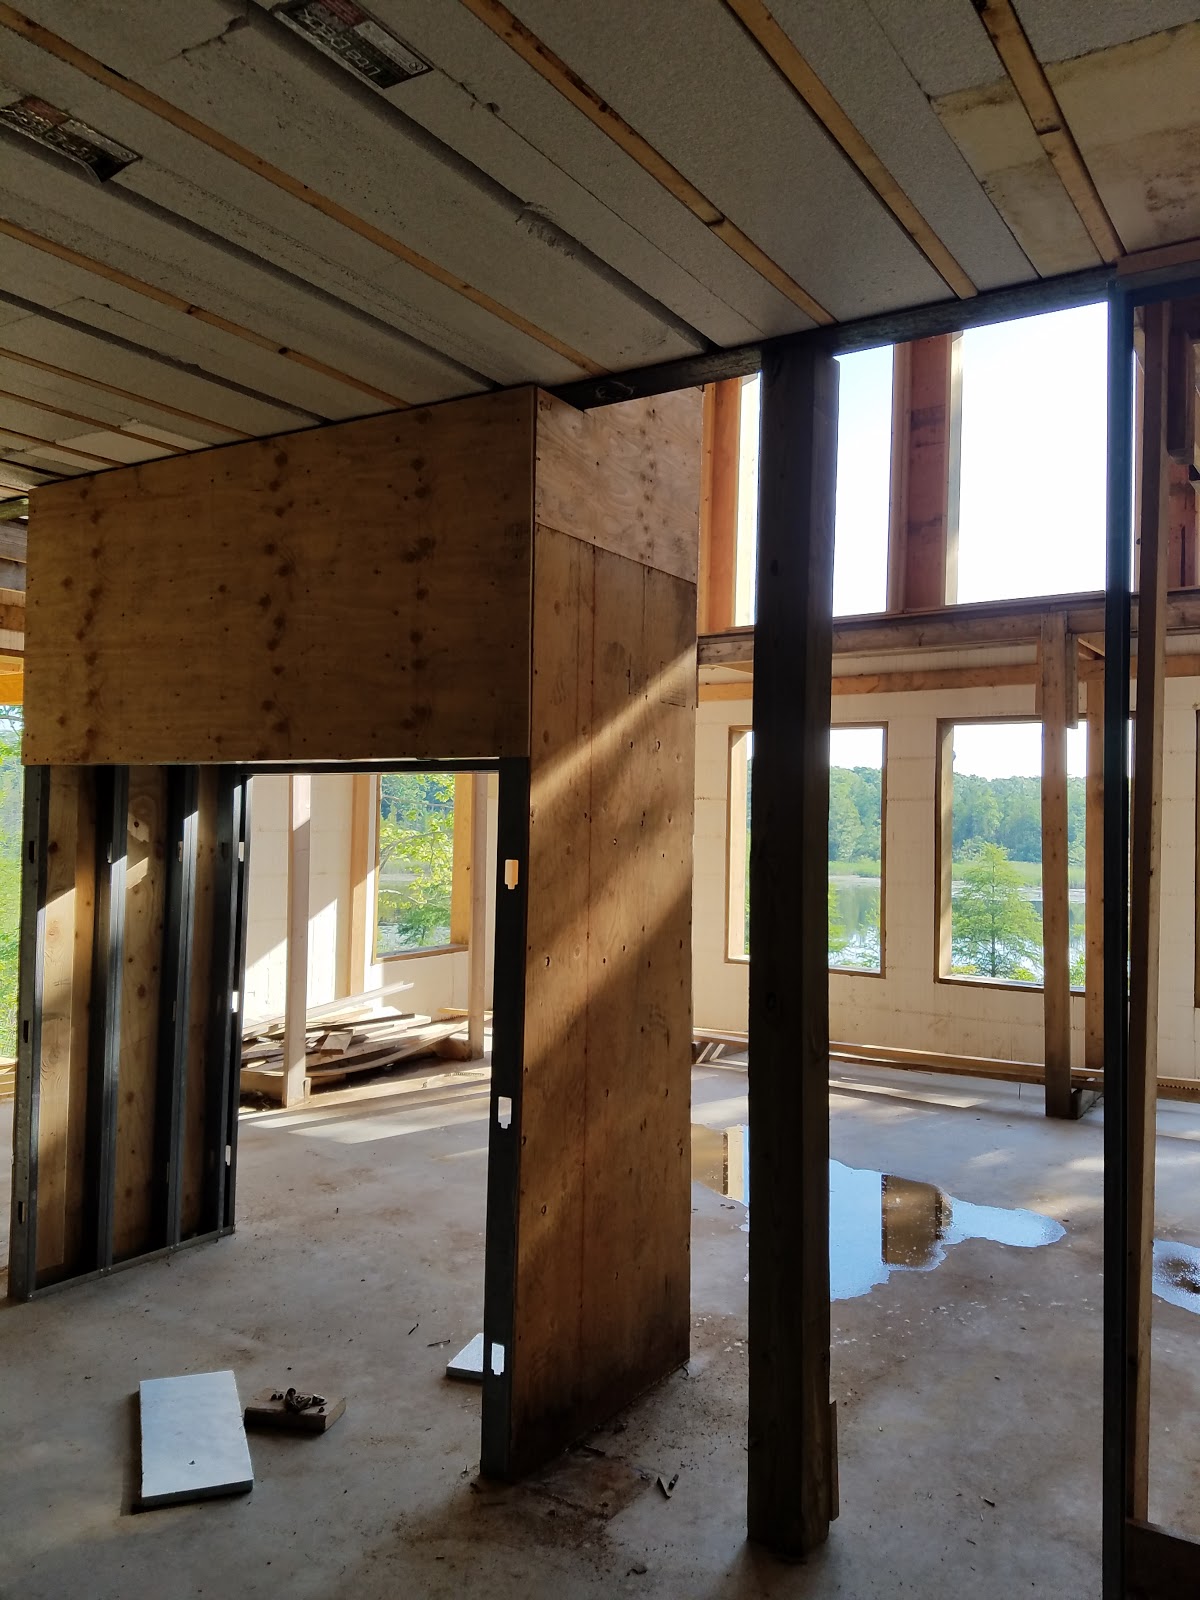
   Minus the temporary post and add a two way fireplace, this is what the space will look like when it's completed.  Since the fireplace doesn't fill the entire space, we can pretty much put the posts anywhere inside the column.  I already gave Matt the specs of the fireplace we want, so we should be able to find the best place for installation.

   So that's if for this week.  I'll try to micro update with the aerial footage, or at least some nice captures from above.  We won't be able to make it to the site this weekend so the next update won't be for a while.  Hopefully we'll have a TON or progress to report on.


Monday, June 13, 2016

Roof level at 99 percent

   We had the most beautiful day to visit the site.  Mid 70s, no clouds, and no humidity.  What a change from the day before at low 90s and high humidity.  It looks like most of the front porch roof is completed and the curved area under the turret has rafters laid out ready to be sheeted.  Some of the fascia is on the curved porch.  There are some design concerns about the beams that support this section, but I think I have a aesthetically pleasing solution, and will meet with Matt some time this week to discuss it.
   Look at that sky!  As you can see, all the support structure for the front porch is up and most of the roof decking is installed.  I actually climbed up on it from the laundry room window with some shingle samples so we could decide on the color.  We decided to go with the Gatehouse slate color.  It's a little darker than the other colors and has some reddish variation in it.  The roof decking that's installed looks great and I can't find any issue with it anywhere.

   Here's the promised shot of the barrel vault above the front door.  They did a great job matching the arc of the vault with the arc that the front door makes.  We decided to keep the porch face of the vault solid rather than cutting out the arch in the gable end.  This time, we took my father-in-law with us and he was just amazed at how awesome the porches were.  As we walked inside the house, he gushed at how great the view was and I agree.  Since it was a such a nice day, we took some time to just sit out on the gazebo and enjoy the view.  As usual, there was a slight breeze which kept any annoying insects away, if there are any.  For every time I've been there, I've never been bitten by a mosquito.  
   Here's a shot of the greatroom fireplace as viewed from the rotunda.  We've had some problems trying to figure out how to hide these posts.  As per normal engineering, there are footings in the basement that have posts bolted to them, which hold up a beam that spans the distance between the walls on the left and right.  On the first floor, in this picture, the posts just to the left and right of the fireplace column are sitting on the concrete slab above the basement beam and directly above the posts below.  This transfers the weight of the second floor straight down to the ground.  Well it's unfortunate that the posts are where they are because they can't cleanly be contained inside the fireplace column, so we've been racking our brain trying to figure out how to wall or box them in.  The original blueprints didn't have any posts, but implementation required them.
   One thought was to just extend the fireplace column width to enclose the posts.  This would have worked, but it also would have reduced the opening to walk through on the first floor, and the view on the second.  At our last meeting, Matt said he would contact our structural engineer to determine if we could move the posts inward by eight inches to hide them in the fireplace column.  They would be still sitting above the beam, but not in line with the posts in the basement.  I guess it's possible to move them because there are some new 6x6 wooden posts set up, presumably as temporary support so they can cut and reweld the posts into the fireplace column.  Score one for us!

   I ventured out on the side porch roof to take this shot.  The roof slop is friendly enough to comfortably walk on, which would be nice for cleaning gutters if we needed them.  We took some time to stand in the turret and enjoy the cool breeze and warm sun.  I know I keep saying that I expect the roof to be completed every week, and for most of this build it seems like the norm.  I'm really hoping that once we get the other subcontracters in, the pace will pick up.

   Here's what the front porch looks like from the turret.  The gable came together well and I don't foresee any issue with debris collecting or shedding water.  With the installation of the front porch roof, the turret loses LOS with the garage doors, which isn't a problem, just an observation.
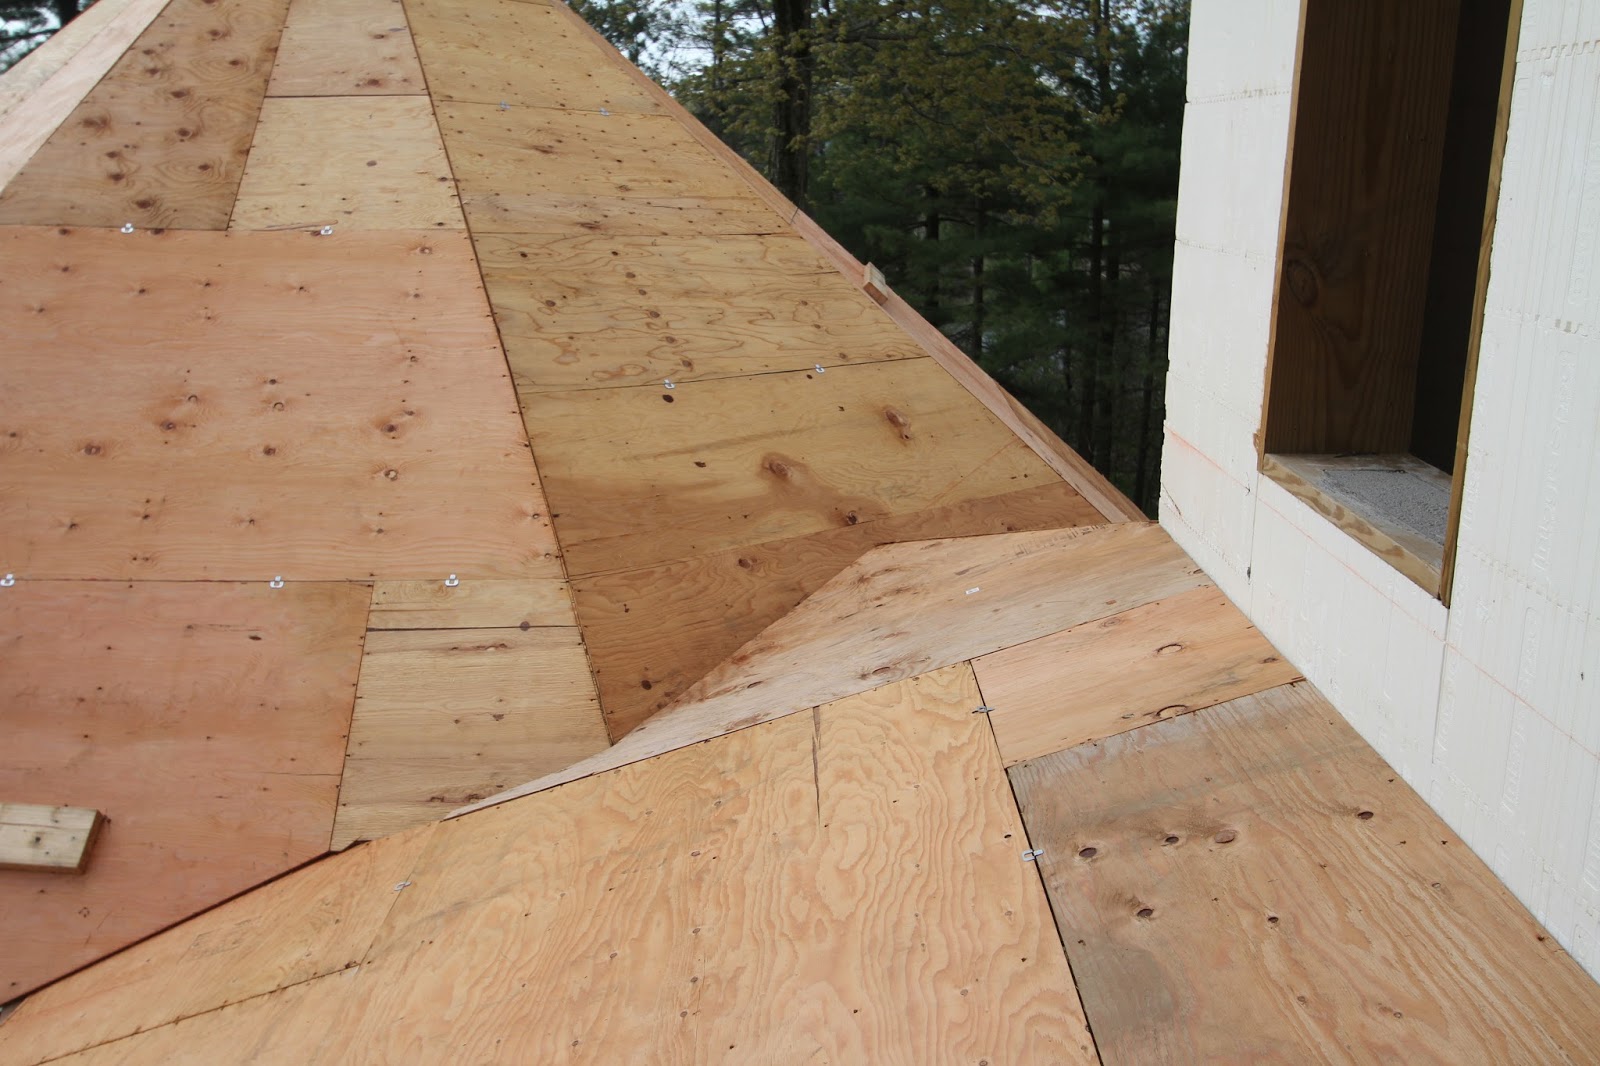
   Here's what the curved roof structure looks like from the turret.  You can see the straight laminated beam that supports the weight of the curved roof, but this beam is causing some asthetic issues.  The beams that support the porch deck run straight from post to post, and that's fine since it's hidden under the deck.  However, with these beams running straight from post to post to support the porch roof, when viewed from under the porch, you'll get odd cresent shaped supports from the curve to the beam.  Either that or the beams themselves will be boxed in and form odd angles in the porch ceiling.  It's not possible to bring the entire ceiling down because the tops of the windows would impinge on the ceiling.  I'll have to discuss it with Matt, but I think the only way to conceal these straight beams is to box them in, inside a large curve that follows the curve of the roof.  Ideally, we would have had curved beams below and above, but this didn't happen and it's way too late to change it.  While the boxing in of the beams will increase the area where the ceiling drops down, I think it's the best solution, and hopefully a viable one.

   Here's where the curved roof meets the straight on the side of the house.  You can see that they've added a laminated plywood curve that extends from post to post that will form the drop down fascia of the beam box.  You an also see that they've started to install the curved rough sawn cedar fascia on the roof rafter ends.  The space between the rafter end and the beam fascia should be about the same height as the porch ceiling and may contain overhang vents.  They probably don't make curved overhang vent, so it will either be short sections of straight vent or small round vents.  My proposal will add another laminated curve on the inside of the beam.  The only odd part will be at this point, and we'll need to find a good way to terminate the box.  Maybe a few more roof supports will need to be added in where the straight and curved interface.  I'm really hoping this will be completed by this weekend and we can get the roofers in the following week.

   Here's an unexpected addition.  It's the ceiling in the turret bedroom walk in closet and it's the attic space access.  It's a central location for the hatch and it will never really need to be accessed.  There will probably be another one in the garage.  It's kind of neat to see it in place since it's thinking forward to attic insulation and drywall finishing.  This one is a pretty generous 34"x24".  It shouldn't interfere with the lighting in this closet.
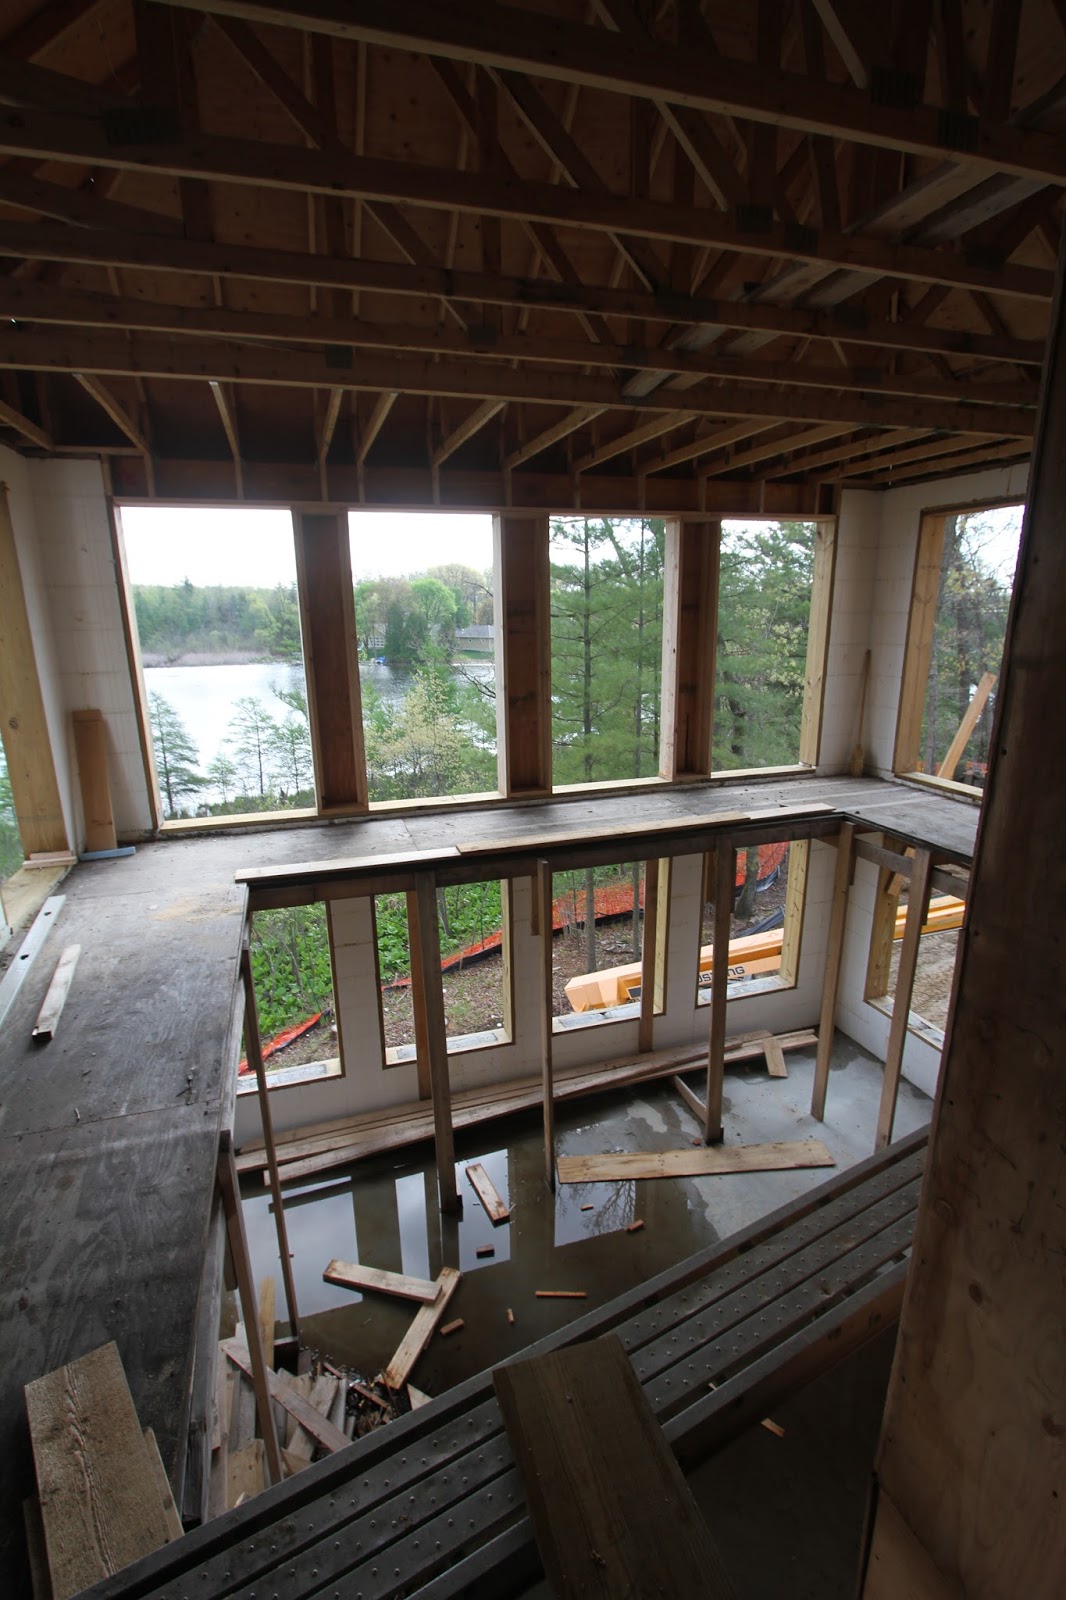
      Here's the last shot this week, of the back of the house.  Nothing new back here but it was too nice a day to not grab a picture.  We lingered on the gazebo for a good half hour just talking and dreaming about what it will be like to finally move in and live in our dream house.  With all the work and time it's taking up, it's hard to remember that this is indeed our dream house and not everyone gets an opportunity like this.  We have to remain thankful that for the chance to create exactly what we want and build a house that will hopefully be around for hundreds of years.  Hopefully there won't be someone a few hundred years from now, cursing the creators of this thing and decrying any odd design choices.  It seems like a house deserving of a name, but we'll have to figure that out later.

   So that's it for this week.  A little progress on all fronts again, but nothing to check off the list.  We'll keep lining up our ducks and hopefully we'll get to give them a chance to swim soon.

Tuesday, June 7, 2016

Our house has a face (well maybe a skull?)

   Temperatures are cooling a bit this week, but we visited the site for a late afternoon meeting with Porter and Heckman, and Matt to verify the HVAC supply and returns, and discuss the routing o fthe main supply and return trunks in the basement.  Besides that, work is progressing well on the front porch and I expect them to be completed by the end of the week.  There are still some tricky parts to complete around the turret and it needs to be tied into the garage roof, but Matt and his crew are already installing the overhang and fascia on some of the completed sections.

   The front porch roof is quickly coming together, so we can finally see what the house will look like when completed.  You can see how the barrel vault in the porch ceiling above the door will look.  I like how it follows the arc of the door itself.  We'll have the barrel vault blocked from the front by the triangular facade, which will also allow us to have a hanging light that will be shielded from the elements a bit.
   So here's the house, now that it has the front porch roof mostly in place.  We're still trying to nail down a roofing contractor but we're finding it difficult.  More on that later.  The grade of the garage approach has be increased to prep for the garage slab pour so that should be happening pretty soon.  


   A little more detail on the turret area.  You can see the initial curved support for the roof trusses.  The wood that's sticking through is the wood that was mechanically attached to the turret support beams.  These indicate the final roof fascia location, so there's a nice overhang to the porch decking.  The roof decking supports will be radiused around the turret.  I think the beams will be hidden by deck fascia, and it will be interesting to see how that will be done around the curve.

   Here's the front porch looking towards the garage.  The large window is two crank casements that look into the dining room.  I'm standing just in the barrel vault area where some of the concrete for the garage slab will go, to finish off the section under the front porch.  After that bit is poured, the final 6x6 posts can be anchored to hold up the front porch here.  Even though this area is in front of the dining room window, it will still be a neat place.  We'll have to think ahead a bit to see if we want to install some attachment points for a porch swing or something.

   Here's the front porch under the turret, looking back towards the back of the house.  The large window here is one of the two in the study.  There's a good amount of roof decking that still needs to be installed here but that's a quick job.  Not much else has changed on this side since my last update.

   Same area, but looking forward towards the front of the house.  It was pretty rainy today so even though the roof decking is up, there are planned expansion gaps in the plywood so water can still infiltrate the house.  We would have liked to have been dried in with roofing felt by now, but no one will install it without installing the roof soon thereafter.  There's a bit of a delay on the roof because of our current choice in material.  

   Another good sign of the times, an almost full dumpster.  There was still a good amount of dirt and scraps inside the house, but you can see that a lot has been cleaned up and thrown out.  There were some nice pieces of the laminated beam stacked on the other side of the dumpster, and I'm not sure if they were throwing them away, or waiting to use them somewhere else.  Those things are pretty flat and dead straight, so they're nice to use in other places.  Maybe I'll have to snag some if they're just going to throw them away.  It's amazing how much waste can go into creating a house.

   Some progress has also been made inside the house, with the erection of the dining room wall to the foyer.  The original plans called for an open area with two pillars.  Very common look in houses this size, but we really didn't like the look, so we're mirroring the study entry.  Both openings might be arched as well to mimic the door shape.  
   There's a little alcove that's created on each side of the opening to the rotunda and we're trying to decide what to do with them.  You can kind of see it to the left of the yellow bucket, where the curved wall of the rotunda meets the straight wall of the dining room.  We could make little nooks there, each holding an orchid lit from above.  Or we could flatten and enclose the space with walls and hang something on each side. Still trying to decide.
   Finally, here's the garage, prepped for concrete.  At last, we'll be done with concrete!  As with the basement slab, there's a layer of waterproof plastic and thin gauge wire mesh that's imbedded in the slab.  I didn't look close enough to see if there's also a layer of foam under this slab, as there is in the basement.  If it's not poured this week, I'll take a look.  We would have liked floor drains to facilitate cleaning, but I think there are environmental issues with that.  The entire floor was raised about a foot before this prep was completed so we could reduce the number of stairs into the house.  As it is now, there's three feet to the house slab.  Figure about three inches for slab, we're looking at 4 steps or 3 treads at an 8.25" rise for each step.  The total run will be 31.5" into the garage, which is also something we wanted to reduce since it takes up valuable floor space.   Four steps is a good amount, but it's better than the six we would have needed if we didn't raise the floor.

Roof
   Soooo roof woes.  Our original plan was to go with a slate composite like Inspire Classic Slate roofing, but we're encountering two issues: Cost and timing.
   Timing: We need to get the roof on before HVAC will come in to work, they're the first of the mechanicals.  We need to have a roof on before windows can go in.  We're also trying to squeeze in the completion of the landscaping after the roof is done.  The Inspire roof installs like real slate, minus most of the weight.  Set the desired overlap then put one or two nails in it.  That's more work than a traditional asphalt shingle, and much more weight.  Because of this, we're hearing from two different contractors that they don't have the manpower to complete our 90 square (9000 sq foot) roof.
   Cost: Inspire comes at a crazy premium.  We're seeing quote for around $60,000 for our 90 sq roof, not including labor, flashing, and drip edge.  That's materials alone.  It roughly translates to $650 per square for materials.  Compare this to $120-$190 per square for a high quality asphalt roof.  The quoted labor cost for installation of the Inspire is from $300-$1000, which is a ridiculous amount. All together we're looking at the worst case scenario of $100k for the roof alone.  Since we only have $18,000 in the budget for a roof, a ton would have to come out of pocket.
   Because of these two reasons, we're looking into alternatives.  There are some companies that make asphalt shingles that do a pretty good job of mimicking slate.  It's not great, but it will do.  This is one of those "not-the-bones-of-the-house" items that we can skimp on now and replace in the future if we really wanted to.  Here's the short list of slate-like asphalt shingles:

   Owens Corning: Berkshire (~161/sq)
   GAF Grand Slate II (~194/sq)
   Certainteed Grand Manor (~190/sq)

   We might have been able to handle two times the up charge for the Inspire but if these quotes are true, then I think we've been priced out of the product.

HVAC
  We also did a walk-through of the planned routing for the supplies and returns run in the basement.  Since we're planning on finishing the basement, we really wanted a say in where the large HVAC trunks will be run along the ceiling.  These ducts would be boxed in with drywall so making them as unobtrusive in their placement is paramount to a nice basement design.  Luckily, the guys with Porter and Heckman are great and we planned out the routing to have a clean look.  I'll discuss this more when it's installed and I can provide pictures, but basically, we'll have to run three main trunks, one for the rear of the house, one for the front of the house, and one that goes to the attic space for the second floor.  The front/rear house split was because we wanted to try to avoid as much passing-under-the-beams in the basement as possible, for the vent supply branches.  If we only used one trunk for the first floor, we would have to pass under two beams, which makes for some ugly boxing.  This is one of the perks of building yourself, you get complete control in the final product.  I would highly recommend Porter and Heckman for HVAC if you're in the market.

   The twins birthday is this Saturday, so I'm not sure if I'll be able to get out to the property or not.  I'm hoping I can swing out there on one day and see the progress on the front porch and peek at the garage slab one more time.


Wednesday, June 1, 2016

Late update: Front porch and HVAC

   Sorry for the late update but thw long Memorial day weekend had me all over the place.  The weather has been hot in the mid to upper 80s and I got a chance to swing by the site on a sunny Saturday afternoon.  I was greeted by the beginning of a front porch roof.  I knew that Porter and Heckman have been out so I was looking forward to reviewing the HVAC supply and return placements.

   All the main laminated beams are up with most of the porch roof trusses up on the side of the house.  Most of the installed posts are permanent, with the exception of the posts that flank the front door.  I think the concrete slab needs to be poured before these posts are mounted.  One item that I reminded the crew about was the barrel vaulting that should be above the front door.

    Here's what the section under the turret looks like.  I'm not sure what the purpose of the curved lip on the deck serves, but it's nice that they placed temporary plywood everywhere.  You can see how they tie in the ceiling joists to the beam.  I'll have to ask how the final ceiling bead board will be attached here since the beam sits a bit lower than the joists.  This happens inside the house too since the beam sits lower than the LiteDeck.  I guess in both cases, the ceiling material can be cut out from the back side to fit the beams so the surface is flush.

   Here's a shot of the front porch, looking at the corner of the house under the turret.  These two windows belong to the study.  I think we gain a couple of feet on the curved part of the porch so it will make a nice place to sit, while still retaining the walking space of the porch.  I imagine this is where I'll be sitting on a rocking chair with a shotgun on my knees, waiting for the kids to come home after a date.  Just kidding.

   Looking forward on the front porch towards the turret corner.  The decking of the front porch is going to be Azek, so the plywood is only temporary.  You can see that they've installed the porch roof supports on this side of the house.  They still need to put up the roof decking, fascia, and overhangs.  I'm guessing a couple more weeks left of work on the front porch.  These posts are 6x6 and are permanent.  They sit right above the steel posts that support the steel I-beams that support the porch deck so the roof load is transferred all the way down to the concrete footings below.

   I'm not going to bore you with all the vent placements, but here you can see an example of how P&H marked in the supply vent locations for the first floor.  Having concrete floors complicates things a bit.  As with any other floor, you can't cut away floor joists to install vents, so they have to be placed in the spaces between.  With the Lite Deck system, there are wider concrete beams that you can't cut away since they're integral to the strength of the floor.  There are spaces 16" wide between these poured beams that you can route HVAC venting through.  Also, from below, you can cut away the foam under the concrete slab inbetween the beams so for the most part, the supply and return runs can sit completely flush with the concrete beams.  Likewise, as with wood joists, supply and vents that run perpendicular to the beams can only sit below the beam themselves so in the basement, they'll have to be boxed in.  
   This makes the supply and return to the second floor a bit more complex.  Usually, second floors are supplied from below as with the first, and they're all creatively boxed in, in the ceiling of the first floor.  While we could have gone this route, it would make odd soffits and intrusions in the first floor rooms.  To counter this, P&H suggested that we run one main supply and return trunk up to the attic space and supply the second floor from above.  While we gain architectural zen, we expose our HVAC to some inefficiencies by running it outside the envelope of the house, in the attic space.  With enough insulation, this energy losses can be reduced, but it's never a great situation to run supplies in the attic space.  Air leaks are complete energy losses and opposite temperature differentials threaten to rob the system.  I'll have to do some research to see if we can spray foam the attic ducts to air seal it and insulate it completely.
   There seems to be some supply vents missing, and some need to be moved to allow cabinets and furniture.  I'll have to set up a walk through with P&H.

   Here's what the porch roof looks like from the upper window of the great room.  When the temporary catwalk is gone, I'll never get this view again unless I'm up in a ladder.  Those laminated beams span an incredible distance but since the roof isn't very large, they don't have to hold up much weight, even in the winter.
   Here's the master bedroom windows that will surround our bed.  You can see the duct tape P&H attached to the ceiling joists to mark the supplies.  They have the opening dimensions marked on the tape; these happen to be 6"x10".  In some retrofit ceiling applications, small diameter vents are used in conjunction with high volume output so the air is "jetted" into the room.  I imagine with vents these large, the air flow will be equivalent to those on the floor.

   Here's the study looking towards the door.  Nothing new on the construction front, but here's an example of how P&H mark the HVAC returns.  You can see the duct tape at the top of the wall just left of the door.  Again, these are marked with vent dimensions.  As with any other forced air implementation, the wall will serve as a duct for the return.  The stud sole plate will be cut through and the duct work will connect below in the basement, which runs to the return duct to the heat/cooling exchange.  

   So progress slowly moves forward.  I'm not sure how much will be accomplished this short work week, but the weather should be nice for some progress.  I just got word today that the initial roofers didn't feel like they had the time nor manpower to complete our project so Matt is contacting two other roofers to get quotes.  The clock is really ticking on this since the cabinets will be coming in at the end of the month.  While we have some leeway on storing them if we're not ready for installation, I would really like to be able to take delivery.  It will be a tight squeeze, as always.

Monday, May 23, 2016

Small progress, big plans

   I think we're starting to run out of the cooler spring weather because this week it's supposed to get up in the 80s.  With nicer weather will hopefully come faster progress as we start to ramp up into the interior work.  Building progress this week is all about finishing rough touches on the existing roofs, and prepping for the front porch.  I fully expect to see a nearly completed front porch come next weekend.
   Changes this week were more subtle but justone more step towards completion.  It looks like all the fascia and overhang vents are installed around the entire house and back porch.  There are still some small sections around the turret and the turret itself that need completion.  It looks like all the prep work for the front porch is done and they'll probably start to work on that this week.
   The roofers visited the site to take measurements for the "dry in", and presumably, to provide a quote for the shingles.  Dry in means that they'll put up all the roofing underlayment, a waterproof membrane that sits between the shingles and the roof decking.  In the short term, this will prevent any water from entering the house through the roof vents.  Shingles will need to be completed before we can get the windows in, which needs to be completed before we can start drywall.
   Porter and Heckman will also be out by Friday this week to mark pass-throughs for the forced air.  This will give me the weekend to check things out and make sure they're not installing vents where furniture will be.  The master and guest bedroom windows that flank the bed will have night stands under them, right in the prime location for an air vent.  In the master, it won't be a problem since the air is coming from the ceiling, but on the first floor guest room, the air is coming through the floor.  I'm not sure if an alternative placement is possible.  I'm also especially interested in how they'l route the supply and return trunks in the basement.  Ideally  any cross joist path will run along side a beam so we can just box the whole thing in together.  With so many rooms to supply, it will be a trick to maintain the ten foot ceiling height everywhere.  The ICF floor foam can be cored out to run ducts parallel to the joists.  Hopefully they'll be deep enough to contain them.

   After meeting with Matt a couple weeks back, we finalized what was supposed to go on with the gazebo ceiling.  Here's the result of that meeting.  We needed to keep the 2x6 supports near the top and Matt needed to reinforce the beams around the perimeter to prevent sheer distortion, but I think it looks tons better.  It gives the gazebo a loftier feel because the previous ceiling height felt way too low for an outdoor space of that size.
   The flat ceiling area in the center of the gazebo will work well since it will provide a good place to install a ceiling fan, some lights, and maybe the outdoor speakers.  There will probably need to be more structure up there to support the ceiling material, but you can get a good feel of the height.  I'll have to measure the distance next time I'm out there.  The 2x4 box structure around the perimeter is just used to bring down the look of the beam.  The reinforcement that was added sits just above this.

   There are some new piles of lumber in the front of the house that I almost overlooked. Plywood, 6x6 posts, 2x4 and laminated beams?  Must be the roof for the front porch!  Originally, Matt wanted to wait on installing the front porch to give the excavator room to trench in the water that will be running into the front basement wall.  I guess he decided there will be enough room and all they have to do is remove some of the floor joists to give room for the machinery.

   Here's a close up of the laminated beams.  Nothing special I guess.  We still haven't decided how to clad the posts, but we've got a solid idea on the railings.  In the rotunda, we threw around the idea of having curved glass rails topped with a square walnut railing.  Curved glass is a custom job and pretty expensive, but allows for the least visually intrusive element.  We decided that round stainless balusters would be almost as good and found some that have a nice crystal element in them.  We might use something similar (san crystal) on the exterior porch railing.  Probably a darker metal color rather than stainless, but keeping a dark top and bottom rail. 

  All the wood is in the turret beams, ready for the porch roof. Porch ceiling shouldn't come too much farther down than the beams since they're already around nine feet.  I'll really enjoy seeing how they pull off this radius roof.  Every time I visit the site, I take some time to stand or sit in the areas I think will be the most relaxing in the future.  As the house build progresses, I find myself hanging out at every window and on every porch.  Standing up here is great because it's at a ten foot elevated position above the forest.  There are so many little things to look at in the woods.  I can't wait until we get to live here and I can just relax and watch the chipmunks running around.

   Here's the back of the garage looking towards the house, now that the gazebo is up.  I think this will be the longest uninterrupted length of wall on the whole building so we'll need some good landscaping to break it up a bit.  I think the plans call for a small planting bed in front of this wall.

   Here's the back of the house now that the gazebo ceiling has been fixed.  You can see all the overhang wood has been installed on all the roof structures.  It shouldn't be too much longer until we have a proper roof and we can keep rolling to get the windows installed.  Those windows have been in storage for over a year, just waiting for the house to reach a level of completeness.  I'll be happy when they're installed we can look inward to installing walls and finishing work.


Sunday, May 15, 2016

Back porch roof finished. Incremental progress elsewhere.

   Snow.  Snow in the middle of May here in Michigan.  Temperatures dipped down into the low 40's and we got a taste of how the snow will accumulate on the roof.  It would have been much more enjoyable if we were looking out at the snow from inside of a warm and finished house, but it gave us material to dream about in the future.

   The back porch roof is completed with all the connections finished.  The roof above the master bedroom balcony is completed and tied into the main roof.  There were also some finishes around the rest of the house so progress is moving in parallel.  Still no movement on the roofers coming in to get the top "dried in" but Matt says that he's trying to get them on the site in the next week.  We're also trying to get the excavator to come in and trench out from the front of the house for water and sewer.  Ideally, we would get that done before the front porch is completed since the water is entering the house there, but if there's too much delay, we can finish the front porch roof and wait for the decking since we wouldn't install the final deck material until near the end of the build.  We're also looking to get the HVAC from Porter & Heckman in so they can mark locations for vents and supply/return trunks.

    Here's the view of the master bedroom balcony.  The plywood decking is temporary and the final material will be the same decking material as the front porch. The two posts on the left and right are permanent and the middle 2x6s are just temporary supports.  The pony wall on the right is needed since the rest of the porch roof angles up on the other side of it, but we're trying to work out a nice way of implementing it.  Since we're thinking about using a glass barrier on the balcony, we were thinking about cutting the pony wall at an angle that matches the roof slope, then having a triangle shaped glass complete the railing height.

    Here's the view from the balcony looking towards the back yard, where the pool will be.  Obviously, the view is blocked from here, but it's great looking out towards the water.  You can just make out how the connected the gazebo roof to the rest of the porch.  They made a nice ridge and cricket that will shed water, and reduce debris collection.  The nice thing is that I can just hop over the balcony wall and use a leaf blower on anything that does manage to get stuck up here.

   Here's a closer look at the gazebo cricket.  This came out exactly how I would have expected it to be.  Somewhere along this roof section, there will be a roof vent for the kitchen hood.  The blower will be housed in the porch roof itself so I'll have to very carefully decide where to put the vent.  Around the corner is some more master bedroom windows, so I think it's best on this side of the house when considering noise or vented smells.  It wouldn't do any good to vent out the odor of cooking fish, only to have it waft back in through the open window.

    They've installed all the bucks and dividers for the upper great room windows.  Now we can get an idea of what the final window layout will look like.  Although it would have been great to have one huge window, it's definitely fiscally impossible, if not physically.  All the upper windows will have a grid and windows on the left and right will have a half arch.  The cavities these make will help route wires for speakers and lights, but I'll pay close attention to how they're insulated.  It might be another great target for spray foam since it's a small area.

   Here's what the great room now looks like from the outside.  As per the usual construction, there's a two inch thick EPS foam sheeting installed on the exterior of the wall wherever ICF is not present.  This is the only part of the house that goes from basement to roof without a porch obstruction.  We might need to look into having a gutter on this part since we wouldn't want all that water streaming straight down, especially with the walk out sliding door.

   Here's what the house looks like from the back yard now.  You can see they boxed in the chimney so it's just about ready for exterior material, which will be the same granite cobble the rest of the house.  That granite cobble will be used around the base of the gazebo, but we're not sure how the edge of the cement will be finished.  The top will be stone tile.  Maybe the edge will also be the same stone tile.  We spent most of our time during today's visit, plotting out the footprints of outdoor tables, chairs, and the eventual fireplace and grilling station that will be housed in the gazebo and back porch.  Definitely one of the highlights of the house.

   Here's a close up of the chimney box.  Since we're just using gas fireplaces inside, this will just house two vented exhaust pipes, one for each fireplace.  I'm not sure how we'll finish the top yet, but I don't imagine anything super fancy.  If we had a real wood burning fireplace, this would probably have been made of firebrick masonry and might have been impossible considering what sits below it in the basement.  I don't think the entire weight of a brick chimney can sit on a metal beam.

    Here's how the master balcony looks from the ground.  The roof for this section worked out really well.  The elevations never really gave a great impression on how the roof lines would look, especially on this section.  I look forward to sitting up here on rainy days.  Hell, I'm looking forward to sitting anywhere in this house on rainy days.

    Here's the side of the gazebo that will have the fireplace and possibly a stone bench that leads to the grilling station on the porch.  This whole side will be heavily landscaped with the caramel mint retaining walls so the gazebo will feel well elevated above the stairs that lead up from the walk out below the great room.

    Here's how the gazebo finishing is turning out.  You can see they vented the roof in the porch, but I don't think they needed to since it's not part of the building envelope.  Generally, you want venting where there's warm air below so the cold exterior air can prevent too much snow melt on the roof, which prevents ice from forming on the roof itself.  Since neither the porch nor gazebo is closed to the elements, venting isn't needed, as shown on the gazebo.  It's not a bad idea that it's on the porch since it will be housing the inline blower.  It might increase the temperature of the porch roof space a bit.

   Progress continues in the garage as they're starting to clean and prep for the slab.  The end window height was increased nine inches to accommodate the slab height increase.  Initially, the garage slab would have been about three feet down from the rest of the house.  That means about five steps up, with larger implications on how far out into the garage those steps would have to be, which was considerable.  Our decision was to raise the height of the slab by one foot, which reduces the number of steps to three, reducing the footprint of the steps themselves.  Of course, raising the slab height means adding more fill dirt outside.  Since we are planning on installing a planting work bench under the window we had to raise the window to accommodate a counter height item.  We had the space, so we implemented it.  Much easier to do now rather than later, and not doing it would make for a low bench.  Since this is a south facing wall, and the entire garage is ICF, this will make for a great window for wintering plants and sunning starter seeds.

   Wood was installed in the beams that support the turret in preparation for creating the front porch roof.  Most of the front porch roof is straight, with the exception of the rounded area around the turret.  Implementation of this roof will be interesting since the plans call for an actual broad rounded area.  All these beams will be hidden in the roof structure, but the posts are part of the front porch design.

   So the month is almost done and the final roof isn't on yet.  I think that since the interior walls are all but completely studded in, we're kind of prepping two things at once so the roof can go on at the same time the mechanicals are going in rather than installing the roof, then windows, then mechanicals.  Once the roof is done, we'll call in the window installers and have the house finally buttoned up.  Sure feels like it will be needed if we get any more cold days and snow this year.