Monday, May 23, 2016

Small progress, big plans

   I think we're starting to run out of the cooler spring weather because this week it's supposed to get up in the 80s.  With nicer weather will hopefully come faster progress as we start to ramp up into the interior work.  Building progress this week is all about finishing rough touches on the existing roofs, and prepping for the front porch.  I fully expect to see a nearly completed front porch come next weekend.
   Changes this week were more subtle but justone more step towards completion.  It looks like all the fascia and overhang vents are installed around the entire house and back porch.  There are still some small sections around the turret and the turret itself that need completion.  It looks like all the prep work for the front porch is done and they'll probably start to work on that this week.
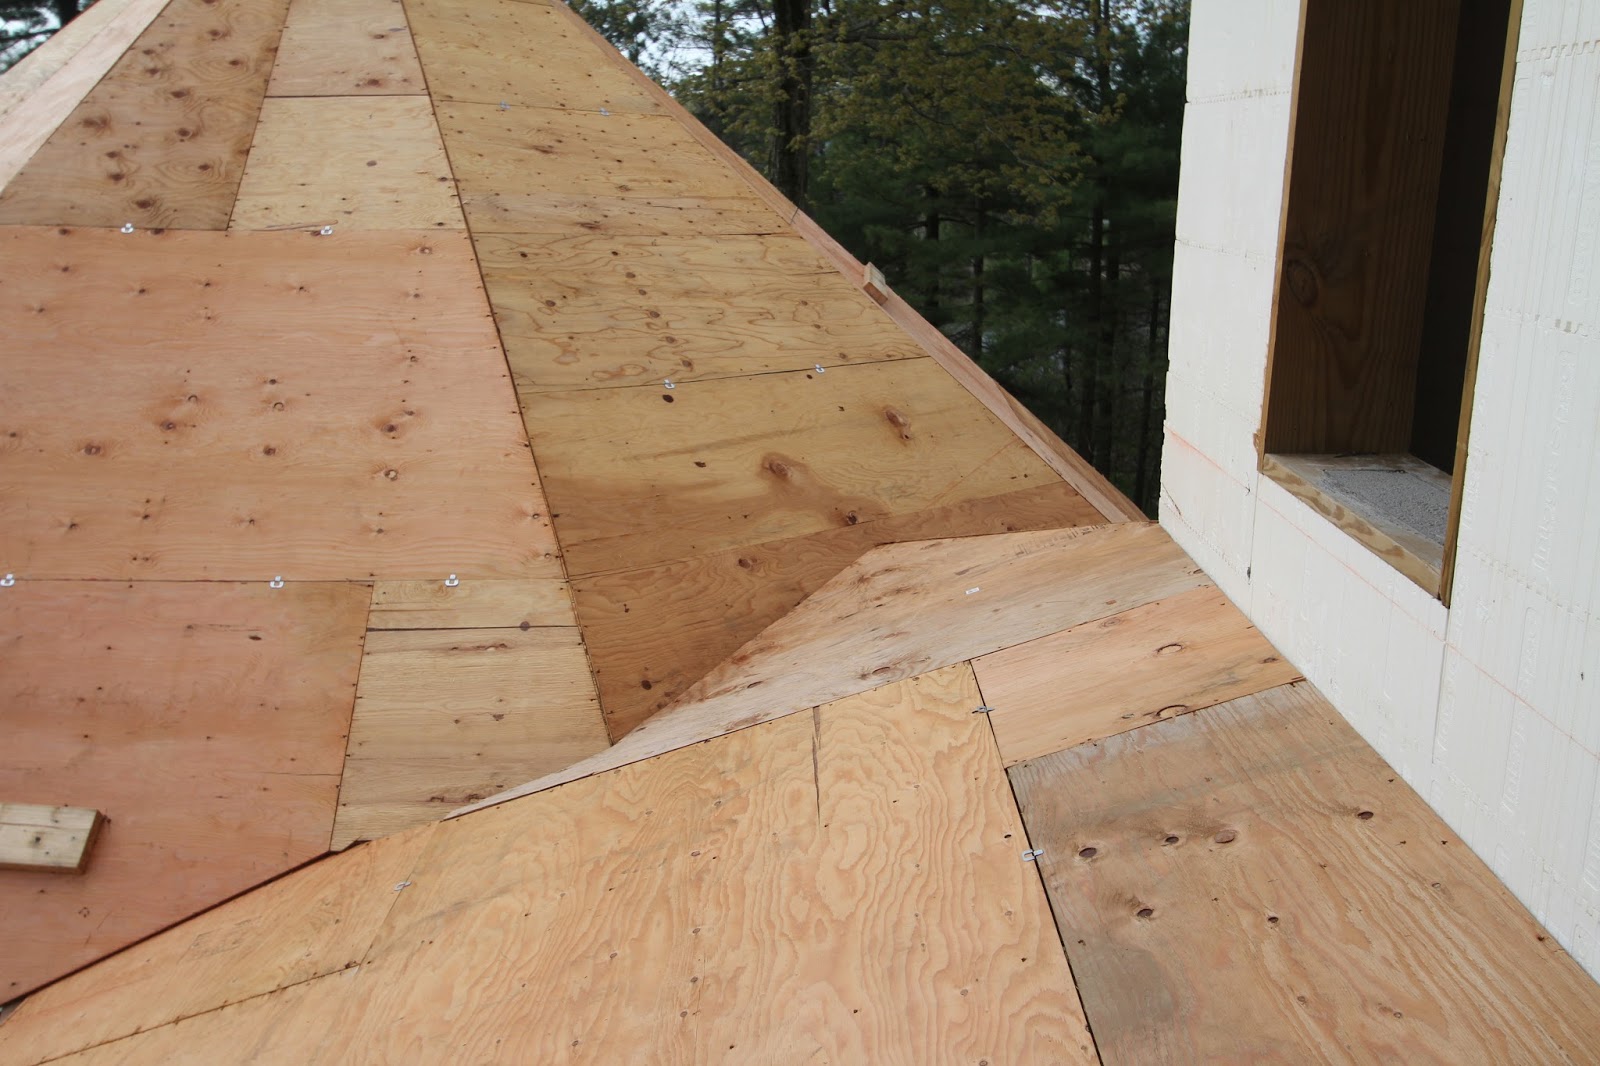
   The roofers visited the site to take measurements for the "dry in", and presumably, to provide a quote for the shingles.  Dry in means that they'll put up all the roofing underlayment, a waterproof membrane that sits between the shingles and the roof decking.  In the short term, this will prevent any water from entering the house through the roof vents.  Shingles will need to be completed before we can get the windows in, which needs to be completed before we can start drywall.
   Porter and Heckman will also be out by Friday this week to mark pass-throughs for the forced air.  This will give me the weekend to check things out and make sure they're not installing vents where furniture will be.  The master and guest bedroom windows that flank the bed will have night stands under them, right in the prime location for an air vent.  In the master, it won't be a problem since the air is coming from the ceiling, but on the first floor guest room, the air is coming through the floor.  I'm not sure if an alternative placement is possible.  I'm also especially interested in how they'l route the supply and return trunks in the basement.  Ideally  any cross joist path will run along side a beam so we can just box the whole thing in together.  With so many rooms to supply, it will be a trick to maintain the ten foot ceiling height everywhere.  The ICF floor foam can be cored out to run ducts parallel to the joists.  Hopefully they'll be deep enough to contain them.

   After meeting with Matt a couple weeks back, we finalized what was supposed to go on with the gazebo ceiling.  Here's the result of that meeting.  We needed to keep the 2x6 supports near the top and Matt needed to reinforce the beams around the perimeter to prevent sheer distortion, but I think it looks tons better.  It gives the gazebo a loftier feel because the previous ceiling height felt way too low for an outdoor space of that size.
   The flat ceiling area in the center of the gazebo will work well since it will provide a good place to install a ceiling fan, some lights, and maybe the outdoor speakers.  There will probably need to be more structure up there to support the ceiling material, but you can get a good feel of the height.  I'll have to measure the distance next time I'm out there.  The 2x4 box structure around the perimeter is just used to bring down the look of the beam.  The reinforcement that was added sits just above this.

   There are some new piles of lumber in the front of the house that I almost overlooked. Plywood, 6x6 posts, 2x4 and laminated beams?  Must be the roof for the front porch!  Originally, Matt wanted to wait on installing the front porch to give the excavator room to trench in the water that will be running into the front basement wall.  I guess he decided there will be enough room and all they have to do is remove some of the floor joists to give room for the machinery.

   Here's a close up of the laminated beams.  Nothing special I guess.  We still haven't decided how to clad the posts, but we've got a solid idea on the railings.  In the rotunda, we threw around the idea of having curved glass rails topped with a square walnut railing.  Curved glass is a custom job and pretty expensive, but allows for the least visually intrusive element.  We decided that round stainless balusters would be almost as good and found some that have a nice crystal element in them.  We might use something similar (san crystal) on the exterior porch railing.  Probably a darker metal color rather than stainless, but keeping a dark top and bottom rail. 

  All the wood is in the turret beams, ready for the porch roof. Porch ceiling shouldn't come too much farther down than the beams since they're already around nine feet.  I'll really enjoy seeing how they pull off this radius roof.  Every time I visit the site, I take some time to stand or sit in the areas I think will be the most relaxing in the future.  As the house build progresses, I find myself hanging out at every window and on every porch.  Standing up here is great because it's at a ten foot elevated position above the forest.  There are so many little things to look at in the woods.  I can't wait until we get to live here and I can just relax and watch the chipmunks running around.

   Here's the back of the garage looking towards the house, now that the gazebo is up.  I think this will be the longest uninterrupted length of wall on the whole building so we'll need some good landscaping to break it up a bit.  I think the plans call for a small planting bed in front of this wall.

   Here's the back of the house now that the gazebo ceiling has been fixed.  You can see all the overhang wood has been installed on all the roof structures.  It shouldn't be too much longer until we have a proper roof and we can keep rolling to get the windows installed.  Those windows have been in storage for over a year, just waiting for the house to reach a level of completeness.  I'll be happy when they're installed we can look inward to installing walls and finishing work.


Sunday, May 15, 2016

Back porch roof finished. Incremental progress elsewhere.

   Snow.  Snow in the middle of May here in Michigan.  Temperatures dipped down into the low 40's and we got a taste of how the snow will accumulate on the roof.  It would have been much more enjoyable if we were looking out at the snow from inside of a warm and finished house, but it gave us material to dream about in the future.

   The back porch roof is completed with all the connections finished.  The roof above the master bedroom balcony is completed and tied into the main roof.  There were also some finishes around the rest of the house so progress is moving in parallel.  Still no movement on the roofers coming in to get the top "dried in" but Matt says that he's trying to get them on the site in the next week.  We're also trying to get the excavator to come in and trench out from the front of the house for water and sewer.  Ideally, we would get that done before the front porch is completed since the water is entering the house there, but if there's too much delay, we can finish the front porch roof and wait for the decking since we wouldn't install the final deck material until near the end of the build.  We're also looking to get the HVAC from Porter & Heckman in so they can mark locations for vents and supply/return trunks.

    Here's the view of the master bedroom balcony.  The plywood decking is temporary and the final material will be the same decking material as the front porch. The two posts on the left and right are permanent and the middle 2x6s are just temporary supports.  The pony wall on the right is needed since the rest of the porch roof angles up on the other side of it, but we're trying to work out a nice way of implementing it.  Since we're thinking about using a glass barrier on the balcony, we were thinking about cutting the pony wall at an angle that matches the roof slope, then having a triangle shaped glass complete the railing height.

    Here's the view from the balcony looking towards the back yard, where the pool will be.  Obviously, the view is blocked from here, but it's great looking out towards the water.  You can just make out how the connected the gazebo roof to the rest of the porch.  They made a nice ridge and cricket that will shed water, and reduce debris collection.  The nice thing is that I can just hop over the balcony wall and use a leaf blower on anything that does manage to get stuck up here.

   Here's a closer look at the gazebo cricket.  This came out exactly how I would have expected it to be.  Somewhere along this roof section, there will be a roof vent for the kitchen hood.  The blower will be housed in the porch roof itself so I'll have to very carefully decide where to put the vent.  Around the corner is some more master bedroom windows, so I think it's best on this side of the house when considering noise or vented smells.  It wouldn't do any good to vent out the odor of cooking fish, only to have it waft back in through the open window.

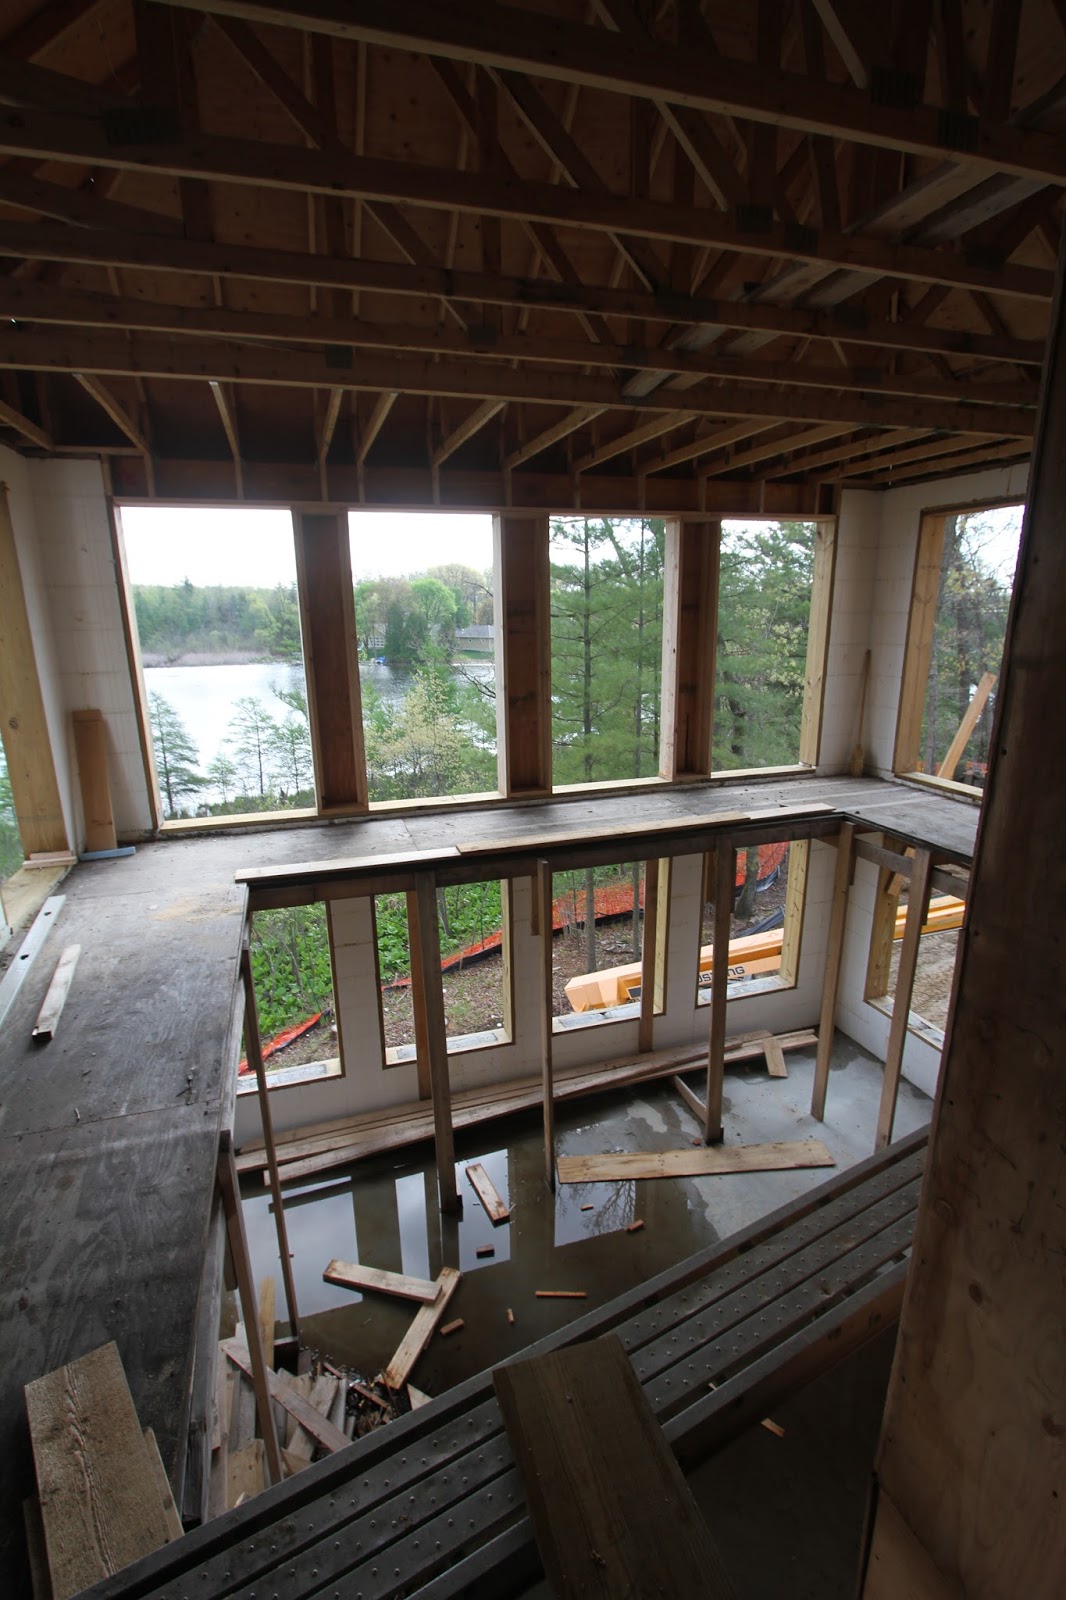
    They've installed all the bucks and dividers for the upper great room windows.  Now we can get an idea of what the final window layout will look like.  Although it would have been great to have one huge window, it's definitely fiscally impossible, if not physically.  All the upper windows will have a grid and windows on the left and right will have a half arch.  The cavities these make will help route wires for speakers and lights, but I'll pay close attention to how they're insulated.  It might be another great target for spray foam since it's a small area.

   Here's what the great room now looks like from the outside.  As per the usual construction, there's a two inch thick EPS foam sheeting installed on the exterior of the wall wherever ICF is not present.  This is the only part of the house that goes from basement to roof without a porch obstruction.  We might need to look into having a gutter on this part since we wouldn't want all that water streaming straight down, especially with the walk out sliding door.

   Here's what the house looks like from the back yard now.  You can see they boxed in the chimney so it's just about ready for exterior material, which will be the same granite cobble the rest of the house.  That granite cobble will be used around the base of the gazebo, but we're not sure how the edge of the cement will be finished.  The top will be stone tile.  Maybe the edge will also be the same stone tile.  We spent most of our time during today's visit, plotting out the footprints of outdoor tables, chairs, and the eventual fireplace and grilling station that will be housed in the gazebo and back porch.  Definitely one of the highlights of the house.

   Here's a close up of the chimney box.  Since we're just using gas fireplaces inside, this will just house two vented exhaust pipes, one for each fireplace.  I'm not sure how we'll finish the top yet, but I don't imagine anything super fancy.  If we had a real wood burning fireplace, this would probably have been made of firebrick masonry and might have been impossible considering what sits below it in the basement.  I don't think the entire weight of a brick chimney can sit on a metal beam.

    Here's how the master balcony looks from the ground.  The roof for this section worked out really well.  The elevations never really gave a great impression on how the roof lines would look, especially on this section.  I look forward to sitting up here on rainy days.  Hell, I'm looking forward to sitting anywhere in this house on rainy days.

    Here's the side of the gazebo that will have the fireplace and possibly a stone bench that leads to the grilling station on the porch.  This whole side will be heavily landscaped with the caramel mint retaining walls so the gazebo will feel well elevated above the stairs that lead up from the walk out below the great room.

    Here's how the gazebo finishing is turning out.  You can see they vented the roof in the porch, but I don't think they needed to since it's not part of the building envelope.  Generally, you want venting where there's warm air below so the cold exterior air can prevent too much snow melt on the roof, which prevents ice from forming on the roof itself.  Since neither the porch nor gazebo is closed to the elements, venting isn't needed, as shown on the gazebo.  It's not a bad idea that it's on the porch since it will be housing the inline blower.  It might increase the temperature of the porch roof space a bit.

   Progress continues in the garage as they're starting to clean and prep for the slab.  The end window height was increased nine inches to accommodate the slab height increase.  Initially, the garage slab would have been about three feet down from the rest of the house.  That means about five steps up, with larger implications on how far out into the garage those steps would have to be, which was considerable.  Our decision was to raise the height of the slab by one foot, which reduces the number of steps to three, reducing the footprint of the steps themselves.  Of course, raising the slab height means adding more fill dirt outside.  Since we are planning on installing a planting work bench under the window we had to raise the window to accommodate a counter height item.  We had the space, so we implemented it.  Much easier to do now rather than later, and not doing it would make for a low bench.  Since this is a south facing wall, and the entire garage is ICF, this will make for a great window for wintering plants and sunning starter seeds.

   Wood was installed in the beams that support the turret in preparation for creating the front porch roof.  Most of the front porch roof is straight, with the exception of the rounded area around the turret.  Implementation of this roof will be interesting since the plans call for an actual broad rounded area.  All these beams will be hidden in the roof structure, but the posts are part of the front porch design.

   So the month is almost done and the final roof isn't on yet.  I think that since the interior walls are all but completely studded in, we're kind of prepping two things at once so the roof can go on at the same time the mechanicals are going in rather than installing the roof, then windows, then mechanicals.  Once the roof is done, we'll call in the window installers and have the house finally buttoned up.  Sure feels like it will be needed if we get any more cold days and snow this year.

Sunday, May 8, 2016

Gazebo

We sneaked a visit to the house in, dodging light rain storms, but at least the temperature is staying close to 70.  Not many changes inside the house, but lots of development to the front and back porches, which should be close to completion.

    The front porch joists are all completed and they're finishing the rim joist on the curved part of the front porch that sits under the turret.  The front and back porches are eight feet deep, but under the turret, it rounds out to about twelve feet.  The rim joist here is a bent 1x6 that's nailed into the deck floor joists.  They laid some plywood down the entire length, so I was able to walk on the front porch for the first time.

   Here's where the round part of the front porch starts and how they're framing it.  The joists are toe nailed into the wood that 's bolted to the beam.  I'm not sure if they're going to install a joist hanger or what code is for something like that.  I'm not too worried about it moving around and I'm sure inspection would catch something like that.  The joists are 12" on center because we're planning on installing Azek decking and read that closer spacing is recommended for a more solid feel.

   Here's the plywood runway that I walked on to check out the great views.  The deck is ten feet off of grade on this side of the house so it will offer a nice lofty feel.  I was a bit surprised at how low the window was but don't anticipate it being an issue.  An eight foot deck will allow us some nice sitting areas without feeling cramped for walking space.  The deck goes from the front of the house, to a door on the great room.

   Here's what the deck looks like looking towards the front of the house.  Eventually, this will be covered with a roof so you won't be able to see the turret or the turret structures since they'll be closed into the roof.  I'm hoping the roof won't make the rooms that have these windows too dark since there will never  be direct sunlight into them.  I guess we'll have to see when it's all in place.  The ceiling for the porch should be between eight and nine feet with the top of the windows at eight feet.

   Here's the porch on the side of the house looking down from the turret.  I guess some of the shoreline view will be blocked when the porch roof is in place, but you'll still be able to see the water and the surrounding forest.

   They have most of the framing and roof decking up on the gazebo and almost all of the back porch roof completed.  They still need to deck junction between the back porch and gazebo since it makes some complex valleys.  At first I was confused by the 2x4 structures that are present in the gazebo.  I measured out their distances, which were 24 inches on center and realized that they were planning on using it for non-load bearing support for a ceiling in the gazebo.  Or intention was that the gazebo would have a vaulted ceiling so I texted Matt and he got back to me right away that they were indeed planning on having a flat ceiling.  He said it's possible to vault the ceiling, but wants to meet to go over the design elements of it before he proceeds any further.  Good thing we checked up on the progress.  With the speed they're moving at, it could have been completed before we even realized it was wrong.

   Besides the ceiling height error, the gazebo looks fantastic.  It's pretty amazing to finally see one of the biggest design elements of the house, come into fruition.  There's a concrete pad poured off the right side of the gazebo, that we can use to support an outdoor, wood-burning fireplace.  We're still working out the details, but we're planning on having that entire section part of the fire place, and maybe the two flanking sections will have seating along the edges that flow into the fireplace construction.

   The segment on the right is where the fireplace will be.  We chose this side because we didn't want the view of the back yard blocked from the gazebo since that's where the pool will be.  We will be blocking some of the great water view, but this side is screened by a good number of trees, so it was never a clear view.  You can see the framing for the chimney on top of the great room.

   Here's the view of the back porch and gazebo from the back of the house.  There will be steps up to the porch right in front of that open doorway, which leads to the mudroom.  Since the mudroom has a full bathroom adjoining it, we figure that will be the bathroom that we use when people come in from the pool.  As such, Margaret is designing it to be more utilitarian and easy to clean.  Great design starts from the beginning.  That huge window is the kitchen sink window, which offers a great view of the back yard.

   There's the framing for the chimney.  Since we're just using two gas fireplaces, it doesn't need to be a real fire brick chimney.  It will be sheathed in plywood and accept the same granite cobble stones that will be on the lower parts of the house.  I apologize to the masons in advanced, for making them work so high up.

   Here's the gazebo from the window on the same wall as the master balcony.  The view to the pool and back yard is now blocked by the roof, but there's still a clear view out to the water.  You can see where they still need to frame and sheet the roof where the porch meets the gazebo.  I'll ask Matt how they're planning on doing it.  I can either see a ridge line from the house to the gazebo, or a small cricket so the water sheds properly.

   The view from the other side of the bed in the master bedroom isn't as obstructed towards the pool area.  I don't anticipate the need to, but I'll be able to walk out on these roofs from the master balcony, so any debris that gets stuck up here can easily be blown off.  There's some concern about security, so I'll have to address it by having a door bolster on the master balcony french doors.  Good thing we have concrete floors to anchor bolts into.

  Once again, here's the curve of the front porch, as viewed from the turret.  They pulled a great radius on this curve because it's pretty much circular eyeballing it.  We're still undecided on post covers and railings but we're thinking something white and round for the posts and dark for the railing, to keep it visually unobtrusive.  I'll have to verify the length of the cantilever on this part, but it doesn't look like it's more than three feet.  If I recall correctly, the joists are 2x8 and the general rule is that you shouldn't cantilever more than 25% of the span length so it might be cutting it close.  

   Besides meeting with Matt about the gazebo design, no other meets are schedule for this week.  We placed the order for the Omega cabinets, so if I have time, I'll make a post about our final kitchen cabinet design.  I'll touch base with Matt about roofing and HVAC installation because that really needs to start moving forward.

Sunday, May 1, 2016

Raising the (porch) roof and talking about elevators.

   I had a meeting with the elevator installer on Friday, so this post is a few days short of my normal spacing.  The crew generally doesn't work on the weekend though, so there wouldn't have been any progress after I left.  The forecast called for some rain, but I was lucky enough to be at the site during some sun, but the temperatures continue to hover around the 60s.  Looks like we're having a real spring this year.

   Here's the progress on the front porch.  They've finished installing all the deck joists at 12" spacing in anticipation of the Azek that we'll use.  The front of the house still needs some joists, but it should be finished within a few days of next week.  They remove a section of the ICF to install the ledger board, and use joist hangers against the house.  The joists are currently sitting on a 2x8 spacer on top of the beam, which is bolted to the beam itself, and joist hangers will be used to nail the two together.  Pretty standard deck construction.  They're holding off construction of the porch roof on this side of the house for some reason.  It might have something to do with roofing shingles for the top of the house and ease of access.

   The roof on the back side is simultaneously going up and here's what has been completed.  Since the roof doesn't have to be as structurally strong as the deck, they don't have to remove any ICF from the wall to attach the ledger board for the roof trusses.  Posts hold up a sistered beam, which holds up the porch trusses that are constructed on site.  Much of the roof decking is already installed here too.

   Here's what the underside of the back porch looks like.  When it's completed, the structure will be covered with a bead-board material in a natural stain color.  We're not sure if we'll use an Azek or wood for that.  The vertical pieces are temporary supports.  The porch roof around the corner will contain the remote blower for the kitchen stove so there should be enough space up there to house it.

   Here's the beginning of the gazebo roof.  The beam that separates the gazebo and porch will be raised a bit higher since it's coming down below the 8 ft height of the porch, but it won't be as high as the beams for the gazebo.  The underside of the gazebo will have a cathedral ceiling so the center will probably top off around 12 feet or so.  The idea right now is that install a stone bench around the exterior of the gazebo that will have a short rail on top that also acts as a back rest, but I'll have to check to see if that meets code.  The side of the gazebo that I'm standing on will have an outdoor wood burning fireplace.  We tried to seize the gazebo to be able to contain both seating around the fireplace and at least an 8 person table.

   Here's a shot of the back of the house now that the porch roofs and gazebo are going up.  I can't wait to sit out here on rainy days enjoy a cup of something warm.  I'd be tempted to poke up a fire and sit out here in the middle of winter.

   Here's how the back porch roof meets the garage roof.  It's not ideal and gives me some cause for concern since it's never nice when two roof planes create a valley against the house.  The should be enough slope to shed water, but I can see this area becoming an issue for debris during the fall.  Ideally, the fascias of the two roof sections would have been at the same elevation and the back porch could have terminated into the garage roof, but you can see there's a few inches of discrepancy between the two.  The height of the porch roof is limited by the master balcony around the corner so we can't raise it up.  This is probably the best way to do it and at least it's outside the envelope of the house.

   Here's that valley from above, taken from the master bedroom window.  At least I'll be able to see when there's crud up there and climb out with a leaf blower to clean it up.  There looks to be enough pitch to shed water, but I can just hear that pine in the back ground saying "Have fun cleaning up my droppings!"

   So the reason I was out there was to meet with the elevator installer and get info and quotes for that beast.  We weren't sure if we wanted it installed for move in so it wasn't included in the price of the mortgage.  It will be installed and maintained by A4 Access and is a hydraulic lift type, as opposed to a chain lift.  For our install, it comes in at a fairly reasonable 28k so we'll have to see if we have room in the war chest to installed right away.  If not, we can prep the elevator shaft for the day when we do want and need it.

   We have a meeting on Monday to finalize the Omega cabinets for the kitchen so we can squeeze the order in before the price hike.  Most of the other cabinets around the house will be either a slightly more cost efficient Omega Dynasty, or a much more cost efficient Homecrest.  Future decisions are really starting to be set in stone and we're almost at the half way point!  We're thinking that in two months, we'll see all mechanicals installed and drywall nearing completion.  Here's hoping.

Monday, April 25, 2016

Walls, fireplaces, and balcony

   The weather has been staying cooler, but it's not snowing anymore so work is progressing well.  We've gotten some rain, which seems to move the work to the inside, finishing up with the stud walls but progress has been made on both the inside and out.  Of course, we're more behind than was projected, with the roof slated to be completed last week, but since the interior walls are going up in parallel, overall, we might be on track.
   Here's the front of the house on a sunny Sunday.  The roof junction at the turret has been completed and the small section where the front porch meets the garage roof is the only remaining open section.  I wonder if they'll be keeing this area open so you can have some kind of access into the front porch roof.  It's the same way on the back porch/garage interface.  From this angle, it doesn't look like much was completed, but the truth tells a different story.
   Here's a better look at the completed roof decking for the turret.  I can't really see from this angle, but there has to be some kind of valley up there.  I'll have to take the multicopter up there with a camera to see what it looks like and determine if it will be a debris trap.  It looks like there's enough slope to wash away any leaves that fall in the valley.  Without gutters, I don't have to worry about that junk getting trapped up there.  
   Here's what's going on with the progress of the exterior of the house.  Soffits and soffit vents!  Our current house has a measly 16" soffit and the whole thing is perforated vinyl, which performs well.  These mega soffits are at least two feet and use an aluminum channel type of soffit vent, which I think should be enough.  Apparently, there's a formula to calculate how much soffit venting you need.  For us, since the attic square footage is about 16.6 square feet, we'll need about 8.3 square feet of soffit venting.  Considering each of these pieces is 2" wide I think we'll need about 50 linear feet to satisfy the calculation, which is easily met.
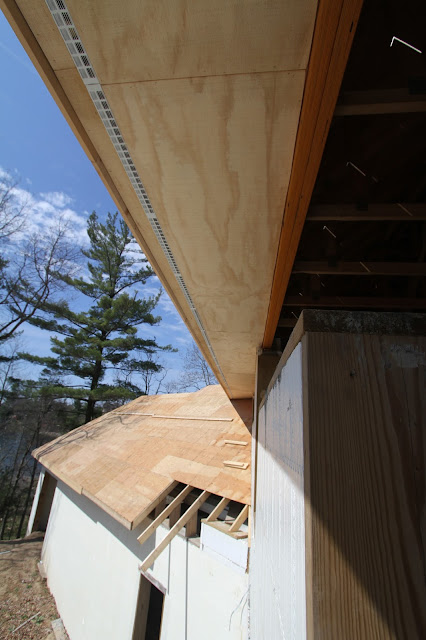
   But wait!  There's more!  They've completed the soffit and vents along most of the back side of the house and garage too.  This is a shot from the master bedroom window.  You can see the roof section that will intersect the back deck roofing, so it's being left uncompleted until they meet up.  The soffit is covered with a rough sawn plywood and the front fascia is finished in a rough sawn cedar.  They'll both be painted white to match the trim on the rest of the house.  Two great things about having such a large overhang.  First, it keeps the rain away from the walls more so there's less wear and tear from the elements.  Second, during the summer when the sun is high in the sky, a larger overhang will block more direct sunlight from hitting the windows, keeping the house cooler.  During the winter, the sun is lower in the sky, so more sunlight gets in the windows, warming the house.  We didn't completely go for the Passivhaus standard, but we did try to incorporate it when we could.  

   Moving inside for a bit, there was some good progress on the interior walls, and I think we're about 95% studded out.  Here's the progress on the rooms attached to the rotunda.  The front entryway closet got its back wall and the powder room and pantry is up.  They had to make a double wall around the steel rotunda supports so we lost a little space there, but we'll just have to work around it.

      Here's the back side of the powder room and the pantry to the left of it.  We also had to move the powder room door, which comes off the elevator hall, a bit to the left to accomodate the rotunda supports.  This shifts the desired toilet location to another place since there's not enough room.  There's still enough space to make everything work.  During our initial design consultation with Margaret, she suggested maybe fitting in a banquette along this angled wall.  It would make a nice every day eating area, and clean up the traffic flow through this space.

   Here's what the pantry looks like.  It's not as huge as some pantries you see online, but it's way more than what we have now, which is the basic closet pantry.  The room measures about 4.5' wide by 5' or so.  We lost a walls width of space when we removed the stud wall from the elevator shaft.  We had some discussion on where to put this door.  Initially I thought we could do a regular door width, double swing door and put the opening in the middle.  I was thinking that this would give us two shallow shelves (2 cans) on either side and a deep shelf on the back wall.  Looking at the space now, I can see that shifting the foor to one side, but maybe retaining the double swing doors might be better.  It will give is a more usable shelf on the left (cereal box width) and a double door would minimize the space requirement on the right, so we could have shelves on that wall too.  In any case, the shelving will go from floor to ceiling so 9 feet of shelves should be plenty. Right?

   Another big piece of the wall puzzle is taking shape; the fireplace column.   Here's a shot of what it will look like from the rotunda.  There's a little bit of a "room" outside the rotunda.  It's not quite the kitchen, and it's not in the great room, so it's kind of a seating area/ waiting room/hallway?  Whatever it is, it's the junction between the rotunda, kitchen, great room, and guest room, and it has a fireplace.  It's actually a two way fireplace and I wish it could be as huge as this space, but in reality, it will be limited by whatever the biggest two way gas fireplace I can find.

   Here's what it will look like from the great room.  The plywood and steel stud at the bottom is just for support since we haven't decided if we want the fireplace at floor level, or elevated.  Hearth?  Floating hearth?  We're not sure yet.  There will be a TV above the fireplace, so I should contact Jonathon to see what his opinion is on a recessed area.  
   You can see the upstairs support posts to the left and right that will be built into the column.  On paper, the sides of the column are thick so we were wondering if a built in cabinet could be put on the first floor to house electronics for the great room.  Since the support posts aren't exactly flush with the column corners, it might not be possible to pull off.  Also, we'll have to see how they close in the posts.  The column should be the same height all the way up, so there should almost be a double wall on the sides, all the way up.
   Moving back towards the front of the house, here's what the doorway to the study looks like from the entry foyer.  We've decided that this will be mirrored on the other side with the dining room, just to get a nice symmetry with the entry.  On paper, this is just a door way and the dining room is completely open with two pillars placed close to the walls.  We knew that we didn't want the pillars and we contemplated closing of this room.  I advocated for it since it was our personal study where we'll be housing our computers.  Some people have a decorative study, with a heavy desk, wood paneling, and bookshelves lined with books they've only read once.  Ours is more of a functioning study since we both have our own computers and use them daily for work.  Gaining privacy to this room is pretty important but opening it up would be nice too.  We're thinking about a double bi-fold door here, and keeping the dining room doorway open.

   Another wall piece that fell into place is the dining room walls.  Here's the built in nook that sits against the elevator shaft.  On paper, the curved wall is covered by a straight one but we've decided to keep construction easy and just use the back of the curved rotunda wall as the dining room wall.  There was just some dead space behind there anyways, so no good reason to cover it.  The dining room built in nook isn't as deep as I though it would be, but it's correct at 12 inches.  Not deep enough for a proper cabinet, but maybe enough for shelves or art.  The butlers pantry on the right leads to the kitchen and the entry to the foyer is off frame on the left.

   Moving upstairs, here's what the fireplace column looks like from the rotunda.  There will also be a smaller gas fireplace up here so I guess this is a sitting area that connects the rotunda to the small bedroom and the master bedroom.  It would be a nice place to put a string quartet to entertain our guests (/sarcasm).  The staris come up from the left and the left and right of the column will be open to the great room.  It looks like a nice amount of light from the great room windows will make it into the rotunda, which is good since there aren't any other windows into this area.  A skylight here would have been interesting, but impossible since it right under the highest peak of the roof.

   Whoa, what's this?  If you guessed master bedroom balcony, you'd be correct!  They started rough construction of the balcony so they could construct the roof supports that cover it.  It just has some temporary plywood covering the floor joists, but it's strong enough to walk on, which I did, which is awesome.  French double doors will lead out onto this balcony, and it offers great views of most of the back yard, and the more natural side of the peninsula.  We're not planning on taking down any more trees on this side so this view is pretty much final.  

   The balcony will be 8' deep since it sits over the back porch below, and about 12' wide so it should go a bit more to the right than what's pictured here.  All the current supports are temporary but I'm not sure how they'll be constructed.  Since there's only supposed to be one post in the corner, I'm thinking they'll install steel posts from below that connect up here since the second story posts line up with the first story.

   Here's what it looks like from the edge of the gazebo.  Looking at the pictures now, it looks like it's a couple feet short.  I'll have Matt verify the length but I'm counting 8 joist spaces.  If it's a standard 16" o.c., I'm calculating only 10.6 feet, which is 1.4 feet short.  I'm also not sure how the drainage works for a deck that's above/part of a roof.  Also, I'm going to request 12" o.c. because this will probably be Azek decking as well.  As always, keep an eye open for correct implementation.  I didn't notice these details when I was there, so I make it a practice to take pictures that I can look at later when I have time to think. 
   Runtime edit:  Just confirmed with Matt that he measured out to 11' on the length of the balcony.  The way the blueprints are draw, it shows 6" from the wall to the first post, then 10'6" to the post that supports the corner or the balcony so that's where he got 11' from.  I was looking at the roof overhang line, which goes to 12' but we agreed that 11'6" is the actual length of the balcony.  There's a caveat on the first page of the blueprint that says: "Use figured dimensions only.  Do not scale drawings."  Matt is going off of that, but I haven't trusted them ever since we had the incorrect figured dimension on the footing foundation.  That's why good communication is important.  Would we have missed a half foot of balcony?  Maybe.

   Here's a dramatic shot of the turret, which won't be possible once the front deck is completed.   The rain has a long way to fall off this side of the house.

   Here's the left side of the house where it meets the great room.  You can see the soffit has been started on this side of the house and continues along the back side of the great room.  The installed fascia board also cleans up the roof a bit.  For the most part, there's pretty easy access to the exterior of the second floor with the only exception being the great room.  That will make repainting and cleaning a bit easier.  Of course all our opening windows can be cleaned from the inside, so I won't be standing out there for that.

   Another nice finishing is the removal of the concrete overflow in the basement.  There were a few areas at the beams where the ICF busted out during the first floor pour.  Some concrete got on the already poured slab, but that cleaned up nicely.  Now, they've ground down the overflow at the beams so it's flush with the ICF, ready to be covered by drywall.  I'm not sure when they did this, but I just noticed it this time.

   Here's another shot of the back of the house.  Eventually, all the dirt in the corner of the great room back porch walls will be removed and retained by stone.  We'll cut an opening in the porch wall for access under the deck, which will make some nice unconditioned storage space.  A path will lead from the basement patio here, up through the retaining walls and to the back yard.  This won't be happening for a few years though since it's one of the last areas of implementation for the landscaping plan.  Installers will need this area to drive their machinery through for backyard stuff so installing retaining walls will have to wait until that's completed.

   Here's what the back of the house looks like from the back yard.  We were talking last night about the house in general and decided that one of the best things about it is that there's no "dead" side.  So many new constructions these days have a great looking front, okay back, but the sides are just monolithic walls of brick and vinyl.  We were careful to design a house that looked great from all sides and had something interesting to look at from all angles.  Every window will have a great view and all sides have a nice useable feature.  Of course it helps to not really have any neighbors in eye sight. so we really don't have to worry about window privacy.

   The last little update is that the door guys came out and installed a more exact shape of the front door we're getting.  Before, this space was just filled up with a rectangular construction door.  Now you can see the actual shape of the door we're having installed.  If I remember correctly, we're going with an 8 foot arch top door with arched sidelights that will fill the whole opening.  The door will be solid, but the side lights will have in between real leaded glass.  This is something that won't be installed until the very end, but this will allow the exterior finishers to build right up to the door jamb. 

   So we're still chugging along with the roof and walls.  Hopefully we'll get a shingle quote soon and get the HVAC guys in there to rough out their floor openings.  There are standard locations to place heating vents, but I'll have to verify some room design with Margaret so we're not placing a vent where a desk will go.