Monday, July 11, 2016

All that's left is the copper cone.

   The weather is staying pretty hot so it's good that the roof shingle is all completed.  There's a little finishing work to do on the flashing and a good amount of clean up and that should conclude this week.  We're getting a quote on the copper roof turret to determine if it's feasible.  Alternatives would be to either just shingle it or install a copper colored metal roof.
   We actually met with the roofer to discuss the options and do a little walk around of the install.  I again broached the subject of the beer and wall damage and he again denied it was his guys so I think that's a dead end.  To my untrained eye, everything looks pretty well installed.  Sure there are a few odd flashing spaces and I would have like it if the flashing was overlapped a bit more, but everything should be okay.  Probably not the highest pinnicle of craftsmanship, but adequate.

   So here's the roof completed.  There's a little bit up at the turret that needs to be finished, but I think it's because they're going to apply Winter Guard to the entire turret and the copper flashing here still need to be installed.  I walked around the porches on the front and back and the shingle application looks clean and flat.  I don't see any apparent patterns or seams so it seems like they installed them with a good stagger.  From the ground, it looks great.  You'll notice that the waste pile looks a little smaller.  That's because the roofer managed to use a good amount of it on the curved porch section.

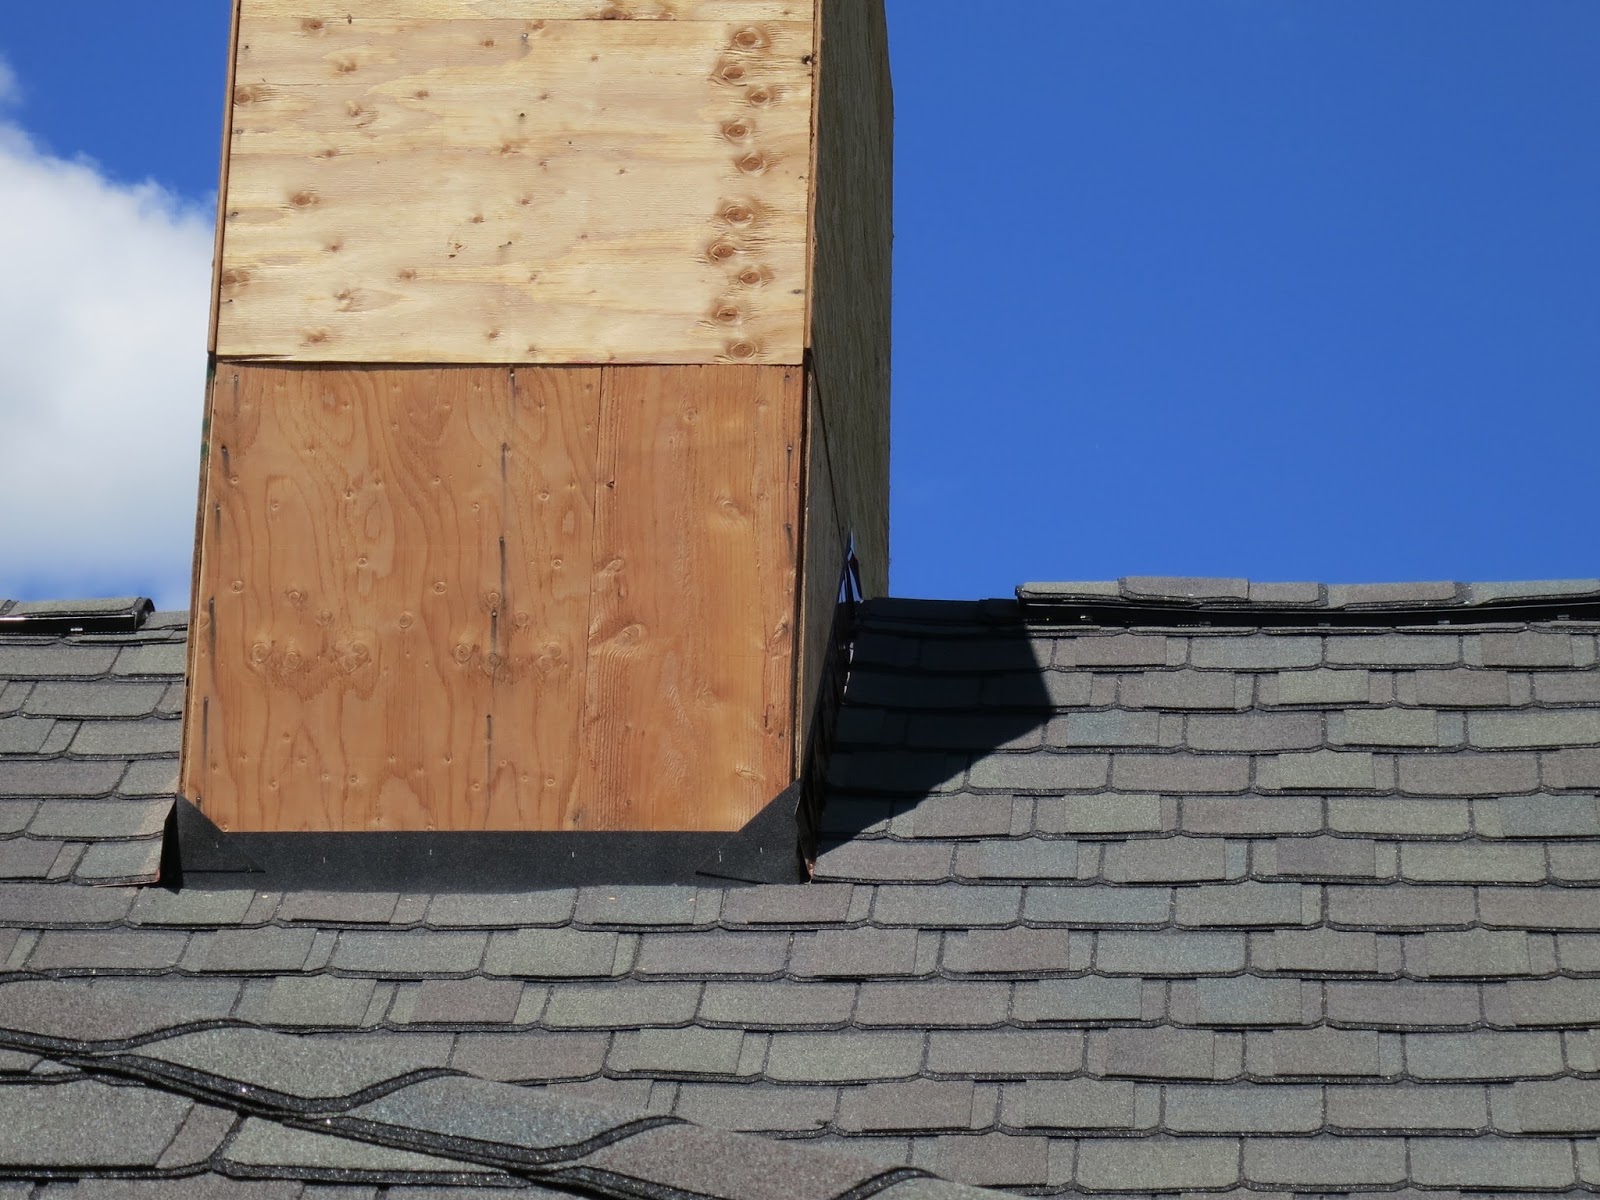
   Here's the last section that needs to be completed.  You can see the Winter Guard peeking through the void.  The plywood on the turret has a little sheen on it, so it's easy to imagine what the copper will look like.  I wasn't crazy enough to climb up on the top roof, but the pitch allows me to get a good enough look at the installation.  All the ridge vent has been installed.  I'll probably have to ask Matt to get some house wrap up on the chimney box and install a temporary cap so we can really be dried in.  The scaffolding on the turret will remain at least until the copper is put on the roof.  After that, the overhang on the turret can be completed.

   Here's how they ended up doing the drip edge around the curved porch.  They cut sections of drip edging and overlapped each a bit on the next one over.  Not the best way to do it but again, acceptable.  I would have preferred them to use downspout crimpers and crimp the nailing flange to achieve the desired radius.  This is an illustrated example of an adequate roofer and a good roofer.
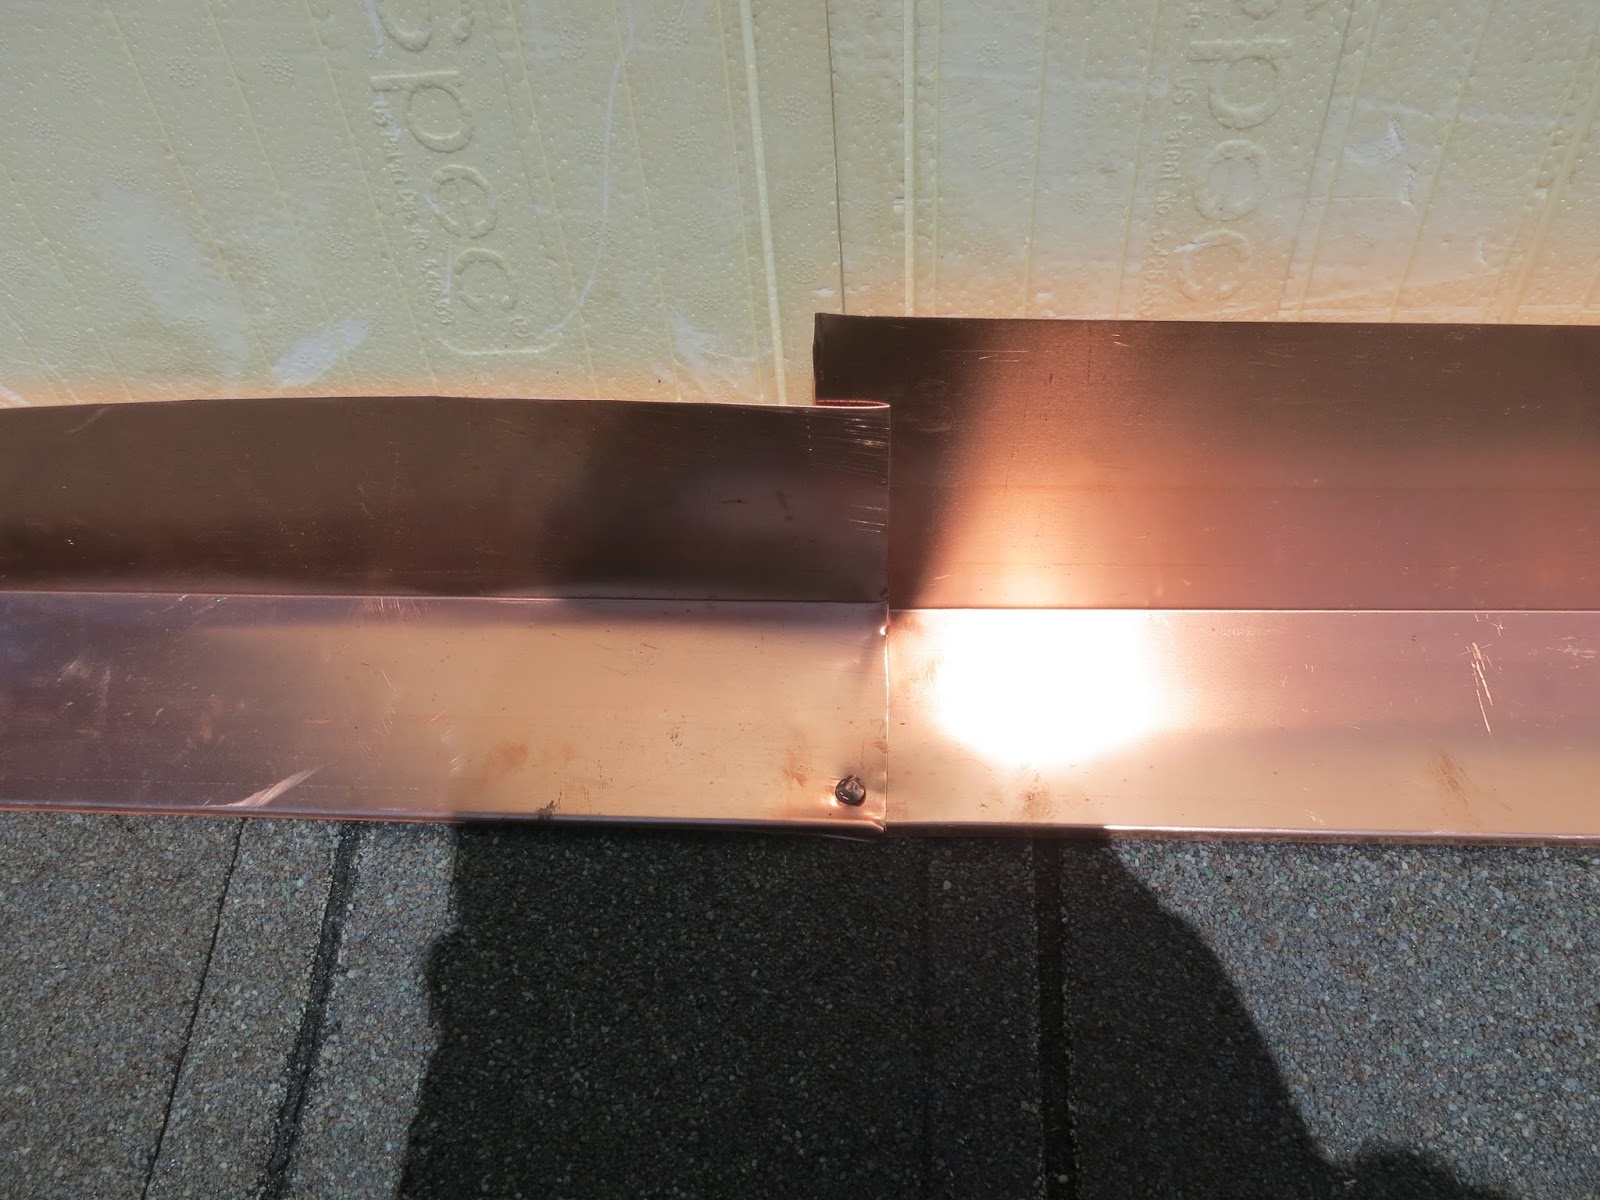
   Oh hey look.  Copper nails.  This flashing is exposed to the elements and as such should definitely have copper nails.  I would have preferred copper nails everywhere, but the roofer insists that they're not needed. I'll keep a close eye on the step flashing that has the galvanized nails to see if it starts to corrode before the siding is applied.  If I see any sign of corrosion, I'm having the roofer come back and replace every single zinc nail that touches the copper.  I've gotten too much advice, warning me about zinc+copper contact.  I'm still thinking about hiring an inspector to get some backing.  Again, notice that the overlap of the two pieces is only about an inch.  Two inches would have been better.

   Here's what the gable peak on the front porch.  It looks like a good installation and the copper looks pretty fantastic.  Definitely something that I haven't seen driving around the neighborhood. Most of the roofs around me are ashphalt shingle, with some concrete tile.  Most roofs have a standard dimensional shingle and no metal valleys so this house will have that unique detail.

   Here's where the porch roof meets the curved porch.  They didn't install a copper valley here and when I asked about it, the roofer said that there's a foot of overlap in the shingles so a valley isn't needed.  I guess this is acceptable since there isn't a steep roof pitch between the two sections so I don't expect a heavy driving water force to push under the shingles.  You can also see how they installed the flashing around the curved turret, step flashing with copper nails. The roofer said that the step flashing will also have a copper adhesive to seal the edges.  Sealant will fail in time so I'll have to keep an eye on this area in the future.

   Here's a shot of the turret and front porch roof.  As I mentioned earlier, the roofer managed to reduce the waste pile and use the cut-offs on the curved section, since the curved roof requred shorter lengths.  Because of how this shingle is, there's a bit more waste when compared to other types of shingle.  You can't reuse a section if there's only half a "slate" on the sheet and you don't want to use short sections on the main field of the roof.  Roofing this curved section allowed us to use the short pieces and I think they did a pretty good job with it.  There are some areas where the shingles are too linear, but it's not a glaring issue.  

   Close up of the step flashing installed around the turret.  Again, since this is sitting on top of the shingle, copper nails were used.  I'm not sure if this kind of thing could have been a single piece.  I'm thinking that maybe another roofer would have used a single piece of copper and sent it through a roller to achieve the desired radius.  It would have taken less time for installation since there would be less cutting and fewer fasteners, but it would require some dedicated tools.  More of an aesthic annoyance than anything else.

   Here's the other side of the turret.  There's the same transition from the curved roof to the straight with the same shingle valley application.  The copper valleys are intentionally kept long on inside corners so the water will pour off the roof away from the house more.  I wonder what the noise level will be in a heavy rain storm with all that water running off the valleys.  Probably won't be able to hear it inside the house since it's ICF, but it will be fun to see buckets streaming off the roof.

   So that's it for this week.  When I talked to Matt last week he said that we're looking at getting the water and sewer trenched, pool excavated, and  garage slab poured.  HVAC should be coming in this week to start cutting the floors and I'm getting in contact with Pro Brothers about getting us scheduled for windows.  I got a chance to meet with another couple who are using Ken as their builder.  It was a nice opportunity to compare notes on our experiences and share thoughts.  I look forward to watching their progress to see if my slow experience is unique.

Monday, July 4, 2016

Rooooooof and wood.

   Hey!  Looks like we have a roof going up!  The roofers started work last Monday and got all of the garage, most of the back porch, including gazebo, and pretty much most of the second floor roof completed.  They still need to put copper on the turret, finish off the front porch, and finalize the finishing touches all around.  I contacted Great Oaks last week to inform them to try to pencil us in for the front landscaping completion, but haven't heard back from them so I'll Pro Brothers to tell them they can come and install the windows in a week.  Looks like we'll be closed up soon!

   Here's what the front of the house looks like now.  I think the Certainteed Grand Manor is a pretty good facsimile to slate and I've seen it on some really nice houses.  They give it a lifetime warranty, but they're pretty stringent about the installation procedure, so if anything is off, it nulls the warranty.  Roofers in general give it a 40 year life since it's a 5 layer shingle so I'm hoping that we'll never have to replace it in my life time.  Well, maybe we'll replace it once when we're old and gray.

   Here's the mostly completed garage.  There's still a bit of finishing work to complete at the gable end but it's otherwise finished.  You can see the ridge venting installed already.  Certainteed makes a ridge shingle, which is just a single shingle the roofers can lay on all the ridges.

   All the flashing in valleys and drip edges are copper.  This isn't copper plated either, it's true copper.  Here's the step flashing where the garage meets the house.  All the horizontal flashing is a single piece and all the diagonal is step flashed.  They overlap in such a way so gravity will shed water to the next piece of flashing, similar to how the roof is installed.

   Here's the Winter Guard they use on the first five feet of the roof to prevent leaks from ice dams that could form during the winter time.  Ice dams happen on the edges of roofs because the heat that escapes from the conditioned space inside the house heats the roof, which melts the ice and snow.  That melt refreezes on the overhangs since they're outside the house envelope.  This ice can "creep" back up the roof and make its way under the shingle, causing leaks and damage.  One way to mitigate this is to have good ventilation in your overhangs, so the roof never warms up too much.  Another way is to install this self adhesive membrane so if ice does form, it can't get to the plywood roof deck and cause damage.  It's code to have it installed, but it's always good to verify it was installed.

   Here's the back of the garage.  You can see some airlines and ropes still up on the roof from the roofers.  This section of the house is pretty much completed.  To my semi-trained eye, they did a good job with the install. 

   Here's where the back porch roof meets the master balcony.  You can see the gray underlayment they're using under the shingles where the Winter Guard isn't installed.  There's some copper flashing that will be installed here.  Usually a felt underlayment is installed under the shingles, and it acts as a water resistant material.  This is a synthetic material that purportedly doesn't buckle, allowing a smoother shingle appearance.

   Lower down in this section, you can see the Winter Guard.  Nice to see they flashed it up on the balcony wall, even though it will be copper flashed as well.

   Here's what the copper drip edge looks like.  This will be a nice detail since we won't have gutters on most of the house.  Eventually, the copper will patina to a dull brown, and maybe when my grand kids inherit the house, it will be a nice green.  We're not planning on having it chemically treated to accelerate the patina process.

   All the valleys have this "w" shaped copper flashing, which is kind of neat.  Our current house just uses shingles in the valley, but when you specify metal, they install this.  The "w" shape is nice because any water running down the roof slope with hit the shape and stop or slow it down, preventing it from forcing up under the other roof slope shingles.  These are just overlayed to run water with gravity but there might be some adhesive under the flashing.

   It's a little hard to make out, but there's copper step flashing on both sides of the chimney box.  The lower side will be copper flashed with a straight piece, that sits on top of the shingle since you want the water to shed onto the roof, not under it.  You can also see the ridge vent installed at the peak, and a nice example of the ridge shingles in the foreground.  Also note that the Winter Guard has been installed up against the chimney box.  It's actually installed in every valley as well.

   So here's how the curved porch roof around the turret turned out.  Pretty nicely I think.  The roofers still need to get to this part and it will be interesting to see how they manage the curve both with the shingles and with the drip edge.

   Here's a close-up of the curved porch roof.  You can see the complexity involved with laying out the plywood to conform to the curves.  Really bang-up job with the installation here.

   In most places I've seen around the house so far, the valley copper extends out from the corner.  I'm not sure if they'll come back and trim it into the corner or if this is how it's usually installed.  I think it would make sense if we're getting gutters since this valley will extend down into the gutter, but without one, it kind of just hangs out there.

   Here's the ridge vent that's used at the top of the roof.  It's just a plastic ventilated sheet with a felt material on the underside.  It's designed to cap the roof ridge and close the plywood gap at the peak, while still allowing heat to vent out at the highest point.  Nothing special about this.
   Here's what the back of the house looks like.  We're thinking about putting a copper finial on the top of the gazebo, but that can come later.  They used a bunch of those ridge shingles to form the peak right now.  

   One last shot of the house in its current state.  The roofers should be able to finish the rest of the roof this week if everything goes smoothly.  I do have some reason to believe that thing will not go smoothly.
   Here's the state of the exterior ICF wall as you walk out the kitchen sliding door.  It looks like the roofers decided to make the wall into a dart board and shoot their pneumatic nails into my insulation.  Although there isn't any structural damage, the nails penetrated enough to reach the concrete.  Since the foam isn't self healing, I now have a few dozen holes through my exterior moisture membrane and insulation that leads right to the concrete.  I've already contacted Ken and Matt about this and I'm pressing heavily for some kind of financial restitution.  Not only is this highly unprofessional, but it's blatant vandalism.  Why is good help so difficult to find?  I wonder what could have lead them to do something like this.  Did they think I wouldn't notice?

   Oh hey, this might be why they felt so bold to shoot up my house.  This is after my clean up.  Empty cans were littered all over the front of the house and a few were thrown down the concrete retaining wall, one was upstairs in the master bedroom and one was in the basement.  Looks like a case plus a 6 pack of 20 oz.  Again, did they not think they were going to be found?  Ken and Matt have a pretty strict no-alcohol policy (amazing they even need a policy).  If the work is good, I don't care if they drink, just clean up afterwards.  This kind of stuff puts my whole confidence in their workmanship in question.

   Another major issue I have is that they're using the same galvanized steel nails they use on the shingles, for securing all the copper.  If you remember anything about high school physics, you'll remember that zinc + copper + moisture = battery.  In other words, these two dissimilar metals in contact with each other and in the presence of moisture, will galvanically corrode, specifically, the nail will be eaten up.  This is plain wrong, but holy crap, ALL of the copper is installed incorrectly.  Sometimes I wonder why I'm paying my builder when I'm the one catching all the mistakes.

On to nicer things, I finally got that pile of logs milled up into some awesome planks.  Owner Steve Mixter of MDJZ came to the lot on Saturday  with his portable sawmill and cut up about 6 of the logs I saved from the latest tree culling.  I thought I had a maple marked to save, but all the logs I had in the pile were red and white oaks.  There was one tree that was too crooked to mill, so that might have been it.

   Here's the biggest red oak on the mill waiting to be cut.  They took a few slabs off each side until a square beam was left, then just cut the beam into planks.  I requested 8/4 thick boards so Steve cut them as a heavy 8/4 so when they dry, they'll be a true 8/4.  Watching him work with his son Zack, you can tell there's a lot of experience needed to harvest the best boards from the log.  

   The bark slabs were sometimes placed three on a side so that stickers (spacers) could be cut.  The stickers are used in between the boards when they're in the pile to promote drying.  Also, narrower boards were harvested this way.  Native cut stickers will prevent "sticker staining", which happens when dissimilar wood species are in contact with each other during the drying process. 

   Check out this nice piece of white oak.  The sinewy markings you see are called medullary rays, which are only present when the wood is quartersawn.  If you imagine the cross-section of the tree is made up of layers of concentric rings, the medullary rays run out from the center of the tree.  These rays are valued for their figurative appeal but trying to harvest as many pieces of this type of wood from a tree creates a lot of waste since the tree would need to be cut radially from the center.  As such, you can either waste a lot of wood, or harvest these from the center cut of the tree, which we did.

   More medullary rays in some of the red oak, book matched.  You can see why the figure in this wood is desired in fine woodworking since it adds interest and character to the piece.  I have a good number of boards like this and two of the largest logs were book matched (mirrored) at the center of the tree.
   Some more light figuring in some of the narrower pieces of white oak.  I'm really looking forward to using this stuff.

   Here's the pile that I was left with.  About 900 board feet of 8/4 boards.  I paid Steve $480 for his time.  8/4 red oak goes for $6/B.F for rift sawn and $8/B.F for quartersawn.  I estimate I probably have close to $6000 worth of wood in this pile.

   I covered the pile with the left over stickers, covered by a tarp, then laid the bark slabs on top to keep it all in place and add some weight.  Here it will sit for at least a year to air dry before I can move it into the house to complete the drying process.  The wood is heavy with moisture and I couldn't move it into the basement or I would risk mold.  Under the cover of the trees, there's always a nice breeze blowing through here, so I think they'll air dry nicely.  Here's a Video of how the saw in action.

   So I have some issues to work out with the roofers but they should be done soon.  I hope to get rolling on the windows soon since I haven't heard back from the landscapers, then we'll be dried in for the HVAC to start work.  I'm a little nervous about having the windows in while there's still so much construction happening, but I guess that's how it's done.  The cabinets have been delivered to Cobblestone Cabinets and they can be held for a month without charge.  After that, it's 0.25$ per cabinet per day so it's not a small amount, but it won't break us either.  The clock is always ticking.


Monday, June 20, 2016

Garage ready to pour, still no roof.

    Another hot weekend and a little progress has been made, but not as much as I would have liked.  Work is moving forward on three fronts, front porch roof, greatroom fireplace, and garage slab.  I guess added together, it's an okay amount of progress.  Seeing how it was fathers day, I got some extra time to myself and took the "drone" up to get some areal movies.  If I figure out a good way to post them, I'll share them here.

   Subtle changes to the front of the house, but nothing drastic.  They finished the fascia and overhangs for the curved roof but still need to put up the roof decking.  There isn't any venting in the curved overhang, and that should be fine. You usually only need venting if the space below is conditioned.  I'm not sure why they put venting on the other parts of the porch.

   I found an inspection tag in the garage dated last Thursday, so it looks like the garage slab is good to pour.  Since we'll have good weather this week, I'm hoping they'll get this poured soon.  We've been talking about how we want to finish off the garage space.  In our current house that we bought new, we epoxied the garage floor with a DIY kit and it has held up well for the past 10 years.  This time around, we'll either get the floor professionally epoxied, or install linoleum or vinyl composite tiles, but I've read mixed reviews about the latter.  We would have loved to installed a floor drain in the garage, but I think it's against code, so we didn't push it.

   Here's where the curved roof porch meets the rest, near the door.  You can see the installed fascia and how it still needs to connect to the rest of the roof.  I still have to talk to Matt about how we're going to conceal those straight beams.  It has been a busy week.  


   Here's the same spot from above.  The laminated beams are installed in an odd way.  Since they're sitting on the same plane as the steel beams, they're just notched to mate up and hang on the beam.  I would usually expect to see some kind of steel tie or something, but his might be an acceptable application since the roof load isn't too high.

   Here's the other side of the curve.  They've connected the fascia and overhang on this side so it's a preview of what's to come.  I'm really hoping that they'll get the decking installed this week so we can get the roofers in since we're taking delivery of the cabinets next week.  Cobblestone Cabinets can warehouse the delivery for us for about a month, but that means we need to get a roof, windows, HVAC, electrical, plumbing, and flooring in, in that month, before the cabinets can be installed.  That's a really tall order.  We might be able to push to get the kitchen done but I doubt it.  With windows installed, we could possibly stash them in the basement and they might be secure down there.  It's a pretty safe area, but it still doesn't make me comfortable.

   Last shot of what the finished overhang looks like from the "inside".  There won't be anything in this roof so it will remain hollow.  I'll have to ask Matt or Ken if we need to thermally insulate the ends of the concrete beams since they're sitting in the porch roof airspace, which is unconditioned.  There's a potential for the cold air to leech into the concrete beams and propagate into the turret, which is an already difficult area to climate control.

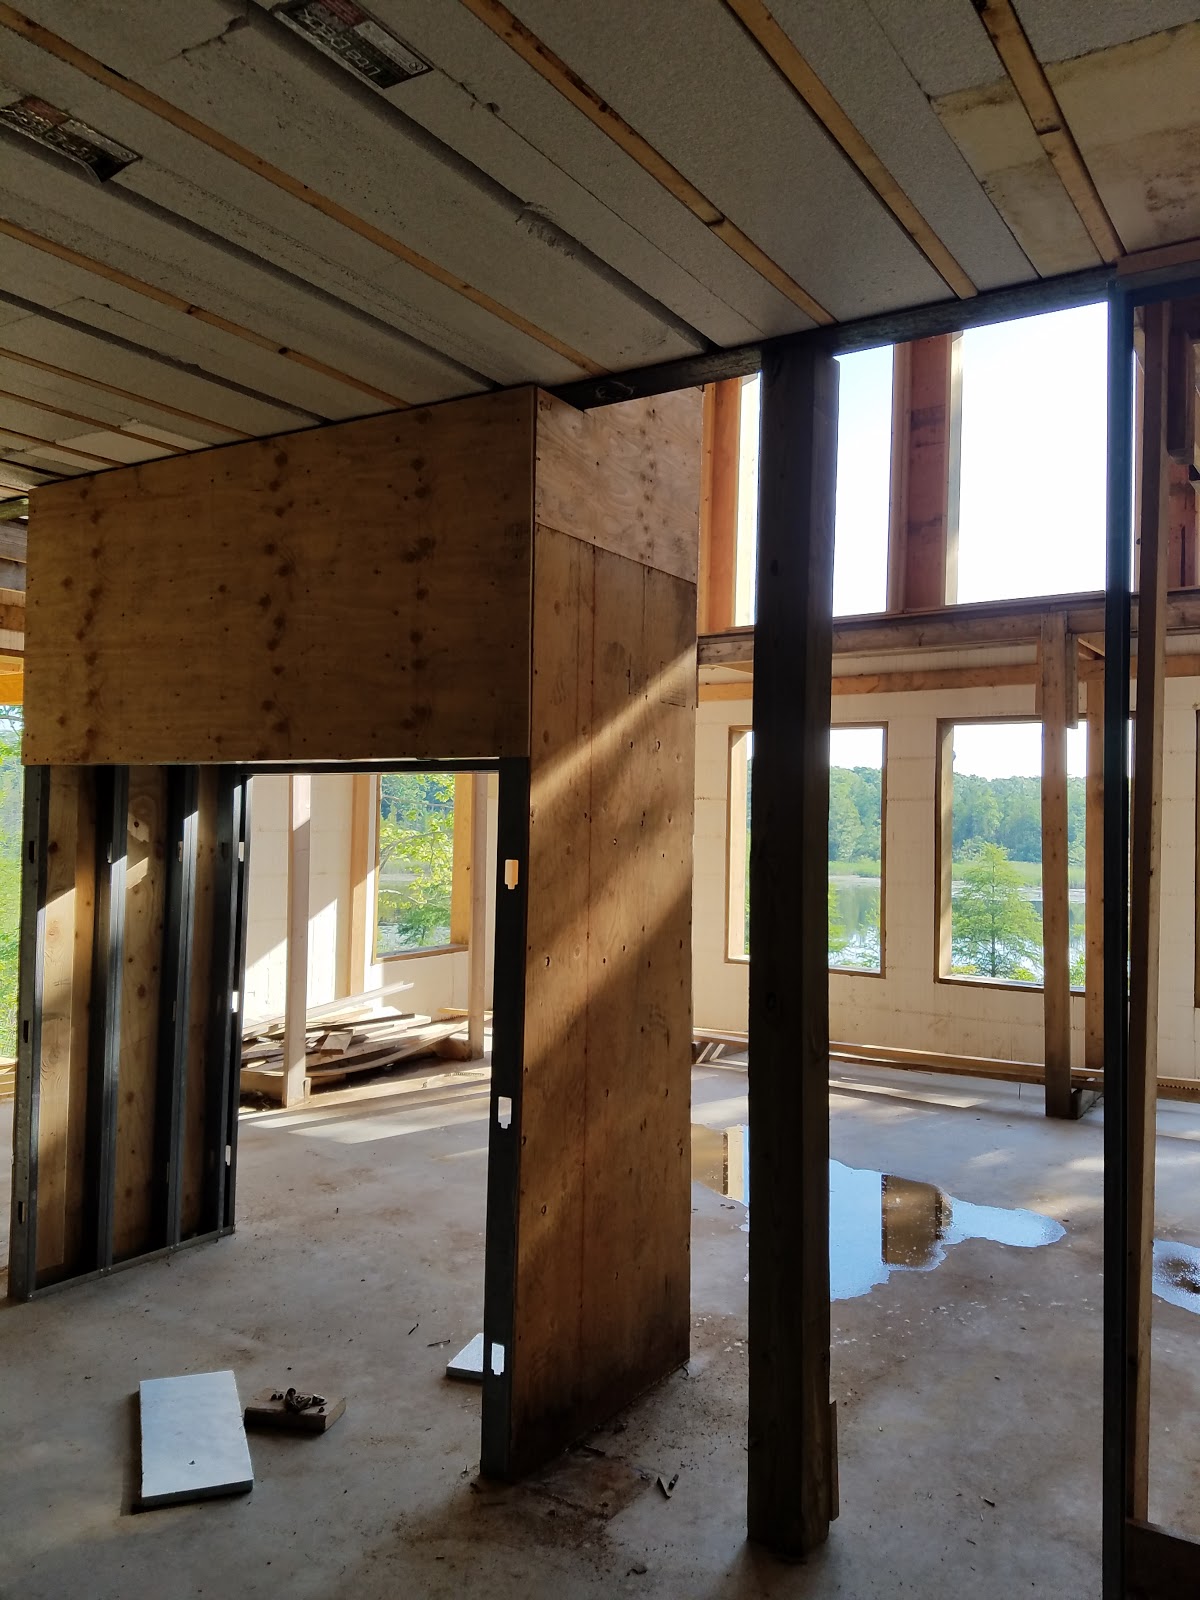
   Moving inside, here's what's going on with the greatroom fireplace column.  I guess we got the go-ahead to move the posts that support the second floor beam, because they're on the floor right now.  The beam is being supported temporarily by the 6x6 posts, and I guess they'll figure out how to put them into the fireplace column footprint.  That's good news for the aesthetics of the room since we don't need to take up more opening to conceal the posts, both on the first and second floor.

   Here's where they cut the bolts that anchored the post to the concrete.  I don't expect it will be filled or anything since it will be hidden by the finished floor.  The beam welds have already been ground down, but they'll need to reconstruct the fireplace column to accommodate the floor mounting plate for the post.  If this was just a spec house, I think a detail like this would have been overlooked.  In this respect, it's nice to have a custom construction so we can work things out as we go along.

   Minus the temporary post and add a two way fireplace, this is what the space will look like when it's completed.  Since the fireplace doesn't fill the entire space, we can pretty much put the posts anywhere inside the column.  I already gave Matt the specs of the fireplace we want, so we should be able to find the best place for installation.

   So that's if for this week.  I'll try to micro update with the aerial footage, or at least some nice captures from above.  We won't be able to make it to the site this weekend so the next update won't be for a while.  Hopefully we'll have a TON or progress to report on.


Monday, June 13, 2016

Roof level at 99 percent

   We had the most beautiful day to visit the site.  Mid 70s, no clouds, and no humidity.  What a change from the day before at low 90s and high humidity.  It looks like most of the front porch roof is completed and the curved area under the turret has rafters laid out ready to be sheeted.  Some of the fascia is on the curved porch.  There are some design concerns about the beams that support this section, but I think I have a aesthetically pleasing solution, and will meet with Matt some time this week to discuss it.
   Look at that sky!  As you can see, all the support structure for the front porch is up and most of the roof decking is installed.  I actually climbed up on it from the laundry room window with some shingle samples so we could decide on the color.  We decided to go with the Gatehouse slate color.  It's a little darker than the other colors and has some reddish variation in it.  The roof decking that's installed looks great and I can't find any issue with it anywhere.

   Here's the promised shot of the barrel vault above the front door.  They did a great job matching the arc of the vault with the arc that the front door makes.  We decided to keep the porch face of the vault solid rather than cutting out the arch in the gable end.  This time, we took my father-in-law with us and he was just amazed at how awesome the porches were.  As we walked inside the house, he gushed at how great the view was and I agree.  Since it was a such a nice day, we took some time to just sit out on the gazebo and enjoy the view.  As usual, there was a slight breeze which kept any annoying insects away, if there are any.  For every time I've been there, I've never been bitten by a mosquito.  
   Here's a shot of the greatroom fireplace as viewed from the rotunda.  We've had some problems trying to figure out how to hide these posts.  As per normal engineering, there are footings in the basement that have posts bolted to them, which hold up a beam that spans the distance between the walls on the left and right.  On the first floor, in this picture, the posts just to the left and right of the fireplace column are sitting on the concrete slab above the basement beam and directly above the posts below.  This transfers the weight of the second floor straight down to the ground.  Well it's unfortunate that the posts are where they are because they can't cleanly be contained inside the fireplace column, so we've been racking our brain trying to figure out how to wall or box them in.  The original blueprints didn't have any posts, but implementation required them.
   One thought was to just extend the fireplace column width to enclose the posts.  This would have worked, but it also would have reduced the opening to walk through on the first floor, and the view on the second.  At our last meeting, Matt said he would contact our structural engineer to determine if we could move the posts inward by eight inches to hide them in the fireplace column.  They would be still sitting above the beam, but not in line with the posts in the basement.  I guess it's possible to move them because there are some new 6x6 wooden posts set up, presumably as temporary support so they can cut and reweld the posts into the fireplace column.  Score one for us!

   I ventured out on the side porch roof to take this shot.  The roof slop is friendly enough to comfortably walk on, which would be nice for cleaning gutters if we needed them.  We took some time to stand in the turret and enjoy the cool breeze and warm sun.  I know I keep saying that I expect the roof to be completed every week, and for most of this build it seems like the norm.  I'm really hoping that once we get the other subcontracters in, the pace will pick up.

   Here's what the front porch looks like from the turret.  The gable came together well and I don't foresee any issue with debris collecting or shedding water.  With the installation of the front porch roof, the turret loses LOS with the garage doors, which isn't a problem, just an observation.

   Here's what the curved roof structure looks like from the turret.  You can see the straight laminated beam that supports the weight of the curved roof, but this beam is causing some asthetic issues.  The beams that support the porch deck run straight from post to post, and that's fine since it's hidden under the deck.  However, with these beams running straight from post to post to support the porch roof, when viewed from under the porch, you'll get odd cresent shaped supports from the curve to the beam.  Either that or the beams themselves will be boxed in and form odd angles in the porch ceiling.  It's not possible to bring the entire ceiling down because the tops of the windows would impinge on the ceiling.  I'll have to discuss it with Matt, but I think the only way to conceal these straight beams is to box them in, inside a large curve that follows the curve of the roof.  Ideally, we would have had curved beams below and above, but this didn't happen and it's way too late to change it.  While the boxing in of the beams will increase the area where the ceiling drops down, I think it's the best solution, and hopefully a viable one.

   Here's where the curved roof meets the straight on the side of the house.  You can see that they've added a laminated plywood curve that extends from post to post that will form the drop down fascia of the beam box.  You an also see that they've started to install the curved rough sawn cedar fascia on the roof rafter ends.  The space between the rafter end and the beam fascia should be about the same height as the porch ceiling and may contain overhang vents.  They probably don't make curved overhang vent, so it will either be short sections of straight vent or small round vents.  My proposal will add another laminated curve on the inside of the beam.  The only odd part will be at this point, and we'll need to find a good way to terminate the box.  Maybe a few more roof supports will need to be added in where the straight and curved interface.  I'm really hoping this will be completed by this weekend and we can get the roofers in the following week.

   Here's an unexpected addition.  It's the ceiling in the turret bedroom walk in closet and it's the attic space access.  It's a central location for the hatch and it will never really need to be accessed.  There will probably be another one in the garage.  It's kind of neat to see it in place since it's thinking forward to attic insulation and drywall finishing.  This one is a pretty generous 34"x24".  It shouldn't interfere with the lighting in this closet.

      Here's the last shot this week, of the back of the house.  Nothing new back here but it was too nice a day to not grab a picture.  We lingered on the gazebo for a good half hour just talking and dreaming about what it will be like to finally move in and live in our dream house.  With all the work and time it's taking up, it's hard to remember that this is indeed our dream house and not everyone gets an opportunity like this.  We have to remain thankful that for the chance to create exactly what we want and build a house that will hopefully be around for hundreds of years.  Hopefully there won't be someone a few hundred years from now, cursing the creators of this thing and decrying any odd design choices.  It seems like a house deserving of a name, but we'll have to figure that out later.

   So that's it for this week.  A little progress on all fronts again, but nothing to check off the list.  We'll keep lining up our ducks and hopefully we'll get to give them a chance to swim soon.