Monday, January 4, 2016

Landscaping part 3

   Here's the update to the landscaping that I promised.  It's timely since we've actually started "phase 1" of the landscaping plan.
  If you'll recall from the previous landscaping post, we had to submit revisions due to the wetlands setback.  Here are the final city/county accepted revisions for the front and back yard.

    The front yard had the retaining walls on the right side of the driveway reduced in size due to the setbacks.  We're basically following as close as we can to the setbacks as possible in order to have enough room to turn around from any garage door opening.  As I stated before, Great Oaks actually marked out the driveway in their parking lot and made the turn from all spaces with a large pickup and a mid-sized car.  You can't tell me that's not awesome.  If you look closely, you'll see that the area in front of the front door steps forms a circle.  The area of the driveway here will actually be covered with a circular concrete paver stone pattern.  Great Oaks gave us three options with three cost points.

   The first option was a small paver circle in the middle of the asphalt driveway.  We felt that it implies something nice, but the negative cost differential wasn't nice enough to consider.

    The second option was a large circle border with the small circle inlay.  It used asphalt to fill the field between the outer border and inner circle.  While this got closer to the full circle implementation, again we felt the negative cost differential from the full implementation wasn't worth the savings.  It could always be the case where, years down the road, we could tear out the asphalt field and fill it with the random paver pattern,  but by then, we would be established in the house and couldn't park in the garage (or charge vehicles) for the duration of the driveway renovation.  Plus, there would be added cost of demolition and removal, possible grading and repair of the existing paver, the curb would probably have to be remade.  It seems like it would ultimately cost more, so if we decided that we could probably squeeze a little more blood from our stone to implement the full design now.  Okay, a lot more blood.

   Here's the design we went with.  The color of the paver is undecided, but it will probably be a blue or gray mix to match the bluestone of the front steps and concrete wall top.  The rest of the driveway leading up to the street will be asphalt since concrete would have been really cost prohibitive.  Since we won't want the final top coat on until all the heavy machinery is done, we'll probably delineate a line at the flare and finish past it, which includes the paverstone circle.  When the last large truck is gone, we'll finish off the rest of the driveway with a new topcoat, having only one seam.
   We don't entertain too often, but we feel that the driveway area near the house (they called it a motor coach) in combination with the two spaces closer to the street, will offer enough space for guests to park.  I figure we could probably squeeze five cars near the house and still have enough room to turn around.
   The only deviation from this plan was a cost saving measure.  We're replacing the caramel mint stone wall on the right of the driveway with a boulder stone wall.  The cost is about half and since it's on the backside of a decline, it won't be really visible.

   One of my favorite features is the little catwalk/deck that wraps around the side of the garage.

   The elevation change here is pretty drastic and this was the best way to have access around this side of the house.  The large tree listed near the deck is a huge white pine; probably the largest on the lot.  It might not seem significant, but the window from the garage looks right out at this tree, with views of the south shore of the peninsula behind it.  The little deck will be just large enough for a couple chairs and a small table, making it the perfect place to site in the morning (southern sun exposure) and enjoy nature.  The deck sits about 9 feet up from the grade here, so it gives the feeling of being in a tree house.  We've thought about putting a tree house in this tree, but it would have to be done so it doesn't harm the tree in any way.  If that thing fell, it could take out our whole garage roof.  Not sure it could damage the ICF.

   Here's the final revision for the rear of the house.  Again, we had to pull in the boarders a bit, reconfigure the retaining walls on the left of the yard and move the pool to the right, to avoid the wetlands setbacks.
  The pool fence is required by state code, and has been a huge pain in the ass.  The whole reason we purchased a property with tons of trees is to be surrounded by nature.  To put a fence up to cage in the pool and bisect the yard would be a crime against aesthetics.  Maybe in any other neighborhood, this fence design would have been okay, but not this neighborhood.  Specifically not with this HOA.  I could write volumes on the lack of logic operating here, but suffice to say, the HOA is attempting to create rules where no deed restrictions exist.  In fact, the lack of a deed restriction defines the rule, but it's just the opinion of five people that the fence encloses "too much" of the back yard.  Not to mention that the portion of the back yard it encloses is a fraction of the entire property.  Also there are at least two other houses that have their entire back yard enclosed in a fence to surround a pool and concrete deck area.  Enough of this for now.  Maybe I'll calm down enough one day to write about it.

   Not a ton of work has been done since my last visit, but I guess that's to be expected considering the holiday season.  It didn't stop the landscaping crew from working.  I guess work will pick up more after they lay some crushed concrete and AA stone on the driveway.  It has been getting rutted out and muddy due to all the landscaping trucks.  Matt had some concern about driving back there, so in the stone goes.  I'm okay with it.  I talked to the Bob Porter, the general manager for our landscape implementation from Great Oaks.  He visited the site when I was there, to check on the progress of the concrete retaining wall.  I expressed my concern with laying down stone for the temporary driveway, only to have it torn up for the driveway installation.  He said that the crushed concrete base was DOT approved now so there would be no need to remove it for the final driveway.

    Almost all the temporary supports for the second floor have been removed and clean up has begun.  I got a nice new battery powered leaf blower for Christmas so it was the perfect opportunity to blow out the leaves and dirt that accumulated in the house. If you're in the market for one, I highly recommend it.  It's almost as powerful as a backpack gas blower, but uses a brushless motor and has tons of battery power.  Blowing out the first floor and basement didn't drop the battery more than 25%.
  Here's the dining room and mudroom, with the rotunda to the left.
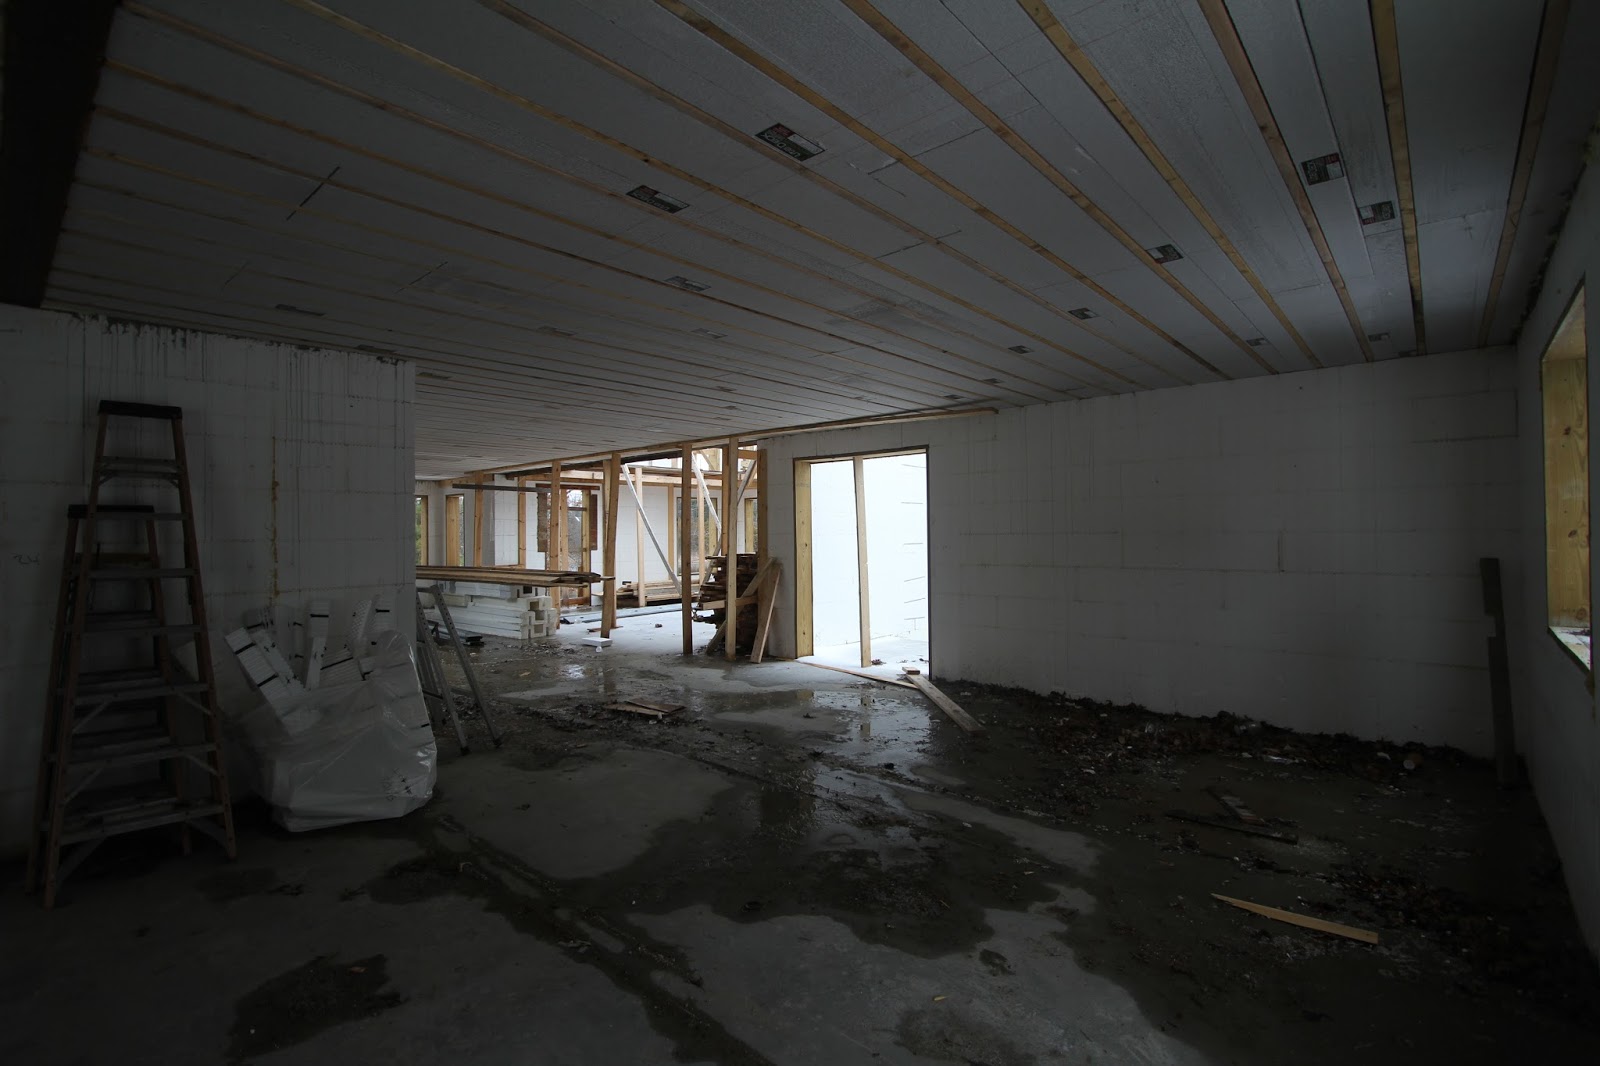
   Here's a shot, standing in the kitchen looking at the greatroom.  We'll need to get these interior walls up as soon as possible since kitchen cabinet prices will be increasing in the spring.

   Here's a shot standing in the kitchen corner of the house looking across at the rotunda and guest room.  Can't wait to be buttoned up.  I didn't get a chance to go up on the second floor, but it's just as well.  Earlier in the week, a freezing rain storm came through and iced all the concrete that was exposed to sky.  The greatroom, rotunda, and second floor are basically a sheet of ice.  Not sure if the temperature will rise enough to melt it or if they'll have to remove it some other way.

   The monster dumpster is now full and there's still a good pile to remove.  They'll have to get another dumpster, but I'm not sure if they're going to wait until they have enough to fill it or if they'll get a smaller one.  I'm also not sure if the rental is by the load or by the duration.  In any case, it's nice to see some job site clean up.

   My saved logs are still there.  They'll be fine over the winter since there really isn't to much rot that takes place in the cold.  You can see one of maybe 5 cement trucks that came in today to pour the foundation of the concrete retaining wall.  There's quite a bit of engineering involved with the wall and you can see the piles of dirt that was excavated for the footing.  Nice to know that my house is sitting in sand.  I won't have to worry about drainage.


   Here's the engineering plan for the poured concrete wall.  You can see that there's only 12" of fill to be replaced over the footing.  I'm not sure why there would be a difference from regular house construction footings, that require either a frost free design, or have the footings below the frost line under ground, but you can see there's quite a bit of engineering involved with this simple wall.  Ultimately, it will be faced with the same granite cobble that we're putting on the outside of our house, so it will hopefully merge well with the boulder stone retaining wall that will be installed next to it.

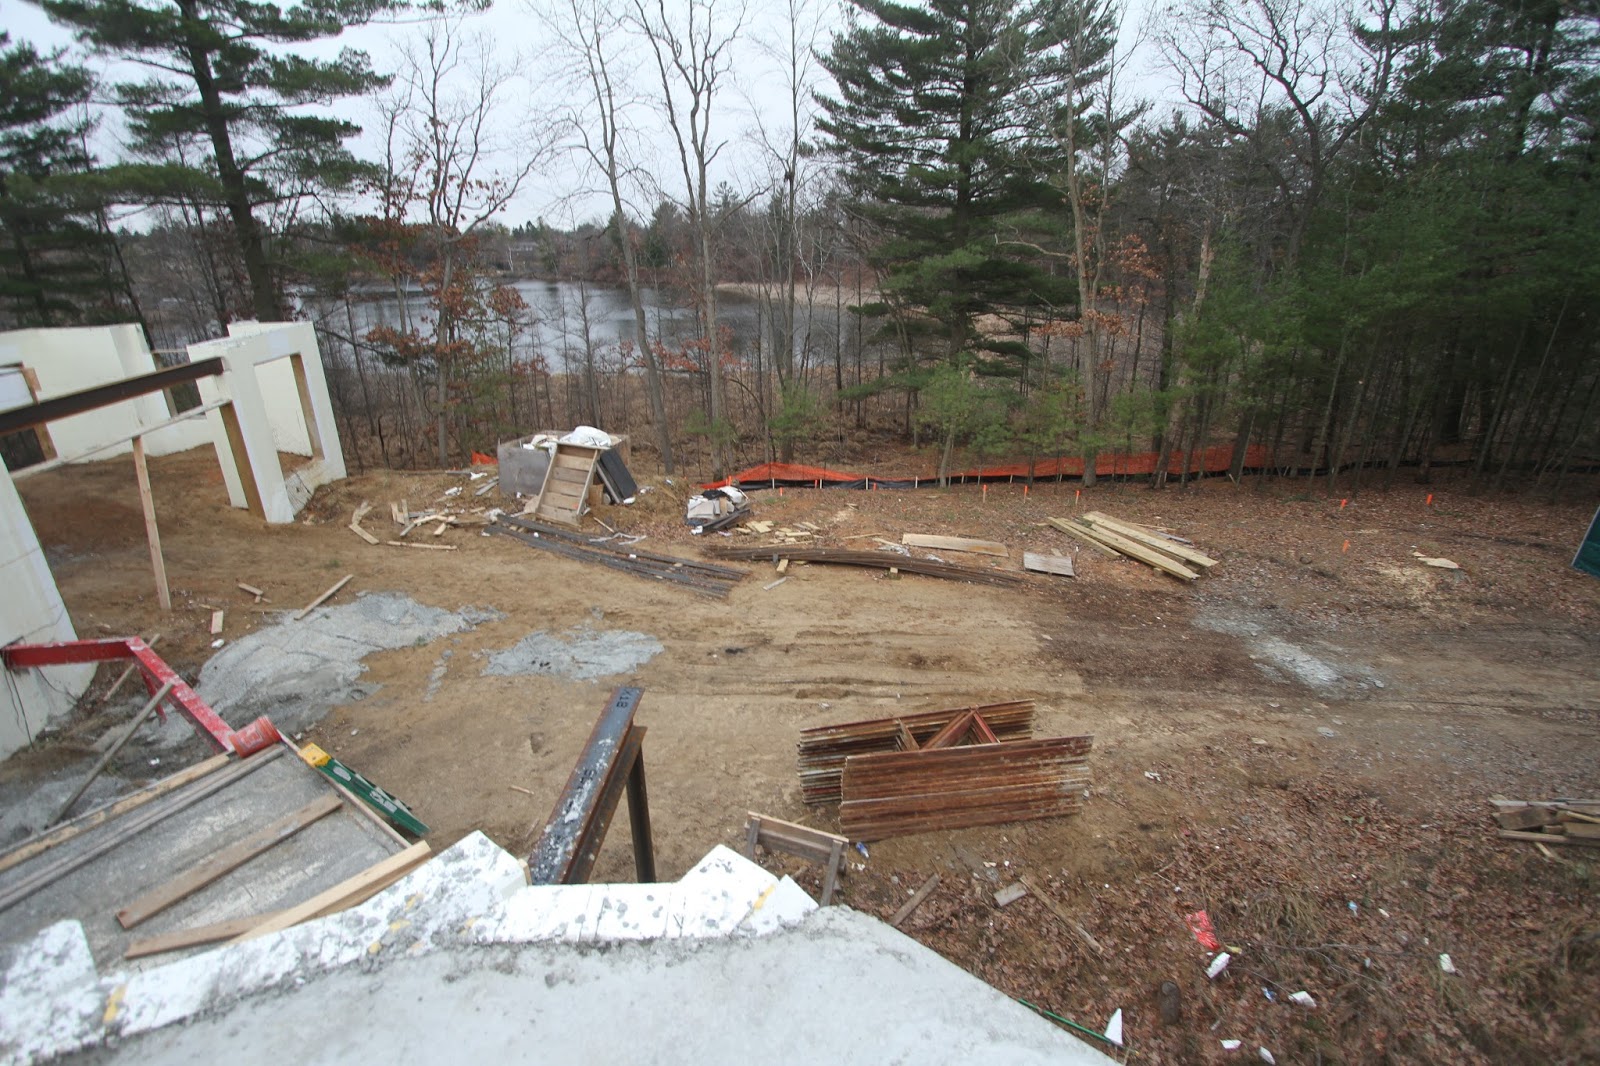
   Here's a shot of the footing mid pour.  I think this is probably the third truck they brought in.  With all the tree removal and landscaping trucks that have been going in and out of the property, there are sections of the driveway that are pretty rutted out.  We'll be grading andlaying down some crushed concrete and AA stone to solidify the driveway for the winter time.  I spoke with Great Oaks Bob Porter about this and he ensured that the material that we lay down now will not need to be removed when we install the final driveway. 

   Here's the footing near the end of  the pour.  They've already begun to set the vertical rebar that will be inside the wall.  There's a little bit of a rise as it approaches the garage because they didn't want to risk underpinning the garage footings.  At this point, they'll probably need one more cement truck to finish off the footing.

   Here's another shot of the footing at the same stage, from the garage door.  It looks like there will be enough room to back out while turning and complete a 2-point turn to drive out.  I can see the importance of the asphalt curb along the driveway near this wall.  There will also be a safety railing at the top of the wall.  Not that it will stop a car from driving off, but should at least act as a visual barrier.

   Here's the sand that was excavated for the footing, piled up near the front of the house.  All this will be going back to either covering the footing, backfilling the wall, or raising the height of the driveway grade in the motor coach.  It's currently about a foot lower than final grade, so we'll probably need to use the swimming pool spoil and add some extra to reach final grade.  I guess we can also count on the driveway foundation to add some height.

   A shot of the future motor coach and where the concrete retaining wall is being constructed.  When the retaining walls are finally in place, it will add a good amount of space in front of the house.  The concrete wall will be topped with the same bluestone we'll be using of the front steps, and other places around the house.  The finishings won't be applied until most of the primary construction is completed on the house.

   One thing that needs to be addressed with the laying of the stone for the temporary driveway is how it will be affected when we finally trench for sewer and water. It might be the case where they only lay stone in the areas that need it, so those sections are sacrificial when we need to lay water and sewer.  The other way it could be handled is that the layers can be scraped away and replaced after the trenching takes place.  

   Wall construction should take place this week, so this weekend I should have some nice updates to this area.  I have a meeting with the HOA tomorrow night to talk about landscaping plan elements that they don't like.  I hope to resolve every issue and finally get them out of our life.

Sunday, December 27, 2015

Second floor: poured. Trusses on order.

The second floor walls were poured as scheduled and cleanup has begun on the site.  Work has taken a pause this week for the concrete in the walls to cure and for holiday.  I think there will be some progress the days in between Christmas and New years but it will mostly be clean up on the site.  The landscaping hasn't begun yet, but I think the on-site dumpster needs to be cleared out before that can happen.

   I think this is the first clear shot of the house with the second floors poured, without trailers in the way.  I confirmed that the turret and master closet wall will be built more conventionally, with wood.  Actually, it will either be 2x6 or 2x8 stud walls with 2" foam on the outside and either spray foam or blown in cellulose for insulation.  While it's not as air tight as ICF, I think it will be okay, if done properly.  I would prefer spray foam since it will cut down on air infiltration, but  the 2" exterior foam will help.

    Here's the final long shot of the master bedroom.  Walk out balcony is to the left and the windows will frame the bed on the far wall.  A header is needed above the window since ICF can't make that span alone with that thickness.  I'm still not sure how the elevator shaft will be finished in the attic space.

    Looks like the walls in between the windows will be build conventionally too.  There's such little wall space here, I'm sure it will okay. A header will also need to be installed across these windows to support the weigh of the roof.  There isn't a pocket on either wall, so I'm not sure how it will be constructed.  I didn't venture out onto the catwalk this time, but it might be the case where the concrete was blocked off of the corners, making a pocket for beams.

    Looking forward towards the turret.  The power float will be needed for the garage slab, but they haven't taken it down yet. I think they'll do it when they get the crane in for the trusses.  A bit of clean up is needed up here, but nothing drastic.

    Here's the driveway approach, now that the trailers have been moved.  You can just make out the painted stakes on the left that will be where the retaining walls are.  The stakes around the small pines will be a semi-circular wall of boulders that will help transition the driveway height to the "lawn" height.  Most of the driveway in this view will be a large circular paver stone turn around.
    Here's all three levels of the house.  When completed, the porch will partition the basement level from the first and second, so it shouldn't look so monolithic.  There will also be two exterior building materials.  We've seen too many houses that are just all brick or all stone.  Looks too plain.

    Another shot of the "motor coach" as the landscape design calls it.  Basically it's an area big enough for any of the three cars to turn around in so we don't have to back out 250' of driveway.  I'll write more about the landscaping plan in the next post.

   Yeah, not much to look at this week.  Next week should be a different story.  

Sunday, December 20, 2015

Second floor, ready to pour

   All the ICF block is up for the second floor pour.  We'll get a pumper truck out tomorrow (Monday) and that will be the end of concrete... except for the garage slab.  The plans have been sent to the truss manufacturer and they're just waiting for the final measurements of the walls after the pour.  Although the house is built as close to spec as possible, there's still room for some variance.  When you're talking spans and sill plates, exact measurements are always best to have. 

   Great Oaks has started to implement our phase 1 landscaping plans.  This involves all the retaining walls necessary for the support of the driveway.  This means that there are two caramel mint rock walls extending from the corner of the house, a combination concrete and caramel mint wall to the right of the driveway, and a few boulder walls up the course of the drive.  The first step in this process is removing trees to make way for the hardscape.

   In total, about 22 trees were removed, not including some small saplings.  I was allowed to "keep" 6 trees from the culling to be stacked on site.  All the trees were cut at the base, leaving a stump.  My keepers were bucked to 12'.  I found a local sawyer, Michael's Woods, who makes cabinetry and furniture who agreed to process the trees into lumber of my choosing.  He has a Wood-mizer portable saw mill and offered to let me help process the wood at a reduced hourly rate.  You can bet I'll take up his offer on that!  I managed to keep 5 oaks, red and white, and the largest maple harvested.  I'm not sure how I'll process the oaks (slab or quarter sawn) but I'm intending to use the maple as part of our kitchen island in the form of an end-grain butcher block.  
   Notice no snow yet?  I'm sure that will change just in time to get our roof on.  Here's my pile of logs, ready to be processed at the saw mill.  Nothing huge; the largest being a 16" oak.  The maple is 14", so I think it will be nice for my purposes.  I also have the option of letting Michael keep some of the wood to sell, to offset the price of processing.

    With the finalizing of the walls and the implementation of the landscaping, comes clean up.  There have been trash piles around the build site, fairly well contained, but unsightly nonetheless.  Now that we won't be needing any more ICF, we can throw away all the cutoffs.  This has to be the biggest dumpster I've ever seen.  You could drive a small car into it.  The end opens up like a barn door and you can simply walk into it to throw away the trash.

     Here's the final wall of the master bedroom and bathroom.  The window bucks are in for our eyebrow windows.  The left side windows will frame our bed.  The right window will be in the shower.  These two windows are separated by a wall, and the water closet.  Because of the span above the window, ICF couldn't be used, from a structural perspective.  Instead, a standard wood header beam will be installed and insulated.
    Here's a shot from the front of the house to the back.  The window bucks for the upper windows in the greatroom are not installed in ICF as they are below.  I'll have to ask what the intent is, but I suspect it's because, again, the header across this span can not be made with ICF alone.  I'm guessing a wooden header will be installed here as well since a steel header won't be necessary since it's not really load bearing.  Yes, the roof will be supported by this, but it can be accomplished with a laminated beam or something similar.
   I'm also not sure how the top of the elevator shaft will be terminated.  It's currently the same height as the walls, but I would imagine that there should be some extra space above for mechanicals or something.  Also, it would need to be well insulated since it's extending into the unconditioned attic space and extends down through the core of the house.  If not properly implemented, it could act as a draft core.

    There used to be three oaks blocking this view.  These are actually the oaks that I kept since they were the largest in diameter.  Now the view is unblocked, save for some larches in the wetlands area.  Even though we won't have a catwalk around the greatroom, we'll still get a great view from the second floor landing.

    The turret is another area that isn't finished to be poured.  I think this will also be conventionally framed, and I'll have to find out what the construction details are.  Minimum, I would expect 2x6 spray foamed for air tightness.  2x10 would closer match the thickness of the ICF walls so I would go for that too.  The turret will have a 10' ceiling so the roofline is separated from the rest of the roof by a foot.  It will have seven windows, two feet off the floor and seven feet in height, with a 1 foot header.  Since they're the only windows in the room, I think they'll give off enough light.

    Now you can see how much more open the woods are now that the trees have been removed.  There will be two caramel mint rock retaining walls terracing down from the upper elevation to the lower.  A stone stair will cut though the walls, allowing us to go from the higher elevation to the lower.  The walls will start at the corner of the house and curve forward, following the natural curve of the ground.

    Here's a shot of the back of the house.  You can see how the windows on the "second" floor will mimic the first, but they'll be arched instead of square.  10' for the basement, 9' for the first floor, 9' for the second floor plus some floor thickness: 30' in height.  Ultimately, there will be a small bluestone patio off this door and retaining walls will contain the elevation changes to the left.  There are also plans for a set of doors to access the area under the back deck.

    This is the area where the under-deck access will be.  We'll have a 2' high retaining wall that will hold a path leading to access doors.  Even with the increased elevation, we'll still have about 8' of height under there.  Since it's unconditioned, we'll probably just store furniture or or boating equipment there.  Another retaining wall with stairs cut through them to access the back yard.  This will be implemented in a few years.  In the interim, we'll probably just grass this area to curtail erosion.  

    Back yard shot of the house.  You can see some of the left over wood from the trees I kept from the culling.  The only visual aspect missing is the gazebo, which will sit on the pad on the corner of the kitchen.  The Great Oaks crew also removed much of the remnant brush from the first lot clearing.  They kept the stumps in the ground, which will probably be removed when they bring excavators for the retaining wall work.  It will be great to finally have the ground cleared.  I just need to find the time to consolidate the firewood before snow hits the ground.

    Here's what the greatroom will look like.  I can't decide where where the best view in the house will be.  These 12 windows offer an almost panoramic view of the lake.  Speaking of which...

  Here's a panorama from the catwalk on the second floor of the greatroom.  There are a few lots in our neighborhood across the lake, but since they don't have riparian rights, they can't build down to the water and there are plenty of larches that will preserve our view.  The shoreline on the left is part of a protected conservation that will never be built on.  In other words, we should always have this awesome view.  The plan is to build a catwalk out over the wetlands, and a permanent dock into the water.

    Here's the view from the greatroom.  You can see the stumps of the three oaks that were removed, opening the view.  Originally, we were going to see if we could file with the DEQ for a shoreline improvement to reclaim the land to the shoreline.  After talking with Great Oaks, we decided that it would be too costly and might not even be possible, depending on the wetland composition.  If we dump dirt we couldn't guarantee that it wouldn't just soak up the water like a sponge.

  A lot of trees were cleared from this area.  You can make out the orange painted wood stakes that mark the retaining wall that will hold the motor coach circle.  It's crazy looking back at the original land and seeing how much we've changed it.  Balancing the installation of the retaining walls and the construction of the house is something I didn't think I would need to do, but since the landscaping is outside the scope of the house build, but the driveway is needed for the house completion, I've had to take responsibility to organize the crews.
   This is the driveway near the street.  To the right is a wetland conservation area that uses a culvert under the driveway to flow into the lake.  We're going to install a boulder wall to the right of the drive to support the driveway.  There's probably enough land stability for the path as it is, but if we want to implement the 12' width for the driveway, we'll need something to hold it up.

   Closer to the street, you can see the silt fence that contains the boulder wall construction site.  Just to the left of the pines on the left is our neighbors driveway.  Although the trees are on our property, we had absolutely no desire to remove them.  There was even an option to remove the large pine at the front of the driveway, to offer a better view of a pillar that will be installed on that side, but it's such a large, old tree, it would be a shame to remove it for our own vanity.

   Front of the house.  It's nice to know that all the trash will be gone for the retaining wall construction, but I'm sure there will be plenty of waste to take its place as we progress on the inside.  Interior walls create a lot of cut-off waste and drywall never comes in perfect sizes.

   Another great tree we kept sits at the end of our garage.  One of the biggest tree on the lot, I hope that it stays alive and well for the rest of my life.  We might need to remove the lowest branches on the left of the tree when the roof of the garage comes in, but I'm really glad we're keeping it.  We're even building a deck to curve around the tree.

   Vacation time is coming up and I'll get a few more posts to detail the landscaping plans and follow the completion of the second floor walls.  As the schedule currently sits, we're looking at second floor walls poured Monday, footings for the concrete retaining wall next to the garage Tuesday or Wednesday, with the completion of the wall and other retaining walls after Christmas, maybe in the new year.  Some time in there, trusses will be delivered and started.  Roof decking takes some time since there's a lot of labor and crane work.  We'll need to order our roofing material (more on this later) and take delivery of the windows.  We've already paid the first draw for HVAC to take advantage of a free internet connectivity module so HVAC will be the first utility in.  After that should be plumbing then electrical.  Oh, somewhere in there, the interior wall will be constructed and cabinets can get their final dimensions.  I can already see the dollar signs flying out the window.

Tuesday, December 15, 2015

Second Floor walls: More walls.

   The walls are getting taller as the days are passing.  The schedule is to get the pumper truck out this coming Friday for the second floor walls.  Besides the front porch landing and the garage slab, that will end our legacy of monumental cement pours.  Window shapes are beginning to appear but the master closet and bedroom turret still have to started.  I'm not sure what the delay is on those parts.  For general ICF construction, I think they need to drill into the concrete to spike with rebar since they're not part of the existing exterior wall.


   Here's a shot of the front of the house from the garage.  The large window on the left is the second floor laundry room and has one of the best views of the driveway approach.  The height of the window from the floor is suspect and I'll have to inquire about it.  In general, all the windows start 2' from the floor with a few exceptions, the laundry room, master bedroom, and master bathroom.  This laundry room window should be at least 36" above the floor so it doesn't get in the way of the counter or laundry machines.  The middle window will be a round one in the bedroom bathroom.  


   I'm standing in the turret looking towards the back of the house.  You can see the large opening for the upper greatroom windows.  There will be four archtop windows, matching the lower four rectangular windows.  The only way to get up here is a ladder.  I'm not sure if they're going to build a temporary staircase, or build the final staircase without final treads.


   Again, standing in the turret looking towards the master bedroom.  Wooden supports are used right now.  Steel supports were used in the first floor when the walls were higher, so they still might be employed here.  You can see 6' of block installed with 3 more courses to come for a total of 9'.


   Looking forward at the master closet.  The two windows on the left of the frame will flank our bed and will be bridged with an eyebrow window.  As I mentioned before, these windows should be higher off the ground because they need to sit above our nightstands.  They're currently at 24" and I believe they should be around 35".  I've already asked Matt to double check the heights.  In the end, all the tops of the windows will be at the same height.


   Another shot of the greatroom window openings.  There are also two side windows so I think we'll get a nice amount of light in here.  The fireplace column will be right in the middle of this shot.  There will be a second gas fireplace on the second floor landing, where I'm standing right now.  The left and right of the fireplace will be open to the greatroom below, so we'll still get some of the great view from up here.


   Here's the opening for our master balcony.  It will offer a secluded view since it's framed on one side by the house, and on the other side by the gazebo roof.  Since it shares the footprint of the deck below, it will be 8' deep by 10' wide.  A generous size of a balcony.

   
   I took a walk out on the greatroom catwalk just because I know I won't ever be able to when the house is finished.  It's pretty high from up here, so I get nervous walking so close to the edge.

So tree removal for the entire landscaping plans is taking place early this week.  All the retaining walls supporting the driveway will be starting next week so in a couple weeks, we should have some nice walls up on the outside, as well as on the house.  The plans have been sent to the truss manufacturer so they can begin design.  Final construction won't begin until the walls are completed because there's always some variance between the actual implementation and blueprint.  Maybe the weather will hold off enough so we don't get too much snow in the house.

Sunday, December 6, 2015

Starting the second floor wall and sweat equity

Two weeks after the second floor pour and they've started putting up the ICF form for the second floor walls.  That's a little ahead of the 21 day cure time for the first floor, but I suspect by the time they need to shoot the floors for the wall supports, it will be at 21 days.  The first few courses don't need the bracing so it's good that they're getting started early. Two more days in this month will mark the end of the first week of December, so it's quite possible they might get the walls up in the second week of December.  After that, roof trusses will be measured and ordered.  Before you know it (most likely in the new year depending on holiday shut down and weather) we'll be buttoned up for the winter.


There are two sections of the walls that haven't been installed yet.  The master closet and turret.  The master closet actually partially sits above the garage and a rectangular section of LiteDeck was installed although it will only occupy some of this space.  Since the garage is 45 degrees from the house, only a corner of the master closet will be above the garage.  I think rebar spikes will need to be drilled down into the concrete deck to anchor the wall.  I think spikes will also be needed for the turret, but since it's before the full concrete cure time, they haven't done it yet.


   Here's the location for the master closet.  If you connect the two walls you'll see how just a corner of the house will sit in that platform.  The roof line for the garage runs the length of the middle so the left and right of that concrete pad will be too close to the garage trusses to use.


   Here's the great room again.  Two courses of ICF have been installed around the perimeter of the second floor.  These are the two courses that are below all the windows on the second floor.  The next course will define most window openings.  Looking at this photo now, I see that there should already be openings for the next layer of windows in the great room.  I'll need to get confirmation that they'll remove the sections from these first two courses for all the windows in the great room.  I'm pretty sure that's what they'll do since the master balcony walk out is also filled in, but at least that's marked.


   Here's a shot that we'll never see when the roof trusses go up.  I'm standing on the master closet pad looking at the driveway approach.  We debated putting a window in the master closet, but finally decided against it.  The natural light is probably nice, but we couldn't really see a reason to take up wall space.


   Here's the turret.  If you look closely near the middle, you can see the rebar they used to determine the circumference of the turret.  The other spikes are the ones coming up from the first floor walls and are used to anchor the floor in place.  As you can see, they'll need to drill rebar spikes for the walls.  I can't wait to see how they pull off a curved wall.  The ceiling will be 10' in the turret.  Two feet of wall under seven feet of window with one more foot of wall above the window.  This little turret will be amazing. 

   
   Here's the view from the turret, looking at the "front yard" and driveway approach.  Pretty commanding view.  I think we might want to install a camera in the eave up here to get a good security shot of the driveway.  Those trees will be staying but you can still see quite a bit. 


   Here's another shot that we won't be able to have when the house is completed.  I have the window  wall of the great room to my back and I'm looking down into the room.  There will be a fireplace where the support is in the middle of the frame.  The fireplace structure will continue up to the second floor, where there will be another fire place on the second floor landing.  To the left and right of the fireplace, we'll have a landing balcony to the greatroom.  I hope this won't cause too much trouble with sound transmission from below to the upstairs bedrooms.


   So as a part of the requirement by the city to sign the permits for our landscaping, they required new silt fencing to be placed against the wetland setback around the perimeter of the proposed construction areas. Another requirement is an orange barrier fence to serve as a visual barrier against people or machinery from entering the setback.  The silt fence is installed with a piece of specialized machinery that trenches down while installing the fence.  This was done by Great Oaks.  The orange fence could have also been installed, by them, but I figured it was time for me to put in some sweat equity and save a few thousand on the installation.  I purchased 600' of 4' tall orange fence and 75 5' steel T-posts.  Orange zip-ties hold the fence on the posts.


   I spent about three hours and ended up pounding in just over 60 posts and used all 600' of the fencing.  I think I went through 200 zip ties, using three per post.  The nice thing is that we just need it for inspection and for areas that are undergoing active landscape implementation.  Since we'll only be attacking the driveway this year, I can remove the rest of it and store it for future use.  The zip ties are disposable, but at least I won't be paying someone each time for installation and removal.  In the end, I can probably sell the t-posts on craigslist or something. 


   The orange fence was installed around the entire tip of the peninsula.  Although more silt fence was installed on the driveway approach, orange fence wasn't required in those locations.

   The weather this week looks pretty mild (50's F) so I think some good progress will be made.  I fully expect to see the walls almost all the way prepped next weekend, ready for a pour next week.