There were a few days of inactivity in progress in the pool in which all the big snapping and painted turtles from the lake came up on dry land to dig nests and lay eggs. I had to rescue a few of the snappers from the pool after they went in between the gaps of the concrete pool and couldn't climb out. The installers came back on Memorial day and put in a half day of work to finish installing all the metal rebar for the pool shell. 5 guys worked in tandem to install and tie all the straight pieces of rebar together to conform to the curves of the pool and prep it for plumbing and finally gunite shooting. I'm surprised how quickly it all went in but it's in.

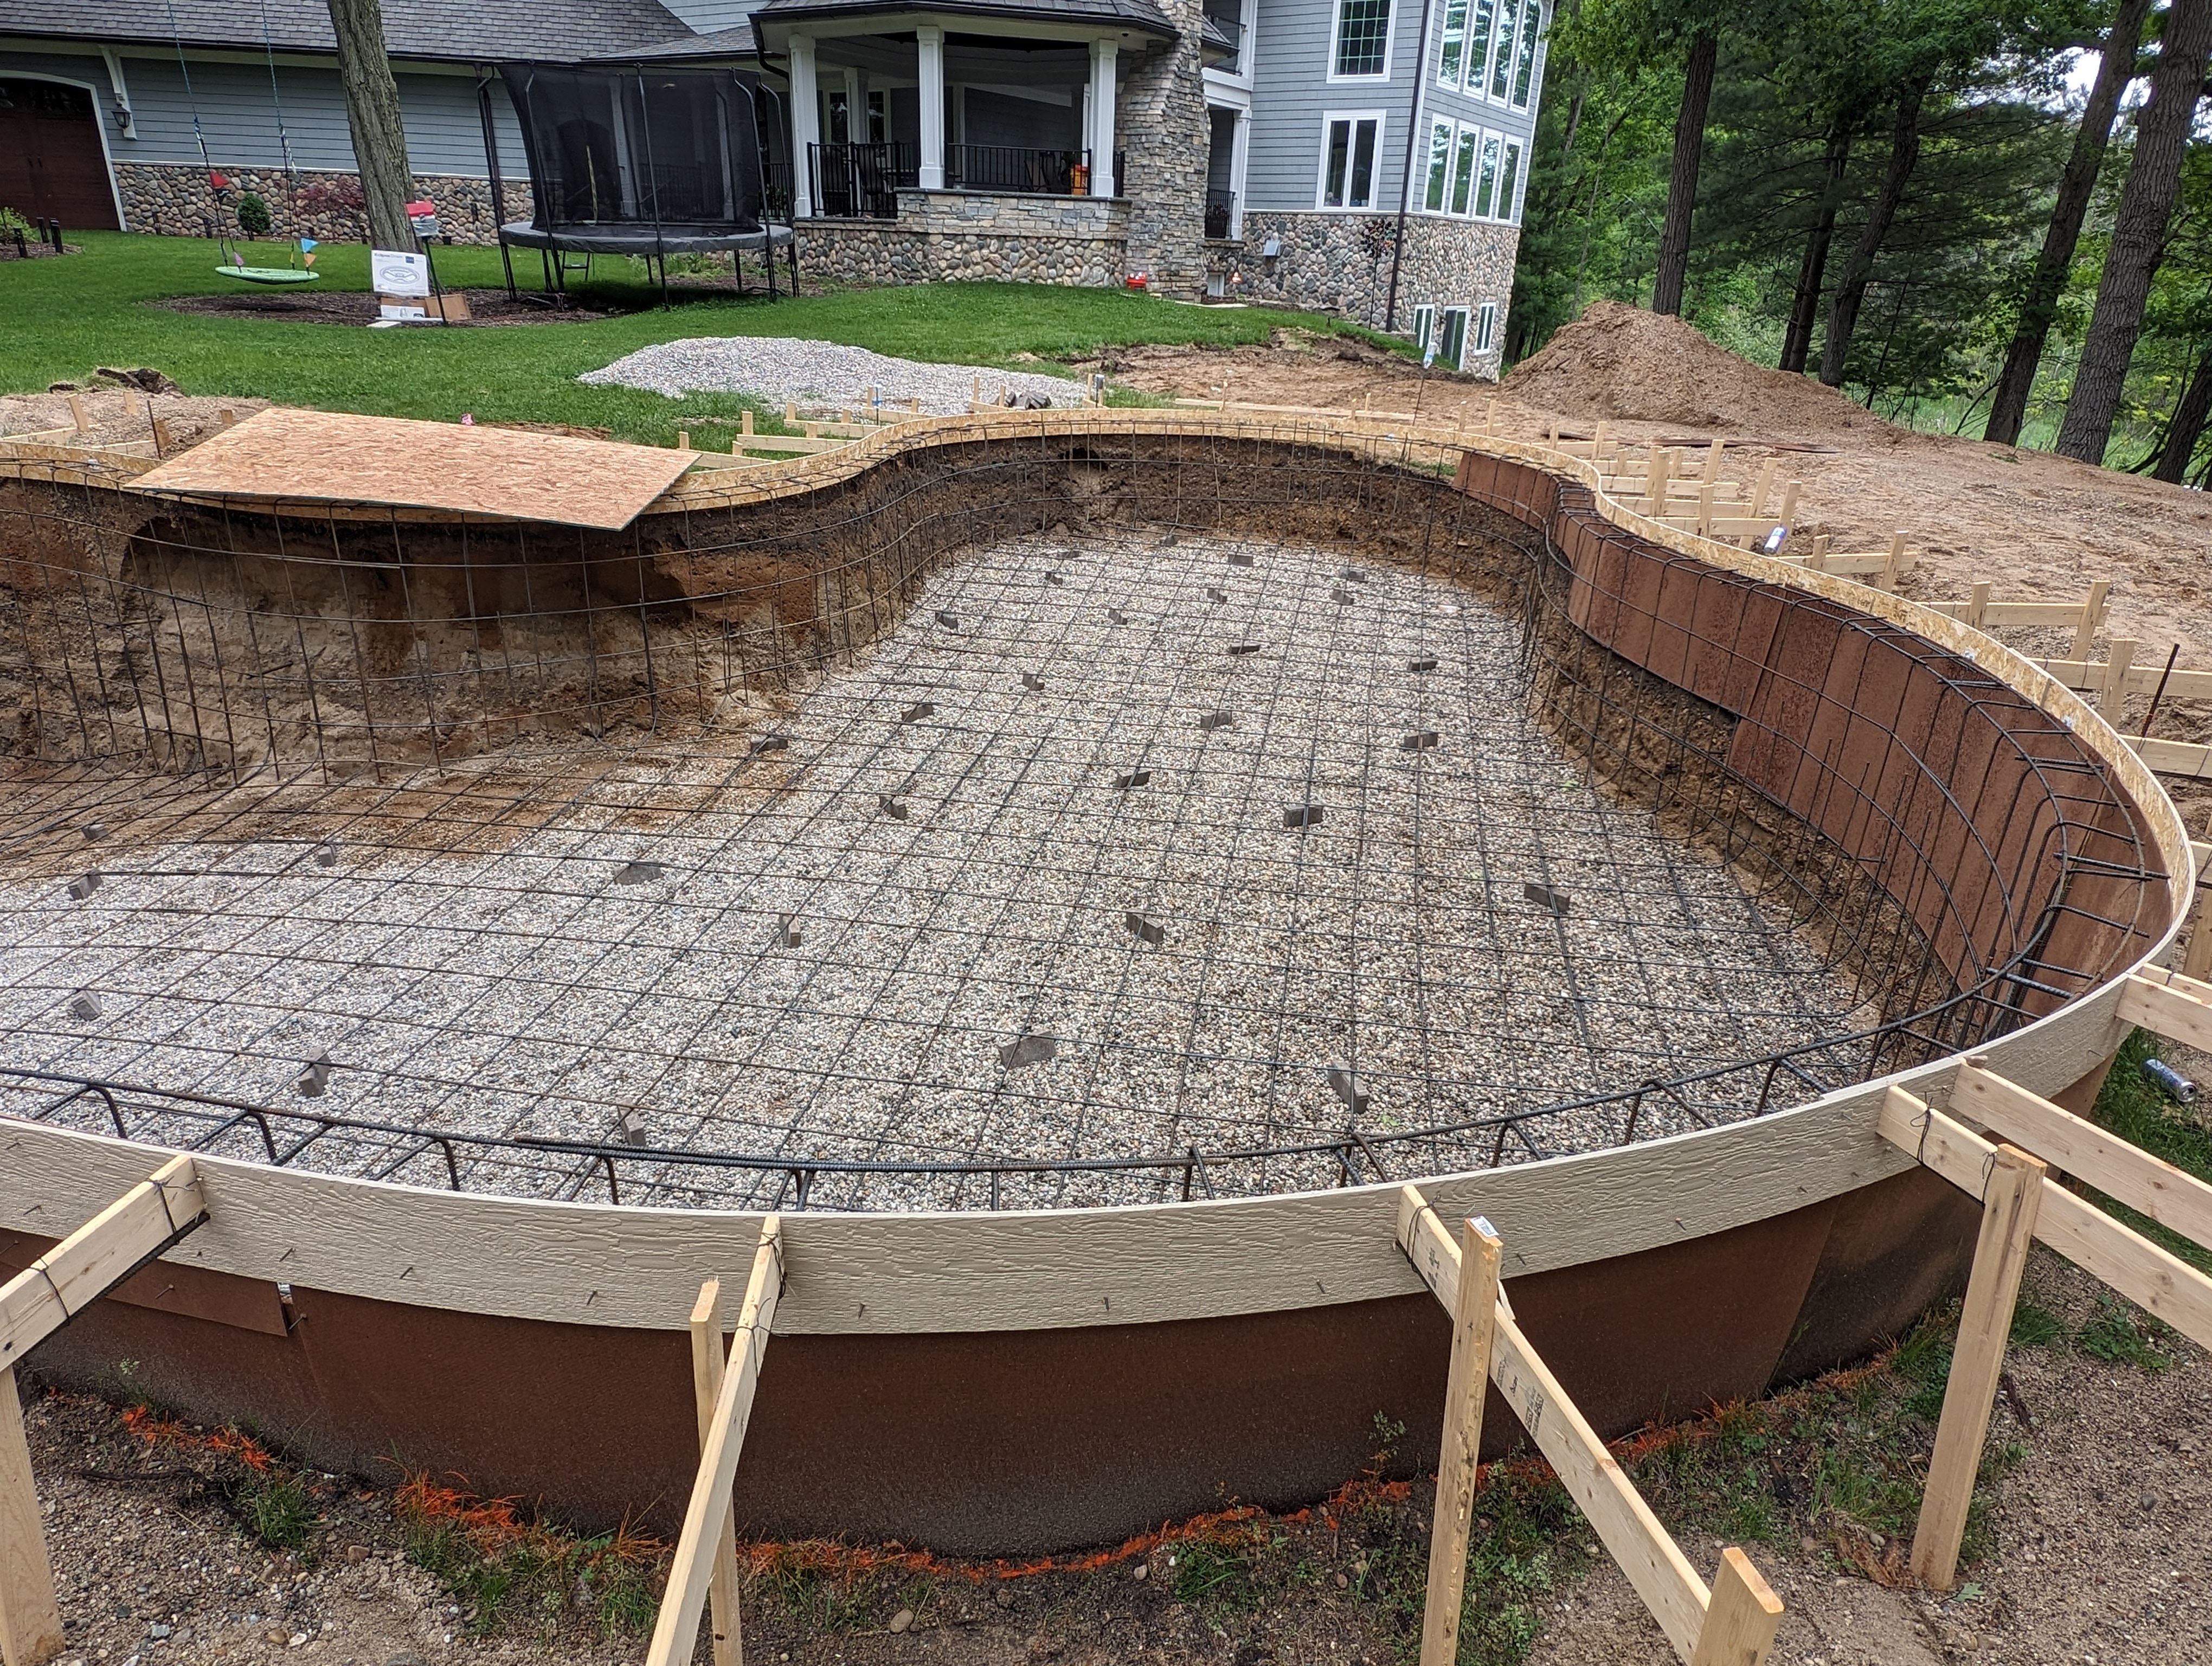
Here's a shot of the pool from the deep end. There still a little bit of erosion on the sides of the pool but it doesn't look like it was an impediment to the installation of the metal. I watched them throughout the day from a distance and let them do their thing. The cage ties into the ground in a few places, but the bulk of the grid is placed roughly 6-8 inches from the excavated walls. The top edge is formed with a piece of rebar bent with a single 90 degree bend.

Here's a closer look at how the top of the bond beam is reinforced. There are two courses of rebar that ring the pool edge and are connected to the bent rebar of the wall. All rebar is tied together in the standard fashion with thin wire. In a few places around the pool, there's one piece of rebar that forms the wall, then makes another sweeping curve upward. I'm not sure what these pieces are for yet, but I'm guessing they'll be used to tie into something related to the pool deck. However, since we're making a paver pool deck, there won't be a concrete base to tie into, so I'm really not sure what they're for.

Here's a shot of that piece of rebar that comes up the wall and remains long. The installers put various cans on top of the rebar to act as a warning marker so you don't impale yourself on it. They make plastic orange caps for this, but there are only a handful of these around the pool so it's not really worth using them. I haven't counted the frequency, but every so often, there's also a piece of rebar that penetrates through the wood form and ties into the rest of the metal. This is probably just to stabilize the top of the metal forms since there's no earth to tie into at that height. Eli confirmed that the concrete walls will be shot at 12 inches thick so by my rough calculations, the metal will sit around 1-2 inches from the surface of the final wall. On top of this will be the plaster coat which is usually around half an inch thick.
The sun shelf and swim out step will be shot with solid gunite and no metal structure inside. I've researched this and found that, while it would be ideal to have metal in the structures, it's not necessary. The reinforced pool shell will be "holding" the shelf and step so reinforcement isn't required. I'm not sure if steps will be formed while the gunite is being shot, or if they'll shoot the sun shelf then put up forms for the steps, but I'm guessing it will be formed by hand.

Here's a look at the pool from the sun shelf. As per the plans, there will be a sunken sitting area on the left where the convex curve of the pool shell is. At first I was confused about how this would be formed, but now I can see that the wood forms will actually be forming the exterior wall of the pool at this place. The elevation change to the sunken sitting area will only be about a foot and a half at most, and the exterior of the pool shell in this place will be faced with stone, adding a few inches of thickness, but it might make a nice shelf to sit on, in addition to whatever seating we have down there.

The rebar is being held off the gravel base by these paver stones. They're used to keep the rebar in the middle of the concrete pour and will probably remain during the shooting process. They're concrete pavers so I don't think there's a detrimental effect to keeping them as part of the pour. While there are formal plastic or metal devices that can be installed to keep the rebar, often called bottom mat, placed in the concrete, some times clay bricks are used to save money. It's thought that the clay material could have a detrimental effect since they can absorb ground water and swell at a different rate as the concrete, causing it to crack. Since the bricks used in this instance are concrete, I'm fairly comfortable with their placement.
That's all the update for this post. Next up will be plumbing fixture installation, which will happen tomorrow. This will include main drain and the two skimmer placements, bubbler, and all plumbing associated with those items that will be under the pool. I imagine that this will require some modification or adjustment of the rebar so we'll see how that goes. Also return jets should probably be roughed in and since the plumbing for drain and bubbler require placement of pipes under the concrete, we'll have to come up with a final placement for the equipment pool pad. I'm still leaning on having it installed on the backside of the retaining wall, but I'm not sure if that will cause complications with the install of the wall itself. I think the plumbing could be buried and stubbed off near the pad and the stones of the wall could be installed carefully, but it would be a delicate operation. I'm not sure if the pad will be shot at the same time as the pool shell, but it would be an opportunistic time.
No comments:
Post a Comment